Urban Fermentation

Recent Posts

Differences Between Kombucha And Water Kefir Explained


two one gallon jars holding fermenting kombucha and water kefir

Kombucha and water kefir are both probiotic drinks which contain live bacteria cultures.  They both can be made into a flavored carbonated drink with a variety of flavors.  The similarities continue with the method of fermentation being aerobic meaning both require oxygen to culture properly.  So why all the fuss about which is which?

Well as it turns out there are many differences between kombucha and water kefir which make the two very different drinks.  It is like asking what the difference is between coffee and tea.  Both contain caffeine, are made with hot water and both can be sweetened with milk and sugar but everyone knows that the two drinks are totally different. 

Kombucha and Water Kefir Differences Chart

Characteristic

Kombucha

Water Kefir

Flavor

Fragrance
  • Acetic
  • Added flavoring
  • Added flavoring
Taste
  • Sweetness from added sugar
  • Bitterness from tea leaves
  • Can have some umami flavor
  • Sour flavor from acetic acid
  • Sweetness from added sugar
Mouthfeel
  • Astingent from tea leaves (puckering effect)
  • Few noticable sensations on hte mouth

Fermentation Methods

Physical Apperance
  • Liquid
  • Grains
Time Period
  • 7-14 days
  • 3-7 days
Enoculation Method
  • Backslopping
  • Kefir grain transfer

Fermentation Medium

Liquid Medium
  • Sweetened tea
  • Sweetened water
Sugar Sources
  • Processed sugar sources
  • Processed sugar sources
  • Fruit juices
  • Acid Content

    Organic acid
    • Glucuronic
    • Gluconic
    • Lactic
    • Malic
    • Citric
    • Tartaric
    • Folic
    • Malonic
    • Oxalic
    • Succinic
    • Pyruvic
    • Usnic
    • Lactic
    • Acetic

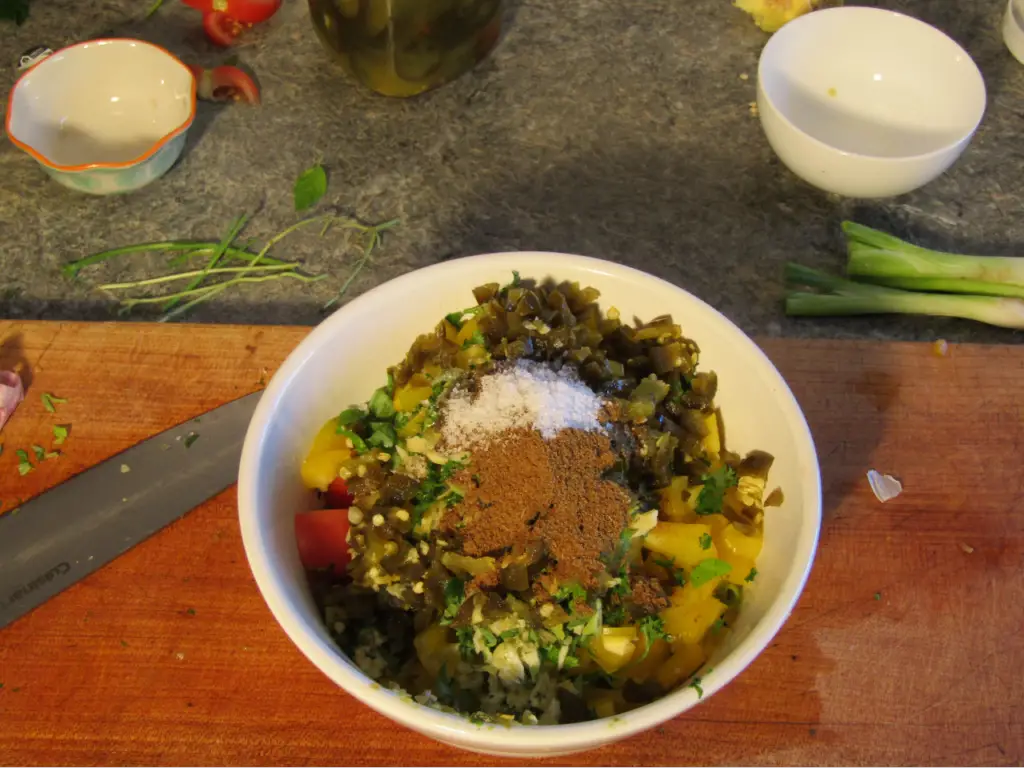
    Kombucha and water kefir’s different flavor

    a glass of water kefir and a glass of kombucha with flip top bottles in the background

    Kombucha’s tangy flavor is made up of a wide variety of components (for an indepth look at the various components which make up kombucha’s flavor read this article here).  Flavor is made up of three main components; Smell, Taste and Mouthfeel.

    The difference between kombucha and water kefirs smell

    The smell of something depends on the volatile (aromatic) components found in it.  Volatile compounds quickly dissipate into the air making them detectable to our olfactory senses.  Since both kombucha and water kefir are second fermented  in a pressurized environment the aromatic compounds remain in suspension until the container is opened.  When the pressure is released, the volatile compounds are released into the air with the carbon dioxide.

    Kombucha’s smell stems mainly from the acetic acid compounds which are carried out with the carbon dioxide gas, this gives kombucha an acidic odor.  The other predominant smell stems from the flavoring agent, anything from fruit to herbs, used in the second fermentation.  Other volatile components in kombucha come from other volatile organic acids and polyphenols produced by the culture during fermentation. 

    Water kefir’s smell stems mainly from the second fermentation flavoring.  It is much less acidic and with the normal shorter fermentation period produces less acetic acid, reducing its acidic smell.  

    The difference between kombucha and water kefir’s taste

    Taste is defined as the sensations detected by the taste buds in the mouth.  The taste buds are made up of five different types which detect different chemical compounds, they are:

    • Sweet
    • Salt
    • Bitter
    • Sour
    • Umami

    Everything you eat has a combination of these five tastes in different combinations and strengths which give each a unique taste.  Kombucha and water kefir have little salt taste making no difference in its salty taste but the other four have major effects on the taste profile. 

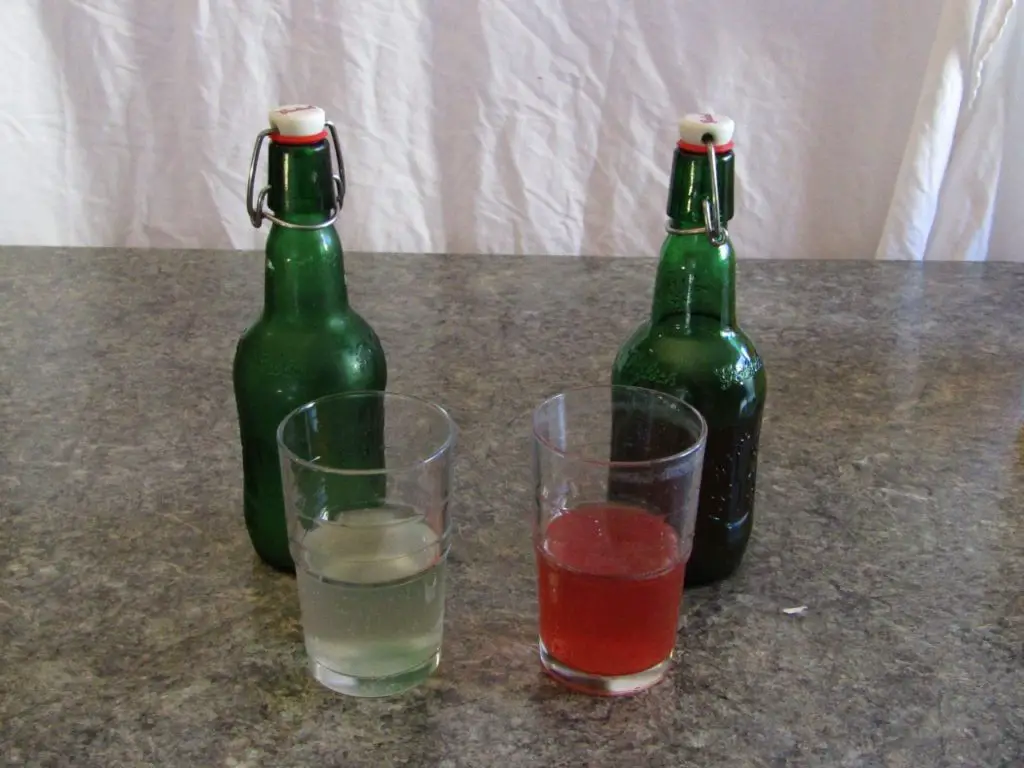
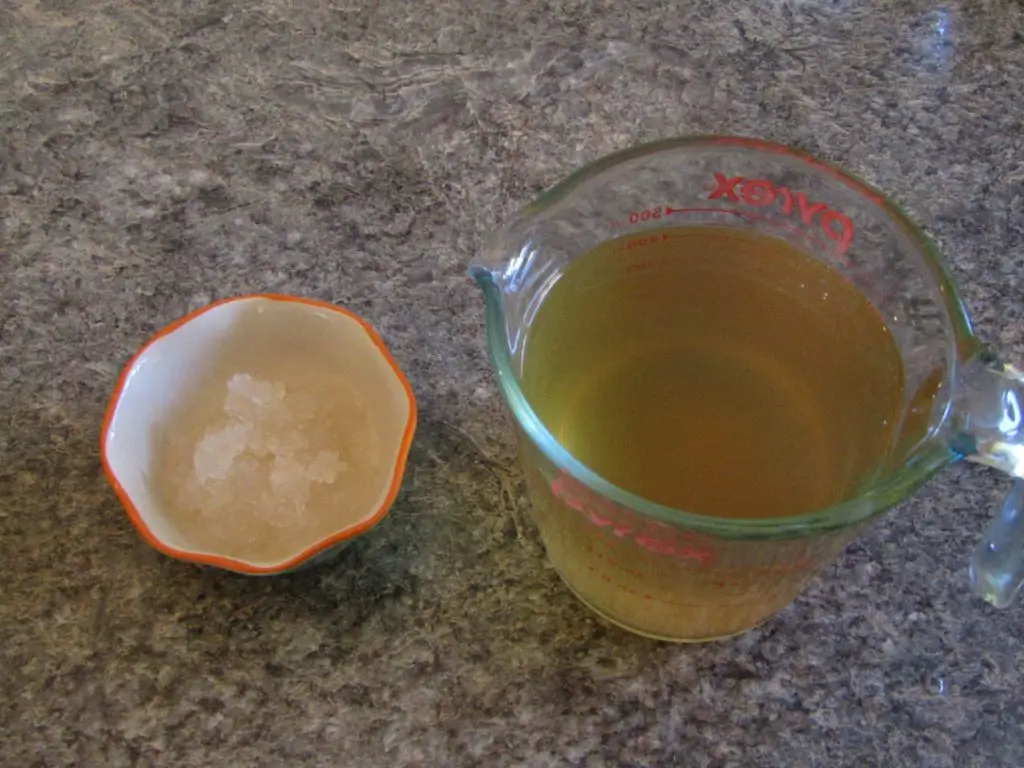
    Difference in sweetness between kombucha and water kefir 

    The sweetness of kombucha is dependent on the amount of sweetener added at the brewing stage and second fermentation periods.  

    Most recipes call for a ratio of one cup of sugar to one gallon of tea to as much as 1 ½ cups of sugar per one gallon.  Kombucha is sweetest during the early stages of fermentation and gets progressively less so as the acetic and lactic acid bacterial species found in the culture consumes the sugar.  The relatively long fermentation time(7-14 days) lowers the available sugar producing organic acids in its place.

    Water kefir is made with the same sugar to liquid ratio of one cup per gallon but the fermentation period is much shorter (2-5 days).  This gives the culture less time to metabolize the sugar in the substrate and therefore produce a sweeter product.

    Difference in bitterness between kombucha and water kefir

    Kombucha is made with a strong tea infusion which contains a high amount of catechins, 70% or so are recognized by the taste buds as bitter compounds.  The amount of catechins in the tea depends on what type of tea it is.  White and green teas contain the highest amount of catechins whereas black and pura tea have lesser amounts.  The presence of catechins produces the bitter taste which can be detected in kombucha.

    Water kefir is usually made from a substrate which does not contain any catechins.  This lowers the bitterness of water kefir to an undetectable amount in the finished drink.  It can become bitter if it is second fermented in a bitter liquid such as a hop infusion or mint. 

    Difference in sourness between kombucha and water kefir

    Kombucha’s taste is predominantly composed of sour components.  The acetic acid bacteria which dominates the fermentation produces high amounts of acetic acid.  Lactic acid bacteria also produce some lactic acid which has a smaller effect on the sour taste.

    Water kefir is fermented for a drastically shorter time, depending on the ambient temperatures it could be as little as two days to as many as five.  This gives the acetic acid bacteria substantially less time to consume the sugar in the liquid substrate (sweetened water, coconut water or fruit juice).  This lowers the production of acetic acid making for a less sour product.

    Difference in umami between kombucha and water kefir

    For a long time umami was not considered a taste as scientists could not identify any taste buds which could detect it but it now is considered a detectable taste in the mouth.  Taste buds which detect glutamates, although the most famous glutamate is monosodium glutamate there are several other types.

    Glutamic acid is an amino acid which is found in various foods including tea leaves.  As it ferments it will combine with whatever salts present in the tea.  This makes for a complex umami flavor which boosts its flavor profile.

    Water kefir can have some glutamic acid depending on the liquid the grains are added to.  Most people use water with small amounts of natural sugar which have small amounts of glutamic acid.  This results in little umami flavor in water kefir unless it is fermented over a longer period of time with a substrate containing high amounts of glutamic acid such as ginger, turmeric, cinnamon and spearmint.

    Kombucha and water kefir’s different fermentation methods

    a bowl of water kefir grains and measuring cup full of kombucha culture

    On the surface the fermentation methods of kombucha and water kefir are basically the same.  Add the starter to a sweetened liquid, place a permeable cover on the top of the container and wait the prescribed number of days but if you analyze each method you find they are drastically different.

    Kombucha starts with a cooled tea infusion sweetened with some type of sugar.  The tea is pasteurized automatically  due to how it is made, the heating of water and infusion with the leaves, and the sugar is liquified and undergoes some chemical transformation from the beginning of the fermentation.  Once cooled the tea is infused with a SCOBY (symbiotic culture of bacteria and yeast) in a method of fermentation called backslopping.

    Backslopping is the use of some of the liquid from a previous batch of a finished fermentation as a starter for the next.  The floating cellulose mat is often added to the sweet tea but is unnecessary for fermentation to happen.

    Water kefir on the other hand is made by the addition of water kefir grains to a sweetened liquid.  The grains are the source of the fermentation bacteria and are very protective of the bacteria which are allowed residency in the grains.  The liquid is not heated usually prior to the addition of the grains so there will be transient bacteria in the water kefir which can affect the flavor. 

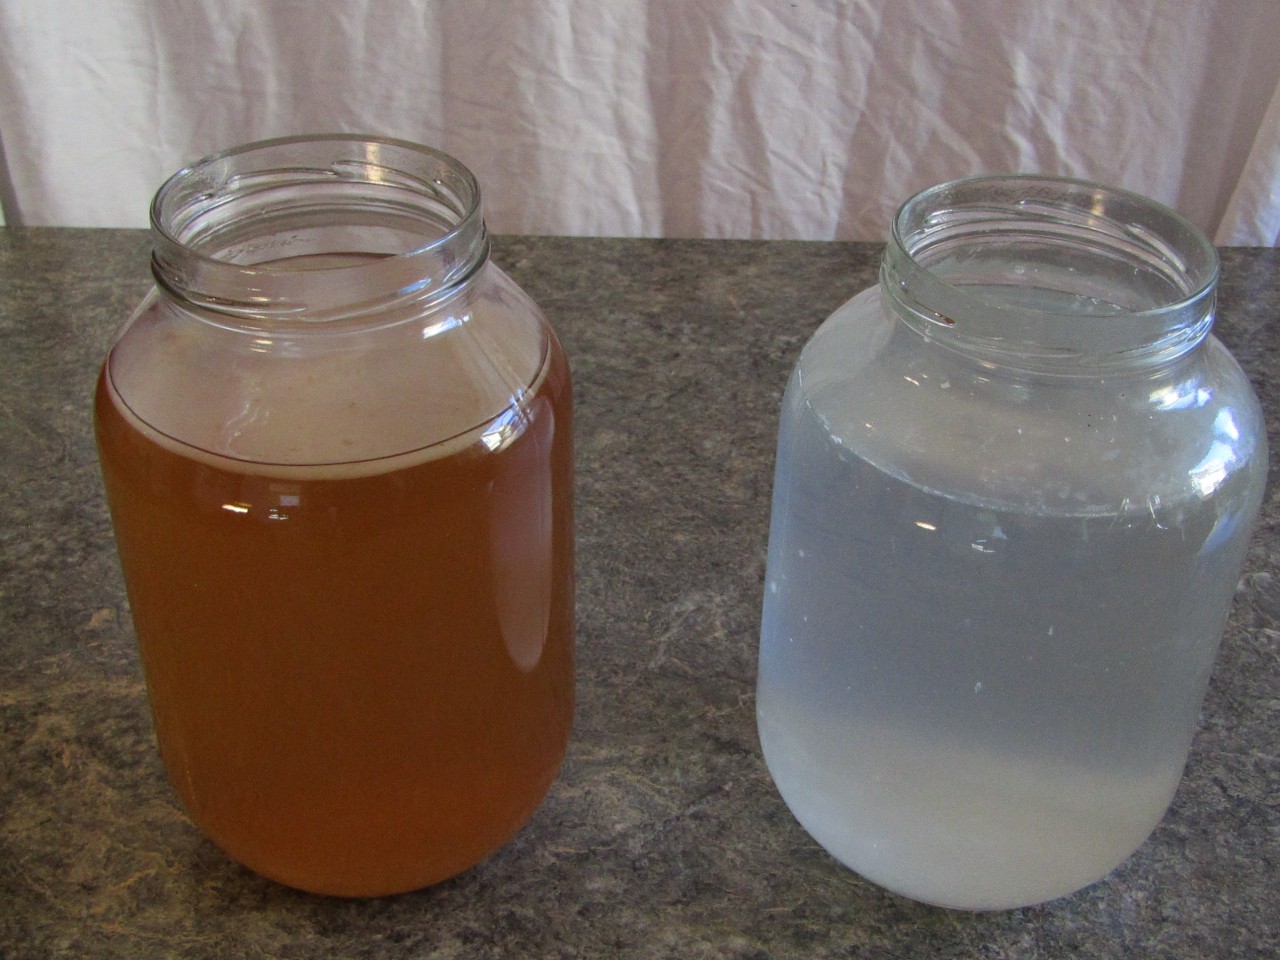
    Kombucha and water kefir’s different liquid medium

    a jug of water with lime slices and a bodum full of hot tea

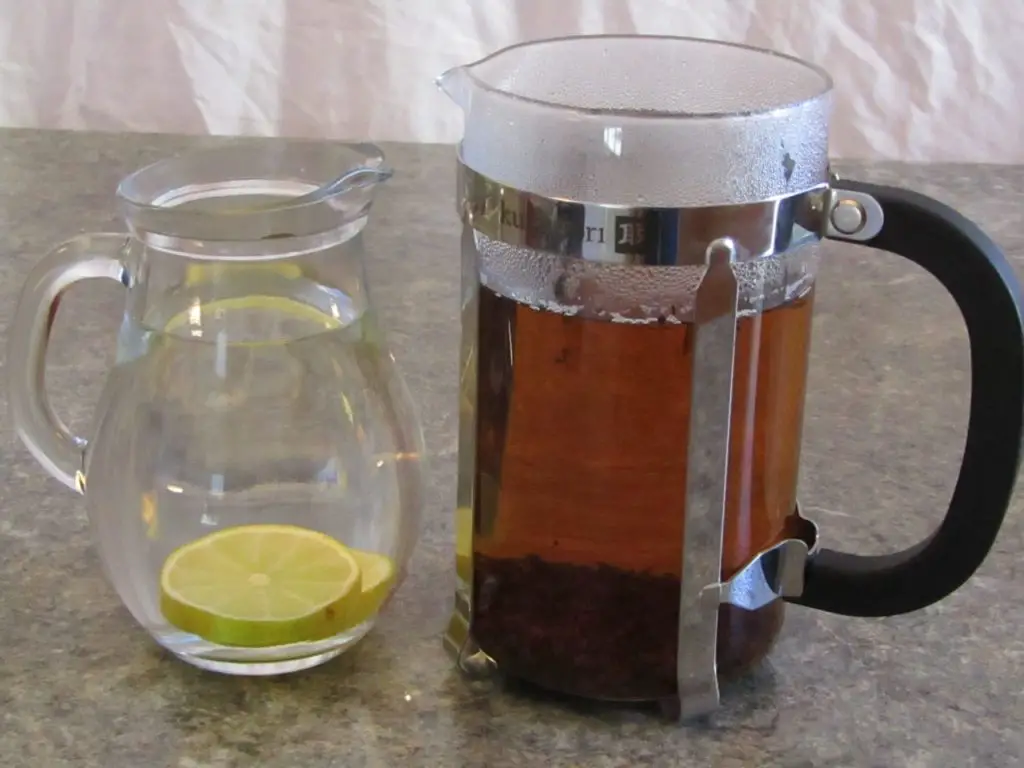
    Kombucha is made from sweet tea infusions.  Tea which comes from the leaves of the camilia sensus plant.  This means that they contain caffeine and other organic compounds found in the tea leaves.  Tea is high in polyphenols which provide the tea with its flavor.  They color the water, provide bitterness and transfer some of the aromatic compounds to the hot water.  

    Water kefir is made from filtered water, coconut water or occasionally fruit juice.  The water is sweetened with any type of sugar including cane, brown, raw or beet.  Molasses can also be added in small amounts to add minerals to the water to help the grains to grow.

    Kombucha and water kefir’s different culture’s physical makeup 

    Most people are confused about the culture which is used to make kombucha, believing that it is the cellulose mat (called a pecile) which harbors the bacteria and yeast for the fermentation to begin but in reality the culture or SCOBY is in the liquid reserved for the next batch.  It is true that the pecile does harbor the same culture as the liquid reserved from the last batch but it makes for a poor starter.

    Kombucha’s starter culture comes from the backslopping method of fermentation.  Inoculating the sweet tea with the liquid starter culture in at least a 1:10 ratio.

    The kombucha starter culture can also be made from scratch.  It is a collection of bacteria and yeasts which are found worldwide.  Just like sourdough it can be started from sweet tea and time.  For instructions on how to do so check out this article here.  Every kombucha culture is different depending on its heritage, current location and past and present substrate (the various types of tea used).

    Water kefir’s culture is found in and around the kefir grains.  They are small transparent cellulose “grains” which house the kefir’s bacterial culture.  They can multiply increasing in number when they are fed correctly and will perpetually make new batches of kefir as long as they are cared for.

    Although water kefir can be made a few times using the backslopping method (using some of the finished water kefir for the next batch) it will only work a few times successfully.

    Water kefir grains cannot be made.  It is not known what combination of bacteria and yeasts produce the unique grain-like structure of water kefir.  They were discovered growing in cactus plants in Mexico where they are known as tibicos.

    Kombucha and water kefir’s different fermentation time

    The recommended fermentation time for kombucha is 7-14 days but there have been studies around the health benefits of kombucha as it ages which indicate that kombucha which has fermented for 60 days has highly beneficial effects.  Since most people drink kombucha for more than health benefits it is usually consumed while there is some unfermented sugar left in the liquid and the pH is still above 3.0.

    Water kefir has a substantially shorter fermentation time, anywhere from 2-5 days depending on how sweet you want it, the ambient temperature and how many grains were used.  Since none of these are controllable with accuracy at home you will have to test it regularly as it ferments.

    If water kefir grains are left in the same water long enough the culture will run out of food and die.  The grains will dissolve and produce a sludge on the bottom of the jar.  To take a break from making water kefir for longer than a month the grains should be dehydrated and stored in a cool dry location.

    Kombucha and water kefir’s different organic acids content

    Kombucha

    The organic acids in kombucha stem from the tea leaves used and bacterial action.  Although not all of the following acids are present in all kombucha samples a high majority of them appear in studied samples.

    • Glucuronic 
    • Gluconic 
    • Lactic 
    • Malic
    • Citric
    • Tartaric
    • Folic
    • Malonic
    • Oxalic
    • Succinic
    • Pyruvic
    • Usnic  

    Water kefir

    • Lactic
    • Acetic 

    20 Easy Ways to Use Fermented Peppers


    Six jars of various sizes holding different types of fermented hot peppers

    Now that you have mastered the art of making fermented hot peppers (click here for a recipe) you may have a fridge full of various pickled peppers.  Possibly hot chilies, jalapeno peppers, habaneros and various other concoctions.  So what do you do with all those peppers?  Well if you are anything like me you like spicy food and you like variety so here is a collection of recipes to help you to use all those peppers you have fermenting away in the fridge.

    1. Fermented Hot Sauce

    The simplest and most obvious use of all.  Hot Sauce can be made with any type of fermented pepper and is dead easy.  Depending on how you like your sauce you can make it thick or thin, spicy or mild and any color you like (depending on the color of the pepper).  

    Fermented hot sauce is great as a condiment to serve with Mexican foods of all types, at a barbeque and in a sandwich to add a little zing.  Put it on anything you wish to spice up to add a little interest.

    1. Spicy relish
    Hot pepper relish in a flip top jar

    Relish is another popular condiment which is served with a variety of foods but when it is spiced up with some hot lacto fermented peppers it enters a category all its own.  This relish can be used on burgers, sausages, smokies or added to a sandwich. 

    It can be made ahead of time but due to the sweetener in it, it needs to be used fairly quickly or it will become very sour (as the live lactic acid bacteria consume the sugar and make lactic acid).

    1. Taco salad
    Bowl filled with taco salad with cheese on top

    Taco salad is a standard use for fermented peppers.  The simplest way is to just sprinkle a good number of them on top of the salad along with the diced tomatoes.  Or you can use them in the guacamole (see recipe below) or add them to the meat sauce.  Whatever method you choose they will up the flavor to a new level. You can use many types of hot fermeted peppers depending on your spice profile.

    1. Guacamole
    bowl of guacamole on a plate filled with corn chips

    Normally guacamole is used to cool Mexican food down.  The creamy texture and oil content coats the tongue and sensitive mucous membranes and prevents the capsaicin from affecting them and diluting it a bit which lowers the spice in the mouth.  

    This recipe does the opposite!  It adds curcumin to the oil in the guacamole which ups the spice level.  If you make this recipe make sure you warn everyone that it is a hot guacamole and if they need something to cool their mouths try sour cream or creamy kefir cheese.

    1. Spicy Smoothie

    The morning smoothie has become a health conscious choice for the morning breakfast.  It is fast to make, easy to clean up after and can be taken to go.  Usually made with fruit and some type of creamy ingredient it provides an easily digestible filling drink.  

    With the addition of one or two fermented pepper slices you can move your bland morning smoothie to a flavor sensation.  The lactic acid in the peppers improves the flavor, helps digestion and breaks down some of the fat from the creamy ingredients.  Since peppers are in the fruit family your morning smoothie is still a purely fruit smoothie!

    1. Sandwich filling
    an open faced sandwich made from almond flour waffles, beef, cheese topped with fermented jalapeno peppers and lettuce

    The standard bag lunch is of course the sandwich and through years of taking a bagged lunch it can get a little boring but with the addition of hot peppers it can be made new again.  This sandwich is made with almond flour waffles using kefir (click here for the recipe) and spicy cheese dip (below).

    You can add fermented peppers to your sandwich in a variety of ways:

    • Whole or sliced pieces between the meat and lettuce 
    • As a hot sauce (see recipe link above)
    • As a cheese spread (see recipe link below)
    • Spicy dipping sauce 

    Depending on your comfort level you can use one or more of these methods of spicing up your regular bagged lunch.

    1. Spicy cheese dip

    Cheese dip is a favorite for social gatherings.  It goes well with everything from cut vegetable sticks, crackers or chips.  This recipe uses kefir cream cheese and lacto fermented jalapenos to make a tangy spiced up version of the usual bland cheese dip.

    1. Red hot chili
    Bowl of chili toped with fermented jalapenos

    Everyone has their own recipe for chili which they believe to be the hottest and most flavorful chili on the planet.  Well every recipe can be improved so why not try adding a few fermented peppers.  You can control the heat by using different peppers, anaheim peppers for mild, jalapenos for medium and chili peppers for hot.  If you want to really go crazy add some fermented habanero or ghost peppers, just remember to warn your diners before they indulge.

    1. Pizza topping

    This is a great way to use all those hot banana peppers you have in the fridge.  You can put them under the cheese with the sauce or sprinkle them on top of the cheese.  If you are using jalapenos then instead of mozzarella try cheddar cheese for a Mexican pizza sensation.  

    1. Dehydrated seasoning powder
    Dehydrated hot pepper powder in a small bowl

    This is similar to having hot chili powder on hand except it has a umami flavor which adds something to anything you sprinkle it on.  It can be made with any type of fermented hot peppers with the aid of a dehydrator. Set the temperature on low and dehydrate over 24-48 hours to preserve the live lactic acid bacteria in the hot peppers.  

    1. Spicy Curry Chicken

    Indian cooking has a reputation for being hot so adding fermented peppers to any indian dish is a natural.  The flavors of the fermented peppers come through adding to the full flavor and texture of this classic dish.

    1. Hot Mango Chutney

    Chutney is made in a variety of ways, it can be made with vinegar, lactic acid fermentation or made fresh.  This Hot Mango Chutney can be used in an hour but is better after the flavors have had a chance to combine for 24 hours, just remember that it is made with lacto fermented peppers so it will ferment and get sour and less sweet as it is stored so eat it fast.

    1. Fresh Salsa 
    Bowl of fresh salsa made with fermented hot peppers on a plate with corn chips around the outside.

    Salsa is another condiment which benefits from the use of fermented peppers.  Add them into a fresh salsa to add a more complex flavor profile.  Although I prefer fermenting my salsa from scratch this recipe uses fresh ingredients along with some fermented peppers to add some kick. It can be made just prior to serving or can be made the day ahead to allow flavors to meld together.

    1. Spicy Barbeque sauce

    This recipe is not for the faint hearted.  If you like a serious hot and spicy barbeque sauce then this is the one for you.  Barbeque sauce comes in all flavor profiles from sweet and mild to insanely hot.  With this recipe you can add as many peppers as you wish and you can use any type of fermented pepper depending on how hot you want to make your sauce.

    1. Spicy Dipping Sauce

    Dipping sauce is always a favorate for dipping wraps, bread or meat in just before eating it. The flavors in the sauce can boost any bland food. To use fermented hot peppers in a dipping sauce simply replace any call for fresh peppers with fermented ones. lower the amount of salt needed and you may have to adjust liquid as well to get the proper viscosity.

    1. Flavored Vinegar

    There are many ways to make a hot pepper vinegar from juicing the peppers and using the juice to make vinegar to chopping up the peppers and fermenting them like other fruit vinegars (yes peppers are a fruit) or like in this recipe just adding hot peppers to vinegar and letting it sit a while until the capsaicin infuses with the vinegar.  If you want to raise it to another level or you are short on time, blend it together and filter out the pulp.

    1. Spicy meatballs

    Meatballs have a special place in almost every culture and have a wide variety of spice profiles.  Italians like basil and oregano, indians like cilantro and ginger but all of them seem to have a spicy version which includes some type of pepper.  It could be fresh, powdered and yes, fermented.  

    The recipe for these meatballs can be adapted for any culture.  Choose the appropriate pepper for the culture.  Jalapenos for Mexican, hot chili peppers for indian etc.  Not to say that you can’t mix and match, have some fun and you may be surprised.

    1. Spicy Tempeh Stir Fry

    Tempeh originated in Indonesia and is a regular part of their diet.  It is made by inoculating  beans with a special fungus which uses some of the sugars and starches found in the beans as food.  It makes a nice base for this spicy stir fry.  The fermented peppers add an interesting flavor and really bring the spice level up (depending on how many you use).

    1. Spicy honey nuts

    Sweet roasted nuts have been a favorite snack food for a long time.  The crunchy texture mixed with the sweet flavor makes them irresistible.  When heat is also added it makes them something special.

    These can be made with any type of fermented pepper or if you have made some dehydrated seasoning powder, just add enough to taste.

    1. Spicy Meat Marinade 

    When using pickled peppers in a recipe the pickle juice seems to be ignored but this recipe uses any extra hot pepper brine which is left in the jar once you have used some of the peppers.  It is used as a replacement for the vinegar which is often in a meat marinade.  

    The brine helps to break down the outside edges of the meat, helping the flavors to penetrate into the meat easier.  This makes the meat more tender and flavorful.

    How and Why of Making Sour Yogurt From Scratch


    Normally fremented Yogurt vs using extra culture

    Normally yogurt has a slightly tangy flavor which when added into a recipe, provides a nice tingly feeling in the mouth, adds to the mouthfeel and the taste of the recipe.  Most of the time cooks are interested in the creamy texture which yogurt adds to the recipe with a little addition of acidity from the lactic acid in the yogurt.  

    Acidity translates to sourness in the mouth, the lower the pH of the yogurt the more sour it tastes.  There are several reasons why yogurt may become overly sour unintentionally (to learn how this can happen check out this article) but this article will focus on why you would and how you can increase the acidity (sourness) of homemade yogurt.

    Why Make Sour Yogurt

    You may want the lower lactose content, increased acidity, higher bacteria count, greater tendency to curdle or make sour yogurt for a specific recipe.  Sour yogurt has many uses and provides some unique benefits which normally incubated yogurt does not have.

    Why sour yogurt has a lower lactose content

    Lactose is the sugar found in milk which many people are sensitive to.  In fact most humans lose the ability to digest lactose once they are no longer babies.  Lactose is made up of two different mono-saccharides glucose and galactose.  The lactic acid bacteria have enzymes which divide these two sugars and use the mono-saccharides for respiration.  

    As the lactic adic bacteria lower the amount of lactose in the milk it becomes more digestable for those who are lactose intolerant.

    Benefit of the lower lactose content of sour yogurt

    Since most of us cannot directly digest lactose (humans don’t have the enzymes needed) consuming yogurt with a lower amount of lactose improves its digestibility.  This is made apparent by those who are especially intolerant to lactose.  Many people who cannot drink milk can digest yogurt with little problem.  This is because there is less lactose in the yogurt and more bacteria which can continue breaking the difficult elements of the milk down.

    Benefit of a higher probiotic count

    If you have ever shopped for a probiotic pill you will know that the main advertisement for them is the live cell count with numbers ranging from millions to billions depending on the brand and delivery method.  It is assumed that the more living probiotic cells the better.  

    When it comes to yogurt the bacterial culture takes time for the population of the bacteria to grow.  The main four bacterial species found in a yogurt culture continue to increase in population for 48-52 hours respectively.  Along with the long incubation time comes high amounts of lactic acid production leading to sour yogurt.

    Make sour yogurt using a long incubation period

    Yogurt is made with the addition of a yogurt culture, mostly made up of lactic acid bacteria, which consumes the sugar (lactose) in the milk and acidifies it by producing lactic acid.  Once the pH of the milk reaches somewhere around 4.6 the proteins in the milk begin to associate with one another forming a loose matrix which thickens the milk.

    A long incubation period allows the lactic acid bacteria enough time to consume more of the lactose in the milk.  This lowers the sweetness of the yogurt as well as raises the acidity of the yogurt adding to its sour taste.  The longer the incubation period the lower the sugar content and lower pH of the yogurt.

    Before making long incubated yogurt you have to understand some of the problems which can wreck the yogurt and why these problems happen.

    Yeast overgrowth on surface of the yogurt

    Yeast is a constant companion of any type of fermentation, including yogurt making.  Yeast species are present in every environment and will consume every type of simple sugars available.  They can grow rapidly and survive in acidic conditions.

    To control the yeast population in a yogurt incubation it is important to limit their population count in the milk prior to incubation and boost the lactic acid bacteria’s ability to dominate the culture.  

    Pasteurize the milk 

    Don’t skip the pasteurization step prior to inoculation.  This will destroy any yeast found in the milk prior to inoculation.  Heat the milk to at least 180℉℃ and maintain it for 10-20 minutes.  There are several reasons why this is done.  To learn more check out this article.

    Incubate in an anaerobic environment

    It is true that yeast can grow in an aerobic and an anaerobic environment (with or without oxygen) but lactic acid bacteria prefer an anaerobic environment.  To encourage the lactic acid growth limit its access to oxygen.

    Separated curds and whey

    There are three components of milk which need to be balanced to make yogurt which is creamy and delicious.

    1. The protein
    2. The milk fat
    3. The water content

    Each of these three components add to the texture and mouthfeel of the yogurt.  When making long fermented yogurt these three can get out of balance and result in excessive amounts of the water from separating from the milk solids forming curds and whey.

    Although this is part of the process of making cheese it needs to be avoided when making yogurt and when making sour yogurt the chances of it happening are higher.

    As the milk acidifies the proteins in the milk are attracted to one another with a stronger bond.  As this bond strengthens the water in the milk is forced out of the matrix which makes up the texture of the milk.  

    To prevent this from happening there needs to be enough fat in the milk to act as a buffer to this effect and the milk needs to remain undisturbed as much as possible.  Use higher fat milk when making sour yogurt to produce a creamy sour yogurt and incubate it without testing or moving it for the duration of the incubation period.

    Moldy off flavors

    Another constant companion of fermentation is mold.  It is not always bad in the case of cheese or kogi making. Koji is used to make a wide variety of traditional asian foods but when it comes to yogurt making it produces an unpleasant off flavor which can linger in the mouth long after tasting it.

    To prevent mold growth follow the recommendations for preventing yeast growth in yogurt but add two other things.

    1. Clean all equipment with hot running water prior to use

    Mold can consume any type of carbohydrate including long chain starches which yeast and bacteria cannot use for energy and in the process of its growth it produces toxins which inhibit the growth of other microorganisms.  It is these toxins which produce the off flavors in spoiled food.  By washing all equipment prior to use you are not only destroying mold spores and removing mold growth but you are washing away much of these toxins from your equipment.

    1. Only use fresh milk 

    Old milk will have a higher amount of mold species and population than fresh milk.  Due to the health standards in most countries milk produced in industrial dairies is safe to consume up to and a little beyond its best before date but when using old milk for sour yogurt the toxins produced by the ever present mold are concentrated and highlighted.  

    The mold itself will be destroyed by the pasteurization but the toxins will remain in the yogurt and due to the lower sugar content they will be more noticeable.

    How to make sour yogurt using an extended incubation period

    Using an extended incubation time will give the lactic acid bacteria a longer active period to consume the lactose in the milk and produce lactic acid.  To extend the incubation period you will need an incubation chamber which can maintain a steady temperature for 12-24 hours or more (depending on your purpose). 

    Equipment:

    • Incubator which can maintain a temperature range between 108-115℉ (42-46℃)
    • Double boiler
    • Wooden spoon
    • Whisk
    • Container to hold the yogurt
    • Teaspoon 

    If you don’t have an incubator checkout this article which gives you several options. If you decide you want to purchase a yogurt maker you can use this Amazon affiliate link to a collection of yogurt makers currently available or if you want to go higher end and purchase an instant pot like this one on Amazon

    Ingredients:

    Instructions:

    • Heat the milk in the double boiler to 180℉ (82℃) 
    • Maintain temperature for 10-20 minutes
    • Pour milk into container and cool to 115℉ (46℃)
    • Add 1 tsp yogurt starter to cooled milk
    • Whisk milk and starter together
    • Place in incubator and leave undisturbed for 12-24 hours
    • Move yogurt to the fridge and cool for 2-4 hours before use

    Note:

    The longer the yogurt incubates the less lactose will remain in the milk.  As this happens it will become increasingly sour.

    Make sour yogurt using extra starter

    This method of making sour yogurt is usually discovered accidentally.  It happens when an extra yogurt starter is used at the beginning of the incubation period.  When an extra starter is used the starting population of the lactic acid bacteria is higher and therefore multiplies faster than otherwise.

    The growth of bacteria in a substrate is an exponential growth not a linear one.  It is like multiplying by two as opposed to adding two to a total.  

    2 X 2 = 4 X 2 = 8 X 2 = 16  as compared to 2 + 2 = 4 + 2 = 6 + 2 =8 

    When extra starter is added it is like you are starting at 4 X 2 or 8 X 2 which leads to a much faster population growth and much more lactic acid production which makes the yogurt sour.  

    Before making sour yogurt by adding extra starter there are some things which are important to understand.  Yogurt made this way can be unpredictable and can have an unfamiliar texture which some find unpleasant.

    Why extra starter can affect the texture of the yogurt

    Every living thing has different environmental conditions in which it excels in.  whether it is the ambient temperature, pH, availability of oxygen or a myriad of other things.  When you use extra starter to make sour yogurt the conditions for growth of some of the cultures in the milk may be more conducive for growth than others and since there is a higher number of them they can quickly overtake the milk.

    With one or two types of lactic acid bacteria dominating the culture the yogurt will have a different texture than when many species of lactic acid bacteria compete for resources.  

    Some lactic acid bacteria produce higher amounts of biofilm, some produce carbon dioxide and less lactic acid while others produce organic compounds which can be unpleasant.  The challenge is you don’t know which one will dominate the culture and why.

    Extra starter increases chance of curdling

    Yogurt when made with the recommended amount of starter will acidify over a longer period of time.  This allows time for the proteins to develop the loose matrix with each other which incorporates the fat and water borne proteins in the milk.

    When extra starter is used the pH of the milk is lowered much faster and as a result the proteins form strong bonds faster, forming curds and driving out the water (the whey) from suspension.  This can be demonstrated by adding vinegar to milk and stirring.  The lowering of the pH of the milk curdles the milk quickly.

    How to make sour yogurt using extra starter

    To remediate the risk of making a yogurt with an unpleasant texture or curdling either use a fresh yogurt starter which is active or use a heritage starter.  The fresh active starter will have a culture which is competing well amongst themselves, keeping one species from dominating the incubation.

    Heritage starters have many bacteria and yeast species in them making up a very stable culture which self-regulates its population.  With the higher number of species one or two find it hard to dominate, this produces a more predictable product.

    Equipment:

    • Incubator which can maintain a temperature range between 108-115℉ (42-46℃) 
    • Double boiler
    • Wooden spoon
    • Whisk
    • Container to hold the yogurt
    • Tablespoon 

    Ingredients:

    • Fresh milk
    • Yogurt starter

    Instructions:

    • Heat the milk in the double boiler to 180℉ (82℃) 
    • Maintain temperature for 10-20 minutes
    • Pour milk into container and cool to 115℉ (46℃)
    • Add 1-2 tbsp yogurt starter to cooled milk
    • Whisk milk and starter together
    • Place in incubator and leave undisturbed for 4-8 hours
    • Move yogurt to the fridge and cool for 2-4 hours before use

    Note:

    Time is the ultimate factor when it comes to sour yogurt.  It is important to leave the yogurt undisturbed for at least 4 hour but the longer you leave it the more sour it will get.

    How to make sour yogurt quick and easy

    Sour yogurt has many uses in cooking.  It can be used in quick bread baking to give the rising agent a boost, add tang to a sauce, add acidity to a dip and be used in marinades to help penetrate the meat’s surface and draw in the flavors.

    When you don’t have any sour yogurt on hand it can be made quickly and easily with the addition of some type of acid and left to sit for 4-24 hours.  Some recipes for sour yogurt are actually recipes for curd which is an unfermented thickened milk made by adding acid to milk to lower the pH of the milk which causes the proteins to associate with one another (just like yogurt).  

    This type of sour yogurt still has the normal amount of lactose in it as the lactic acid bacteria has not had the time or population to consume it so it cannot be used as a replacement for those who are lactose intolerant but it can be used as a substitute for sour yogurt in recipes.

    Two ways to quickly make sour yogurt

    1. Add some acid to the milk during incubation

    When making yogurt you can add some acid like acetic or citric acid by adding some vinegar or lemon/lime juice to the cooled milk once the starter has been added.  The additional acid will quickly lower the pH of the milk and produce sour milk in 4-6 hours.

    1. Add some powdered acid to finished yogurt

    If you have some yogurt which you need to sour quickly you can add some powdered citric, acetic or lactic acid.  These can be found at beer and wine making stores or online.  

    Simply add a small amount of powdered acid to the yogurt and gently mix it in.  The acid will quickly lower the pH of the yogurt making it tangy.  Be careful to not mix too much as it may cause it to curdle.

    How to Make Spicy Chilli With Fermented Hot Peppers


    Bowl of chili toped with fermented jalapenos

    Chili recipes are everywhere, some with normal ingredients which you would expect while some include ingredients like coffee, maple syrup or blended vegetables.  Now I don’t know about you but I like a simple chili with ingredients I can recognize and full flavors which combine well.  Mostly I want a chili which has some spice in it.

    This recipe includes the use of fermented hot peppers which not only add heat to the chili but also additional complex flavors which add to its interest.  You can use any type of fermented hot peppers depending on your preferred flavor and spice tolerance.

    Equipment:

    equipment for making chili with fermented hot peppers: a cutting board, kitchen knife mixing bowl, steel pot wooden spoon and various measuring spoons
    • Kitchen pot
    • Mixing bowl
    • Cutting board
    • Kitchen knife
    • Wooden spoon
    • Various measuring devices

    Ingredients:

    Ingredients for chili with fermented hot peppers: ground beef, tomaoto sauce, kidney beens, onion, garlic, fermented jalepeno peppers fresh oragano and parsly, bowl of cumin, salt and 3 hot chili peppers
    • 1 kg of regular ground beef
    • 1 onion minced
    • 1 green pepper roughly chopped
    • ½ cup fermented hot peppers roughly chopped
    • 1 can crushed tomatoes 
    • 2-4 garlic cloves minced
    • 1-3 dried chili peppers
    • 1 can kidney or pinto beans
    • 1 tbsp cumin
    • 3-4 sprigs fresh oregano minced or ½ tbsp dried
    •  2 Fresh parsley or cilantro sprigs minced
    • Salt to taste

    Instructions:

    • Add ground beef to pot and heat slowly to medium high stirring constantly.
    • Cook beef until it browns and releases some of its fat
    Browned ground beef in a pot

    • Remove beef from pot and add minced garlic to the pot
    • Cook until garlic browns slightly 
    • Add onion and cook until soft
    Cooked Onion
    • Lower heat to low and add cumin
    cooked onion and garlic in pot with added cumin on top
    • Add oregano and parsley/cilantro and stir for 1 minute
    cooked onion, garlic with chopped oragano and parsly on top

    • Add tomato sauce and browned ground beef
    Added tomaot osauce and graound beef to garlic, onion mix
    • Add hot peppers
    Added fermented jalapeno peppers
    • Simmer over medium heat for 10 minutes and then add beans
    Added kidey beans to grownd beef mixture
    • Add green pepper
    Add green peppers to chili
    • Simmer another 5-10 minutes 
    • Add salt to taste
    • Remove from heat and rest for 5 minutes
    bowl of chili, a salt grinder with a pot of chili in background

    Note:

    Many recipes use vegetable oil to saute the onions and garlic.  Vegetable oils are high in polyunsaturated fats which are unhealthy, even healthy oils like olive oil become unhealthy when heated in a pan once the heat gets above 350℉ (180℃).  This recipe does not use any vegetable oils since there is enough beef fat in regular ground beef to accommodate sauteing the aromatics prior to adding the tomato sauce.

    Adding the dried spices while sauteing the garlic helps to release the flavors in the spices and increases their flavor profile in the chili.  Fresh vegetables contain high water content so they need to be added at the end of the sauteing process just prior to adding the tomato sauce to preserve the aromatic effect of the spices.

    How to Make Lacto Fermented Garlic Cloves


    sealed jar filled with garlic cloves salt and water

    There are many ways to store garlic for later use.  It can be hung in a cool dry location, mashed and mixed with vinegar, slowly fermented into black garlic or pickled with vinegar but by lacto-fermenting them you get a chance to experience one of the most reliable, safe and delicious ways of garlic preservation.  

    Now I know we no longer have to worry about preserving our harvest for later use in today’s world of global trade but preservation is only a small part of why lacto-fermented garlic is so great.  As the garlic ferments it mellows the flavor of the garlic, adds a tangy taste and improves its digestibility (for those who have trouble with garlic sauces).

    Equipment:

    A cutting board, kitchen knife scale and swing top jar
    • Cutting board
    • Kitchen knife
    • Fermenting jar
    • Kitchen scale

    Ingredients:

    a pitcher of water, a bowl of galic heads and a container of salt sitting on a cutting board
    • Enough garlic to fill the fermenting jar
    • Salt
    • Filtered water

    Instructions:

    • Separate garlic cloves 
    A pile of garlic cloves still in their husks
    • Trim end and peel
    closeup of garlic cloves whith end trimmed
    • Place jar on scale and tair it
    empty swing top jar on taired scale
    • Add peeled garlic cloves to jar
    swing topped jar on scale filled with garlic cloves
    • Add filtered water to just cover the garlic cloves (leave some headroom)
    jar filled with garlic cloves and water sitting on a scale
    • Calculate 2-3% by weight of salt 

    502g X .02 = 10.4g

    • Add desired amount of salt by weight
    kitchen scale reading 511g
    • Seal the jar
    sealed jar filled with garlic cloves salt and water
    • Place jar in a cool dark location
    jar of fermenting garlic cloves in a cupboard
    • Burp the jar daily until no bubbles appear
    • Ferment at least 2 weeks 
    • Move to cold storage once desired fermentation level is reached

    Note:

    Many recipes will require a 3-5% water brine to be used as the liquid to submerge the garlic cloves.  This is a very inaccurate method of calculating salt concentration as the volume of water added to a jar varies with how many cloves are packed into the jar.  Instead by weighing the total volume of the jar the correct amount of salt can be added to ensure your garlic will not spoil.

    How to Make Fresh Salsa With Fermented Hot Peppers


    Bowl of fresh salsa made with fermented hot peppers on a plate with corn chips around the outside.

    Fresh salsa is a wonderful addition to a summer lunch or dinner.  Served with corn chips, as a side dish for any Mexican meal or added to a sandwich which needs some spicing up it will provide a tangy, spicy addition to any meal.  The fresh ingredients can be easily found in the summer from local producers or if you have space you can grow them yourself.

    This recipe is quick to make and can be adapted to your spice preference by adding more or hotter fermented peppers.  

    Equipment:

    equipment needed to make fresh salsa with fermented hot peppers: a cutting board, kitchen knife, mixing bowl, measuring spoon and mixing spoon
    • Cutting board
    • Kitchen knife
    • Mixing bowl
    • Mixing spoon
    • Measuring spoon

    Ingredients:

    Ingredients for fresh salsa made with fermented hot peppers: tomatos, bell pepper, green onions, fermented peppers in a bowl, garlic, fresh oragano and parsly, powdered cumin in a bowl and a container of salt
    • 3 medium sized tomatoes
    • 1 colored bell pepper
    • 2-3 green onion stalks
    • ½ cup fermented hot peppers
    • A few sprigs of fresh oregano
    • A few sprigs of fresh cilantro or parsley
    • 2-4 cloves of garlic
    • 1 tbsp cumin
    • Salt to taste

    Instructions: 

    • Roughly chop the tomatoes
    Mixing bowl with three chopped tomatos in it
    • Finely chop the green tops of the green onions
    green onion tops sliced and added to fresh salsa ingredients
    • Roughly chop bell pepper
    roughly chopped yollow pepper for fresh salsa made with fermented hot peppers
    • Remove hard stalks from fresh oregano and parsley and mince 
    minced parsly and oragano with stalks removed on a cutting board
    • Mince the garlic
    Miinced garlic for fresh salsa made with fermeted hot peppers
    • Add cumin to the bowl
    • Add a little salt 
    Bowl of fresh salsa ingredients with a tablespoon of cumin on top
    • Mix all ingredients together in the mixing bowl
    Bowl filled with fresh salsa ingredients all mixed together

    Note:

    Consume this quickly as the fermented peppers may still have active lactic acid bacteria in them which can acidify the salsa quickly.