Urban Fermentation

Recent Posts

Kefir and Almond Nut Waffles


Plate of almond nut waffles

For all those who can’t have wheat but still like to have something to pour syrup over these waffles are made for you.  There are no grains in this recipe but still make waffles which hold together well and make great syrup carriors.

They can also be used for bread for sandwiches or cheese melts.

The recipe calls for kefir which adds a nice tang to the waffles which is hard to get with their grain based counterparts.   

Almonds are chock full of protein and other good for you vitamins and minerals.  Which makes these waffles a super protein powerhouse.  Made with almonds, eggs and kefir they give a wide variety of sources of protein making these waffles a hearty and filling breakfast.

They are made with kefir rather than milk which means they have less lactose in them making these waffles easier to digest.

They are simple to make with a high powered blender with little cleanup. 

Equipment:

  • High powered blender
  • Waffle maker

Ingredients:

Three eggs

One cup almonds

¼ cup butter plus some for the waffle maker

½ cup kefir

1 teaspoon baking powder

A pinch of salt

Instructions:

Pre-heat the waffle maker

Place all the ingredients into the blender and blend until smooth.  Do not over blend as you want the almonds to still have some texture.

Pour enough of the mixture into the waffle maker to cover the bottom and close the lid.

Wait until the steam from the waffle maker slows. 

Open the waffle maker and remove the waffles. 

Repeat until all the waffle mixture is used.

Note:

If you make a double batch of these waffles and store the extra in the freezer.  You can then heat them up by placing them in the toaster. 

Dehydrated Hot Fermented Pepper Powder


powdered fermented hot pepper in a small bowl

Everyone who likes hot food has a stash of their favorite ground hot pepper powder.  Whether it is cayenne, chillies or serrano it is used to add a little heat to anything and everything.  Well here is another one to try.  You can use any type of pepper, lacto-ferment it, dehydrate them until they are crispy and then process them into a powder using a blender, or coffee grinder.  

Equipment:

  • Silicone pad
  • Food dehydrator
  • Blender or coffee grinder
  • Spice jar

Ingredients:

  • Fermented hot peppers of your choice

Instructions:

Spread the fermented peppers onto the silicone pad

Place the silicone pad on top of the dehydrator rack and put it into the dehydrator

 Dehydrate at 150℉ (65℃) until they are very dry (24-48 hours)

Dehydrated Jalapinos on a silicone pad

Remove them from the dehydrator and powder them in the blender or coffee grinder

Dehydrated hot pepper powder in a small bowl

Spoon into the spice jar and keep it handy for your next spicy recipe

Hard Kefir Cheese


Hard Kefir Cheese

Kefir grains are a great option for making kefir because the culture is made up of some 50 different probiotics which help to promote health, if they are taken care of they will last forever and they can be used daily to make a new batch of fresh kefir. 

The problem is that every day you make a fresh batch of kefir!  This can lead to an overwhelming amount of kefir in the fridge and as the kefir grains grow (yes they grow) the amount of kefir you can produce increases.

Here is a great way to use all the extra kefir your grains produce and in the process make a wonderful hard cheese which has a feta like texture.  It can be flavored however you want making it a very versatile cheese.

Equipment you will need

  • Two pieces of tightly woven cotton cloth about a foot square
  • 2 feet of String
  • Bowl to catch whey
  • Colander
  • A small plate
  • Something heavy

Ingredients:

  • 1 liter of kefir fermented for 48 hours.
  • Salt
  • Flavorings of your choice.  I like herbs, pepper or fermented jalapenos

Instructions

Line the bowl with the cotton cloth and pour the kefir into the bowl.  Gather the edges of the cloth together and tie closed with the string.

Tie the other end of the string to something high enough to suspend the bag of kefir above the bowl and hang the kefir for 24 hours.  This will allow some of the whey to drip into the colander leaving the thickened curds in the cloth bag.

The kefir will now be thickened enough to add the flavorings. 

Open the cloth bag and scrape the kefir cheese into a bowl. 

Mix in the salt and other flavorings a little at a time and tate it often. It is easy to add more but not possible to take any out. 

If you are using dried spices remember the flavor will get stronger as the spices combine with the curds so don’t add too much.

Place the second cloth on the counter and put the flavored kefir mixture in the center.  Wrap the kefir so that it is entirely contained within the cloth.

Place it in the colander.  Empty the whey from the bowl and store for later use.  Place the colander over the bowl and put the small plate on top of the kefir.

Place the weight on top of the plate.  This will force more of the whey out of the kefir cheese.  In 24 hours you can either check the consistence of the cheese or add more weight. The more weight the harder the cheese.

Once the cheese is as hard as you want it place it in a container and refrigerate.

It can be enjoyed in salads, omelets, on crackers or just plain.

Why Your Homemade Yogurt Does Not Set


A bowl of runny yogurt on a spoon

Anyone who has been making their own yogurt for a while will eventually have the experience of the milk not thickening no matter how long it is incubated.   When this happens to you it is not readily apparent why the milk does not thicken into the usual sweet tangy yogurt you have made so many times before.  

Milk becomes yogurt when its pH drops below 4.6 where it begins to gel. There are a number of reasons milk does not reach this pH such as: weak starter, contaminated milk or equipment, improper incubation temperature and poor milk choices.

When you first start making yogurt you are usually very particular about following the steps outlined in the recipe.  You wash all utensils, heat the milk to the correct temperature and incubate the milk under close scrutiny.  Once a routine has been developed often the careful attention to the details begin to slide and you end up with a failed batch.  

To prevent this and learn what you did wrong take some notes about what you did when making the failed batch and any changes you noticed of prior batches.  This will give you some good clues regarding what you need to change in your system to prevent failure again.

Here are some of the most common reasons why your milk does not gel into yogurt.

Why a weak yogurt starter can lead to yogurt not thickening

The process of making yogurt requires the action of live lactic acid bacteria using the lactose in the milk for energy and producing lactic acid as a byproduct of their respiration.  It is the lactic acid which lowers the pH of the milk which leads to the thickening of the milk into yogurt.

When the starter is not strong enough to dominate the milk during the incubation process unwanted bacteria and yeast strains may dominate the culture.  Some of these unwanted bacteria produce an environment which is basic rather than acidic, preventing the milk from thickening.

Three reasons why a yogurt starter can become weak

  1. Too few lactic acid bacteria strains

Commercially made yogurt and direct set yogurt starters only contain a few (up to four) lactic acid bacteria strains in any measurable quantity.  Some only contain two which makes it especially susceptible to contamination. 

When making yogurt using commercial yogurt as a starter or direct set powdered yogurt packets it is recommended that you only make one or two batches using the backslopping method of yogurt inoculation.  With so few lactic acid bacteria strains in the starter the chance of growth of unwanted bacteria is higher.  This is because every microorganism has a niche in nature which it grows best.  

Without a wide variety of lactic acid bacteria niches are left in the milk which the present lactic acid bacteria are not adapted for, be it cooler, exposure to oxygen or less agitation, whatever the reason this gives unwanted bacteria, mold and yeast an opportunity to get a foothold in the milk leading to a weak starter.

  1. Too much time between new batches

Yogurt is a dynamic food, the lactic acid bacteria in homemade yogurt will continue to consume the lactose in the milk lowering the pH of the milk.   Unfortunately not all lactic acid bacteria are as acid tolerant as others.  This leads to die off of some strains of lactic acid bacteria which reduces the viable lactic acid bacteria species which weakens the starter.  

When using commercial yogurt or direct set yogurt packets don’t use the yogurt to start another batch once your yogurt is over two weeks old as the few lactic acid bacteria species can deteriorate quickly.  If you are using heirloom starter the culture is much more robust but still needs to be fed fresh milk regularly to maintain a strong culture.

  1. Not enough sugar to feed the lactic acid bacteria

Lactic acid bacteria need sugar to grow.  Lactose is the sugar in milk which the yogurt starter will break down into two smaller sugars called glucose and galactose.  It then uses these two simple sugars in their respiration.  If there is not enough lactose in the milk the yogurt starter can become weakened and susceptible to contamination.

Not all milk has the same amount of sugar in it.  High fat milk is lower in sugar than skim milk and sheep and goat milk have less sugar than cow’s milk.   If you like thick yogurt made with heavy cream use a fresh starter from commercial yogurt or a new direct set packet.  When using a heirloom yogurt starter, alternate between high and low sugar content milk to ensure the lactic acid bacteria are fed properly. A recipe for making yogurt from high fat milk can be found here.

Why contaminated milk can lead to yogurt not thickening

Milk which is old or has been left at room temperature for a long period of time can become contaminated with unwanted bacteria and mold even if it has not been opened.  Pasteurization is meant to control the number of spoilage bacteria in commercial milk, not sterilize the milk.  As the milk ages or is placed in a warm environment the microorganisms left in the milk will begin to multiply.  

As spoilage microorganisms grow they consume sugar in the milk leaving less for the lactic acid bacteria to use for respiration and can produce a basic environment.  This means lactic acid bacteria in the starter have less fuel to acidify the milk to a pH of 4.6 where it will begin to gel.

Contaminated milk will introduce unwanted bacteria to a weak culture with few lactic acid bacteria strains in it.  This is why using commercial yogurt or direct set packets as yogurt starters only work a few times reliably.  Without the wide variety of bacterial strains in the culture it leaves opportunity for spoilage bacteria to get a foothold and eventually overtake the starter culture.

Heirloom yogurt is much more robust, preventing spoilage bacteria from getting a foothold in the culture but the use of contaminated milk can affect the flavor of the yogurt.

Why contaminated equipment can lead to yogurt not thickening

Using unclean equipment is another error which can creep in once you get familiar with making yogurt.  With several successful batches under your belt it is easy to start to take shortcuts such as not washing the jars as thoroughly as you should or using utensils straight out of the drawer.

Using contaminated equipment can lead to the introduction of unwanted bacteria through food residue, unclean hands or contact with contaminated surfaces.  These bacteria consume milk sugar and make the milk more basic, preventing lactic acid bacteria from acidifying the milk properly.

When making yogurt it is important to keep your equipment clean and in good order.  Dispose of any equipment which are damaged or have scratches or grooves which can harbor unwanted microorganisms.  Plastic containers are easily scratched during cleaning so before using such containers inspect them.  Glass is easier to clean but avoid using metal scrubbers as they can scratch the surface of the glass.

Prior to making yogurt, wash all your equipment in hot soapy water, rinse with clean running water and let air dry.  It is not necessary to try to sanitize your equipment with high heat or chemical means as your starter should be strong enough to prevent small numbers of unwanted bacteria from getting a foothold in your yogurt.  This is especially true if you are using a heirloom yogurt starter as they are very robust and self protecting.

Why incorrect incubation temperature can lead to yogurt not thickening

The ambient temperature affects the growth of all microorganisms.  They each have a specific temperature which they grow best in, this includes lactic acid bacteria.  If your incubation temperature is either too hot or too cold it will affect the growth rate of the starter and can sometimes prevent its growth enough to allow other bacteria, yeast or mold to get a foothold in the starter.

Incorrect incubation temperature can kill the starter above 120℉ (48℃) or inhibit their growth below 100℉ (38℃).  Either way the lactic acid bacteria growth will be inhibited allowing unwanted bacteria to grow.  When incubating yogurt keep the temperature between 108-115℉ (42-46℃) for best results.

Some yeasts grow well in cool temperatures such as the yeast Saccharomyces pastorianus with a temperature range between (6-12℃).  This yeast is used to produce lager commercially but is often found in the environment.  Since yeast can grow on any simple sugar, milk which is not heated properly can become the medium for yeasts with similar temperature ranges.

Mold is also pervasive in the environment and can grow in all types of temperature ranges from hot to cool.  They usually grow best in warm temperatures but some species of mold grow in cool temperatures.  Mold can also utilize complex carbohydrates for energy unlike bacteria and yeast, making it difficult to eliminate from the environment.

Other bacterial species also have a different temperature range, some of which are considered spoilage and even pathogenic.  These bacteria can produce a basic environment which can inhibit the growth of lactic acid bacteria further reducing the thickening ability of the lactic acid bacteria.

Why poor milk choices can lead to yogurt not thickening

For milk to thicken into yogurt it needs to have protein which will associate with one another to form a loose matrix.  This loose matrix encoumpases all four componetes of the milk, lactose, water, fat and protein.  If the milk choice you make does not have a good balance of these components the thickening power of the lactic acid bacteria is limited.

Poor milk choice reduces yogurt thickness by altering the balance of milk components.  Enough sugar is needed to acidify the milk, adequate fat makes the yogurt creamy but too much prevents thickening, water thins out yogurt and the presence of protein provides the thickening power.

Why sugar is needed to thicken yogurt

Sugar comes in three forms: monosaccharides, disaccharides and complex carbohydrates.  Monosaccharides come in three forms: glucose, fructose and galactose.  These three sugars are the basic building blocks of other forms of sugar and starch.

The sugar in milk is called lactose and is made up of one molecule of glucose and one molecule of galactose.  Lactic acid bacteria have the ability to break down the lactose in the milk into its component parts and use the simple sugars as fuel.  As a result they produce lactic acid which acts on the protein in the milk causing it to form weak bonds with one another, thickening the yogurt.

Without enough sugar in the milk the lactic acid bacteria does not have enough fuel to produce the acid to thicken the yogurt.  For yogurt to thicken it needs to have a pH of at least 4.6 and the amount of acid needed to lower the pH of the milk can vary depending on its original pH.

Milk choices like lactose free, nut and seed “milk” and any grain based milk products will either have too much sugar (due to added sugar) or not enough.

The effect fat content has on yogurt thickness

The amount of fat in the milk influences the texture of the yogurt.  Low fat milk such as skim milk or 2% produces yogurt with a harder less creamy texture whereas high fat milk produces a creamy yogurt with less structure.  

The fat in yogurt gives it its creamy texture by providing a barrier between the protein molecules preventing them from associating too closely together.  This distance keeps the proteins from forming curds and forcing the water out of the solution.

How the amount of water in the milk changes its thickness

Water makes up about 87% of milk volume so it is an important component of the milk, making up the majority of the volume.  It provides the yogurt with its soft and malleable texture which makes it so popular.

Too much water in the milk will make yogurt thin and runny, which is one of the reasons why it is recommended that the milk is heated to 180℉ (82℃) for 10-20 minutes prior to inoculation (for more reasons read this article).  The long pasteurization reduces the amount of water in the milk, thickening the yogurt.

Why the correct protein balance makes the best yogurt

It is the protein in the milk which thickens it into yogurt.  The protein molecules associate with each other forming a weak matrix which increases in strength as the milk acidifies.  This is apparent if you incubate your yogurt for an extended period of time (for more information about the effects of long incubation check out this article).

Too much protein will give it a grainy texture as the proteins have less distance between them making it easier to associate strongly with one another and too little protein will make thin yogurt with very long weak bonds producing a thinner yogurt.

When choosing what type of milk you use to make yogurt keep a log which you can refer to when making future batches.  Once you have made yogurt with a few different types of milk you will be able to refer back in your note which one made the best.  This will give you a good idea as to which milk to use in the future.

Four Cultures To Use For Yogurt Starter


Four mason jars filled with yogurt made with different starters

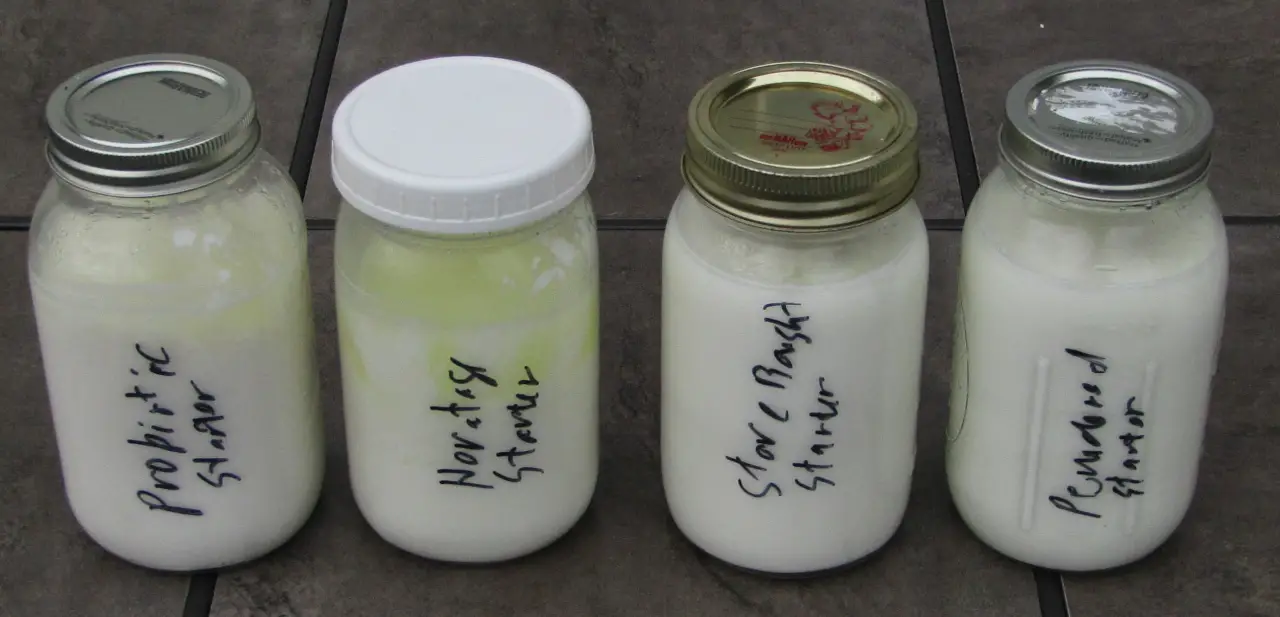
There are four general types of yogurt starter which can be used, live culture store bought yogurt, powdered direct set culture, heirloom culture and probiotic powder culture.  Each has their own strengths and weaknesses and depending on your situation one method may be better than another for you.

Using store bought yogurt as a yogurt starter

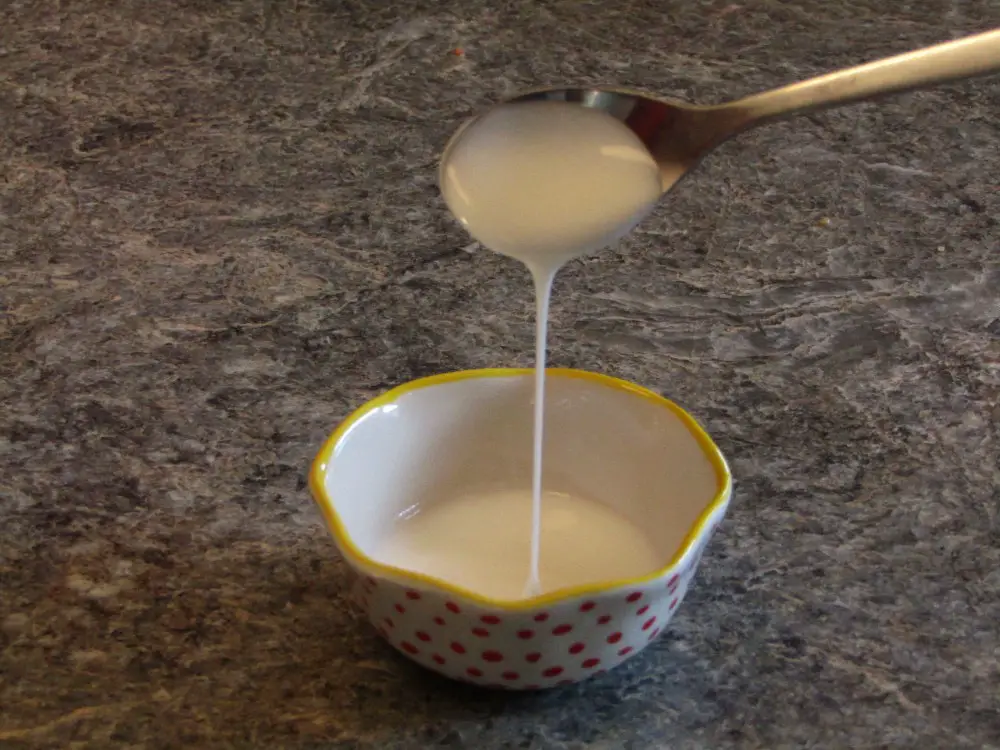
Store bought yogurt can be used as a yogurt starter by adding a little yogurt to freshly pasteurized milk and incubating it for 6-12 hours.  Store bought yogurt contains live bacterial cultures which were introduced to milk at the factory.  

The culture is very controlled, usually having two to four lactic acid bacteria species which have been identified as being able to acidify the milk quickly and produce a very consistent product.  This is beneficial to the dairy which produces the yogurt and the store which sells it as the product is very predictable and can be produced quickly with the least amount of expense.  

Benefits of using store bought yogurt as a starter culture

It is readily available

Every grocery, corner and health food store will carry store bought yogurt.  Ensure that the yogurt has live bacterial cultures in it, does not have any added sugar or fruit and is as fresh as possible.  

Most store bought yogurt has some type of thickener in it.  This is because it needs to be consistent, being the same no matter how far it was transported or how long it was stored in the cooler prior to being purchased.  If you can find one which does not have any thickeners use it rather than the thickened versions to keep your yogurt as pure as possible.

It is easy to use

To use store bought yogurt as a starter all you need to do is to add a spoonful of yogurt to the prepared milk (for instructions on how to prepare your milk check this article) and stir thoroughly.  Incubate normally.  

This method is called backsploping in fermentation terms and is how many fermentations are propagated.  The culture from the previous batch (the store bought yogurt) is used to start the next batch.

It produces a consistent yogurt

Consistency is a hallmark of good manufacturing processes and commercial yogurt making is a manufacturing process.  Milk is converted into yogurt in the most efficient manner as possible with the same results expected each time.  This is because consumers like things being the same every time.

One of the ways they do this is by using very specific bacterial cultures which produce the flavors and textures their customers like.  Since you are using the same cultures which made the store bought yogurt you will get yogurt which resembles store bought.

Drawbacks of using store bought yogurt as a starter culture

Only contains a few lactic acid species

In order to get a consistent product their customers want, dairies use yogurt starters which have a limited number of lactic acid bacterial cultures.  This is great for producing a consistent product in a manufacturing plant but it limits the types of lactic acid bacteria which are present in the yogurt.

The limited number of lactic acid bacterial strains limits the benefits you get from the yogurt.  Each strain of lactic acid bacteria requires different living conditions and will fill a different niche in the yogurt, making for a strong culture resistant to unwanted bacteria, mold and yeast.  Store bought yogurt does not have the diversity so it is more susceptible to spoilage.

Usually contains additives

Additives are added to store bought yogurt for a number of reasons:

  • To maintain structure during shipping and handling
  • To produce a thick creamy texture for the customer
  • To shorten the incubation time 
  • To be able to use no or low fat milk and still maintain the right texture

These additives are mostly starch based which are industrially processed.  They all make the yogurt harder to digest and take on an unusual texture which becomes noticeable once you start to make your own yogurt.

Some of the thickeners used include:

  • Agar-agar
  • Guar gum
  • Corn starch
  • Tapioca starch
  • Flour
  • Pectin
  • Gelatin
  • Modified milk ingredients (milk powder)

All of these ingredients will contain unwanted industrial chemicals and contaminants.  When using store bought yogurt as a starter some (albeit a small amount) will be included into your yogurt.

Must be purchased regularly 

The process of making yogurt at home is different from making yogurt at a commercial plant.  Commercial plants use high heat and toxic chemicals to sanitize all equipment before every batch of yogurt.  The process is highly controlled and monitored to ensure no contamination of unwanted bacteria and yeast strains get into the yogurt which can produce an inconsistent product.

When making yogurt at home such standards are unnecessary and hard to achieve and as a result you will not be able to continue to use the same starter from a previous batch of yogurt from a store bought culture.  Each time it is used it will pick up additional bacterial strains from your environment.  Some will be good but some will be unwanted and can cause spoilage, off flavors and inconsistent yogurt texture.  It is recommended that you use a fresh yogurt starter each time you make yogurt this way. 

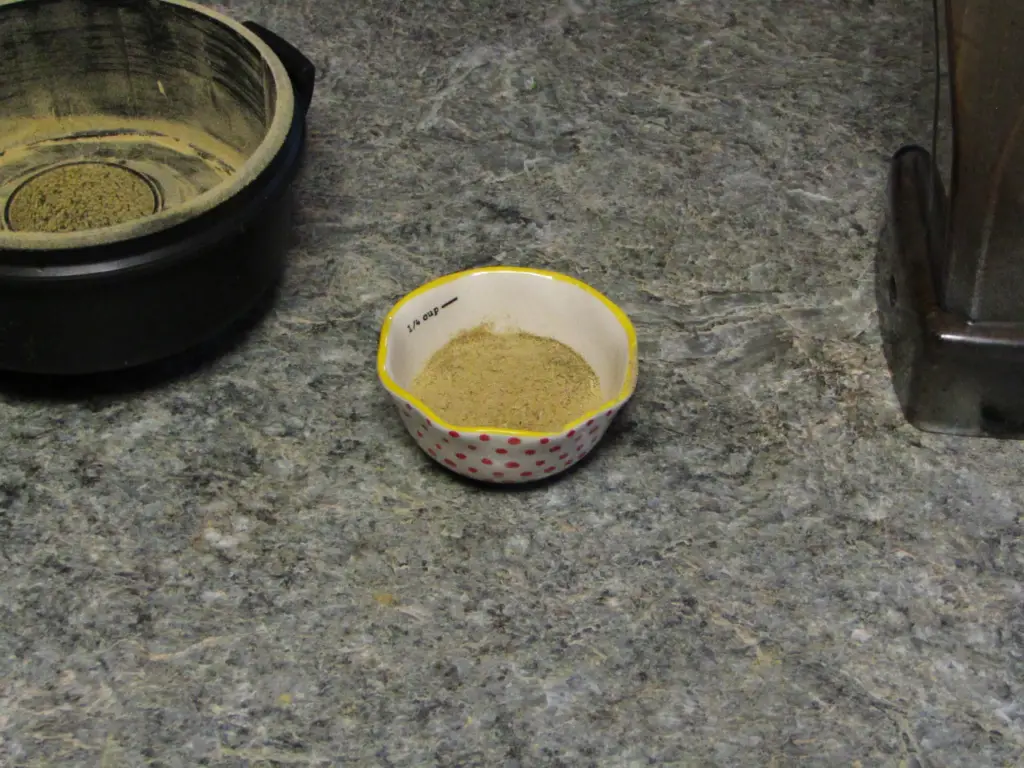
Using powdered direct set culture as a yogurt starter

Powdered yogurt direct set cultures come in little pouches with dehydrated yogurt starters in them.  The cultures vary depending on the type you purchase but the most popular types are for thermophilic cultures.  These are species of lactic acid bacteria which need to be incubated between 108-115℉ (42-46℃).  Although there are some which are mesophilic starters which grow well in ambient temperatures.

Benefits of using powdered direct set yogurt starter

Can be purchased at most health food stores or online

There are several brands of yogurt starter which come with full instructions on how to use them.  They are conveniently packaged in packets meant for a specific amount of yogurt.  Most boxes of yogurt starter will start several batches at a price less than that of purchasing yogurt at the store.

Comes in a variety of types

Yogurt has many cultural roots.  It seems every culture which kept livestock has some heritage style of yogurt.  Be it greek style, belgian or indian yogurt each have their own texture and method of production.  Starters for many types of yogurt can be found at health food stores or online.  

It produces a consistent yogurt

Yogurt made with these packets are very consistent so long as you follow the instructions on the packet.  The cultures in each packet are produced and dried using an industrial process which will produce the same product within very small tolerances.  This makes for a predictable culture which will provide the user with the same experience over and over.  

With a predictable product companies can more effectively market it.  People are more likely to purchase a product regularly which produces the same results every time rather than one which is hit and miss.

Drawbacks of using  powdered direct set yogurt starter

Only contains a few lactic acid species

These packets are essentially the same cultures which commercial yogurt makers use to produce their yogurt.  This makes for a very similar yogurt but it also lacks the bacterial variety of heirloom yogurt styles. 

The lack of variety means these starters are meant for one time use.  Some people use yogurt made from these starters to start another batch or two but because of the lack of diversity they can get contaminated with unwanted bacteria quickly.

Is more difficult to make

The instructions on the packet require milk to be treated differently.  The packets need to be dissolved in warm milk and stirred for a longer period of time to be evenly distributed throughout the milk otherwise it can incubate unevenly (most lactic acid bacteria are not motile).  

The packets need to be stored in the fridge to maintain freshness and deteriorate with extended periods of time in storage.  If the packets are old they require a longer period of incubation before the milk will gel into yogurt.  During that time the milk is more susceptible to growth of unwanted microorganisms because the pH of the milk does not fall quickly enough to limit their growth.

Must be purchased regularly 

Each packet is meant for one time use.  As mentioned above some people use the yogurt produced by these packets one or two times again but it is not recommended.  As a result the starter must be purchased regularly to maintain your yogurt supply.

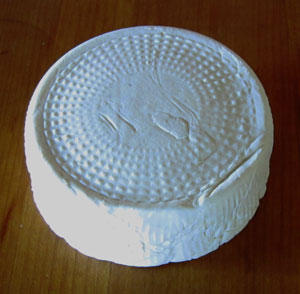
Using a heirloom culture as a yogurt starter

Heirloom starter cultures come in a variety of styles.  They come from all over the world and each type has a different flavor and texture.  These types of yogurt starters can be perpetuated indefinitely as long as they are cared for.  Some heirloom cultures have been maintained over a hundred years and have spread throughout the world to take on different characteristics depending on its environment.

Benefits of using heirloom culture as a starter culture

Contains a wide variety of lactic acid bacteria species

Heirloom yogurt styles are yogurt cultures which have been developed over hundreds of years.  Some even have pedigrees which show where they came from and how old they are.  Such yogurt cultures contain a wide variety of bacteria cultures which occupy every niche environment in the milk/yogurt.  

It is the wide variety of bacteria which make for a stable environment which prevents unwanted bacteria and yeasts from getting a foothold in the yogurt.  Due to the acidifying effects of the lactic acid bacteria in the milk, the speed at which the milk is acidified and the competition for food, contamination of the milk from outside bacteria, yeast or mold is very unlikely.

As the environment changes for the milk/yogurt different microorganisms within the culture grow quickly preventing contamination from outside.  This established culture will have varying populations of the various microorganisms in the culture depending on the ambient environment.  If it is warm the bacteria which like it warm grow; if it is a high fat milk the bacteria which grow well in high fat milk grow quickly; once the milk is acidic the bacteria which thrive in low pH solutions get the upper hand.  

Can be perpetuated indefinitely

Due to the wide variety of lactic acid bacteria, some acetic acid bacteria and yeast species found in these cultures they have a very robust nature.  They produce compounds which are protective of the culture preventing unwanted microorganisms from growing and compete with any unwanted bacteria which does enter the medium for food and space.

This makes for a culture which can be used again and again.  It does not get contaminated with spoilage bacteria as the culture protects itself and can reproduce quickly when given the right environment.

Comes in a variety of styles

Heirloom yogurt is how yogurt was made for centuries without the need for industrialized processes.  They come from all over the world and each community would have a different yogurt culture made up of different bacteria and yeast species depending on what is in the environment it came from.  

The different cultures will produce yogurt with varying characteristics.  Some will be thick or runny, creamy or viscous.  

Drawbacks of using heirloom culture as a starter culture

Must be cared for 

It is true that heirloom yogurt cultures can live indefinitely but that does not mean that they do.  Just like any other living thing a heirloom starter needs:

  • A continuous supply of energy (fresh milk)
  • Favorable environmental conditions
  • Protection from invasion

The lactic acid bacteria in the culture break down the lactose in the milk for energy which it uses to fuel its metabolism.  As the energy supply in the milk drops the cultures growth slows and will eventually stop.  Most of the bacteria found in the culture have methods of survival in times of low food but it is hard on the culture.

To prevent stressing a heirloom culture it is recommended that they are refreshed weekly.  This means that every week you should be making more yogurt with your culture.  

More difficult to find

Heirloom cultures are not as popular in homemade yogurt making circles and as a result they are harder to find.  Some health food stores carry a limited supply, online retailers such as Cultures For Health are the best way to gain access to a heirloom starter but you could also search for other yogurt enthusiasts and ask for a starter from them.

Heirloom yogurt is exclusively inoculated using the backslopping method (some yogurt from a prior batch is used to inoculate the next batch) so getting a little yogurt made from a heirloom culture can act as a starter.

Can produce varying results 

The highly controlled environments for making yogurt in the above two methods produce a very consistent product but heirloom yogurt can be made in a variety of ways (depending on the type) from various temperatures,  milk types, incubation times and oxygen availability.  Each of these variables will affect the flavor and texture of the yogurt.

Each one of the strains in the yogurt has a specific set of environmental conditions which it grows best in.  When those conditions are met they can dominate the culture which causes the yogurt to take on the flavors and textures produced by that particular strain.

A typical unwanted result is a slimy, stringy or ropey texture.  This is caused by an overgrowth of a particular lactic acid bacteria strain which can dominate the milk when the incubation temperature is too low for too long (to learn more about this checkout this post here), but other conditions can arise such as an unpleasant flavor, yogurt with a high acid content or a grainy texture.

Using probiotic capsules as a yogurt starter

This seems to be a new thing in health circles for some reason.  Probiotic capsules are made from growing specific lactic acid strains on a medium of some kind and then dehydrating it into a powder before loading it into a capsule.  Some companies have proprietary bacterial strains which they have developed and tested while others use off the rack lactic acid bacteria.  

Use fresh capsules with live bacteria which are not proprietary as a yogurt starter.  Without fresh live bacteria yogurt will not set properly and can spoil rather than make healthy yogurt.  Proprietary strains protected by law.  Companies spend millions in their development: do not steal from them.

Benefits of using probiotic capsules as a starter culture

Are available in most grocery and health food stores

Probiotics are all the rage now and can be found everywhere.  Grocery stores, health food stores and sometimes even convenience stores.  The benefit of this is that all probiotic supplements are made from lactic acid bacterial cultures.  Not all of them are usable for making yogurt but most of them can.  The probiotic capsule must contain active cultures in it to make it possible to use as a yogurt starter. 

Can make yogurt with specific lactic acid bacteria

Every living thing has different characteristics, some of which have been found to be beneficial to other organisms.  This is the case with probiotics and we as humans have taken advantage of this by producing probiotic capsules with specific lactic acid bacteria.  This means that if you are looking for a particular benefit which you get from a specific probiotic capsule you can use that capsule to increase the number of live probiotic strains in your diet.

When yogurt is made from probiotic capsules the lactic acid bacteria will activate in the milk and multiply quickly, dominating the milk and producing yogurt.  The population of the probiotic bacteria is limited by the amount of lactose in the milk and the time it is incubated.  This allows a specific probiotic bacteria to increase in number and produce yogurt with the characteristic you want.

Can be cheaper than powdered yogurt starter

Powdered yogurt starter comes in a box with 6-8 envelopes of starter.  They may cost half that of a bottle of probiotic capsules but the number of probiotic capsules in the bottle can be 30-100 depending on the size and brand of probiotics.  Clearly the probiotic capsules are cheaper in the long run.

Drawbacks of using probiotic capsules as a starter culture

Very limited lactic acid bacterial strains

Probiotic capsules are a controlled health product and need to maintain a strict manufacturing process to avoid any contamination of unwanted bacteria, yeast or mold.  As a result only the probiotic strains found on the label will be present in detectable levels.  

This makes for a very weak starter which should only be used once.  It is rare in nature where a species of anything will monopolize an environment and when it does it experiences weakening forces which allow other “invaders” a foothold.  This is especially true when dealing with microorganisms.

Could be protected by law

Probiotic capsules are a manufactured product.  The probiotic strains have to be either purchased from a supply source and incubated to increase their numbers or the manufacturer will have developed their own strain which has specific characteristics.

When a manufacturer takes the time to develop their own strain of probiotic bacteria, perform the studies needed to show its benefits as well as its safety, develop the manufacturing process and market it, using it to make probiotic yogurt is called theft.  If you are after the benefits which the particular strain of bacteria produces then shouldn’t the company which spent big money to produce said strain be compensated to the fullest extent.

Such products are called proprietary and it is illegal to “manufacture” your own probiotics using their property.  When using probiotic capsules to make yogurt read the label to determine if the company has rights to the particular strains on the capsules.  If they do use another product.

Unknown manufacturing processes 

Probiotic capsules are made in an industrial plant with large machinery which can produce thousands of capsules a day.  Advertising would make us believe that it is a clean, wholesome process where nothing ever goes wrong.  Unfortunately this is not the case.  Manufacturing equipment is meant to do one thing, produce a product within a set of tolerances at a profit for the owner.  That’s it.

Can Homemade Yogurt Be Lactose Free


large mason jar filled with lactose freee yogurt with the milk carton and a small bowl of the yogurt

This is a common question which is asked by those of us with lactose intolerance.  If you have trouble digesting lactose then eating fermented milk products is a great option but if you are seriously lactose intolerant then any dairy products are out of the question.  All dairy products contain lactose. Yes,  some which are chemically treated with an enzyme called lactase, contain less lactose and in some cases only trace amounts but it is still present.

Dairy yogurt cannot be made lactose free, there will always be trace amounts of lactose in dairy yogurt, even with long incubation times.  A lactose free yogurt like product can be made with non-dairy milks which contain live lactic acid bacteria providing similar benefits of dairy yogurt. 

There are lots of recipes online for yogurt purporting to be lactose free but in reality only reduce the amount of lactose in the yogurt.  To remove all the lactose from milk through the action of lactic acid bacteria would take an extended incubation period and produce a very sour yogurt.  This is because the presence of lactose (the disaccharide found in milk) provides energy which the lactic acid bacteria uses to produce lactic acid, which gives the yogurt its tart flavor. 

As the yogurt is incubated the amount of lactose decreases.  This does two things:

  1. It produces more lactic acid
  2. It makes the yogurt less sweet

If the milk was incubated until all the lactose was removed the yogurt would become inedible.  The amount of lactic acid in the milk and lack of sweetener makes it unpleasant to consume.

If you are extremely sensitive to lactose then there are yogurt substitutes which can have the same texture as yogurt which make good toppings for fruit, can be made into dips and used in shakes.  They will not have the same flavor and characteristics as traditional yogurt but they can be used to replace yogurt in a number of situations.

Can homemade yogurt be made with lactose free milk?

It can be a bit confusing to some when they learn the name of the bacteria species which produces yogurt thinking that lactic acid is somehow related to the lactose in the milk.  Actually lactic acid bacteria grow in all sorts of environments and can utilize all three monosaccharides in its respiration.  It is the bacteria which produces sauerkraut, pickles and sourdough bread, all of which do not contain lactose.

Lactose is a disaccharide made up of two sugars glucose and galactose.  To break the bond between these two sugars an enzyme called lactase is needed.  When the enzyme is exposed to lactose it reacts and separates the two molecules into its two component parts.  These sugars can then be used by the lactic acid bacteria in their respiration.  

Lactose free milk can be used to make homemade yogurt.  Lactic acid bacteria don’t use the lactose directly in their respiration, rather they use the two sugars glucose and galactose to produce lactic acid which acidifies the milk producing yogurt.

There is no usable energy released when the enzyme lactase is used to split the lactose molecule into its two separate sugars and therefore provides no benefit to the lactic acid bacteria themselves besides making the sugars available.  Once the sugars are available they are used for growth and as a byproduct they produce lactic acid.  When using lactose free milk this process of splitting the lactose molecule has been done already making the sugars immediately available. 

How do they make yogurt lactose free?

There are two types of lactose free yogurt which are on the market:

  1. Milk yogurt

This is a good option if you are after the same flavor and texture of normal yogurt.  There will still be some lactose in the yogurt even if it is only trace amounts so be aware that this type of yogurt is only for those who find lactose bothersome.  

Commercial lactose free yogurt is made by adding lactase to milk during pasteurization.  Lactase has an effective temperature range of 118-124℉(48-51℃) separates the lactose into glucose and galactose, reducing the lactose in the milk.  Next the starter is added and incubated until the milk gels.

  1. Dairy free yogurt

If you are hyper-sensitive to lactose then there are few choices for you to have yogurt.  Lactose free yogurt is made using non-dairy milks such as coconut, cashew and almond milk.  All of which are not really yogurt but have a yogurt-like consistency.  They all have the flavor of the base ingredient which does not work for all recipes using yogurt.

Dairy free yogurt is made by soaking and blending the nut or seed which the yogurt is to be made from, adjusting the fat, water, sugar and protein levels and incubating it with a non-dairy lactic acid bacterial starter.  

Both of these methods are not ideal as the first one produces yogurt with trace amounts of lactose still in the yogurt.  It is great for those who are not hyper-sensitive to lactose and still want to add yogurt to their diet.  Non-dairy yogurt produces a yogurt-like product which has the same consistency and texture of yogurt (or as close as possible) but has radically different flavor.

Is Greek yogurt lactose-free

Greek yogurt has a thick creamy texture and a slightly tangier flavor which some people really enjoy.  It makes great dips, toppings and is also wonderful eaten with a spoon.  Unfortunately the idea that it is lactose-free is totally wrong.

Greek yogurt is not lactose free as it is made using the same process as normal yogurt with one added step.  Once the milk has thickened some of the whey (the watery part of yogurt) is drained out, thickening the yogurt.  This process does reduce the lactose but doesn’t eliminate it.

The lactic acid bacteria in greek yogurt starter does have a different makeup than other starters but then so does belgian, icelandic and for that matter any other yogurt from around the world.  This doesn’t mean that it has more or less lactose in it.  The main difference in lactose content is how much the milk had to start with, how long and at what temperature it was incubated and the amount of starter.  If you want to know the effects of these variables check out this article.

Does lactose break down with heat?

In your search for options to lower the lactose in yogurt heat is a natural thought, since heat destroys enzymes and vitamins, breaks down proteins and releases and alters some fats it seems like an obvious question.  

Lactose begins to breakdown at 300℉(150℃), a temperature which is unattainable for making yogurt.  A pressure cooker would be needed to reach this temperature without boiling off all the liquid and using a pressure cooker would destroy all the benefits of the yogurt.

Long chain carbohydrates can be broken down by heat.  This is one of the methods of extracting sugar from barley or other grains in making alcohol (beer and hard liquor).  These long chain carbohydrates can only be broken down so far without high heat.  In milk this would destroy all the protein and fat in the milk making it unusable for yogurt making.