Urban Fermentation

Recent Posts

Homemade Vinegar Trouble Shooting


Five bottles of in various sizes and shapes filled with different types of vinager

If you have ever tried to make vinegar but instead ended up with moldy fruit in a jar or your vinegar just doesn’t taste right then you must have wondered why.  Some of the typical problems when making vinegar are mold growth, low acid production, too high acid production and stagnant or stubborn fermentation.  Although these problems can be avoided if you don’t understand what is happening you may become frustrated and quit trying.

Making vinegar is a two step process which can be separated into two time periods or performed simultaneously but to avoid problems you need to understand each step and provide the proper conditions to allow the appropriate microorganism to thrive.  These processes are:

  1. Production of ethanol

Ethanol is produced by yeast cells found in the environment.  If you are making fruit vinegar then most of the needed yeast is found on the fruit itself but additional yeast species can be found within the environment at all times.  

  1. The production of acetic acid

Acetic acid is made by acetic acid bacteria.  These microorganisms use ethanol as their main source of energy, although they can use sugar as well their preferred energy source is ethanol.  In the process of consuming the ethanol produced by the yeast cells they produce acetic acid which prevents unwanted spoilage bacteria from colonizing the fermentation.

Most vinegar making problems disappear once it is understood what the roles of the two types of microorganisms are and how they should be supported during the early stages of the fermentation.  This includes how much sugar to start with, how long the fermentation period is and what should be done to the fermentation during each stage.

There are many ways to make vinegar (check out this article about the five main methods used) but they all boil down to the above two processes.

How to tell if your vinegar has gone bad

When making vinegar there are a few times when it can spoil but once your vinegar has reached a pH below 4.0 it is rare that it will go off.  Acetic acid bacteria produce many other organic compounds which can protect the vinegar from spoilage which include additional acids and biofilms but before the acetic acid bacteria can gain a foothold mold and other spoilage bacteria can sometimes begin to grow.  

Vinegar which has an off taste, seems to be losing its acidity or has fuzzy growths on its surface has spoiled.  This can happen when the pH of the vinegar is not low enough or the vinegar gets contaminated with debris.  When exposed to oxygen it can become less acidic leading to spoilage.

Homemade vinegar has a few times when it is susceptible to spoilage prior to the growth of acetic acid bacteria.  During the initial period when the liquid medium mostly made up of sugar and water mold can easily grow if left alone (for a complete step by step process on how to make vinegar read this article here).  Another time when vinegar is at risk is when the medium is left to ferment once the yeast has started to grow.  This often happens when there is too much organic matter in the vinegar giving mold and other spoilage bacteria a place to live.

Why does my homemade vinegar smell like alcohol?

Vinegar is made in a two step process the first being alcohol production.  Yeast found on the fruit or in the air use the sweet liquid to grow.  The waste product yeast cells produce is alcohol.  If your vinegar fermentation smells like alcohol it may be that the acetic acid bacteria have not had a chance to convert the alcohol into acetic acid yet.

Acetic acid bacteria need oxygen to live.  One common mistake is to restrict the amount of oxygen the vinegar is exposed to by fermenting the vinegar in a narrow necked container, using air locks rather than breathable cloth covers or sealing the container with a non porous lid.  

When making vinegar it is important that the acetic acid bacteria get enough oxygen.  Most commercial vinegar makers use incubators which have the ability to oxygenate the liquid much like a fish tank is oxygenated with a bubbler.  Other methods include alternating the vinegar from container to container or using barrels which  have a wide surface area to volume ratio.  For further information on vinegar making methods check out this article here.

Another reason your vinegar smells like alcohol is that it is at the early stages of fermentation.  At the beginning of the process acetic acid bacteria will not have enough time to convert the alcohol into vinegar.  This can take up to a week to ten days before your vinegar begins to smell like vinegar, sometimes longer depending on the ambient temperatures of the room.

What is floating around in my vinegar?

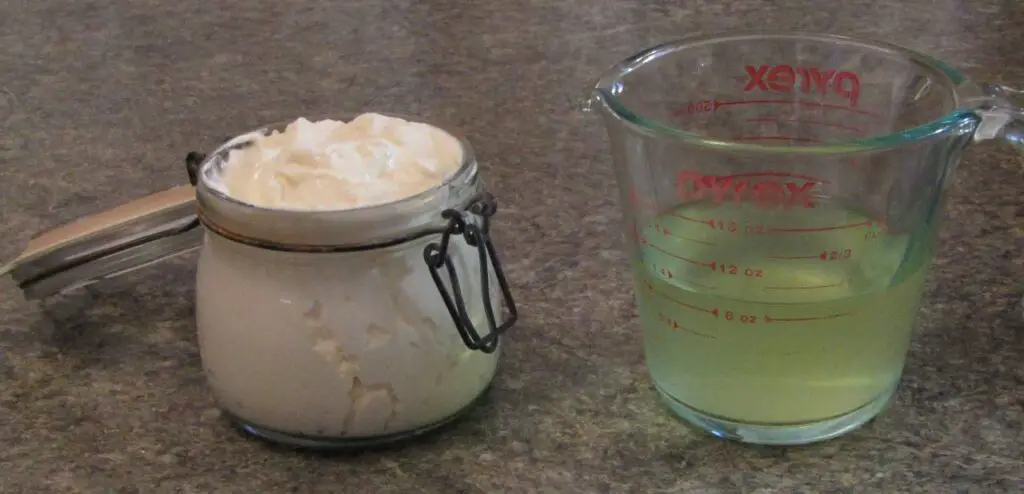
There are a few possibilities depending on how your vinegar was made, how old it is and how it has been stored.  Homemade vinegar is most often unpasteurized because most fermenters are after what is called the mother or the bacterial culture found in most fermentations.  

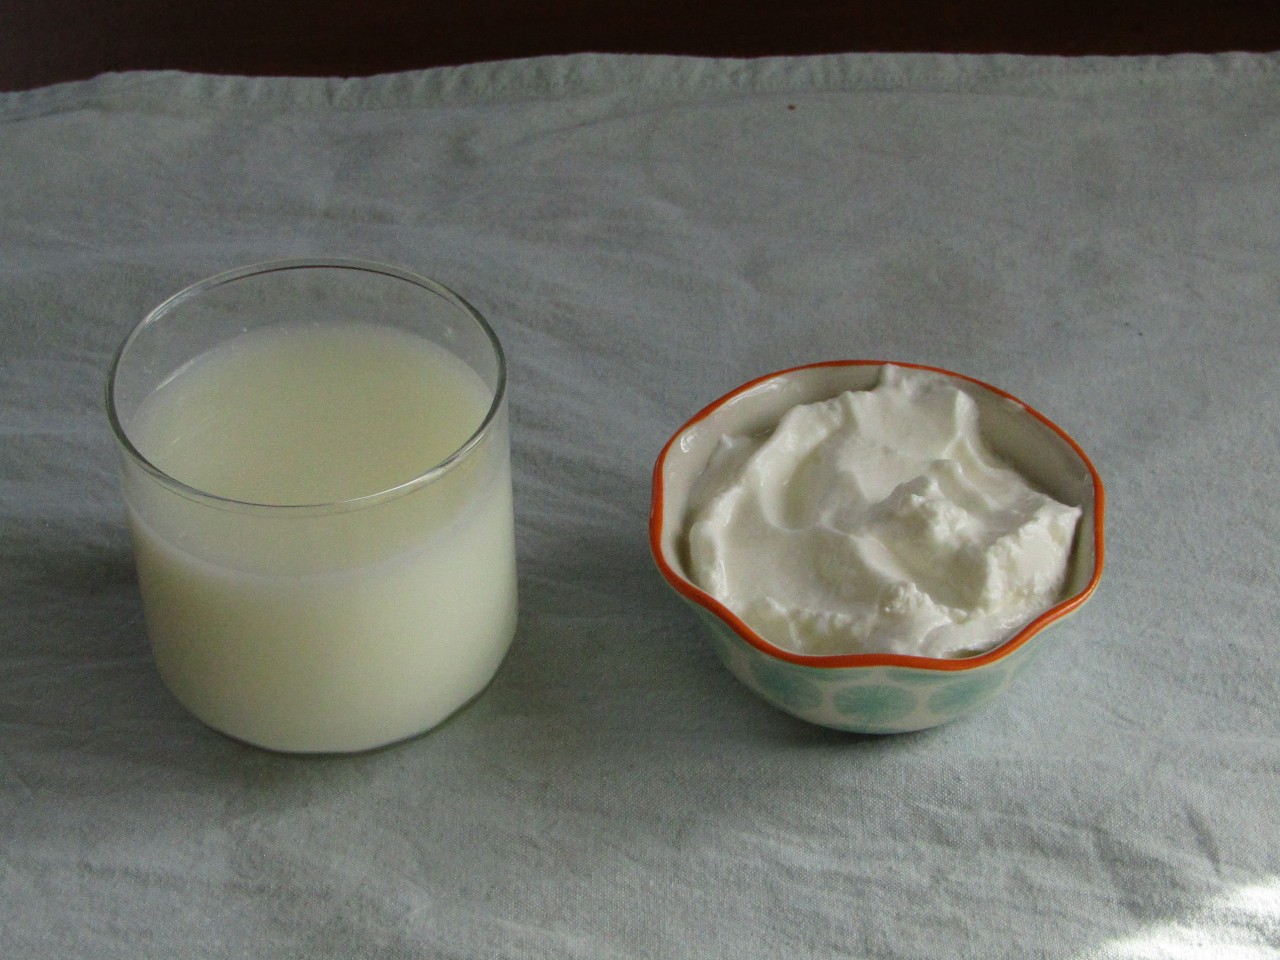
Unpasteurized vinegar contains the vinegar mother which can present itself as a cloudy amorphous stop floating around in the vinegar.  It is made up of the biofilm which the bacterial culture of the vinegar produces during the fermentation process.  

The vinegar mother is actually the collection of yeast and acetic acid bacteria found in the vinegar culture.  A vinegar mother can produce a cellulose mat like that found in kombucha and serves as a barrier between the fermenting vinegar and the environment.  It also will produce yeast strings which are dead yeast cell bodies held together loosely by biofilm.  It is these which are often found in commercial apple cider vinegar.

The mother of vinegar has been used to indicate that it is a living product as evidenced by the biofilm produced after the vinegar has been filtered and bottled.  Although this is true to some extent properly fermented vinegar has little acetic acid bacteria activity as the available sugar which feeds the yeast which makes the alcohol the acetic acid bacteria require for growth is depleted in properly aged vinegar.  This gives the acetic acid little chance to grow.

To learn more about what the vinegar mother is and what its purpose is check out this article about kombucha SCOBY which are similar to that of a vinegar mother.

Why vinegar fermentations get moldy on top

If you have been making vinegar for any period of time then you may have had the experience of checking on your vinegar jars only to find one or two growing a nice colorful carpet of mold on the surface.  Mold comes in many types and can grow in a wide variety of conditions so it can sometimes be difficult to avoid this from happening but with a few precautions it is easy to control.

Vinegar gets moldy when yeast and acetic acid bacteria are not active enough to prevent mold growth.  Mold grows in warm places with a neutral or slightly basic pH.  To prevent mold growth in a vinegar fermentation, start with an acidic solution and stir it regularly.

Mold is everywhere and although it is usually an unwanted visitor in your kitchen it is still a valuable organism which provides us with a great service.  That said, when making vinegar it is important to prevent its growth.  Mold produces mycotoxins which are meant to prevent its environment from being disturbed and its food source from being consumed.  These are antibacterial agents like penicillin which deter the growth of other organisms.  

Mold is an aerobic microorganism which means it needs oxygen to survive, it also has no method of movement but rather relies on the sheer number of mold spores it produces to ensure some will end up in an environment conducive to its growth.  This is why stirring a vinegar fermentation is important while the yeast and acetic acid bacteria grow.  By stirring the solution any mold spores which are on the surface get submerged in the liquid where there is limited oxygen.

Since mold grows best where the pH is basic you can prevent most mold growth by acidifying your vinegar fermentation at the beginning of the incubation period.  This is done simply by adding a little vinegar which is the same or close to the type of vinegar you are making.  This will lower the pH of the solution which slows mold growth.  For more about how to make vinegar check out this article about making fruit vinegar from scratch.

5 Ways to make sour yogurt


A bowl of yogurt with a thermoneter, clock measuring cup with milk, jar with citric acid and a measuring cup surrounding it.

There are several ways to make sour yogurt and the method you choose will depend on your timeline, purpose for the yogurt and available equipment.  The flavor of the sour yogurt will also vary a little with each method for a variety of reasons such as the number and type of active lactic acid bacteria, the remaining sugar in the yogurt and how sour the yogurt gets.

Extend the incubation time

By extending the incubation time you give the lactic acid bacteria in your starter more time to make lactic acid which makes your yogurt sour.  Additionally the starter consumes more of the lactose in the milk making it less sweet.  

To prevent contamination from the air you will need a container with a sealable lid.  This will prevent any mold and other unwanted spoilage bacteria from entering the milk during incubation.  When making normal yogurt the incubation time is short enough that any unwanted bacteria, yeast or mold don’t have enough time to get a foothold in the milk but with a longer incubation time you either need a strong starter like a heirloom starter or you need to take extra care to prevent contamination.

Equipment:

  • 1 container with a sealable lid
  • An incubation chamber (yogurt maker, oven with light on or other temperature controlled space)
  • Double boiler
  • Whisk
  • Measuring spoon
  • Thermometer

Instructions:

  • Follow the instructions on how to make yogurt using your usual method (check this recipe if you don’t already make yogurt regularly)
  • Ensure your container is sealed properly to prevent air flow into the container
  • Incubate the yogurt 12-48 hours depending on how sour you want your yogurt (for a full explanation of what happens to yogurt during long incubation times check out this article here
  • Once you have reached the appropriate sourness refrigerate it for at least 2-4 hours

Use extra starter

Sour yogurt gets sour when the lactic acid in the starter consumes most of the sugar in the yogurt and produces high amounts of lactic acid.  To do this it needs a large population or cell count.  The above method used time to allow the lactic acid bacteria to multiply and consume the lactose in the milk.  This method jump starts that process by starting with extra starter from the get go.

To make yogurt you only need a teaspoon or so of starter so to make sour yogurt try using double the amount of starter.  Incubate for the usual amount of time and test the result.  If it is not sour enough try using even more starter.  

To get predictable results using this method of making sour yogurt you will need to control the temperature and time you use to make your yogurt.  A higher temperature will speed up some of the lactic acid bacteria species which can alter the flavor of the yogurt.  The amount of time affects the population of the lactic acid bacteria in the milk which can quickly make the yogurt too sour for your purpose.

To prevent temperature and time from affecting the finished yogurt use an incubation chamber, dehydrator with temperature control or a yogurt maker.  That way you reduce the number of variables in making your sour yogurt to only the amount of starter you are using.  

Instructions:

  • Follow the instructions on how to make yogurt using your usual method (check this recipe if you don’t already make yogurt regularly)
  • Add double the amount of starter you usually use
  • Whisk the starter into the milk thoroughly 
  • Incubate the yogurt 4-6 hours 
  • Refrigerate for at least 2-4 hours

Increase incubation temperature 

Every living thing has an optimal temperature range which it thrives in, including lactic acid bacteria.  For yogurt starters the range is between 108-120℉℃.  Anything below this temperature and the lactic acid bacteria will multiply slowly causing the yogurt to become stringy or ropy.  If the temperature is much above 120 for any period of time and the starter will die which will allow other bacteria to grow and spoil the milk rather than gelling it.  

To produce sour yogurt by incubating the milk at a higher temperature the temperature needs to be as close to 120 as possible.  This will allow the lactic acid bacteria to multiply quickly and consume more of the lactose in the milk.  As the lactose falls the yogurt tastes increasingly sour.

To do this you can use an incubation chamber with a temperature control, a dehydrator set at 120.  Using an oven with the pilot light on is only an option if your oven is well insulated and you can contain the heat from it in some way.  Some yogurt makers have a temperature control which allows other fermentations to be incubated with them.  To use them, set the temperature manually rather than using the preset buttons.

Instructions:

  • Follow the instructions on how to make yogurt using your usual method (check this recipe if you don’t already make yogurt regularly
  • Set your chosen incubation appliance to 120
  • Incubate the yogurt 4-6 hours 
  • Refrigerate for at least 2-4 hours

Use high sugar milk

One of the limiting factors for the growth of lactic acid bacteria is the availability of fermentable sugars.  Since bacteria need simple sugars for their respiration and they cannot break down starches or protein to use as fuel like other organisms, having an abundance of sugar allows the culture to increase its population rapidly.

As the culture grows it produces lactic acid which acidifies the milk causing it to gel into yogurt.  By using milk with a high sugar content the starter will be able to produce more lactic acid than other types of milk.  To take advantage of this use skim or 2% milk as they have a higher sugar content than milk with a higher fat content.   With more lactose available the starter will be able to grow bigger.

You can also add additional sugar to the milk prior to heating it to give the starter an additional boost if you are after a really sour yogurt.  To do that add no more than a teaspoon per quart of milk.  Any more and the lactic acid bacteria can grow too quickly and curdle the milk, making for curds and whey rather than creamy yogurt.

Instructions:

  • Follow the instructions on how to make yogurt using your usual method using low fat milk
  • If you want additional sourness add a teaspoon of white sugar prior to heating the milk
  • Incubate the yogurt 4-6 hours 
  • Refrigerate for at least 2-4 hours

Add additional acid

Sour yogurt is sour due to a higher concentration of acid in the yogurt.  The preceding methods of how to achieve this have been focused on the lactic acid bacteria which produce lactic acid but that is not the only method of making your yogurt sour.  You can also add additional acid directly to the yogurt.  

To do this you can add the acid either prior to or after incubation.  You can get powdered acetic or lactic acid from home winemaking stores.  Acetic acid is used often to adjust the acid level in wines whereas lactic acid is used in the making of Saki.  Either acid will work although lactic acid will produce a sour yogurt which is closer to the flavor of naturally fermented sour yogurt.

When adding acid to your milk prior to incubation be sure to only use a small amount.  Add it after the milk has been heated and gently stir it in before incubation.  If you add too much acid at the beginning your milk will curdle as it heats up.  This is because the proteins in the milk will begin to associate with each other when the pH of the milk falls below 4.6.  

When adding additional acid after incubation, sprinkle the acid on the surface of the yogurt and gently fold the acid into the yogurt prior to refrigeration.  This will allow the acid to permeate throughout the yogurt and allow the yogurt to set in the fridge.   If your yogurt’s pH falls too low it will cause the whey in the yogurt to separate from the curds which will destroy the texture of the yogurt.

Problems with making sour yogurt

Sour yogurt has a lower pH than normal yogurt, which is why it is sour, but this can cause problems as the lower pH affects the behavior of the proteins in the milk.  As milk sours it changes the proteins in the milk to associate with one another which is why the milk thickens into yogurt.  If the association is strong enough it will curdle by clumping together in tight bonds and expelling water and fat. 

There are three things to know to avoid this from happening. 

  • Keep the acidification process slow

When the acidification is too fast the consistency of the milk does not change fast enough to prevent the protein molecules from clumping together causing curdling.

  • Use whole milk

Whole milk is thicker with more fat than skim milk.  The fat resists being expelled from the association of the protein, maintaining the yogurt’s consistency. 

  • Do not disturb the milk while incubating it

When milk is disturbed it encourages the water in the milk to separate from the yogurt.  As milk acidifies it is the proteins which associate with one another not the water molecules.  Once disturbed the water will be forced out of the way and clumps of proteins will form and the milk will curdle.

Sour yogurt is not easily eaten

Sour yogurt is high in lactic acid making it very tart.  Not the typical yogurt flavor which makes it difficult to eat plain or with a little fruit.  Since you may be making sour yogurt as part of a specific diet, consuming it like you would normal yogurt is not pleasant.  Instead you can use it as a base for savory meals, use it to make dips and sauces or as a cooling topping for spicy meals.

Sour yogurt is best used as an ingredient rather than the main item of a meal.  To get the most out of your sour yogurt do not heat it too much.  Instead add it at the end of the cooking period to preserve any good for you lactic acid bacteria and vitamins which can be affected by heat.

Milk Kefir vs Water Kefir


small glass of kefir and a small bowl of yogurt

Many people get confused when it comes to milk kefir and water kefir.  Not knowing the differences between the two results in questions like:

Can you make water kefir with milk kefir grains? And vice versa.  Or are milk kefir grains the same as water kefir grains?

Milk kefir and water kefir are fundamentally different but also fundamentally the same.  The grains to make them are made up of different bacteria species and strains of lactic acid, acetic acid bacteria and yeast species which produce granular structures as a form of protection and environmental control.

Water kefir grains are found in a cactus plant and have been used for centuries to produce water kefir by fermenting sweetened water into a slightly effervescent tangy drink.  The grains are small clear nodules which multiply slowly when fed regularly with a sweet liquid made up of mostly glucose and fructose.

Milk kefir grains have not been found in nature and are a bit of a mystery.  Their origin is the  Caucasus Mountains where they were protected by jealous tribes who believed that the grains had special powers to make them feel good and be successful and it was bad luck to share the “secret” of the grains.

They are used to ferment milk sugar made up of glucose and galactose to acidify the milk, slightly thickening it into an easily digested milk product.

Milk kefir and water kefir physical differences

Milk kefir grains are white structures which resemble cauliflower when they get large.  They are soft and rubbery and often surrounded by a stringy biofilm which protects the grains from becoming contaminated by unwanted bacteria.  The resident bacteria create the biofilm which is thought to thicken into the grains as the life cycle of the bacteria progresses.

Water kefir grains are clear solid structures which have a little give to them when they are handled.  They appear to grow individually rather than from a central colony like milk kefir grains.  When fed with different types of sweetened water they take on the color of the water for a short period of time.  Water kefir grains remain on the bottom of the fermenting container and need to be stirred to mix well with the fermenting medium.

Overall the difference in physical makeup of water kefir and milk kefir can be summarized with this picture.  The two types of grains have obvious physical differences but the main differences are the different bacterial cultures.  Although not easily seen the culture differs in one aspect which can be observed, the production of biofilm.  The biofilm produced by the milk kefir grains is easy to see and feel whereas no discernible biofilm is made by the water kefir bacteria culture.

Milk kefir and water kefir fermentation differences

Milk kefir and water kefir are similar in how they are fermented in the beginning but can vary depending on how you like your water kefir.  Both of them are made by straining out the kefir grains from a previous batch and simply adding them to a new medium made up of either plain milk or some form of sweetened water solution.  This is where the similarities stop.  Milk kefir is incubated for a 24-48 hour period where water kefir can take longer depending on the medium you used, the temperature and how tangy you like your water kefir.

Once the first stage of fermentation is complete milk kefir is usually strained from the grains and placed into a fridge but water kefir is often second fermented by adding a primer to pressurizable bottles along with the water kefir and then left to ferment for another few days.  This produces a fizzy kefir soda which is similar to that of kombucha without the caffeine.

Check out these two recipes for how to make milk kefir and water kefir.

When making milk kefir if it is left to ferment for more than a few days it will become extremely tart and will need to be used in cooking as it will quickly lose its pleasant sweet flavor as the lactose is converted into lactic acid.  Water kefir on the other hand takes longer to become acidic enough to turn undrinkable, this is due to the type of sugar used being made up of the two mono sugars glucose and fructose.

Although glucose is readily used by the various bacteria in the water kefir grains the fructose is not as easily used and remains in the solution providing a sweet taste for a longer period of time than milk kefir.

How milk and water kefir are the same

Milk and water kefir are similar in some ways, after all they are both considered kefir.  Although the medium which they are made from is different, the culture which ferments the mediums have some similarities.  Both are predominantly lactic acid bacterial cultures with acetic acid bacteria in the culture as well.  Common yeast species also exist producing a small amount of alcohol.

The method and ease of making milk and water kefir is also similar as all it requires is the addition of the grains into a measured amount of milk or sweetened water.  Placing a cloth over the jar and waiting.  The culture on both kefirs are active at room temperature (homophilic) unlike many yogurt cultures which require heat to incubate milk properly (thermophilic).  Here are the steps to make water kefir using filtered water and sugar.

They are also similar in the vitamins which are produced by the culture.  They both have a variety of B vitamins which are produced by the culture, often the yeast species are responsible for the simulation of B6 and B12 vitamins.  They also have a combination of lactic and acetic acid making for a tangy slightly acidic beverage which helps the digestion and prevents bacterial infections in the gut.

Everything You Need To Know About Sour Yogurt


Bowl of yogurt with a slice of lemon hanging on the side

Sour yogurt has been around for centuries, although it has not always been categorized as sour yogurt.  It is yogurt which has a higher than normal amount of acid in it.  The acid can be from natural fermentation processes or by adding acid to the yogurt after incubation.  It has many uses from savory sauces to sweet and tangy desserts.  

There are also many ways to make sour yogurt which include what I would call instant cheats like adding ascorbic or acetic acid to store bought yogurt to making it from scratch using a live yogurt culture and milk.  Here are answers to some of the frequently asked questions about sour yogurt along with some great ways to use it in your daily cooking.

Why does homemade yogurt become sour?

Once you have been making yogurt for a while you may get the experience of adding some of your latest batch to a bowl of fruit or into a smoothie only to discover it is overly sour tasting.  When you smell it it seems fine, maybe a little more tart smelling than usual but nothing like how it tastes.

Yogurt gets sour when lactic acid bacteria in the culture consumes most of the lactose in the milk.  This reduces sweetness and increases the amount of lactic acid found in the yogurt.  This can happen due to using too much starter, incubating too long or using too high an incubation temperature.

Yogurt culture is a collection of living bacteria which have very specific environmental needs such as temperature, starter-milk ratio, species in the culture, length of time the milk is incubated, how long the milk was pasteurized and cleaning procedures.  

When making yogurt at home it is difficult to be able to control all these conditions and as a result your yogurt will have some variation.  It may have more or less lactose remaining giving it some variation in tanginess.

For a complete explanation of why your homemade yogurt gets too sour and how to control how sour your yogurt gets check out “The three reasons why your yogurt becomes sour”.  

Is it safe to eat sour yogurt

The first time you make yogurt which has become overly sour the first question which pops into your mind is probably is it still safe to eat?  The fear of getting food poisoning and becoming violently ill by eating spoiled food is overwhelming.  This fear is baseless when it comes to fermented foods, including yogurt.  If you have followed the recommendations for fermenting foods safely they will be safer than their fresh counterparts.

Sour yogurt has a high lactic acid content lowering the pH of the yogurt more than normal. This acts as a preservative, protecting the yogurt from spoilage bacteria like clostridium botulinum.  Most spoilage microorganisms thrive in a basic environment rather than acidic conditions of sour yogurt. 

Although it can be unpleasant to eat overly sour yogurt (unless you like the taste of sour things) it is perfectly safe to eat.  The WHO (world health organization) states that fermented foods which have a pH below 4.0 are generally safe to eat.  This is because bacteria like clostridium botulinum cannot thrive in acidic environments.  Many molds are also sensitive to acidic conditions which extends the length of time your homemade yogurt can be stored.

What are the benefits of sour yogurt

In years past yogurt was dubbed a health food, it was said to improve digestion, help prevent flu or shorten its infection, improve constipation and help prevent colds.  Although these claims were exaggerated to some degree to improve the sale of certain brands of yogurt, most of the advertised benefits had some basis in truth.  

The health benefits of yogurt stem from the lactic acid bacteria used to ferment the milk.  Lactic acid bacteria use the lactose to grow and produce lactic acid as a byproduct of their respiration.  As the  lactic acid bacteria population increases their effect on digestion is greater. 

Sour yogurt has a higher bacteria count due to the culture having had a longer period of time to multiply its population.  Lactic acid bacteria can double its population in under an hour depending on the incubation temperature, the pH of the milk and the strength of the culture so by incubating yogurt for 24-36 hours the population of the lactic acid bacteria is greater than yogurt incubated for 6-12 hours. 

Does sour yogurt improve digestion

Sour yogurt can have a positive effect on the digestive system depending on the individual, their current state and food sensitivities.  It does this by adding live lactic acid bacteria into the digestive tract.  Live lactic acid bacteria does survive the acidic conditions of the stomach, something which was in doubt in the past, the surviving lactic acid bacteria consume some of the sugar it finds available in the digestive tract and produce beneficial compounds which can improve digestion.

Although it was thought that the surviving lactic acid bacteria can take up permanent residency in the digestive system, this has been found to be incorrect.  The lactic acid bacteria which are found in yogurt rarely persist in the gut but instead they are transient.  This is not a bad thing, it just means that if you want the benefits of these bacterial species you need to consume yogurt regularly.

Does sour yogurt reduce the chance and shorten the duration of a flu

There are some studies which suggest that regular consumption of a high quality yogurt can lower the chances of getting a cold or flu and can shorten the duration of the sickness if you do get sick.  Again this requires regular use of yogurt to maintain the benefits 

Besides the health benefits there are other benefits of sour yogurt.  Sour yogurt will last longer than regular yogurt, improve the flavor of savory dishes and sauces and provide an added boost to the rising agent in quickbread baking.  The additional lactic acid and lower sugar content in sour yogurt provides savory recipes with an added tang.

Is greek yogurt and sour yogurt the same

Greek yogurt is another product which has become quite popular in recent years.  It has a thick creamy texture which provides a great base for dips, sauces and just eaten plain or on a bowl of fruit.  It is made by adding an additional step to the yogurt making process which is the removal of some of the whey from the yogurt to make it thicker.

Greek yogurt and sour yogurt are not the same.  The process for making sour yogurt requires extending the incubation time, adding additional starter and/or adjusting the incubation temperature, whereas making Greek yogurt is done by removing some of the whey from the yogurt.

Greek yogurt can be made using sour yogurt.  This will make for a very tangy creamy greek yogurt which would be especially good for savory sauces and dips.  The thick texture of the yogurt will help it to stick to whatever food it is poured over or dipped into and the tangy flavor will accentuate the spices.  

What can I do with sour yogurt

As mentioned above there are many uses for sour yogurt.  Here is a list of the 10 ways I use sour yogurt most often.  It includes everything from making tangy cream cheese to using it for tzatziki.  

  1. Tangy cream cheese

This is an easy recipe and is the base for several of the following recipes including ice cream, cheesecake and hard yogurt cheese.  It is the same process used to make Greek yogurt with an extended draining time.  Check out this recipe for step by step instructions.

  1. Tzatziki

A classic greek dip used for veggies and bread or as a spread in sandwiches.  Tzatziki made with sour yogurt has an added tang which helps to bring out the dill and lemon flavors.  Use it in rich dishes to clear the palate between bites and courses.  Use it as condiment wherever you feel the need for a fresh tangy flavor.

  1. Creamy mustard dressing

The tangy flavor of sour yogurt provides the acidic flavor which vinegar usually adds to a salad dressing.  This creamy mustard dressing uses our yogurt, lacto-fermented mustard (recipe here) and a little honey.  It is great on mixed salad greens or used in sandwiches.

  1. Dilly veggie dip 

Dilly dip is a popular addition to any get together.  It has an element of healthy eating built into it as it goes well with vegetable sticks as well as crackers and chips.  It is simple to make, requiring only dill, lemon or lime and salt and pepper to taste.  A good dilly dip should be made the day before use to allow the flavors to fully develop but it can also be made short notice when necessary. 

  1. Grain free waffles or pancakes

When making grain free waffles or pancakes the challenge is that the “flour” is really heavy which prevents them from rising.  When sour yogurt is used the extra lactic acid reacts with the baking powder more completely causing the batter to rise more.  

  1. Morning smoothie

The morning smoothie can be made with a variety of ingredients.  This one uses any type of fruit, kombucha, sour yogurt and a little honey to cut the tartness of the yogurt and the sweetness of the fruit.  

  1. Turmeric health smoothie

Turmeric has been used for centuries to reduce inflammation, improve __ and as a flavor agent in a wide variety of recipes.  Scientists have found that the main active ingredient in turmeric is curcumin which gives the spice its color.  This recipe provides an easy method to get the most out of turmeric as it includes the addition of a little black pepper.  Black pepper improves the absorption of curcumin.

  1. Ice cream

Sour ice cream sounds like a strange flavor but it really goes well with sweet fruits like cherries, blueberries or strawberries.  The contrast between the sweet fruit and the sour yogurt provides a full flavor experience.  Sweet and sour are different flavors which are detected in the mouth differently but also simultaneously. 

  1. Baked cheesecake 

Cheesecake is a typical high calorie dessert made from cream cheese, sugar and eggs, flavored with fruit or chocolate.  When making baked cheesecake, sour cream is used which has a high fat content and adds the signature tangy flavor which helps to cut the sweetness and fat content of the cake.

By replacing the sour cream with sour yogurt cream cheese the flavor of the cheesecake takes on another level of interest.  Sour yogurt has a higher amount of acid than sour cream as it has a longer incubation time giving the culture longer to acidify the milk.  This has two effects; it consumes more of the sugar which increases the lactic acid.

  1. Hard yogurt cheese

This is a more creamier cheese which goes great on crackers, in sandwiches and added to salads.  It is made by pressing additional whey out of yogurt cream cheese.  It can then be aged by adding salt to the outer edge and drying it out to prevent it from molding.  Aged sour yogurt cheese continues to acidify as the culture consumes more of the lactose in the cheese.  

The difference between regular and greek yogurt


When making or buying yogurt you will be presented with a wide variety of choices, one of which is whether to make (buy) regular or greek yogurt.  Without knowing the differences between the two this is a difficult decision to make so the intent of this article is to provide you with all the relevant information you need to make an informed choice.

Greek yogurt has a thicker consistency than other yogurt styles having some of the whey removed.  As a result  it loses some water, lactose and protein and increases the fat percentage per serving.  Both types of yogurt are made with the same lactic acid bacteria and produce similar health benefits.

This may seem like a trivial difference but the removal of some of the whey from regular yogurt has a great impact on how it can be used and its nutritional value.  Both have their good and bad points and can be best used to achieve certain results, whether it be health or culinary effects 

Nutritional differences between greek yogurt and regular yogurt

With the added process of removing some of the whey from regular yogurt the nutritional content of greek yogurt is different from that of regular yogurt.  Whey is high in protein and lactose which are more water soluble than fat.  When some of the whey is removed it takes a higher percentage of the water soluble components with it.  

Also as whey is made of mostly water the remaining components of greek yogurt are more concentrated than regular yogurt.  The following chart is the nutritional differences for one cup of greek yogurt vs one cup of regular yogurt. 

Component Greek  YogurtRegular Yogurt
Protein26g8.5g
fat14g8g
carbohydrate11g11.45 g
Sodium100 mg112.7 mg
Cholesterol 37 mg39.9 mg
Calcium299.6 mg448.3 mg
Potassium344 mg573.3mg
Vitamin B20.45mg0.52 mg
Vitamin B121.03mcg1.37mcg

As you can see the removal of some of the whey alters the nutritional makeup of yogurt.  This makes it good for some situations but not for others.  Before considering which you should use, determine what you are wanting to increase and what you need to avoid.

The differences between how greek and normal yogurt are used

This is one of the more frequently asked questions.  Can I use greek yogurt to make… There are many reasons why you would choose greek over regular yogurt in a recipe and they are not interchangeable ingredients as some may think.

Due to the differences in consistency between greek and regular yogurt their culinary uses vary.  The thicker greek yogurt is good for thicker sauces and dips whereas regular yogurt can be used as a milk substitute in most recipes as its hydration level remains the same.

Greek yogurt is much thicker than regular yogurt because some of the liquidy whey has been removed.  This leaves a thick and creamy yogurt which is good for making dips, using as a topping for fresh fruit or thickening sauces.  Whereas regular yogurt lacks the creamy texture but has the tangy fresh flavor we like in yogurt.  

Regular yogurt is used to make creamy salad dressings, liquidy dips and sauces as well as a main ingredient for beef stroganoff.  It provides additional flavor and tanginess when needed.  Due to its slightly acidic nature regular yogurt is a great substitute for milk in quickbread baking as it gives the rising agent a boost, making for a fluffier product.

As the nutritional makeup of the two types of yogurt are different they are useful for different diet regimens.  Greek yogurt with its higher fat content needs to be used carefully in low fat diets but are great for ketogenic diets which allow a high fat content.  Those who need a higher protein content should choose regular yogurt as some of the protein is removed from the yogurt through the straining process.

The differences between how greek and normal yogurt are made

When making greek yogurt you begin by making normal yogurt.  This is accomplished by heating your milk, cooling it to incubation temperatures and then incubating it for 6-12 hours.  For a complete explanation on how to make yogurt read this article.  Once you have made regular yogurt the process of making greek yogurt includes removing some of the whey.  This is done by straining regular yogurt.

To make greek yogurt at home filter regular yogurt through a finely woven cotton cloth or use a greek yogurt maker which drains the whey into a catch basin under a filter. Commercially yogurt is centrifuged and whey is filtered off as it passes through a screen, leaving the milk solids behind. 

Since there is an additional process in the production of making greek yogurt it takes more  time.  Depending on how thick you want your greek yogurt it can take anywhere between 4-12 hours to let the whey drain from the regular yogurt.  Once it has reached the thickness you want, remove it from the filter with a spatula and refrigerate it for at least a couple of hours before using it.

The differences between how greek and normal yogurt’s Culinary uses

With its thicker consistency greek yogurt tends to be used when you want a richer creamier texture to your recipe.  It is used to replace cream cheese in some recipes, on top of fruit, used to make thicker dipping sauces and any other sauce which you want to stick to the food.  Greek yogurt is also great eaten plain or can be flavored with cinnamon and honey for a quick breakfast.

Regular yogurt on the other hand has a thinner texture which makes it good for runnier sauces like honey mustard dressing, stroganoff and tangy mac and cheese.  The presence of the whey gives regular yogurt a runnier texture which is good when you want to use the yogurt to cut some of the richness from a recipe.  Regular yogurt does this well due to its slightly acidic nature, leaving the mouth with a fresh feeling.

Greek yogurt can have a tangier flavor depending on its fat content.  The fat in the yogurt acts as a buffer lowering the effect the lactic acid has on the tongue.  Regular yogurt is less tangy due to the shorter incubation period when making it.  This gives it less time for the lactic acid bacteria to convert the milk sugar (lactose) into lactic acid (the acid which makes yogurt tangy).

How to choose between using greek or normal yogurt

As you may have surmised, you don’t have to decide between greek yogurt and regular yogurt just like you don’t have to decide between cheddar or gouda cheese.  They both have their uses and have their own benefits.  When choosing which to use, consider what is important to you.  Do you prefer a thicker or thinner textured yogurt?  Do you need to limit your exposure to lactose?  Is making your own greek yogurt seem like too much bother and if so what are the options?

Greek and regular yogurt are made with the same basic yogurt culture so the beneficial lactic acid bacteria are similar.  Their effect on the digestive system is the same.  Greek yogurt has a higher fat content and less carbohydrate as the removed whey  was mostly water, lactose and some protein.  

The main difference is the texture.  Greek yogurt, being thicker than regular yogurt, makes thicker, more creamy recipes.  This may be good for some dishes like vegetable dips of beef stroganoff but as an ingredient in pancakes or other quick baking can cause the batter to be too thick and doughy.

Other options for making greek yogurt include making high fat yogurt with heavy cream.  This takes the same amount of time as regular yogurt but produces a yogurt which is thick and creamy like greek yogurt.  For a step by step recipe click here.

Five Easy Ways To Make High Protein Yogurt


Five containers of hig protein yogurt in a row: added protein powder, alternate milk, condenced milk, greek and added milk powder

To make high protein yogurt you have a few choices, you can remove some of the low protein content components, add protein from external sources or use milk which is naturally high in protein.   You also have the option of using one or more of the following ways of increasing the protein content of your yogurt, depending on your goals.

Remove some of the whey (make greek yogurt)

A swing topped jar filled with greek yogurt sitting beside a measuring cup with whey in it.

The claim to fame of greek yogurt is that it is thick and creamy.  Its texture is sought after for adding it to thick sauces like tzatziki or added to a bowl of fruit but another benefit of greek yogurt is its higher protein concentration.  

To make greek yogurt you remove some of the whey from the incubated milk.  Since the whey has a lower concentration of protein than the solids the protein concentration of the yogurt increases.  

The protein content in cow’s milk is 3.4% whereas the percentage of protein in whey is only 0.8%.  As a result of removing the lower protein whey the remaining yogurt will have an increased concentration of protein.  In mathematical terms this means that if you remove half of the whey of your yogurt you will essentially double the protein concentration of the yogurt.  

The more whey which is removed the higher the protein percentage in the yogurt.  If you want to make super high protein yogurt, remove more of the whey by hanging it longer or even pressing it into hard cheese, for instructions on how to make hard yogurt cheese check out this recipe. Although it uses Kefir you can do the same with yogurt, it makes for a creamier cheese which is less crumbly.

Hard Kefir Cheese

As a result you will end up with two components of yogurt.  The high protein solids in the form of greek yogurt or yogurt cheese and a container of low protein whey.  The whey can be used in baking, soups and sauces. 


Use high protein milk to make your yogurt

It may come as a surprise but not all dairy milk has the same amount of protein content.  This is true in the various milk fat content of milk.  In the table below is a list of the various types of milk which can be used to make yogurt and the percentage of protein in each.

Milk typeProtein percentage
Whipping cream2.0%
Whole milk3.0%
2% milk fat3.25%
Skim milk3.4%
Table cream3.6%
1% milk fat3.6%
Goat milk3.6%
Buffalo milk 3.7%
Sheep milk 6.0%

As you can see the percentage of protein in milk varies quite a bit depending on the type of milk you choose.  Cow’s milk is not naturally homogenized so it can be separated by its fat content simply by letting the fat rize to the top and skimming it off.  Other species of mammals produce milk which does not separate which is used to make yogurt, cheese and other dairy products.

The benefit of using high protein milk is that you can decide how much protein you want depending on the type of milk.  There are no additional steps to take.  You can also further increase the protein content by hanging your yogurt to concentrate the protein in the yogurt.

Make high protein yogurt with milk powder

Commercial yogurt uses modified milk ingredients, usually milk powder, to thicken and provide additional structure to their yogurt and as a result the amount of protein in their yogurt is higher.  You can use this same method to increase the amount of protein in your homemade yogurt.

To make skim milk powder, skim milk is heated and sprayed into a thin mist.  The heat in the evaporation chamber removes the water from the milk and a fine powder falls to the bottom of the chamber.  This removes most of the water and concentrates the remaining components in the milk, including the protein.  Skim milk powder contains about 26 grams of protein per 100 grams of milk powder. 

It is best to add the milk powder before you heat the milk.  This will help the protein in the milk powder to be amalgamated into the milk.  Since it is the proteins in the milk which provide the gelling effect during incubation, having properly dissolved milk powder in the milk helps the yogurt to thicken more and also improves the texture. For detailed instructions on how to make yogurt using milk powder read “3 Easy Ways To Make Powdered Milk Yogurt“.

Add protein powder to the milk prior to incubation

Jar of milk with protein powder in small bowl sitting beside it

Adding protein powder to the milk prior to incubation helps the protein in the powder to associate with the milk protein.  Protein powders come in a wide variety of types from many different sources.  There are other options such as whey protein powder from cheese making, plant based protein powder from soybeans, peas or hemp.  

Non-milk based protein powder will add an additional flavor to the yogurt which can be detected in the yogurt so if you want to use these only make a small amount the first time. Once you have ascertained whether you like the flavor or are able to get used to it you can make bigger batches.

To use protein powder add it to the milk prior to heating it.  This will help the powder to dissolve properly and can help the protein in the powder to gel better during fermentation.  Some proteins don’t associate easily with others, heating the milk can denature them enough to be chemically available. To understand why the heating of protein improves the yogurts texture checkout this article here.

Evaporate some of the water prior to incubation

One of the ways of increasing the protein content of yogurt is to remove some of the low protein components of the milk.  The lowest fat content component is water which makes up about 87% of milk.  To remove this water in the home you have one option which is to evaporate some of the water off before you incubate it.

It is recommended that milk is heated to 180℉(82℃) before it is inoculated  (To learn more about why check out this article here).  The heating of the milk will naturally remove some of the water from the milk through evaporation.  To remove more water maintain the temperature at 180 for 20-30 minutes this will allow more water to evaporate leaving behind milk which will have a higher protein content.  

To capitalize on this for making high protein yogurt leave the lid off of the pot and stir the milk regularly.  This will increase the amount of water which is evaporated off of the milk and prevent scorching and sticking.

Another option to evaporating some of the water off yourself you could add some condensed milk to your milk prior to heating it.  Condensed milk is made by evaporating much of the water out of the milk and then canned to make it shelf stable.  Condensed milk has about 7 grams of protein per 100 grams making it a good shortcut to doing it yourself.