Urban Fermentation

Recent Posts

How to Maintain a Healthy Kombucha Scoby


Mason jar with fermenting kombucha

When you first start making kombucha you may be concerned with contamination from pathogenic and other unwanted bacteria and molds which can make your kombucha undrinkable.  Although this is a common fear if you maintain your kombucha SCOBY properly you will never have to fear this happening to you.

A kombucha SCOBY is a pellicle formed by acetic acid bacteria, and inhabited by yeast and bacterial species.  To maintain a healthy SCOBY keep it between 70-80˚F, a pH below 4.5 and at least 1 cup of sugar per gallon of tea.  A healthy culture will form a new SCOBY on the surface of each batch.

Your kombucha SCOBY is an indicator of the health of the various species found in your kombucha culture.  Maintaining your culture is not difficult to do with a little guidance.

The purpose of your SCOBY

Your SCOBY is a natural formation called a pellicle.  It is made up of mostly cellulose by the acetic acid bacteria found in your kombucha culture.  It preforms various functions to help keep your kombucha fermentation healthy.

Acts as a physical barrier from bacteria and mold

Bacteria and mold are everywhere.  They are found in the air, on any surface and on dust particles.  It is imposable to keep all these invaders from coming in contact with your kombucha. 

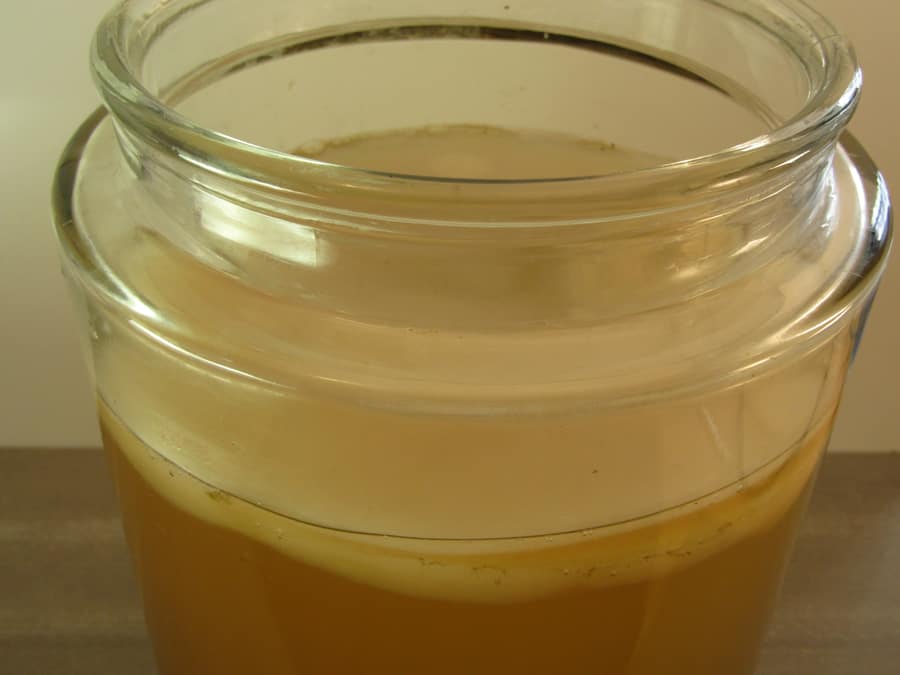
The SCOBY tends to float on the surface of the kombucha and acts as a physical barrier between the liquid sweet tea and the outside environment.  Any bacteria or mold which lands on the SCOBY must be able to survive the harsh conditions of the SCOBY. 

Protects from UV light

UV light affects bacteria and yeast species negatively.  As the UV light penetrates the cell it damages the DNA of the cell.  This affects the yeast by producing mutations in the cell which shorten the lifespan of the yeast.  This lowers the yeast cell count and slows population growth necessary for producing the alcohol needed by the acetic acid bacteria.

The bacteria are damaged similarly with the UV light affecting their DNA.  This prevents the bacteria from multiplying until the damage is repaired.  This again slows the growth of the AAB and LAB found in the culture.

The SCOBY acts to filter the UV light as it travels through the SCOBY.  This prevents the UV light from damaging the microbial cells which makes up your kombucha culture. 

Helps maintain a low pH in new batches

A new batch of kombucha has a higher pH than a finished batch.  This gives mold and other microbial species a chance to grow in your batch.  The SCOBY is produced mostly by two species of acetic acid bacteria which keep the pH of it below 4.0.  As the SCOBY usually floats on the surface of a new batch any air bourn mold or bacterial species are destroyed due to the low pH of the SCOBY before they can get a foothold in the sweet tea.

Helps to inoculate your new batch

When you make a new batch of kombucha you place your SCOBY onto the surface of the sweet tea from the old batch you just bottled.

When you do this you introduce the bacteria and yeast species which were found in the original batch into the new batch.  This is called backslopping and has been done in many forms since fermentation was first discovered.

The yeast is found mostly on the underside of the SCOBY.  It looks like a brown layer growing on the surface.  If it has been warm and you like your kombucha sweet it may have formed long strand running from the SCOBY towards the bottom of the container.

The lactic acid grow in and around the SCOBY and get included in the matrix of its formation as it thickens. 

The acetic acid bacteria are the producers of most of the biofilm which forms the SCOBY and are also found in and around it.  Acetic acid bacteria need oxygen to grow so they are found close to the surface of the fermentation.

Why temperature of your kombucha fermentation is important

There are two reasons why this temperature range is best for kombucha fermentation:

Helps the wanted microbial species to grow

The yeast species found in a typical kombucha fermentation grow well in a temperature range of 70-90˚F.  Within this range they are very efficient at consuming the sugar in the tea and producing alcohol and CO2.  The additional alcohol inhibits the growth of mold. 

The bacteria in the culture have an ideal temperature range of 60-80˚F.  There are two types of bacteria found in a typical kombucha fermentation, Lactic acid bacteria and acetic acid bacteria.  Both or these produce an acid which lowers the pH of the sweet tea rapidly when allowed to grow efficiently.  As the pH drops it inhibits the growth of the mold.

Both the yeast and bacterial species consume the sugar found in the tea rapidly at this temperature which lowers the available energy for the mold.  This out competes the mold and prevents it from getting a foothold on the tea.

Hinders the growth if mold

Mold has a higher temperature range than the yeast and bacteria in your kombucha.  It can grow in temperatures as low as 40˚F although they grow best in the 77-87˚F range.  Keeping your kombucha cool provides damp conditions which mold like to grow in.  As the temperature is raised the water on the surface of the container evaporates leaving nowhere for the mold to grow.

Why pH of your kombucha is important

Mold growth is inhibited in an acidic environment.  It cannot multiply quickly once the pH drops below 5.0 and most mold species cannot tolerate a pH below 4.0.  By keeping the pH of your kombucha fermentation low you prevent the possibility of any mold from growing.

This is done by using some of the old kombucha to acidify the new batch.  This does two things:

Acidifies the new batch quickly

To prevent unwanted microbial growth you need to maintain a low pH of your fermentation.  To do this you add at least 1 part old kombucha to 4 parts new sweet tea.  Depending on the pH of the old batch this should lower the pH of your new batch to at least 4.5.  If you like your kombucha sweet and only ferment it a short period of time you will need to add more old kombucha into the new batch to ensure this minimum pH value.

If you are unsure how much to add get some pH testing strips and test each batch until you get an idea how much to add.

Inoculates the new batch

This is another form of backslopping.  When you add old kombucha into a new batch you are introducing the microbial species which like to live in the liquid of your fermentation.  These can be different than the ones which are found in and on the SCOBY. 

By adding some of the old culture into the new one you are feeding the culture new sugar and providing a fresh environment for all the species to grow without the hindrance of an acidic environment.  This keeps the culture young and active which further reduces the chances of unwanted microbial growth.

Why sugar concentration of your kombucha is important

Everything living needs some type of food.  In a batch of kombucha that food comes in the form of sugar.  Without enough sugar the culture will not have enough food to multiply rapidly enough to maintain the hostile environment which inhibits mold and other microbial growth. 

Mold species are opportunistic and can use a wide variety of things for food energy.  They can use simple sugars to grow but they also can break down the bonds in starches to use as energy.  The SCOBY is made up of cellulose which are long carbon chains of simple sugars which the yeast and bacteria cannot use for food but mold has no problem breaking these strings down into simple sugar. 

Yeast and most bacterial species are unable to break the bonds that hold the simple sugars together which make up starch.  Without enough sugar they are unable to maintain their environment to inhibit the growth of mold which makes your kombucha susceptible.

Recognizing a stressed kombucha culture

By watching how your current SCOBY reacts to the fermentation process you can determine the health of your kombucha culture.  A healthy kombucha SCOBY can take on several shapes, have different colors depending on the type of tea and be shaped odd but an unhealthy SCOBY is easy to spot.

SCOBY is not very thick after 7-10 days of fermenting

When the new kombucha SCOBY which forms on the top of the container does not get at least ¼ of an inch thick something is hindering the growth of the AAB in your fermentation.  When your AAB do not grow as well your kombucha will not acidify as quickly leaving it exposed to unwanted microbial invasion. 

Some typical reasons for this are:

  • Not enough sugar for the yeasts to convert to alcohol
  • Fermentation too hot or too cold
  • Mother SCOBY too small

If you are moving from a small container to a bigger container your mother SCOBY may not entirely cover the surface of the new container.  This is not a problem as long as the starter tea is properly acidified and the container is covered.  The first SCOBY which forms in the new container will cover the whole surface but it may be thinner than normal.

Yeast Strings on the bottom of the SCOBY

Yeast growth is a normal part of making kombucha but when the yeast population gets out of balance several problems can arise. 

  • The alcohol level goes up. For an explanation of this read How Much Alcohol is in Homemade Kombucha
  • The yeast cells consume more of their share of the sugar keeping the pH higher
  • Kombucha takes on a yeasty flavor as the number of yeast cells increase

If you notice an abundance of these yeast strings then your fermentation may be too warm.  Any temperature above 80˚F will hinder the growth of ABB and LAB but will encourage yeast and mold growth.  Also with increased heat the humidity also goes up within the container which encourages mold growth.

Another reason for these yeast strings is short fermetation time, high sugar batches.  Yeast species have the ability to multiply in numbers quickly once they reach a certain population.  If you provide the yeast in your culture with a high sugar concentration with a short fermentation time the yeast can overwhelm the other cultures in the fermentation.

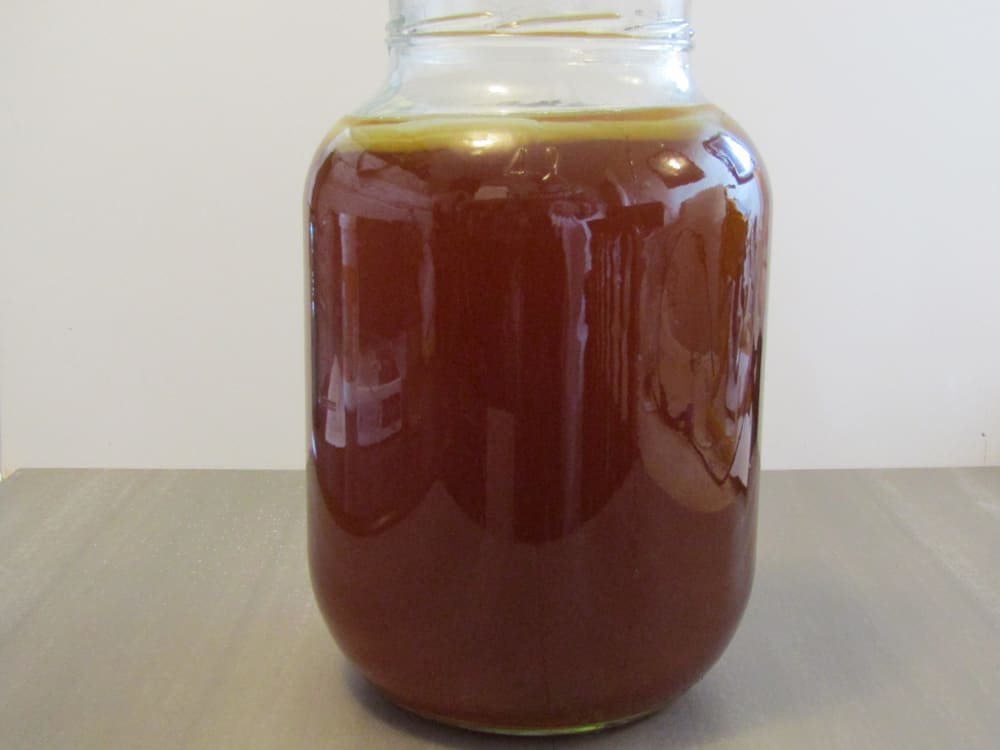
SCOBY sinks to the bottom

The cellulose which makes up the SCOBY has a density which is slightly denser to that of the starter tea it grows in.  This means that it should sink rather than float if all things were equal but because the SCOBY forms a mat which can capture air bubbles it tends to float.

If your SCOBY sits on the bottom of the container it is a sign that the yeast and LAB species found in the bottom of your fermentation are not multiplying and not producing enough CO2.  This could be because:

  • They don’t have enough sugar to multiply
  • The temperature is not high enough

When to dispose of a SCOBY

The only time a SCOBY needs to be disposed of is if it gets infected with mold.  This is apparent when discolored spots show up on the top or sides of the SCOBY or the fermentation container.  Mold is easy to spot as it is characteristic of mold found on any other food.

The mold can be green, yellow, red or black.  It will be fuzzy in appearance and be accompanied by an off smell from the container. 

Do not consume any of a kombucha batch with mold growth in it.  Once the mold has appeared the batch is totally infected with mold and can cause serious sickness if consumed just like any other food which gets mold in or on it.  Throw the whole batch away including the SCOBY as it is completely beyond repair and start again.

Make sure you wash the containter completely with hot water and soap. rince well and let it air dry. Once the container has been cleaned it is safe to start a new batch in it.

Kombucha SCOBY myths

A mother SCOBY is necessary for kombucha fermentation

For all those who want to start making kombucha but do not have access to a mother SCOBY you don’t have to wait.  It is not the presents of the SCOBY which makes the fermentation work it is the presents of the various species which make up the kombucha culture.  There are several ways to start making it without a SCOBY including:

  • Using raw commercial kombucha
  • Starting from acidified sweet tea
  • Using a vinegar mother

For a full explanation of how th make a SCOBY from scratch check out this article here.

A kombucha SCOBY produces a baby SCOBY

There is no mechanisim which the SCOBY has to duplicate itself.  It does not reproduce, multiply, clone itself or any other self-propagating method you can think of.  The new SCOBY which forms on the top of a new batch of kombucha is produced by the AAB which are found in the kombucha culture.

This is a totally separate pellicle than the original, although it may be attached in some way it is an original formation.  It has the same characteristics as the original as it is produced by the same AAB species as the original.

A kombucha hotel is important to ensuring continuous kombucha

A kombucha hotel is a way of keeping extra SCOBYs which form every time you make a new batch.  These extra SCOBYs can be kept in a container with some sweet tea and will continue to house the cultures from the original kombucha batch.

If you decide to keep these SCOBYs you will have doubled your work in making kombucha for no reason.  Sure it is nice to have an extra SCOBY for making experimental batches of Kombucha like herbal tea, green tea or coffee kombucha but you can always use the new SCOBY from a current batch in a new batch since you will get a new one with each batch you make.

In the off chance that you lose a batch to mold it is easy to start a new batch without a SCOBY and you will be up and running again in a few weeks. 

What to do instead of a SCOBY hotel

SCOBYs are made up of mostly cellulose but also have a wide variety of vitamins and minerals in them from the yeast and bacteria cells which are included in its matrix.  This makes them a good addition to your diet once you know how to use them.

Rather than storing unlimited amounts of SCOBYs you can:

  • Put them in your smoothie in the morning
  • Add them to baking recipes
  • Blend them in sauces and gravies
  • Make them into creams
  • Turn them into candy

If you still have extra SCOBYs then you can feed them to your animals or put them in the compost.

How Milk Kefir Can be Used for Cooking Almost Anything


Plate of almond nut waffles

So you have started making milk kefir, your grains are growing and as a result you are making more and more kefir.  Every time you open the fridge you are reminded that you have too much kefir and you have to use some of it up but you can only have so many kefir smoothies or bowls of cereal with kefir.  It is time to start cooking with it.

Milk kefir has properties making it ideal for cooking.  It has a lower lactose content then plain milk, is slightly acidic which adds tang and helps quick breads to rise and is thick enough to add body to any dressing or sauce.  It can be used in soups, stews, baking, sauces and salad dressing. 

Once you have learned the basics below you will find you rarely have too much kefir.

Milk kefir is acidic

As your kefir grains consume the sugar in milk it produces lactic acid and acetic acid.  These two acids are produced by lactic acid bacteria (LAB) and acetic acid bacteria (AAB).  These two acids lower the pH of your milk kefir enough for the proteins in the milk to solidify causing the kefir thicken. For an explanation why this happens read Five reasons Why Milk Kefir Separates: Plus the Real One.

This acid provides additional rising power to any quick bread recipe.  The acid in the kefir reacts with the baking powder and baking soda releasing CO2 gas which gets caught in the dough forcing it to rise.  This is the same principle which makes buttermilk pancakes fluffy or adding vinegar to muffins makes them extra light. 

The acidity also adds tang to the kefir which gives creamy salad dressings or dips an additional zip.  For a thicker dip you can hang the kefir in a cotton cloth for a few hours to drain off some of the whey.  This adds body to the kefir for thicker dips or sauces.

Milk kefir can be made with different fat content

Kefir grains are very versatile and can be used to make kefir with any type of milk.  With a little foresight you can make kefir for specific purposes.

The amount of fat content does not affect the action of the kefir grains as there are few changes in the milk fat from the microbial action of the grains.  Some fat is included in the kefir grains but most stays in the kefir unchanged.  This can be used to your advantage if you plan for it.

Low fat kefir:

Low fat milk kefir makes kefir with a thin consistency.  It can be used for making salad dressings and runny sauces which need a bit of body.  Dressings like honey mustard or ginger miso are good choices for this type of kefir. 

You can make low fat kefir with 0% or 1% milk.  It makes a kefir which is easily drinkable.  It can be quite fizzy if it is fermented in warm temperatures because the yeast has lots of available sugar to ferment.

Medium fat kefir:

This is a good all round kefir.  It is great for smoothies, as a milk replacement in cereal, baking and soups.  If left to over ferment it can be used to make bread as the yeast can use the sugar in the flour to produce CO2.  The texture is closer to yogurt but still has a liquid consistency.

Make this type of kefir with 2% to homogenized milk. 

High fat kefir:

High fat kefir produces a kefir with a thick creamy texture.  It can be substituted for sour cream or yogurt.  If it is hung for 24 yours or so it makes a very thick cream cheese.  This is the type of kefir to make thick dips, ice cream, sauces and gravy.

Use 10% to 33% whipping cream for this type of kefir.

Milk kefir can be heated without loss of most probiotic effects

The heating up of milk kefir has a negative effect on the amount of live probiotics which are left in the food.  Once kefir has been heated above 70˚C to 100˚C most of the live probiotics are killed.  At that point they are no longer probiotics as they will not multiply or take up residence in your gut.

But that doesn’t mean that the benefits of consuming them are lost in the cooking process.  In fact there are several researchers studying the effect of heat killed probiotics on the gut and they have found that although the probiotics have lost their ability to actively destroy pathogenic bacteria they still have a positive effect on reducing inflammation, providing vitamins and minerals and blocking the receptor sites used by disease causing bacteria in the gut.

This is an active research topic because giving live probiotics to seriously ill patients with damaged immunity such as cancer patients, those suffering from AIDS or sever gastro-intestinal diseases are at risk from live probiotics.  If the cells are destroyed prior to ingestion it has been found that most of the benefits of the probiotics are retained.

If you use your milk kefir for baking, thickened soups or sauces which require high heat you will not have lost all the benefits of the milk kefir.  Heat does not destroy all the proteins and enzymes found in the milk kefir or make the minerals unavailable again. 

If you are concerned with consuming enough live probiotics in your kefir than use your milk kefir in recipes which don’t require high heat or add the kefir at the end of the cooking time just before serving. 

The affect heat has on kefir protein

When milk kefir is heated the protein has a tendency to curdle.  This is especially noticeable when cooking with low fat kefir because the lack of milk fat allows the proteins to collect together more easily.  When using milk kefir for creamy soups use high fat kefir and add it at the end of the cooking time.

Another option is to use a high powered blender to make you creamy soups and sauces as the blender breaks down the protein particles as they form keeping them liquid.  This makes a thickened product which has lots of body and creamy texture.

Kefir gets its protein from two sources, the milk and the growth of the microorganisms.  This diversity provides a variety of proteins for your body to use. 

How to substitute kefir in recipes

The nice thing about kefir is it can be easily substituted for other liquids in recipes.  It can replace milk, water, yogurt, cream cheese, sour cream and even hard cheese.

Replacing water for kefir

Water is used in baking for hydration in making breads and other bakery items.  The water helps to dissolve the sugar and helps to improve the formation of gluten while working the dough. 

When you replace kefir for the water in baking you are adding three other things besides the hydration.

  • Acidity
  • Protein
  • Leavening

The pH of kefir is at least 4.0 as milk tends to not thicken before it reaches a pH of at least 4.0.  This makes the kefir much more acidic than water.  This will help quick breads rise faster and with more CO2 gas but it also imparts a tangier flavor to the baked product.  You may have to compensate by adding less other acidic ingredients.

Additional protein will add more body to the baking making for a firmer bread.  For a lighter product you may need to increase the hydration level and/or let rise longer. 

Kefir has active yeast and lactic acid bacteria in it so when making yeasted breads you may not need as much or any additional leavening.  The active culture in the kefir can use the sugar in the dough just as packaged yeast does and can mimic the sour flavor of sourdough bread.

For non-bakery items kefir can replace water for a thicker tangier flavor in gravies, soups and sauces.  Again this will add body to the sauce allowing you to use less or no thickener like flour or corn starch.  For really thick sauces use full fat milk to make the kefir or hang some medium fat kefir for a while to remove some of the whey.

Replacing milk with kefir

Kefir can replace milk on a one to one basis in most recipes.  The thin consistency of kefir allows it to behave the same as milk for hydration levels.  The added acidity improves the rising power of baked goods such as muffins, pancakes and biscuits. 

The added acidity reacts with baking soda and baking powder giving it extra action making for fluffier baking.  This is similar to the action buttermilk has when making buttermilk pancakes.  The end product has a tangy creamy flavor which works well with quick breads.

Replacing milk with kefir in thickened sauces can be done with a few cautions.  Kefir is acidic which makes the proteins more likely to congeal and form globules when heated.  This is why milk which has soured tends to curdle when put in hot drinks.  To avoid this add the milk at the end of the cooking time just before serving.  Cool the liquid down before adding the kefir. 

If you are adding kefir to a hot soup then remove some of the broth from the soup and bland it with the kefir in a high powered blender for a minute or so to break down the proteins.  This helps to keep the soup smooth and creamy.

You may need to add less thickener to get the required thickness as the kefir is thicker than milk with more available protein.  As the sauce cools it may become thicker than you want so you may want to use less thickener overall.

Replacing heavy cream with kefir

Heavy cream is used to make some of the richest sauces around.  It is high in fat and can be hard to digest when mixed with pasta or other starches.   Kefir on the other hand is easier to digest and has many health benefits not found in heavy cream.

To replace thick cream for sauces like Alfredo sauce use kefir made with heavy cream like half and half or whipping cream.  The high fat in these kefirs goes well with the cheese and spices of these sauces.

It can also replace the cream in ice cream recipes on a one-to-one basis.  Make the custard for the ice cream in a high powered blender to avoid curdling then add the remainder of the cream once the custard has cooled.  This will keep the ice cream smooth.  You may need to add additional sweetener to counter the loss in sugar from the fermentation process or you may like it the way it is. 

Replacing yogurt with kefir

If kefir is being used to replace yogurt then either use high fat kefir or hang it for a while until you have reached the proper thickness.  It can then be used on a one to one basis.  Kefir can be tangier than yogurt so if you want a bland flavored kefir use fresh kefir rather than older kefir as more of the lactose will still be in the milk and there will be less lactic acid.

Replacing cream cheese with kefir

This is a two-step process:

  • Make kefir cream cheese (link to kefir cream cheese article) 
  • Use the kefir cream cheese on a one-to-one basis

It will add additional tang so it is ideal for savory creamy dips, cheesecakes, cheeseballs and quiche. 

For sweet recipes you may have to adjust the amount of sweetener or reduce other acidic ingredients to balance the sweetness with the tangy flavors or you can add a basic ingredient like soda to reduce the acidity if they’re other intense flavors in the recipe. 

Replacing sour cream with kefir

Sour cream is not as acidic as kefir so replacing it with kefir makes for a more intense flavored product.  When making dips with kefir use high fat kefir and add any acidifying ingredients after adding the kefir.  This includes vinegar, brined or pickled ingredients.  The kefir will amplify the flavors of added ingredients so taste the dip often as you make it.

Replacing kefir with sour cream in cheesecake or other desserts check the consistency of the kefir cream cheese.  You may have to adjust the amount of other liquids in the recipe to get the required thickness.  If you want a very thick kefir cream cheese then hang it to let more of the whey to drain.

Using kefir for salad dressings

When making dressings with kefir add the kefir in first then adjust the amount of vinegar to get the right acidity.  Kefir continues to acidify as it ages so by adding the vinegar at the end you can adjust the acidity of your dressing without sacrificing the creamy texture. 

Replace kefir for blue cheese in salads or baked goods

To di this you will have to make hard kefir cheese.  Which takes a few days depending on how hard you want your cheese to be.  Kefir with a low fat content like 0-1% milk fat make a crumbly kefir cheese with substitutes well for blue cheese without the string blue cheese flavor.  This can make a mild dressing but still retain the texture of the dressing.

Hard kefir cheese made from higher fat milk makes a cheese which is creamy and smooth in texture.  This can be a great addition to cheese platers or cut up into salads or flavored and served with eggs and toast.

Replace whipped cream with cream kefir

When you make whipped cream you are adding air to the cream.  It is the fat in the cream which holds onto the air and acts as a thickener giving it its fluffy texture. 

Kefir made with high fat milk has the same properties.  The microbial action of the grains does not affect the amount of fat in the milk to a great degree.  This makes it possible to whip kefir made from whipping cream.  This gives a topping which has a pleasant tangy flavor which helps to cut the rich texture of the whipped cream.

Kefir made from other types of milk

Kefir is also made with goat, sheep and buffalo milk which all have their own characteristics.

Goat milk if naturally homogenized so the milk fat does not separate.  This can be useful for making cheese from goat milk as it tends to make a softer more spreadable cheese.  It has the traditional goat cheese flavor which goes well in salads, savory drinks and soups.

Sheep milk is very mild in flavor and makes a kefir which is very smooth in flavor.  Best kept plain or added to delicately flavored drinks.

Uses for Nut and seed kefir

Nut kefirs of all types can be used to make vegan cheese although it does not have the same creamy flavor if it is pressed can make a hard cheese for crumbling into salads.  Nut kefir can be used to make nut waffles, pancakes or pound cake for those who are sensitive to milk products.  Just follow this recipe for making nut or seed kefir.  The resulting kefir will have little or no lactose in it.

How to Make Homemade Vinegar Without a Vinegar Mother


There seems to be a lot of confusion about what a vinegar mother is and what role it plays in the production of vinegar.  It seems to be a prized ingredient which is guarded and cared for surrounded by some type of mystery.

The vinegar mother is a pellicle which is formed by acetic acid bacteria in the liquid.  Pellicles are not exclusive to vinegar production but also appear in several other fermentations.  Vinegar pellicles are usually present in homemade vinegar but are not necessary for vinegar production.

Vinegar is made by allowing yeast and acetic acid bacteria to grow in a sweet liquid.  The yeast produces alcohol and the acetic acid bacteria produce the acetic acid.  This process will happen with or without a vinegar mother.

How vinegar is made without a mother

When making vinegar without a mother you are relying on two naturally occurring microbial cultures to grow and then dominate your potential vinegar.  These cultures are made up of yeast species and acetic acid bacterial species.

The yeast species can be found mostly on the ripe fruit or vegetable you are using to make your vinegar.  They grow best in the presents of simple sugars which makes there population high when the fruit it ripe.  Most of these yeast species have a low tolerance for alcohol of about 4%.

The acetic acid bacteria (AAB) are made up of Acetobacter, Gluconacetobacter, Gluconobacter and Komagataeibacter.  In commercial production Acetobacter is the main species which is used to convert alcohol into acetic acid but homemade vinegar usually includes them all in varying populations.  It is the Gluconacetobacter and Komagataeibacter which are the main producers of the vinegar mother which is so prized in homemade vinegar production.

When making vinegar at home there are two methods available:

Simultaneous alcohol and acetic acid production:

When making vinegar without a mother with this method you are relying on the naturally yeast and AAB to dominate the vinegar base preventing the growth of unwanted species which can produce unwanted flavors in your vinegar.

To do that you must encourage the growth of the yeast and ABB by putting your vinegar in the proper environment which includes the correct temperature, sugar concentration, access to oxygen and regular stirring.

Method of simultaneous alcohol and acetic acid production without a mother  

The concern with making vinegar with an unfermented sweet liquid is the opportunity for mold and other unwanted microbial growth in the liquid before the yeast and acetic acid bacteria gain a foothold.  If this happens the vinegar will have an off taste and often be unusable.

To prevent this from happening clean all your equipment thoroughly.  Wash everything you will need in hot soapy water and rinse well to get rid of any soap residue. 

Make your vinegar base

According to WHO (world health organization) vinegar is safe to use and store if it has a pH below 4.0.  This translates to about a 4-5% acid concentration in your finished vinegar.  To make vinegar which is safe to store and will last indefinitely you will have to prepare the vinegar base with enough fermentable sugar. 

The base which most homemade vinegars are made from are fruits like apple, pear and strawberry.  These are great bases because they have distinctive flavors which come through in the finished vinegar once the sugars have been consumed.  You can also get them pre-juiced from the grocer or farmers market. 

For a less intense flavored vinegar you can chop any fruit into small cubes and add it to sweetened filtered water.  You will have to add 2/3 cup of white sugar for every quart of liquid you add to the fruit to ensure the yeasts have enough fuel to make the needed alcohol.

You can check the specific gravity of the vinegar base with a hydrometer which will give you a rough idea the amount of potential alcohol the yeast will make for the AAB to convert into acetic acid.  With a specific gravity of 1.050 at the beginning and a reading of 1.010 or less at the end you can be sure that the yeasts have converted the sugar into alcohol. 

Pour the juice or sweetened water and fruit pieces into your fermenting container and put a breathable cover on it.  You can use anything with a fine mesh which will not allow bugs of dirt particles to enter.  Secure it with an elastic band.

Aerate the vinegar base

When starting without a mother the various yeast and AAB species will have a low population.  This makes your young vinegar susceptible to unwanted bacterial and mold growth.  To prevent this unwanted microbial growth you should agitate the surface of the vinegar base and aerate it to encourage the growth of the yeast and AAB. 

It will not take long for the yeasts to dominate the culture when it is given adequate oxygen.  Yeast can double their population in a short period of time once they get past their lag period.  With repeated doublings of their population other microorganisms find it hard to compete and either die off or fail to grow.

The AAB need oxygen to grow.  When the vinegar base is aerated oxygen enters the liquid and the AAB are put in contact with more of it.  This helps the AAB to multiply as the yeast produces the alcohol.  At the AAB grow they acidify the vinegar base making it harder still for unwanted microbial growth.

Ferment until the sugar is consumed

The yeast will continue to grow until it has consumed most of the fermentable sugar in the vinegar base.  At this point you will notice that the liquid will begin to smell acidic and little or no effervescence will be noticeable when stirring the vinegar. 

It is now safe to leave your vinegar alone.  The yeast has consumed most of the sugar and will have started to die off.  You will be able to tell by looking to see if there is a layer of dead yeast cells on the bottom of your container.  At this point the AAB are very active producing acetic acid. 

You can continue stirring your vinegar or you can leave it alone.  If you leave it alone the AAB will begin forming a pellicle otherwise known as a vinegar mother.  It will start as a layer of whitish film on the surface of the vinegar and thicken over time. 

Filter and age your vinegar

Begin tasting your vinegar after a month or so.  When it has reached a pleasant flavor pour some into a container for use.  Filter the rest into a clean container to remove the lees (the sediment on the bottom).

Filtering the vinegar off the lees will help prevent it from developing a yeasty flavor as your vinegar ages.  Age it by transferring it into another clean container with a wide mouthed lid.  Unless the AAB have completed the conversion of all the alcohol into acetic acid you will get another pellicle forming on the top.  Let it thicken as the vinegar ages.

Aging helps to smooth out the flavors of your vinegar just like aging smooths out the flavors in wine.  Some vinegar is aged for years such as balsamic and rice vinegar.  As long as it has reached the proper acid concentration level it will not spoil.

Pre-fermentation of the alcohol prior to acetic acid production:

Vinegar made from an alcoholic base are vinegars like red wine vinegar, rice wine vinegar and mead vinegar.  All these types of vinegars are easier to make than with unfermented sweet liquids. 

The presents of the alcohol helps to inhibit the growth of molds and other unwanted bacterial growth.  This helps keep off flavors out of the vinegar.  It also provides different flavors which are not present in vinegar made from unfermented sources.

To make vinegar from an alcoholic base you can start with commercial wine, beer or any other alcoholic liquids or you can produce your own out of any sweet liquid. 

Prepare the alcoholic base

When you make vinegar from wine or other spirits you have to prepare the solution to provide the best opportunity for the acetic acid bacteria to flourish.  You do this by diluting the liquid to be in a range between 5-8% ABV.

Acetic acid bacteria grow best in a solution with an alcohol content between 5-8%.  Outside of this range they will either not have enough fuel to raise the concentration of the liquid above 5% acetic acid or the high concentration of alcohol will inhibit their growth delaying the conversion to vinegar.

Alcohol By Volume (ABV) is a measurement used to indicate how much alcohol is in a solution expressed as a percentage.  To adjust the percentage of alcohol to optimum levels for vinegar production use the following formula:

For example:

If you have 100 fl.oz. of wine with a 10% ABV and you want your vinegar base to be 8% then:

Additional liquid = (10% / 8% – 1) X 100 fl.oz

Additional liquid = 0.33 X 100 = 33 fl.oz

Your will have to add another 33 fl.oz of non-alcoholic liquid to lower the ABV to 8%.

Aerate the vinegar base

When starting with an alcoholic base it is not as critical to aerate the liquid.  The alcohol will protect it from unwanted bacterial growth as the AAB begin to convert it into acetic acid.  Aerating your vinegar will speed up the acidification process producing vinegar much faster than otherwise. 

AAB need oxygen to grow so to encourage their growth stir the liquid to help to oxygenate it giving the AAB access to more oxygen.  Once the liquid begins to smell acidic you can leave it to ferment or continue aerating it.

If you leave it alone it will most likely form a pellicle on the surface which thickens over time.  This is what is referred to as a vinegar mother and can be used to make vinegar with other sweet or alcoholic liquids.

Age your vinegar

When making vinegar from wine or other spirits the aging process is a valuable step.  It will help lower the alcohol level of your vinegar, smooth out the flavors and add additional flavors as the various AAB species grow. 

There are several methods of aging vinegar:

  • Open air container

  As the alcohol content goes down so does the population of AAB.  This slows the rate the alcohol level declines.  Aging in an open air container helps to reduce the alcohol content by giving the AAB access to oxygen.

  • Air locked container

This type of aging allows the CO2 to escape but will not allow anything back into the container.  This prevents the AAB from getting any more oxygen and slows their growth.  This will produce a vinegar which has a higher alcohol content for a longer period of time.  This low oxygen environment favors different AAB which helps to develop new flavors which cannot be found in commercial vinegars.

  • Closed non-reactive container

When aging vinegar in a sealed container like a glass jar ensure you use containers which can withstand pressure as the growth of the AAB will continue to produce CO2 which can be dangerous if the container explodes.

Closed to the air the vinegar flavors will blend together over time making your vinegar less harsh and young tasting.  Once it has been aged a year or two the flavor will change as the various organic acids stabilize and meld together into a more even flavor.

  • Closed wooden cask

Aging in a wooden cask provides another level of flavor possibilities.  The vinegar reacts with the wood in the cask adding wood tones to the vinegar.  Some of the more volatile compounds in the vinegar escape through the wood along with some of the liquid.  Over time this makes a vinegar with a completely different taste, texture and feel.

The best example of this type of aging process is balsamic vinegar.  It is aged at least 5 years before it can be considered true balsamic vinegar but it can be ages 10, 20, 25 or 50 years. 

How to prevent mold growth

Mold growth in vinegar will give the vinegar a bad taste and makes it unsuitable for consumption.  Preventing the growth of mold at the beginning stages of vinegar production is of prime importance as once the liquid has acidified mold will not grow. 

Besides stirring your vinegar regularly until it has started to acidify it is important to:

Start with clean equipment

Wash all your equipment in hot soapy water or run them through a dishwasher with heat dry.  This will eliminate enough of the unwanted mold and unwanted bacterial species on your equipment.

Protect it from contamination

Using a tightly woven clean cloth to cover the vinegar and secure it with an elastic band.  This will keep out any floating contaminates as well as flies or other bugs from entering the vinegar.

When stirring your vinegar use a clean spoon and wash it in between uses.

Provide adequate heat

Yeast and acetic acid grow quickly when put in the right environment and heat is one of the most important.  With adequate heat the yeasts will quickly dominate the culture leaving little room for mold to gain a foothold. 

Start your vinegar in a warm location between 20-25˚C.  This will give the yeast and AAB a fast start.

Pre-acidify your liquid base

A liquid which is acidic is protected from mold growth so if you pre-acidify your liquid then the chances of mold growth is minimized.

To do this you can:

  • Add powdered acetic acid or lactic acid available through wine, beer or cheese making stores
  • Add 1 part finished vinegar to 4 parts liquid

These will help protect your vinegar from mold growth but they will change the flavor of the finished vinegar.  When adding straight acetic acid or lactic acid to a liquid the flavors which would have been developed in the process of getting to that acidity will have been skipped. 

It is like the difference between sourdough bread and quick rise bread.  The quick rise bread makes a nice fluffy loaf but it is missing many of the flavors which are found in a good sourdough.

Adding finished vinegar will add the flavor of the vinegar you added.  If you are making cherry vinegar adding apple cider vinegar to acidify it will add a distinct apple flavor to your cherry vinegar.  Even white distilled vinegar has a distinctive flavor so be careful when choosing your acidifying vinegar.

Using finished vinegar not only adds flavors but also can infect your vinegar with vinegar eels.  Production vinegar often has these small creatures growing in them.  Although these are not harmful in any way they are a little disconcerting and can change the flavor of your vinegar.

Five Easy Ways To Take a Break From Making Kefir


Once you have started making kefir it can seem like you are locked into a routine which you can’t get out of.  Every day you need to strain your grains out of the fresh kefir and add more milk.  It gets even worse when you end up with extra kefir in the fridge which you don’t know what to do with. 

If you feel you need a break from making kefir for a couple of days, a week, month, year or longer here are some ways to do it.

Over fermenting

This is the shortest method of taking a break and the easiest.  All it requires is you ignore your grains for a day or two.  It will separate forming whey on the bottom and curds on the top.  The grains will continue to ferment the milk converting it into very sour kefir which you can use for a variety of purposes.  For some ideas of what to do with over fermented kefir read “23 ways to use over fermented kefir“. 

You can leave your kefir fermenting a few days to up to a week but remember the longer you leave it the sourer the kefir will get.  If you leave it too long the grains will take a while to equalize again when fed fresh milk.  This is because the microorganisms in the kefir react differently to low food sources and may need a day or two to get back up to speed. 

If you want to take a break of longer then 2-3 days try the next method.

Why it works

Kefir grains are hardy and can survive with little food energy for quite a while.  The microbial makeup of the grains includes a wide variety of bacteria and yeasts which have ways of dealing with periods of low food availability.

The response yeast species have to low sugar environments

Yeasts alter their respiration rate as the sugar in a batch is consumed.  They have the ability to slow their metabolic rate by up to ten times(https://www.ncbi.nlm.nih.gov/pmc/articles/PMC3430547/).  This means that once the bulk of the lactose has been consumed in your milk the yeast will slow the rate which they consume it.  This ensures there survival when you strain your grains and add more milk.

In extreme situations where the yeast has essentially run out of food(https://www.ncbi.nlm.nih.gov/pmc/articles/PMC3213374/#:~:text=In%20response%20to%20nitrogen%20starvation,produced%20in%20meiosis%20into%20spores.) they will go through a process of sporulation which produces inert spores which become dormant until new sources of sugar are introduced into their environment.

It is very hard to starve the yeast species in your kefir grains.

The response bacterial species have to low sugar environments

Although not all of the species found in milk kefir grains have been studied there appears to be a consistent pattern with the bacterial species which have been studied.

They go through metabolic changes which allows them to survive extremely low carbon sources.  This allows them to survive long periods of low or no sugar environments.

Not all bacterial species can go through the process of sporulation but some can which indicates that the bacterial species found in kefir grains have two methods of surviving long periods of neglect. 

  • Change their metabolism to require lower amounts of energy 
  • Go through the process of sporulation

The take away here is don’t worry about killing your grains by ignoring them for a day or two.  The various microbial species have ways of surviving these types of conditions, otherwise they would have died off a long time ago.

Refrigeration

So you are going on vacation or have a large project which needs all your time.  Maybe you are just tired of kefir and want to stop for a while.  Then the next level up is to refrigerate your grains.  Refrigeration is a great fermentation slowing device and can lower your grains need for nutrients.

This method is great for times when you need a break of a week to a month from making kefir.

The method:

  1. Strain your kefir grains out of its current batch of milk/kefir
  2. Place grains in a clean jar the same size as the one they come out of
  3. Fill the jar with fresh milk and put a lid on it
  4. Label it so you know what it is and when it was put in the fridge
  5. Place the jar in the refrigerator

The method for restarting your kefir grains:

  1. Strain the grains out of the milk/kefir (you can use the strained kefir in baking recipes)
  2. Put the grains in a clean jar and add fresh milk
  3. Ferment for 24 hours
  4. If the kefir has not thickened repeat the first two steps
  5. Once the kefir has thickened (shouldn’t take longer than 48 hour) continue on as normal

How it works

The refrigeration method of preservation relies on two things:

When the microorganisms are cooled the enzymes which are responsible for their respiration slow down.

Enzymes are biological catalysts which break down the nutrients found in the milk.  They act on the sugars, proteins and fats found in the milk to break it into pieces which can be used by the cell.  As these enzymes slow down the food source is not digested as fast making it last longer. 

The cell walls are made up of proteins in a fluid which becomes thicker as temperature drops.

The cell walls are semi-permeable which means that some things can get through while others cannot.  It also means that the things which get through need to pass through a matrix of proteins, phospholipids and liquid.  As the liquid gets cooler it thickens and motion through the cell wall is slower.  This slows the rate which the nutrients pass into the cell where it is used for energy.

Basically when you refrigerate your grains they do not need as much food due to slower enzymatic reaction and there is  less food entering the cell.  This slows the respiration rate down even though there is food available for the cell.

Once the food source gets low the cell will change accordingly as explained in the over fermentation section.

If you forget about a set of grains in the back of the fridge you may find that it has converted the milk into a very sour kefir with a different texture then the normal kefir you are used to.  This is because the various microbial species in the kefir grains have different temperature ranges which they can tolerate. 

As you cool them down some become less active then others which reduces different flavors in the kefir. This kefir is still usable in recipes like waffles or pancakes, fruit smoothies or made into a very tangy cream cheese.

Freezing

This method can be a little more involved depending on how long you intend to stop making kefir.  For a full explanation effectiveness of each of these methods read “Can Kefir Grains be Frozen and Easily Revived?“.

Break for 1-6 months

This is the easiest method of freezing your grains but is the least reliable for long term storage.

The method:

  1. Strain the grains from the current batch
  2. Place the grains in a sealable plastic bag
  3. Add some powdered milk
  4. Remove as much air as possible
  5. Label the grains with the current date
  6. Place in the refrigerator freezer

For a longer hiatus of 6-12 months

There is only one additional step for increasing your chances of reviving your grains after a long dormancy.  You need to dry the grains for 12-24 hours.  The longer the better.  This gives the yeast cultures a chance to dehydrate a little helping to reduce the damage of water crystals forming within the yeast cell.

It also will encourage sporulation in some microbial species providing spores for these species when you reactivate your frozen grains.

The deep freeze method

1-2 years (maybe longer)

Many think that freezing temperatures will kill microorganisms just like it will kill higher life forms but fortunately in this case this is not always true.  Bacterial species have been found in the arctic which have been frozen for thousands of years and have been revived by scientists in laboratory conditions.

The difference here is that not all the species in the grains react the same to extremely cold environments.  The yeasts are the most susceptible to cool temperatures and often few of the yeast cells survive the deep freeze temperatures.

On the other hand the bacterial species don’t seem to be affected as much by the extreme cold but they are affected by varying temperatures.  They need a constant cold temperature to ensure enough viable cells are left to repopulate the kefir grain and be able to make kefir again.

So to ensure the yeast species have the best chance of surviving the deep freeze you need to have as many yeast cells in the grains as possible.

The method

  1. Strain the grains from their current batch of kefir
  2. Leave as much of the biofilm which surrounds the grains as possible
  3. Dry the grains for 24-48 hours (they should be dry on the outside all around)
  4. Place the grains in a plastic sealable bag with a good amount of powdered milk
  5. Place the plastic bag into a hard freezable container
  6. Label it with the date
  7. Place it in the deep freeze on the bottom where there will be little temperature variation

This method is reliable because it considers all the various species methods of survival. 

  • The yeast cultures are encouraged into sporulation
  • The bacterial cultures which develop spores are also encouraged into sporulation 
  • The whole community is placed under low food source stress which slows their respiration
  • The constant cold temperature helps lower the rate if die off of the bacterial species which do not produce spores.

The method of reviving your grains:

  1. Remove your grains from the freezer
  2. Place them into a jar of fresh milk put a breathable lid on the jar
  3. Put the jar in the fridge for 48 hours
  4. Next day strain the milk gently and fill the jar again with fresh milk replace the lid
  5. Place the jar in a warm (18-20˚C) location for 24 hours
  6. Strain the grains again and add fresh milk as before
  7. Repeat until the grains are thickening the milk into kefir

If your grains do not revive after a week or the flavor of the kefir has changed considerably and you do not like it throw them away and start again. 

Dehydrating

Dehydrating your grains is the hardest but can give you the longest break from making kefir with your current kefir grains.

To dehydrate your grains there are two methods to try:

Air dry on a cookie sheet

To air dry on a cookie sheet you need to use a non-stick surface like a silicone pad or saran wrap

The method:

  1. Strain the grain from freshly made kefir
  2. Place the  grains on the non-stick surface and spread them out
  3. Place a colander over the grains to give them some air
  4. Place a cloth over the whole thing to keep out bugs
  5. Every 24 hours stir the grains around until they are hard and yellowish colored
  6. Remove them and any powder formed as the grains dried and place it into a plastic sealable bag
  7. Add some powdered milk, remove as much air as possible and seal the bag

Use a dehydrator

This is a simpler method but requires a food dehydrator with a silicone pad to prevent liquid from leaking down to the bottom of the dehydrator

The method:

  1. Strain the grains from freshly made kefir
  2. Place the grains on the silicone pad for your dehydrator
  3. Place the pad into the dehydrator and set it for the lowest setting
  4. Daily stir the grains until they are dry and yellowish colored
  5. Remove them from the dehydrator along with any powder on the pad
  6. Put them into a sealable plastic bag with some powdered milk
  7. Remove as much air as possible and seal the bag
  8. Label with the date

For best chances of reviving your grains after a long period place the grains in the refrigerator or the freezer taking advantage of the other methods of slowing metabolic activity in the grains.

Why it works:

When you dehydrate your grains the microorganisms in the grains act to protect themselves by slowing their metabolic rate and/or sporulation.  It also removes as much water as possible to prevent crystallization which damages the cells membranes when frozen.

Yeasts which are industrially dehydrated go through a process of freeze drying.  When this process is employed the yeasts go through a metabolic change which replaces the water in their cells with a special sugar called trehalose.  At this point the yeasts metabolic rate has basically stopped.

When using a home dehydrator or air drying a small percentage of the yeast cells will go through that change.  For the rest the dehydration does not stop the metabolic rate it only slows it down (albeit considerably) so by providing them with some dehydrated milk the yeasts will have something to consume.

 The bacteria use a different method to survive extreme dehydration.  They fold up their cell wallshttps://analytik.news/en/press/2014/109.html to make a thicker barrier between the inner cell and the outside environment.  As the air dries out the cells change their DNA to make this possible.

Once you have dehydrated your grains place them in the fridge or freezer to further extend the period of time they will be viable for. 

Give them away and start fresh later

So maybe you are just sick of kefir!  You want to try making something else or you have begun a new hobby which is using all your creative energy.  Kefir is no longer on the list. 

If you are wanting to take a break from kefir for more than a year then let’s not be silly.  It probably means you don’t want to have them hanging around your freezer or in the back of the fridge. 

It is time to unload them and move on but how is the question.  If you have been making kefir for more than a year you most likely have an attachment to them and don’t want them to go to waste.

To do so you could:

  • Give them to a friend
  • Feed them to a pet (I hear dogs love them)
  • Post them on social media
  • Blend them into a smoothie
  • Compost them
  • Add them directly to your garden

If you want to start making kefir again or is you want to make kefir a few times you can get a direct set powder which will make one batch of kefir without the use of grains.  Make it from some store bought kefir or purchase another set of grains.

For details on the tree methods of making kefir read “Three ways to make kefir an illustrated step by step guide”.

Kefir has been around for thousands of years so don’t worry that you won’t be able to find new grains when you want to start again.

Seven Simple Steps to Make Your Own Kombucha Vinegar


Anyone who has been making kombucha for a while has had the experience of forgetting about a batch in the back of a cupboard or left a bottle of kombucha soda fermented too long.  Upon tasting this over fermented kombucha you will declare that it has turned to vinegar.  It will be super sour and have no sweetness left from the sugar or flavoring you added when you made it.

Although you’re over-fermented, kombucha tastes really sour or the soda has a tanginess to it that makes it undrinkable. It may not be considered vinegar.  Vinegar, like kombucha, is fermented with two primary microbial cultures, yeast and acetic acid bacteria (AAB).  The yeasts make alcohol and the AAB converts the alcohol into acetic acid.

Commercial vinegar must have an acetic acid content of between 4% and 14%.  This is because vinegar with a lower percentage has the danger of getting infected with pathogenic bacteria detrimental to your health.  Although this is unlikely that it would happen to over fermented kombucha without the minimum acidity it still is not officially vinegar.

Here are seven steps to make kombucha vinegar with at least   4% concentration level:

Make strong tea

When making kombucha that is meant to be drinkable like kombucha soda the tea should not be too strong.  Tea which is too strong can make the kombucha bitter and highly caffeinated but when making kombucha vinegar the flavor of the tea will quickly get overwhelmed by the acetic acid and lactic acid. 

To counter this effect you need to make a strong tea which will still be detectable in a strong acidic solution.  When intentionally making kombucha vinegar I double the amount of tea which goes into the same amount of water.  After a few batches you will find a balance you like but for the first one add at least 1/3 more tea to the water as normal for you.

Let it steep longer than normal also as this will help the tannins and other nutrients disperse into the water more thoroughly.  Do not be concerned with the caffeine levels or the bitterness it the leaves as both will mellow as the vinegar ages and you will want the additional body in the final vinegar.

Add the correct amount of sugar

Vinegar is a fermentation driven by the growth of acetic acid bacteria which to grow efficiently and produce acetic acid need the presence of alcohol.  The alcohol comes from the yeast activity in the liquid which is dependent on the amount of sugar in the tea. 

To get a vinegar with a 4% acetic acid level at least you need enough sugar for the yeast to produce an ABV of 8%.  This means you need to add 3 ¼ cups of sugar for a one US gallon batch of kombucha vinegar.  Which seems like a lot of sugar for kombucha and it is if you are going to drink it but you aren’t going to drink it you are going to make it into vinegar. 

The yeasts in your starter liquid and SCOBY are not all high alcohol producing yeast species rather most of them are low alcohol producing species.  The famous Saccharomyces cerevisiae which is the yeast which takes over when making wine or beer are very efficient but because kombucha is a low alcohol drink these less efficient yeasts can proliferate the sweet tea.  As a result less alcohol is produced giving the acetic acid bacteria less alcohol to make acetic acid. 

All that to say you need more sugar than normal to make kombucha vinegar.  If you follow the ratio above your sweet tea will have a specific gravity of about 1.061 or above.  This should give the yeast adequate sugar to produce enough alcohol for the AAB to convert to vinegar.

Add the starter liquid and SCOBY

The starter liquid should be from a recent batch of kombucha, not one which has sat for a while.  You want an active starter liquid with lots of live yeast and AAB cells in it.  This will kick off the fermentation quickly as the yeast can rapidly multiply in the presents of available sugar.  With a sluggish starter liquid the tea will be at risk of unwanted bacterial and mold growth, giving the vinegar an off flavor.

The SCOBY will provide the needed active AAB cells which will begin to convert the alcohol in the tea faster than if it was a dormant SCOBY.  This is necessary as you want to keep the alcohol content as low as possible to allow all the yeast species to contribute to the flavor rather than only the high alcohol tolerant ones.

Ferment until most sugar has been consumed

The concentration of the sugar in your kombucha vinegar will drop rapidly at the beginning of fermentation but as the easily fermentable sugar is depleted the population of the yeasts will diminish as well.  This combined effect will slow the rate the sugar is used until there is little sugar and few active yeast cells in your vinegar.

This process can take a month to six weeks depending on the temperature, population of the yeast species, population of the AAB species and how much sugar was added.  After a month the vinegar will have a low enough pH to ward off any unwanted microorganisms and the population of the various species in the vinegar will be declining. 

At this point you can check to see how much sugar is left in your vinegar a number of ways:

Use a hydrometer

A hydrometer is a weighted glass float with a scale on the inside.  When it is floated in a liquid how high it floats indicates how dense the liquid is. 

The concept is that water has a certain density, which on the scale is 1.000 for distilled water, when you add sugar which dissolves into the water it becomes denser.  The more sugar the denser the water.  As the microorganisms in your vinegar eat the sugar the density of the water will go down. 

This is used mostly in beer and wine making as an indication of the potential alcohol level in a batch of wine or beer and when to rack or bottle.  For a complete explanation of the use of a hydrometer read “Determining the Concentration of Sugar(S) in a Soft Drink on the Basis of Density Using a Hydrometer”.

What to do:

  1. Fill a clean long thin flask with your vinegar
  2. Over the fermentation vessel gently lower the hydrometer into the flask
  3. Read the level where the hydrometer floats at the surface of the vinegar
  4. Pour the testing vinegar back into the fermentation vessel

A reading which is less than 1.000 indicates that the vinegar is less dense than water and that most of the sugars have been consumed.  This is not completely accurate of course because your vinegar is no longer just water and sweet tea.  It also has less dense acetic acid, alcohol and lactic acid in it which all are less dense than water.

Using a chemical color test

This method relies on reactions with special chemicals in the presence of sugar which changes the color of the solution in predictable ways.  So if you mix the chemical with your vinegar the chemical will react with the sugar in the vinegar and change color.  The color indicates the amount of sugar.

For a fuller explanation read “Using Simple Chemical Indicators”.

This method requires special chemicals and experience.  Both of which can be hard to aquire.

Taste test

Taste the vinegar to see what it tastes like.  If it is super tart and tangy then there will be little sugar left.  Unfortunately this method is not very reliable as everyone has a different “sweetOmeter” but after a while you can be fairly certain when your vinegar is ready for the next step.

Pressure bottle test

Pour some of the vinegar into a pressure safe bottle and seal it.  In about a week open the bottle.  If there was any pressure in the bottle the vinegar is still active so leave it for another week or two.

Filter and age your vinegar

Filtering your kombucha vinegar at this point is important to remove the dead cells and other remnants found on the bottom of the jar.  Without this step the vinegar will take on a yeasty off flavor as the flavors of these cells (which are mostly dead yeast cells) permeate the vinegar.

Pour the liquid through a tightly woven cotton cloth and let drain until most of the liquid has flowed through.  Do not squeeze or otherwise force the liquid through as this will force some of the sediment through the cloth.

You can either discard the SCOBY or use it for another batch of kombucha or vinegar. 

Once your vinegar has stopped actively fermenting it is time to filter it and put it into an ageing container.  For this you have three choices:

A sealed container

A sealed container will prevent air flow in or out of your vinegar and allow all of the flavors found in the vinegar to meld together.  The danger here is that there may be fermentation continuing for a while and pressure may build up in the sealed container.  To avoid explosions and loss of vinegar only seal young vinegar in pressurizable bottles and every month or so burp the bottle to release any pressure.  Extend the period of time you handle the bottles depending on if there is built up pressure or not.

An air locked container

These are mostly used for racking wine.  They let pressure out (CO2) but no air in.  This allows some volatile elements in your vinegar to escape along with the CO2 which can mellow the vinegar out. 

Air locks are available at any wine or beer making store and are very inexpensive.  Other methods such as a hose into a glass of water also works but are less reliable as the glass can often be knocked over allowing access to the vinegar to bugs (mostly fruit flies) which destroy the vinegar.

Open air container

A wide mouthed jar with a cloth held on with an elastic band works fine for this method.  It allows free flow of air in and out of the vinegar and produces the most smooth tasting kombucha vinegar.  Storing your vinegar this way allows the acetic acid in the vinegar access to oxygen allowing it to continue to convert any alcohol into acetic acid.  It will also continue to grow a SCOBY as it is mostly the AAB which produce it in kombucha. 

Bottle and age

Once the vinegar is a year old or so it is time to bottle and store it.  Bottle it in sealable containers which can be opened and closed often without a lot of fuss.  Swing top bottles are great for this.  Store the bottles as you would wine in a cool dark location.

Alternatively you could get a wooden barrel to store it in.  This will add another level of flavor to your kombucha vinegar.  The type of wood will give it a deeper texture and add its own flavors as the acid in the vinegar reacts with the wood in the barrel.  This evens out the vinegar and adds esters and other flavor compounds to it.

As the vinegar ages it changes flavor, texture and feel.  It is a good idea to keep a log to keep track of the changes in your kombucha vinegar as it ages.  This will not only be interesting but also help you make new batches which have specific flavors at different ages.

Enjoy at your leisure

At this point your kombucha vinegar will last almost indefinitely.  It has a high enough acetic acid content and low usable nutrients and food energy in it that there is little or no microbial activity in it.  You can use it in salad dressings, dips, sandwich spreads or anything else you use vinegar for. 

Kombucha vinegar is especially good at activating the baking powder when making quick breads.  This is because there is more than one type of acid prevalent in kombucha vinegar.  Acetic acid is the main player but lactic acid is also present and provides an additional boost to the base in the baking powder when it is heated.  If you like really fluffy slightly tangy quick breads then add a little vinegar to your liquids when making biscuits, pancakes or muffins.

Making vinegar from over fermented kombucha

This is a little different.  You didn’t start out with the idea of making kombucha vinegar it just seemed to happen when you left a batch ferment a little (or a lot) too long and it became a tangy undrinkable liquid.  It is no longer suitable for making into kombucha soda but isn’t really vinegar either. 

If you want to convert it into vinegar which will last a long time then you will have to increase the amount of acetic acid concentration in it.  Here is a method which will ensure your over fermented kombucha has enough acetic acid content in it.

  1. Make a new batch of strong tea
  2. Add enough sugar for the acetic acid content needed
  3. Add some starter liquid, a SCOBY and ferment for a week
  4. Combine the two batches and add more sugar
  5. Ferment another 3 weeks before checking the sugar content
  6. Once most sugar has been consumed filter and store in an open container
  7. Bottle and age

This is a less exact process and the amount of acetic acid will not be predictable but it will produce a vinegar which can last a long time and age without incident.

Use the sugar ratio of 3 ¼cups per US gallon as a guide for the new tea.  This will give the culture enough sugar to convert into acetic acid for this amount.  By fermenting it for a week you will have allowed the yeast and AAB cells to multiply enough to restart the fermentation of the over fermented kombucha.

Add enough sugar to total that 3 ¼ cup per US gallon ratio for the original batch.  For example if you make your kombucha with the regular 1 cup per gallon ratio then you need to add 2 ¼ Cups more sugar.

The fermentation time is unknown here so begin checking it for sugar content after three weeks or so and when you are ready filter and store the vinegar only in an open container.  The reason for this is that there may be more sugar present than you expect and you don’t want any explosions when storing in sealed containers and you also don’t want the vinegar to have extra alcohol.

The open container will allow the AAB access to oxygen and they will convert any extra alcohol into acetic acid quickly.  You will notice a large SCOBY forming on the surface of the container as it ages.  Just leave it alone for at least 3 months and then you can filter it again.  If the SCOBY forms slowly you know the acetic acid has slowed their action and the vinegar is almost ready to bottle and age.

At any time you can use some of your kombucha vinegar so don’t think that you have to wait a year to try it.  Make a large batch and use some right away, some in six months and some at a year.  If you make enough you can age it a long time and compare the experience at each point. 

Why Homemade Lacto Fermented Pickles Get Fizzy


When you first start making lacto fermented pickles you will find that a few days into the process if you are using a sealed jar it will start to pressurize and need to be burped (opening the lid momentarily to release CO2).  This is a natural part of the lacto fermentation process and nothing to be worried about.

Lacto fermentation is a process where lactic acid bacteria (LAB) consume sugar producing lactic acid and CO2.  Pickles will become fizzy because of the active LAB in and around the cucumbers during fermentation.  The action of the LAB will slow as the sugar is depleted or when refrigerated.

Lacto Fermented pickles are made in a variety of ways but all of them require the action of LAB which acidifies the cucumbers by using the simple sugar found in the cucumbers for energy.

Fizzy brined pickles have not gone bad

Do not be concerned if your lacto fermented pickles go through a fizzy stage.  This is perfectly normal and to be expected when lacto fermenting pickles.  It is a sign that the LAB are doing their job of acidifying the pickles and in the process releasing some CO2 gas.

It is the CO2 that makes your lacto fermented pickles fizzy.  Cucumbers naturally have LAB on them when they come from the field and like any living thing need energy to live.  In their case they consume the simple sugars which are found in the cucumbers.  As the LAB consume the sugar in the cucumbers they break it down into metabolic energy usable for the cell, lactic acid and CO2. 

The CO2 is just a byproduct of the fermentation process and exists in all forms of fermentation including all methods of lacto fermentation. 

The cucumber fermentation process

The process a cucumber goes through to become a pickle requires specific environmental conditions which protect the cucumber from spoilage while allowing the LAB to multiply and acidify its environment.

Lactic acid bacteria need an anaerobic environment for fermentation

LAB are anaerobic bacteria which means they grow best without access to oxygen (anaerobic conditions) so when you start your lacto fermented pickles you need to have a sealable container such as:

  • Repurposed food grade glass jar
  • Food grade plastic container
  • Swing top glass jar
  • Mason jar
  • Fermenting crock
  • Wooden pickle casks

Any of these are acceptable choices and each will give your pickles a different taste.  Ensure you match the size of the container with the amount of pickles you want to make.

When packing the container ensure the cucumbers are under the liquid.  This can be done using one of these options

  • Specially designed Weights
  • Stones
  • Glass beads
  • Plastic covers

When using a sealed container such as a mason jar or other sealable glass container it is important that you release the pressure from the jar every few days.  Otherwise the jar may explode as the pressure increases which can cause serious injury as well as a big mess. 

You can release the pressure from your container in a number of ways:

  • Burping the container daily
  • using plastic bags filled with water
  • using an air lock
  • using a hose into a cup of water

If you have access to a crock then sealing the top requires adding some water to the groove where the lid sits.  This will prevent air from going in but will allow pressure out of the jar.

Keep the temperature cool

LAB have a wide temperature range where they like to grow but they will grow slower when kept cool.  This is what you want when fermenting cucumbers as it helps the pickles to be crisp and flavorful.  If you ferment you pickles in warmer temperatures the LAB get a chance to break down the structure of the cucumber making which can make them mushy.

A temperature between 13-18˚C. during the first three weeks of fermentation the cooler the better.  If you store them at cooler temperatures they will take longer to ferment but will be nice and crisp.  Be aware that storage temperatures slow the fermentation process down considerably, up to five to 6 weeks.

Molds and yeast need to be inhibited from growth

The main method of reducing yeast and mold growth is by the addition of a salted brine to the fermentation container.  LAB are salt tolerant microorganisms whereas yeast and mold are not.  With the addition of the salt the yeast growth is inhibited giving the LAB the upper hand.

The amount of salt you need to add depends on the weight of the contents of the jar.  To ensure your pickles do not spoil before the LAB dominate the culture and acidify it enough to inhibit mold growth it is recommended to have a 3.5% salt concentration. 

How to calculate how much salt is needed:

  • Weigh the container you are using
  • Pack the container you are using with cucumbers
  • Add filtered water to cover the cucumbers with at least an inch of headroom
  • Weigh the full container
  • Multiply the result by .035
  • Pour out the water and mix the salt into the water until dissolved
  • Fill the container up with the brine and cover

LAB must be able to reach its food source

LAB live in the surface of most vegetables throughout their growth stages but they cannot penetrate the skin on thick skinned vegetables like cucumbers.  To aid the growth of the LAB in your fermentation pierce the cucumbers several times.

This does two things:

  • It helps the salt draw out the sugars in the cucumber where the LAB have easy access to it
  • It allows the LAB easy access to the inside of the cucumber
  • LAB must be given enough time to acidify the cucumbers into pickles

LAB grow slower when kept in cool temperatures so it takes time for them to get into the cucumber and consume the sugar in them.  Especially if you are making whole dill pickles because it is harder for the LAB to enter the cucumber while it still has skin on all sides. 

Sliced cucumbers will ferment faster than whole ones but they still take at least 3 weeks to properly acidify.

Safety aspects of lacto fermentation

Lacto fermentation is considered one of the safest methods of food storage.  In fact fermented vegetables of any type are safer to eat then fresh.  That said there are some precautions you should take when making lacto fermented pickles

  1. Start with clean containers and utensils
  2. Wash all cucumbers under clean running water before packing then into a container
  3. Cover the container to prevent contamination during the pickling process
  4. Refrigerate once the pickles are to your liking or seal them and place them in cold storage

How to tell if your fermented pickles are bad

Lacto fermented pickles will last a long time if they are stored in a cool place in covered containers but like all foods they do not last indefinitely.  Pickles which have gone off are easy to spot and should be thrown away.

Signs of contaminated pickles:

  • Mold growth on the surface
  • Rancid smell coming from the container
  • Slimy or mushy pickles

Can I eat my pickles while they are fermenting?

Of course!  There is not time which your pickled cucumbers go through a stage which they are unsafe to eat.  As the pickles age they will get tangier and less sweet so depending on what you want your pickles to taste like they may not be to your liking but they are not bad or contaminated.

This is how food was preserved before such things as refrigerators.  At the end of the growing season cucumbers were packed into casks and brined to preserve them.  Then the casks were stored in the cellar or some other cool location.  When they were needed or wanted they were retrieved from the cask and consumed.  As the winter progressed the pickles would get tangier and less like the cucumbers which were packed into the cask.