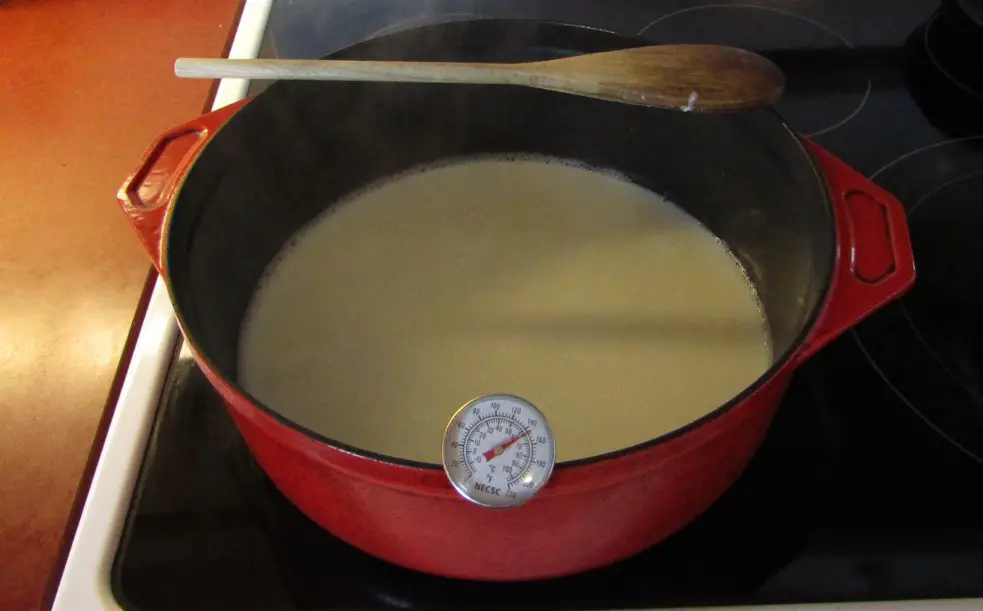
When making yogurt it is recommended that you heat the milk slowly in a pot until it reaches 85 degrees C. and then cool to the proper fermentation temperature. You may wonder why not just heat the milk to its fermentation temperature rather than heating it up so much and then letting it cool.
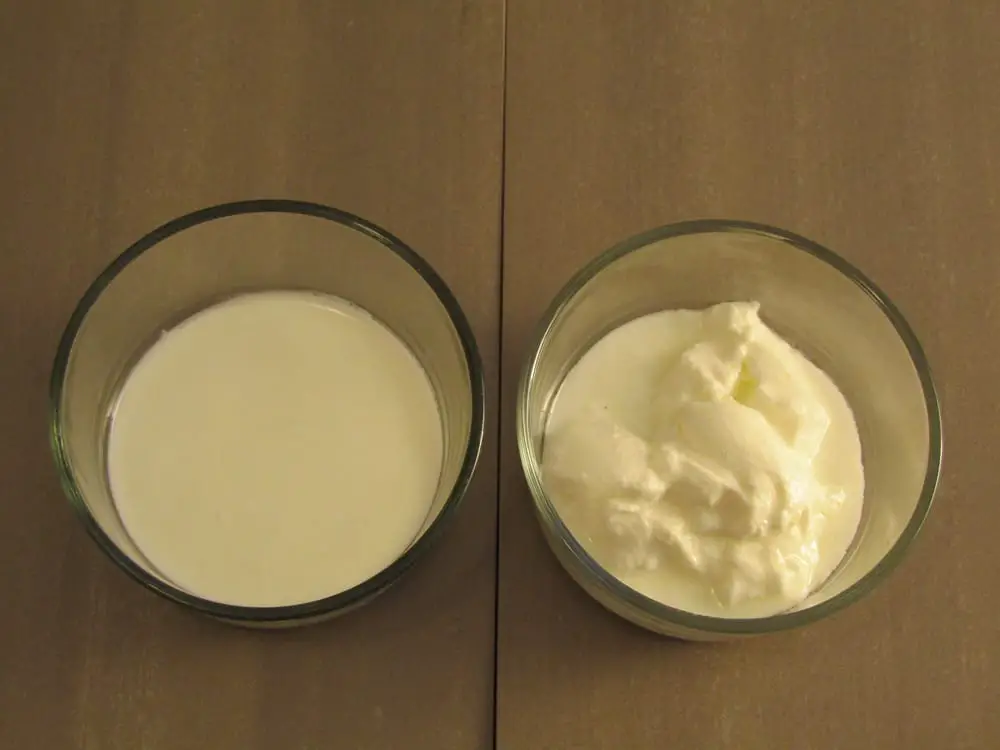
Milk is heated prior to the fermentation process of yogurt production to pasteurize the milk, denature some of the whey protein and to remove some of the water. This prevents spoilage during fermentation and makes a thicker yogurt.
To get the best results when making yogurt, having a good understanding of the processes which take place will help you to alter your yogurt making process to suit your needs. Heating the milk has several other affects which can alter the yogurts characteristics.
Most types of milk fermentation require heating the milk for various reasons but if you find this too bothersome you could always try making kefir. To learn the differences between yogurt and kefir check this article out here.
To pasteurize the milk
There are several types of pasteurization which is used in the milk industry which are differentiated by the temperature and time the temperature is maintained. With each successive increase in temperature there is an associated decrease in microbial activity in the milk.
Minimum pasteurization
This type of pasteurization causes the least amount of changes to the milk. Although the temperature is higher than vat pasteurization it is maintained for only a short period of time.
The temperature reached is above 72 degrees C and held for 15 seconds.
This type of pasteurization is often done at the dairy before the milk is shipped to maintain its freshness and reduce the microbial count during storage.
Vat pasteurization
This type of pasteurization is the most common method of pasteurization for yogurt making. It reduces the microbial population in the milk by destroying any active bacteria or mold. It has no affect on spores which are present in the milk but because the milk is inoculated with a live active yogurt culture the spores do not have a chance to sporulate and dominate the milk. For commercial vat pasteurization milk is heated to 80C/180F for 30 minutes.
High temperature short time
High temperature short time pasteurization is performed at temperatures between 88 degrees C to 100 degrees C. with each successive increase in heat the time required is lowered.
Heating the milk to such high temperatures not only destroys the living microbes in the milk but also destroys the spores making for a longer shelf life for the milk but changing the chemical makeup of the milk, altering its flavor, benefits and behavior which is detrimental to the yogurt making process.
The goal of pasteurization is to give the yogurt culture the upper hand during the fermentation process. Once the culture has populated the milk the milk will begin to acidify making it uninhabitable for the unwanted microbial action to take place. By reducing the population of the unwanted microorganisms ensures the yogurt culture can grow unhindered.
To change some of the whey protein
There are two types of protein in milk, whey protein and casein. The casein protein is very stable due to its structure and remains unaffected by vat pasteurization. The whey protein structure is different and unfolds with the application of heat. This allows the protein to react with other components in the milk as it acidifies.
As the whey protein reacts with the other components in the milk it gels and forms a loose structure. This makes for a thicker yogurt which resists the separation of the curds and whey as the yogurt ferments.
To help reach correct fermentation temperature
When making yogurt there are two different types of yogurt starter cultures:
Thermophilic – requires above ambient room temperature
Mesophilic – requires room temperature
Both types require higher than refrigeration temperature which means that the milk needs to be heated before it is inoculated with the culture for best results. By heating it on the stove and then lowering the temperature to the correct fermentation temperature the starter culture will be able to begin fermenting the milk immediately.
If the milk is inoculated into cold milk and then heated to the proper fermentation temperature, spoilage bacteria can get a foothold and give the yogurt an off flavor.
To change some of the fat structure
As the milk is heated the fat in the milk changes its chemical structure making it easier to react with the whey protein in the milk. This improves the texture of the milk by making it creamier and thickens the yogurt further as the whey protein is included in the solids found in the milk.
High fat milk tends to make a thicker creamier yogurt with a smooth texture but by heating the milk it also increases the yogurts tendency to maintain its structure. This texture is more typical of commercial yogurt.
To improve the flavor
Alters some of the enzymes and other flavor components
Yogurt can have a creamy caramel flavor which goes great with cereal, fruit or in dips and sauces. This caramel flavor is achieved through the heating process where the enzymes and other flavor components in the milk are altered. If the yogurt is heated properly only a few of these enzymes are changed leaving most in their natural state.
Prevents unwanted flavors from microbial growth
If you have ever tasted food which has gone off you will know the affect spoilage bacteria has on the flavor of the food. It has a taste which is inherently unpleasant and ensures that you do not consume any more of it.
The thing is that all food has spoilage bacteria growing in it. Whether they come from the original source, the container or utensils used during fermentation or just from the air, they will be present. By heating the milk up you give the yogurt culture a head start which limits the amount of spoilage bacteria which can grow in the yogurt. This reduces any off flavors which are present in the yogurt.
To remove some of the water
When the milk is heated some of the water evaporates into the air. This makes for a thicker yogurt with a higher fat and protein content. The water in the milk is associated mostly with the whey which is the protein in the milk which helps the yogurt to thicken. With a lower ratio of water to protein the yogurt becomes thicker and more creamy.
To lower the pH
As milk is heated some of the chemical components break down and become more acidic. This helps to lower the pH of the milk prior to fermentation. With a lower pH at the start the yogurt is less susceptible to spoilage and will thicken faster than milk which is not heat treated.
The protein in the milk will begin to thicken once it reaches a pH of 4.6 and will get firmer as the pH drops. Once it gets low enough the whey in the milk will disassociate from the solids and separation will occur. Heated milk will thicken quicker than non-heated milk making for a shorter fermentation period.
Most people who regularly drink commercial Kombucha do not know that the Kombucha they are drinking is actually Kombucha soda. The Kombucha that was consumed for thousands of years was just fermented sweet tea and consumed without any form of second fermentation which we do today.
Second fermentation carbonates the Kombucha, adds flavors and increases its shelf life. Through the second fermentation process the flavor of Kombucha can take on any flavor you can imagine.
Flavor Kombucha with store bought fruit juice
This is one of the easiest ways to flavor your Kombucha. You can use any type of fruit juice as all commercial fruit juice has lots of easily fermentable sugars. Try the usual grape, apple, strawberry, pineapple and mixed varieties often called fruit medalies.
How to use commercial fruit juice for second fermentating Kombucha
Fill the bottle ¾ full with plain Kombucha
Top up the bottle with the fruit juice of your choice leaving a bit of headroom
Cap the bottles and leave them in a warm location out of the sun for 4-7 days
After four days check one bottle for carbonation
Once the desired carbonation has been reached refrigerate to slow further fermentation
When choosing a fruit juice you will get the best results with juices which don’t have a lot of preservatives as these can slow the growth of the microorganisms in the second fermentation leading to longer fermentation times. The most common food preservatives used in fruit juices are:
potassium sorbate
Potassium sorbate has been used for 200 years. It is used to prevent mold and yeast growth but is not as effective in inhibiting lactic acid bacteria which will continue to convert the sugar in the juice into CO2 which carbonates the Kombucha. Potassium sorbate will slow the process of second fermentation somewhat but the Kombucha will still carbonate.
Sodium benzoate
Sodium benzoate is more effective on bacterial strains than potassium sorbate. It is used to inhibit the growth of mold, yeast and bacteria in food. The fact that it inhibits the growth of both yeast and bacteria make it detrimental to the Kombucha culture when juice using this preservative is used. Sodium benzoate will slow the carbonation process of your Kombucha, adding a few days to the carbonation process.
Frozen juice has less preservatives as it is the freezing process which is being used to extend the shelf life of the juice. These types of juice are great for adding a strong flavor to your Kombucha as these juices come concentrated. Only a small amount of the concentrate is needed to flavor and add enough extra sugar to the Kombucha for its second fermentation.
Any type of commercially prepared fruit juice can be used including:
Apple
Grape
Mango
Pineapple
Cranberry
Strawberry
Fruit medalies of various fruits
Flavor Kombucha with freshly made fruit juice
Freshly made fruit juice is not only high in sugar but also carries the benefits of the fresh fruit into the Kombucha. Any type of sweet fruit can be used without adding any additional sugar for the yeast and lactic acid bacteria to use during the carbonation process.
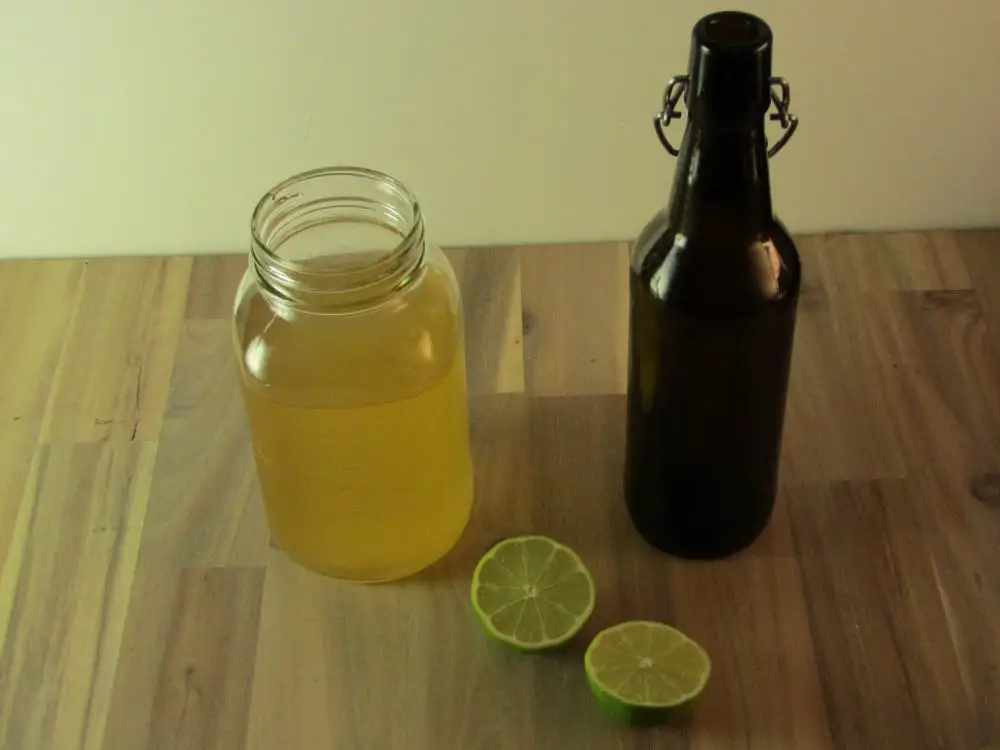
Citrus fruits
Citrus fruits such as oranges or grapefruit can be squeezed using a citrus juicer. They provide good flavors to your Kombucha as the tangy citrus flavor goes well with the tangy lactic acid flavor in the Kombucha. Use about a ¼ cup citrus juice per bottle of Kombucha and be sure to check the carbonation level regularly to avoid over carbonation.
Hard fruits
These types of fruits need a fruit and vegetable juicer. These juicers come in all shapes and sizes as well as price points. If you have access to one of these types of juicers then making juice for second fermenting your Kombucha is a great use for it. If you are going to make kombucha regularly with hard fruits then it is a good idea to purchase a juicer, they have many other uses beyond making kombucha such as making fruit vinegars. Don’t have a juicer? Check prices on Amazon here.
Any type of fresh hard fruits can be used to flavor your Kombucha such as apples, pears and peaches.
How to use freshly made fruit juice for second fermenting Kombucha
Prepare the fruit for juicing depending on the type of juice you are making.
Run the fruit through the juicer to make enough to fill each bottle ¼ full
Fill the bottles ¾ full of kombucha
Top up the bottles with the fresh juice leaving some headroom
Place the bottles in a warm location out of the sun
Ferment for 3-7 days
Begin testing for carbonation after 3 days
Once it is carbonated to your liking refrigerate to slow fermentation
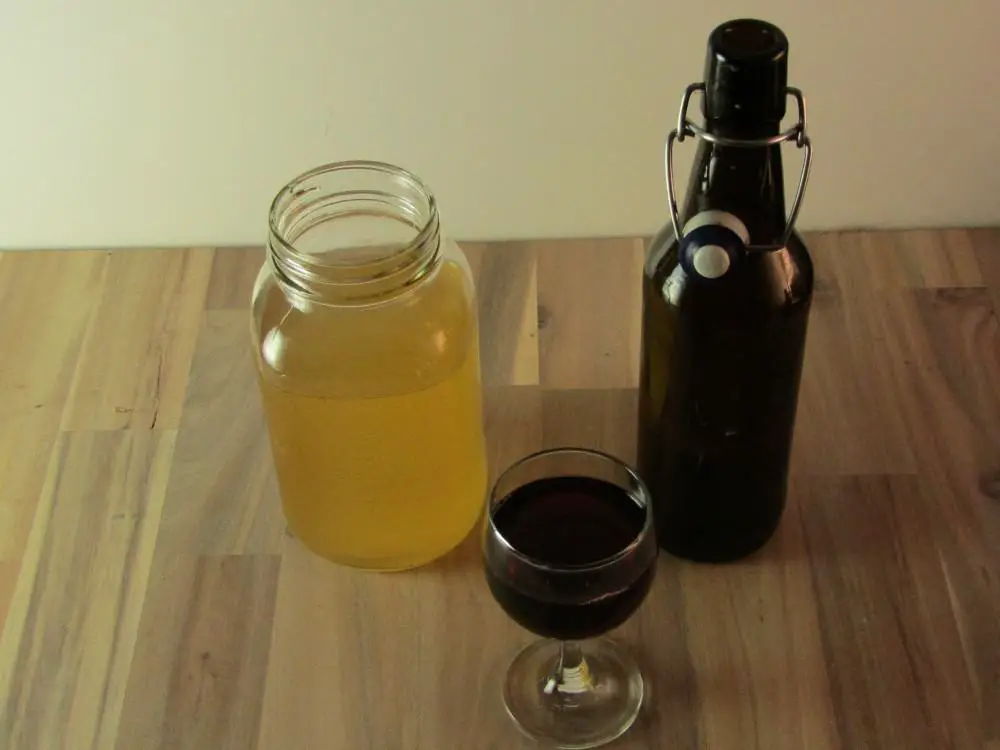
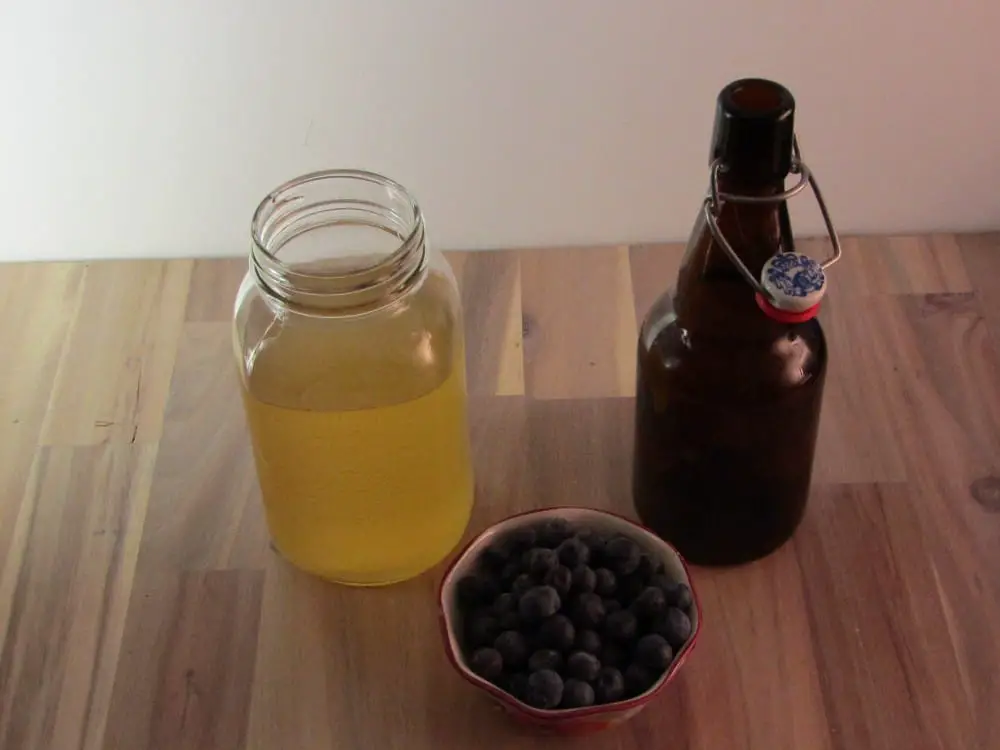
Flavor Kombucha with whole fruit
Whole fruit can be used as well. This is a great way to use small berries in the second fermentation process such as blueberries, elderberries and blackberries. You can also chop up larger fruits into small pieces to allow them to go through the neck of the bottle.
The use of whole fruit adds food value to the Kombucha while supplying enough sugar for the culture to carbonate the Kombucha. Any dark colored fruit adds tannins which have health benefits as well as adding flavor and texture.
When using whole fruit cut the fruit into small pieces to give easy access to the sugar in the fruit. This will shorten the fermentation time while allowing all the flavor of the fruit to premiate the Kombucha. Another way of adding fresh whole fruit to the second fermentation is to blend it up in a high powered blender. This liquifies the fruit and helps the flavor to permeate the Kombucha soda.
How to use whole fruit for second fermenting Kombucha
There are two methods you can use:
Cut the fruit into small pieces
Either cut large fruit into small enough pieces to easily pass through the neck of the bottles you are using or use small fruit like berries which can pass through whole.
Put ¼ cup or so of fruit into each bottle
Fill the bottle with Kombucha leaving some headroom
Place the bottles in a warm location out of the sun to ferment
Ferment for 3-7 days then begin checking for adequate carbonation
Once your Kombucha is carbonated to your liking move to the refrigerator to slow fermentation.
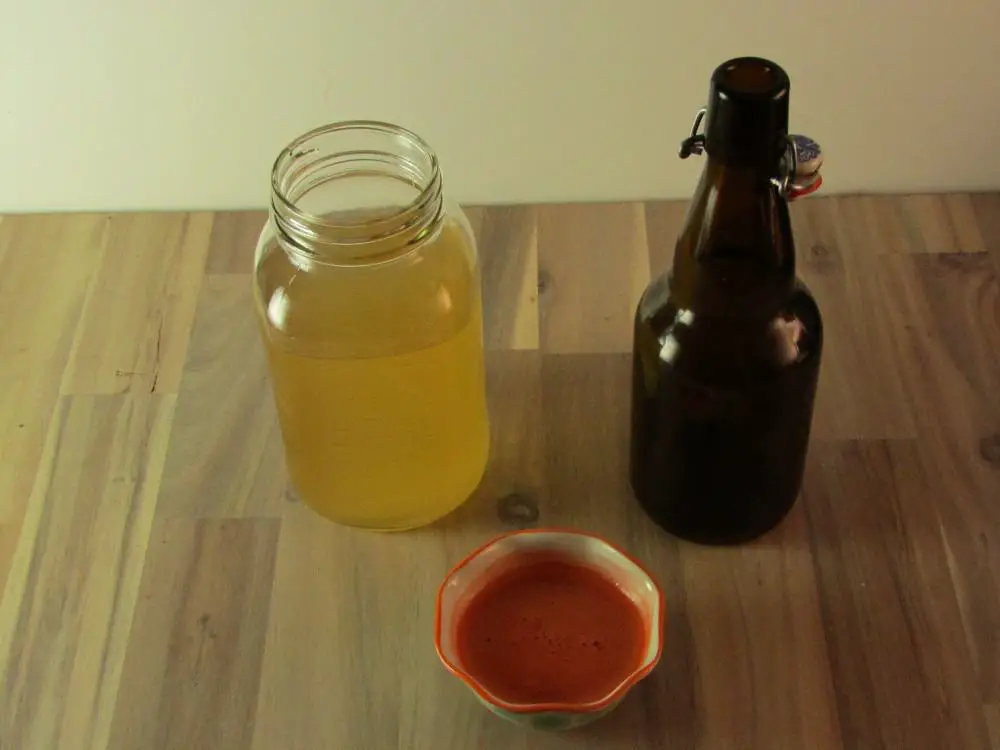
Blend the fruit
Remove any hard pits or unwanted cores of the fruit and put into the blender
Add two cups of Kombucha to the blender
Blend on high for a minute
Fill the bottles ⅔ full of Kombucha
Top up the bottles with the blended fruit Kombucha mix
Ferment for 3-7 days then begin checking for adequate carbonation
Move to the refrigerator once it is carbonated enough for you
Flavor Kombucha with vegetable juice
Some vegetables are high in fermentable sugars which can feed the lactic acid bacteria and yeast to produce CO2. Root vegetables are good ones to start with as they are high in sugar and have flavors which can go very well with Kombucha.
You will need a good vegetable juicer which can remove most of the liquid in the vegetables leaving a very dry pulp. These can be found at kitchen supply stores, health food stores or online. If you plan on using a juicer regularly, get a good quality one as the cheaper versions are hard to clean, don’t make as much juice and can break easily.
Some vegetables to try:
Carrot
Beet
Parsnip
Radishes
Fresh Corn
Fresh Peas
Each of the above vegetables are high in fermentable sugar content providing the Kombucha culture with enough energy to carbonate in the bottle. Other vegetables like cabbage, broccoli and onions have enough fermentable sugar but may conflict with the flavor of the Kombucha. Try them if you are adventurous but don’t be afraid to pitch a bottle or two if the flavor is not good.
How to use vegetables for second fermenting Kombucha
Cut the vegetables into small enough pieces to fit through the juicer
Juice enough vegetables to fill the bottles ¼ full
Fill the bottles ¾ full with Kombucha
Top up the bottles with the freshly made vegetable juice leaving some headroom
Place the bottles in a warm location out of the sun
Ferment for 3-7 days
Begin checking for adequate carbonation after day three
Once it is carbonated to your liking refrigerate to slow fermentation
Flavor Kombucha with Ginger or Tumeric
Ginger and turmeric are in a special category as they are considered a spice as well as a vegetable. They are officially rhizomes which are root like formations which when planted can regrow the plant. This is how ginger and turmeric are propagated.
Both ginger and turmeric are high in sugar but also have many proven health benefits. When they are used to flavor Kombucha they carry these benefits through into the soda improving the positive effect Kombucha has on your body.
One thing to be aware of is the carbonation power ginger and turmeric have on Kombucha. A little goes a long way when using these two in a second ferment. You can use any type of ginger or turmeric, fresh, powdered or juiced. The flavor is strong and can be quite spicy if enough is used.
How to use ginger and turmeric for second fermenting Kombucha
There are three ways you can flavor your Kombucha with ginger or turmeric (maybe more).
Use powdered ginger and/or tumeric
Fill the bottles with Kombucha leaving some headroom
Add ¼ tsp of ginger or turmeric to each bottle
Add a one tsp of white sugar to each bottle
Place bottles in a warm dark location
Ferment for 3-7 days
Begin checking for carbonation after day three
Refrigerate after carbonation is to your liking
Use fresh
Chop the ginger and/or turmeric into pieces small enough to fit through the neck of the bottles
Place one or two pieces into each bottle
Fill the bottles with Kombucha leaving some headroom
Place bottles in a warm dark location
Ferment for 3-7 days
Begin checking for carbonation after day three
Refrigerate after carbonation is to your liking
Juice fresh rhizomes and use the juice
Juice the ginger and/or turmeric in a vegetable juicer
Fill the bottles with Kombucha leaving a little more headroom than usual
Divide the fresh juice between the bottles
Place bottles in a warm dark location
Ferment for 3-7 days
Begin checking for carbonation after day three
Refrigerate after carbonation is to your liking
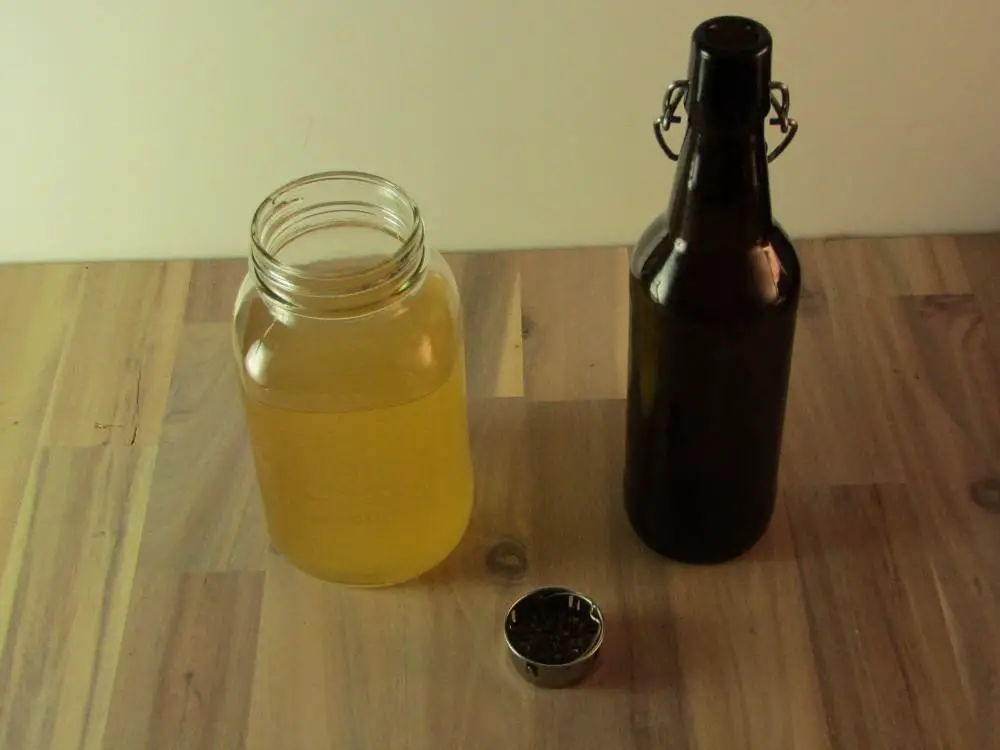
Use dried or fresh herbs
Spices like cinnamon, peppermint and cardamom can also be used to flavor Kombucha. The combinations you can try are unlimited, especially with the availability of dried spices from all over the world. You could try herb combinations including licorice and cinnamon or single flavors such as hibiscus or sassafras.
If you can get fresh herbs they can be added directly into the bottle before filling them with Kombucha. Add small amounts and judge the flavor after carbonation, then you can determine if you want more flavor. Once your Kombucha is flavored you cannot go back.
When using dried herbs to flavor Kombucha use small amounts for each bottle as the spices are very concentrated and can easily overwhelm the Kombucha soda. It is also important to add a little sugar to each bottle to provide additional energy for the lactic acid bacteria and yeast to produce the CO2 needed for carbonation.
How to use dried or fresh herbs for second fermenting Kombucha
Add small amounts of the spice to each bottle
Add one tsp of white sugar to each bottle
Fill the bottles with Kombucha leaving a little headroom
Shake the bottles to help the sugar to dissolve
Place the bottles in a warm dark location
Ferment for 3-7 days
Begin checking for carbonation after day three
Refrigerate after carbonation is to your liking
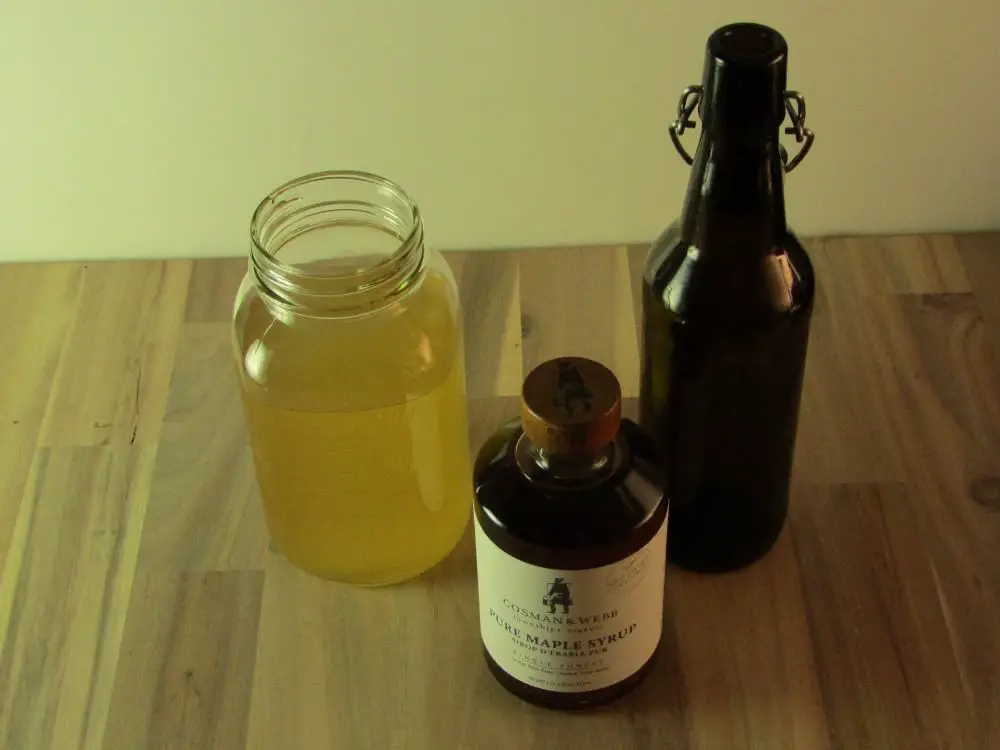
Use tree syrup
Tree syrup is another source of fermentable sugar which can add additional flavor to your Kombucha soda. The usual maple syrup is a good choice as it has lots of flavor with a smoky aftertaste and is readily available in stores.
Birch and palm syrup can be found in speciality stores or if you are adventurous you could tap your own trees. Any maple tree can be tapped as well as walnut, alder and sycamore. The process requires tapping the trees, collecting the sap and reducing the water content of the sap to concentrate the sugar.
If you want to try flavoring your Kombucha with tree syrup begin with readily available syrups and experiment from there.
How to use tree syrup for second fermenting Kombucha
Pour the fermented Kombucha into a container leaving some for the next batch
Add one tsp of syrup for each bottle of kombucha you are making
Stir until the syrup is incorporated into the Kombucha
Fill the bottles with the syrup Kombucha mixture
Place the bottles in a warm dark location
Ferment for 3-7 days
Begin checking for carbonation after day three
Refrigerate after carbonation is to your liking
Use Molasses
Molasses is the syrup left after making white sugar. It is full of minerals and has a strong smoky flavor which adds another level of interest to Kombucha. Molasses comes in a variety of types from light to blackstrap and gets progressively stronger flavored and less sweet. Avoid sulfured molasses as it will inhibit the growth of the lactic acid bacteria and yeast as well as adding a chemical flavor to the Kombucha.
When flavoring with molasses start with the lightest type you can find. Once you have made a few batches and you like the result try a stronger flavored molasses. You can also add other flavors which go with molasses such as ginger for another level or flavoring.
How to use molasses for second fermenting Kombucha
Pour the fermented Kombucha into a container leaving some for the next batch
Add one tsp of molasses for each bottle of kombucha you are making
Stir until the molasses is incorporated into the Kombucha
Fill the bottles with the molasses Kombucha mixture
Place the bottles in a warm dark location
Ferment for 3-7 days
Begin checking for carbonation after day three
Refrigerate after carbonation is to your liking
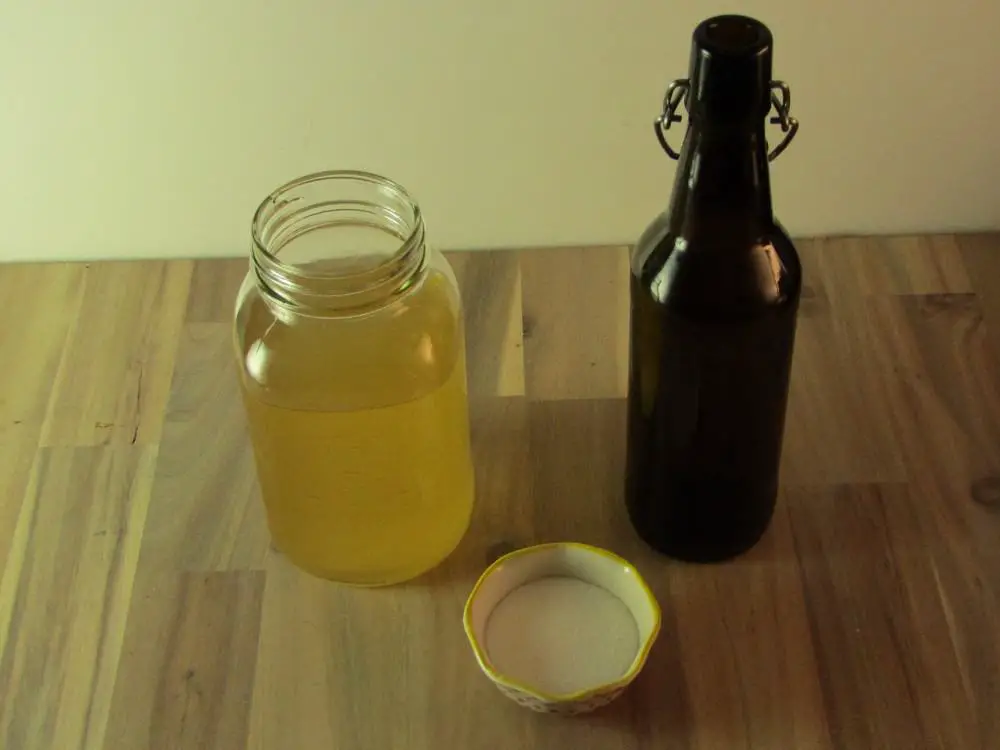
Use plain sugar
Kombucha with no added flavor is another great choice. The flavor of the tea which you used to make the Kombucha comes through so try a variety of teas of different types. There are lots of different types of tea even though they all come from the same plant (Camellia sinensis). Each type of tea provides a different flavor which is noticeable when other flavors are not added during second fermentation.
Teas from the Camellia sinensis plant for making Kombucha
Black teas to try
Assam
Darjeeling
Ceylon
Lapsang Souchong
English breakfast
Oolong teas to try
Tieguanyin
Jin Xua
Da Hong Pao
Tung-ting
Baozhong
White teas to try
Baihao
White Peony
Silver Needle
Long life eyebrow
Tribute Eyebrow
Green teas to try
Sencha
Gyokuro
Genmaicha
Longjing
Gunpowder
Hōjicha
Bancha
Stay away from tea which has essential oils added as they can be bitter and unpleasant.
Herb teas may not have any caffeine in them which is a typical Kombucha ingredient but they still have lots of tannins and other flavor components. Using herbal tea without any flavoring provides additional flavors which are difficult to produce any other way.
The list of herbal teas is endless, all of which have their own characteristics, benefits and flavors. Combinations of herbal teas also add to the varieties you can make.
Some herbal teas to try
Peppermint
Licorice
Chamomile
Rosehip
Rooibos
Cinnamon
Tulsi (holy basil)
Rosemary
How to use plain sugar for second fermentation of Kombucha
Pour off the amount of Kombucha you are ready to second ferment into another container
Add one tsp of sugar per bottle you are making
Stir to dissolve the sugar
Fill and cap the bottles
Place the bottles in a warm dark location
Ferment for 3-7 days
Begin testing for adequate carbonation on day 3
Once it is carbonated to you liking refrigerate to slow fermentation
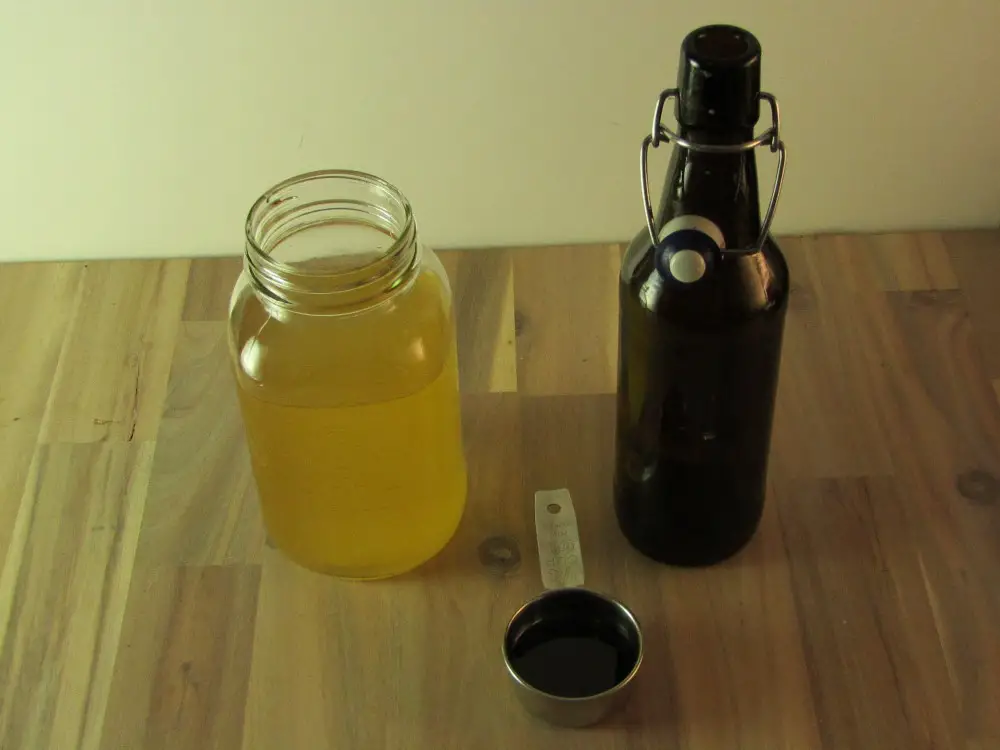
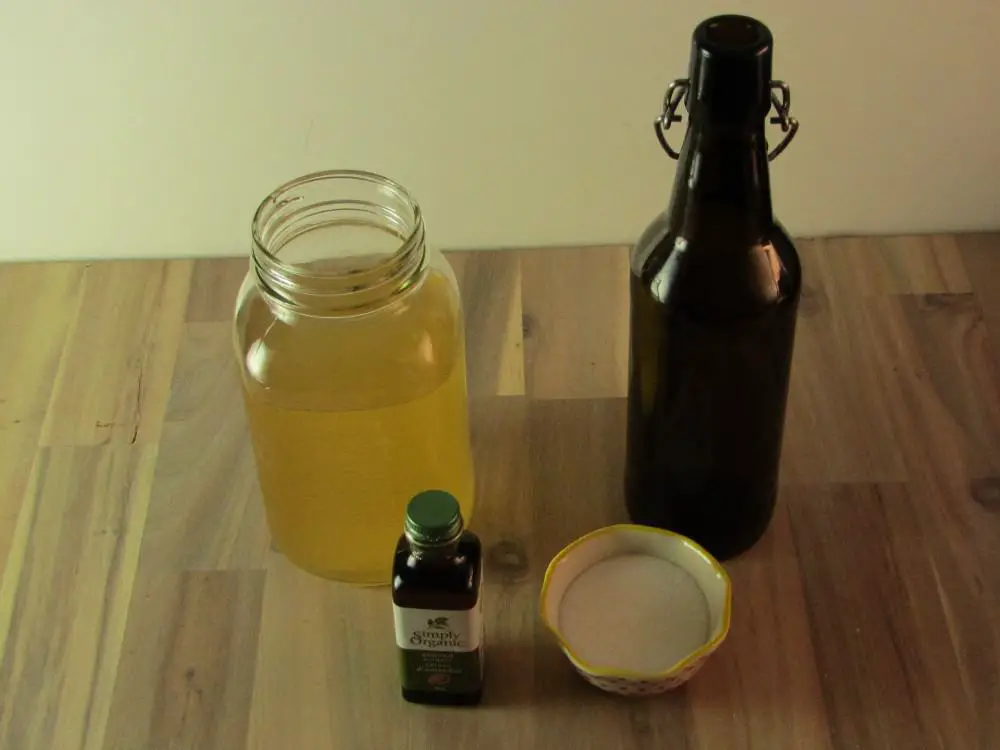
Use flavor extracts
Flavor extracts can be found in the bakery section of most grocery stores. They can be added to the kombucha after the first ferment to add interesting flavors to the Kombucha. With flavor extracts you don’t even need to second ferment the Kombucha if you don’t want to. Instead just pour some into a glass, add a little flavor extract of your choice and drink it.
Flavor extracts are usually alcohol based which provides the acetic acid bacteria with a little fuel but as the carbonation process requires an anaerobic environment they have little chance to use the alcohol and produce much CO2. Instead sugar needs to be added to feed the lactic acid bacteria and yeast.
Some flavors to try
Butterscotch
Carmel
Rosemary
Almond
Ameraeto
Vanilla
Brandy
Chocolate
Coconut
Rum
How to use flavor extracts for second fermentation of Kombucha
Pour off the Kombucha you are going to second ferment
Add a little flavor extract at a time and taste it after each addition
Once you have reached the desired flavor add one tsp of sugar for every bottle of Kombucha you are making
Cap the bottles and place in a warm location out of direct light
Ferment for 3-7 days
Begin checking the carbonation level after day three
Once adequate carbonation has been reached refrigerate the Kombucha to slow fermentation
Additional more adventurous methods of flavoring Kombucha
The different ways of flavoring Kombucha is endless and if you are reading this section you must have noticed the repetition in how each of the above methods are accomplished. This section will give you some ideas for flavorings which normally would be considered strange but once you try a few of them you will be able to come up with some of your own.
Start with coffee for the first ferment rather than tea
Simply replace the tea leaves with coffee grounds when making the liquid for the first ferment. Once it has finished the primary fermentation you can add additional flavorings if you like.
Some second fermentation flavors to try
Vanilla extract
Butterscotch extract
Cocoa powder
Use tree sap rather than water for making the tea
Rather than using water to make the tea use some fresh tree sap. Tree sap can only be collected during certain times of the year so this limits the time frame for this type of flavoring but in the spring it can be an interesting experiment.
You will need
access to tappable trees
A spile
A bucket
A drill with a drill bit
The tree sap will have a little sugar in it but not nearly enough to feed the Kombucha culture so you will have to add some white sugar for the first ferment.
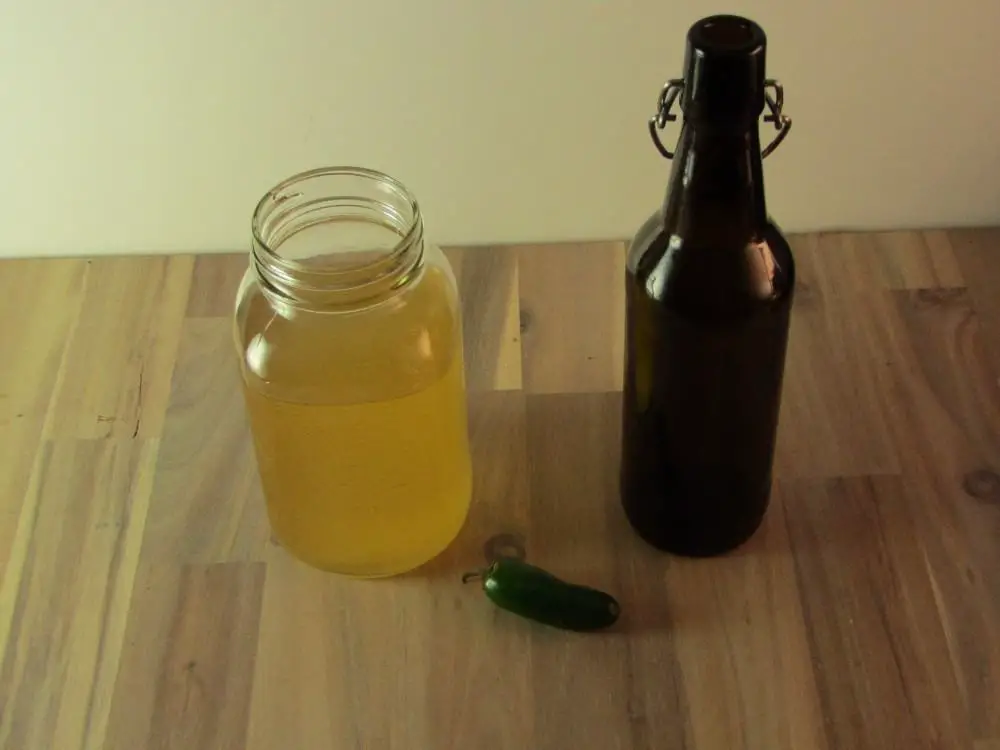
Use hot peppers for the second ferment
There are many types of hot peppers which all have different levels of heat, flavor and color. They can be added to the second fermentation just like any other fruit. They are high in sugar but because of their spicy nature you will not want to add to many. This means you will have to add a little sugar before bottling your spicy Kombucha.
Things to know about hot peppers
The heat in the pepper is in the white pith which the seeds are attached to so if you want more flavor but less heat remove as much of this pith as possible.
The fermentation process increases the spice level of the peppers so the longer they ferment the hotter the Kombucha soda will be.
Each type of pepper has a different level of heat so be selective in the type you choose for the result you want.
Use honey to sweeten the first ferment
Honey can be used to sweeten the Kombucha during the first ferment. In fact if you use green tea and honey for the first ferment the result will be Jun tea which is considered a high end beverage all its own.
Jun tea is usually not second fermented but rather consumed plain after the first ferment. It has a wonderfully smooth flavor and highlights the type of tea you used.
Flavor the second ferment with hops
Hops are a flavoring usually associated with beer or hopped ciders but they can also add depth of flavor to your Kombucha. They add a slightly bitter flavor to whatever they are added to so use them sparingly for the first few times and adjust how much to use as you go.
Ways to use hops to flavor Kombucha
Boil the hops with water and sugar to make a light syrup to use for the second fermentation
Add some hops directly into each bottle of Kombucha.
Blend a few ounces of hops with some kombucha and divide the mixture between the bottles.
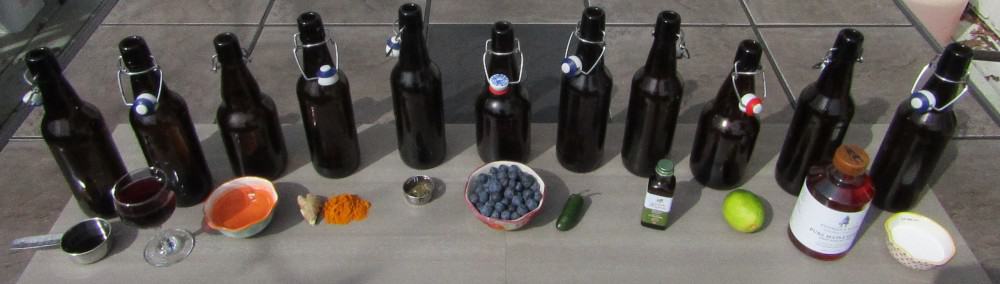
Basic Equipment You Need to Make Nine Fermented Foods
Fermentation has been a part of the human experience since the dawn of time. We have been fermenting things for a wide variety of reasons from food preservation to flavor enhancement and alcohol production. Fermentation is a part of every culture in some way shape or form and has provided us with the ability to survive long winters and hot summers.
If you look at the recommendations for making fermented foods today you will find expensive equipment, toxic chemicals and fear driven marketing designed to make you believe that if you aren’t careful you will poizon yourself unless you buy their product.
Well I am here to tell you that you can start fermenting a wide variety of foods and drinks in perfect safety without all the expensive equipment and sanitation chemicals which are so prevalent in today’s market.
Here is a list of nine different fermented foods you can make with a minimum amount of equipment and little cash investment. Each of these fermentations are great beginner projects. Once you have tried one and you like the result then you can make the decision to invest in more sophisticated equipment if you need and want to.
Some of these fermentations can be made without ever investing in any equipment other than that which you can find in most kitchens already.
Equipment needed for making Kefir
Kefir is the easiest dairy fermentation to make. You do not have to heat the milk, sterilize jars or incubate the milk at a warm temperature. The process is as simple as adding the grains into a clean jar and pouring milk over them. Leave the jar in a cupboard away from the sun for 24 hours and then strain the grains out of the milk.
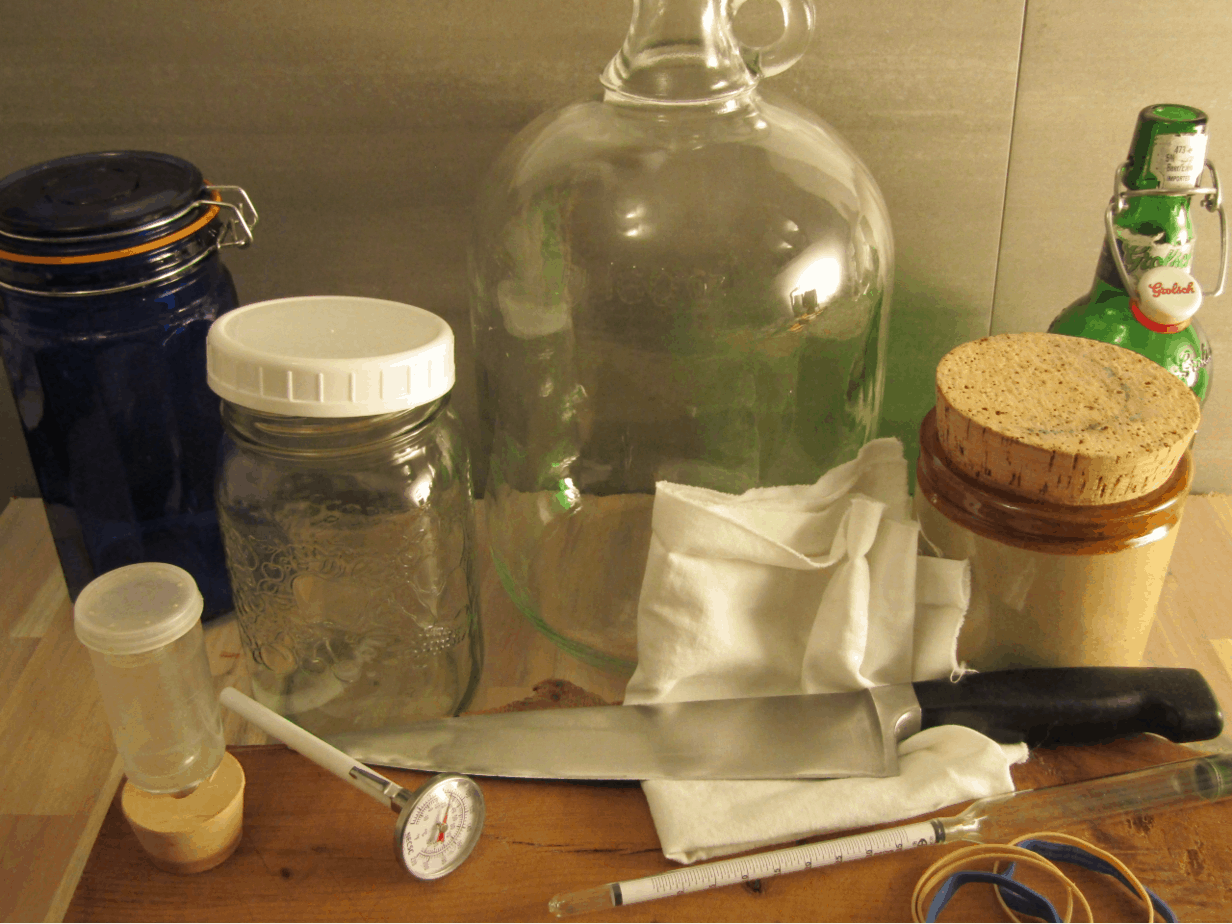
Two non-reactive container like a glass jar
The container only needs to be big enough to hold enough kefir for 24 hours so often a quart mason jar will be sufficient. You will need one to ferment the milk in and one to store the fermented kefir in.
A tightly woven cloth rag of cheese cloth
Any piece of cloth will do just as long as the weave is small enough to prevent any insects or airborne debris from getting into the kefir.
An elastic band
A bowl or other container to collect strained kefir
Use anything which is large enough to hold the strained kefir after it has fermented for 24 hours.
A strainer to strain out the kefir grains after fermentation
Any strainer which fits into the container you are using to catch the strained kefir will do, it can be plastic or metal. Contrary to popular belief a stainless steel strainer will not react with the kefir or the kefir grains so use what you have on hand.
Equipment needed to make Yogurt
Yogurt can be made from two types of cultures:
Mesophilic
Mesophilic yogurt cultures can grow in the ambient temperature of most kitchens (between 18-25℃) and therefore can be fermented much like kefir with the exception of having to strain out the kefir grains. Mesophilic cultures make yogurt which is not as thick as commercial yogurt but they have a wide variety of textures and flavors.
One non-reactive jar with a lid
That is it. That is all. Since all you will have to do is to add some already fermented yogurt into the milk and stir or shake until it is well mixed and then wait for 12-24 hours.
Thermophilic
Thermophilic cultures grow in warmer temperatures than most kitchens (between 30-35℃). This means that you will have to keep the fermenting yogurt somewhere warm while it incubates and for best results the milk should be warmed before it is inoculated. This means that you will have to have more equipment than for mesophilic yogurt.
Glass jar with a lid
Any jar will do here just as long as it has a lid which seals and is large enough to hold the right amount of yogurt you will need. Again a quart sized mason jar should work fine but any other non-reactive container will work (including plastic).
Pot large enough to hold the milk
A non-reactive stainless steel or enameled pot is best here. Copper or cast iron pots can leave trace amounts of metal in the milk which can add unwanted flavors to the yogurt.
Stirring utensil
While heating the milk it is a good idea to stir it often to keep the milk from scalding. Any stirring utensil will work like a wooden or stainless steel spoon.
Thermometer
The milk does not need to boil, it just needs to be heated above 72℃ for a short time (15 seconds). Using a thermometer helps you to know when the correct temperature has been reached.
Warm space to ferment the yogurt
This is where it can get tricky. Thermophilic yogurt needs a steady warm environment to ferment. This is where yogurt makers come in. They are appliances which hold the milk at the correct temperature while it is fermenting but if you don;t have access to a yogurt maker there are several other options.
The oven with the oven light on
Most electric ovens still use incandescent lights for the oven light. These lights can produce enough heat to keep the oven warm enough to ferment a batch of yogurt. Simply place the jar of fermenting yogurt close to the light and close the door. Leave a sign on the oven to prevent others from preheating the oven and cooking your yogurt.
A gas oven with a pilot light
Old style gas ovens have a pilot light which remained lit to start the oven when the gas was turned on. If you have access to such an oven the pilot light will produce enough heat to ferment a batch of yogurt. Place the fermenting yogurt close to the pilot light and leave until it is fermented to your liking.
A cooler with hot water bottles
A cooler can act as a simple fermentation chamber with the addition of some hot water bottles. The water bottles hold lots of heat which can keep the cooler warm for a long time. The danger here is the heat getting too high. To prevent this pre-warm the cooler and only use water a few degrees hotter than you need for fermenting the yogurt.
A crockpot and bath towels
The outside of a crockpot is insulated to keep the heat focused on the cooking container in the middle. By preheating the container the heat can be maintained long enough for the yogurt to ferment when you add a few layers of bath towels to help insulate the crockpot.
This works the best when you make enough yogurt to fill the crock pot container as the larger mass of the milk contains more heat for longer.
Equipment needed to make vinegar
Vinegar fermentation can be done with a minimum amount of equipment to expensive systems which can produce vast amounts of vinegar in a short period of time (link to methods of making vinegar article). At its core it is a two step process where yeast species use simple sugar found in a liquid to make alcohol which is then converted into vinegar by acetic acid bacteria.
For the home vinegar maker there are basically three methods you can try.
Convert an alcoholic beverage to vinegar
This is the easiest method of making vinegar and requires the least amount of equipment.
A nonreactive container like a glass jar or stoneware crock
An air permeable cover like a cotton cloth or tightly woven cheesecloth
An elastic band or some other method of securing the cloth on the top of the container.
Use fresh fruit or other sweet food
You can make vinegar out of almost anything which has fermentable sugars in it. This means you can make any type of fruit vinegar, beet, carrot or any other sweet vegetable. To ensure you have enough fermentable sugars in your vinegar starter read “How to Make Homemade Vinegar Starting with no Alcohol”
To make vinegar this way you will need to add:
A kitchen knife
A cutting board
Which you will undoubtedly have in your kitchen already.
If you want to make vinegar from hard sweet vegetables like carrots or beets you will have to juice them first to get the full potential of flavor from the vegetables. Juicers come in a variety of price points from $50-$1000 dollars or more. The main difference is the amount of juice they get out of the fruit or vegetable. The cheap ones eject a watery pulp and only keep a small amount of the juice whereas the more expensive types produce a very dry pulp and produce much more juice.
If you are just starting out making this type of vinegar stick with fruit vinegar as they do not need to be juiced using this method. Once you have made a few batches of vinegar and you want to try other types then keep your eyes open for a good quality juicer as they go on sale regularly.
Make the alcohol first then convert it into vinegar
This is the most intensive way to make vinegar. It separates the processes of making the alcohol and the acetic acid. This means that you will have to have the equipment for making alcohol as well as the equipment needed to make vinegar.
Equipment you will have to have:
Larger nonreactive container to use as a primary fermentation vessel
Any large glass jar will work for this. You can use one gallon glass jars pickles come in, plastic containers which are food grade storage containers or large ceramic crocks. Just as long as they are large enough to hold enough liquid to fill the secondary container after the fruit has been removed (if you are using whole fruit).
A carboy or demi-john for secondary fermentation
This needs to be a large enough container to hold the strained liquid from the primary container. It can be a one gallon glass container which fruit juice comes in or an official demi-john which can be found at any wine or beer making shop.
The important thing about the secondary container is it must have a small opening at the top which will accommodate an airlock to prevent oxygen exchange.
Some type of air lock
An air lock is a simple device which prevents oxygen from entering the fermentation but allows CO2 to exit. They can be improvised any number of ways:
A balloon over the opening of the secondary container
A hose into a glass of water
A hose used as a water trap
But since airlocks meant for beer and winemaking are so cheap and easy to use this is one piece of equipment which makes sense to purchase. They can be found at your local wine making store or online.
A hydrometer
This is a tool used to measure the specific gravity of a liquid. It is used mostly in the wine and beer making industries to estimate how much fermentable sugar is in a liquid. To make vinegar you should have an ABV of 5-12%. This tool is used to ensure your fermenting liquid will have an alcohol content within this range.
Once you have fermented your liquid into alcohol use the first way of making vinegar to convert it into vinegar.
Kombucha Fermentation
Kombucha is a very popular drink today. It is sold in stores almost everywhere and is produced by both large and small producers but it is also easily made at home with a minimum amount of equipment.
There are two types of Kombucha making:
Batch Kombucha
Batch Kombucha is made by fermenting a batch of sweet tea with some Kombucha starter and a SCOBY (although the SCOBY is not required as the starter will make its own). The equipment needed is very minimal.
A non-reactive container
A cloth
An elastic band
Continuous Kombucha
Continuous Kombucha needs more specialized equipment than batch Kombucha as the setup needs some way of removing finished Kombucha from the bottom of the container while being able to add new sweet tea to the top without disturbing the SCOBY floating on the top.
There are specialized continuous Kombucha kits for sale which include everything you need for making Kombucha this way but if you don’t want to invest in such a system you can improvise with the following things:
A nonreactive container with a spout on the bottom
use any container used for dispensing drinks from a spout on the bottom. These can be found everywhere and are meant for holding water or punch at parties.
Some sort of stand to place your container on
Anything will do here just as long as it is waterproof and solid enough to hold the container when it is full of liquid.
A funnel
The funnel is used to add new sweet tea at the top of the container. Simply slip it into the Kombucha under the SCOBY and pour in the fresh tea so you will not disturb the SCOBY and cause it to sink.
A cloth rag and elastic band to hold it over the top
The weave needs to be tight enough to prevent any bugs or dust from landing in the container.
Vegetable Fermentation
Vegetable fermentation can be simple or complicated depending on the type of fermentation you are performing. In its basic form vegetable fermentation amounts to stuffing salted vegetables into a jar and leaving it in a cool location until the lactic acid bacteria has soured the vegetables.
To do this safely you will need some specific equipment:
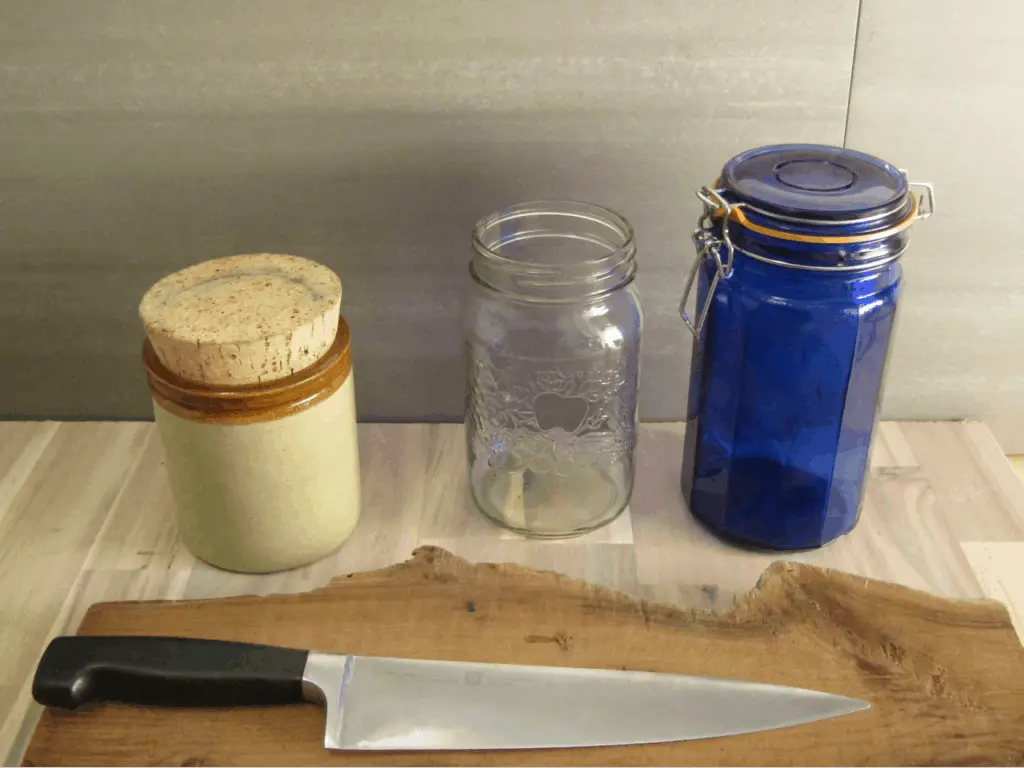
Non Reactive containers
Again glass jars like mason jars are good for this also vegetable crocks which are specially made for vegetable fermentation are available. These crocks include systems to prevent air from getting in as well as allowing CO2 to escape eliminating the need for the next two items.
Swing top jars like the one pictured below also eliminates the need for the next two items as they are meant to hold some pressure but will release it once it gets too high.
Some way to weigh the food down under the liquid
This can be anything from a bag full of water, glass beads or more sophisticated equipment like fermentation weights.
Some way of letting CO2 out of the container while preventing oxygen from entering
This can be accomplished by the above mentioned bag full of water or the more sophisticated mason jar air locks. These can be found at most health food stores or online.
A scale
The scale is used to determine the correct amount of salt needed to protect the fermentation from mold growth. Mold does not like to grow in salty environments so with the right amount of salt, about 2.5-3% by weight, the growth of mold will be prevented while making a fermentation which is not overly salty.
SourDough Fermentation
Sourdough is one of those fermentations which seems to be very intimidating. There is some belief that it is difficult to make and there is some magic mogo needed to make it work properly.
Sourdough is actually easy to start but takes practice to perform well. It can be started in a week with only:
A glass mason jar
A cloth rag
An elastic band
For more information on how to make a sourdough starter read “How to make a sourdough starter”
Equipment needed to make Natto
Natto is a fermentation which is very poporizing. It has a unique texture and flavor which takes some getting used to. It is known to have a wide variety of health benefits including the presence of nattokinase which helps to break down arterial plaque. Making it is simple but requires some method of incubation which maintains a higher temperature and humidity.
To make natto you will need:
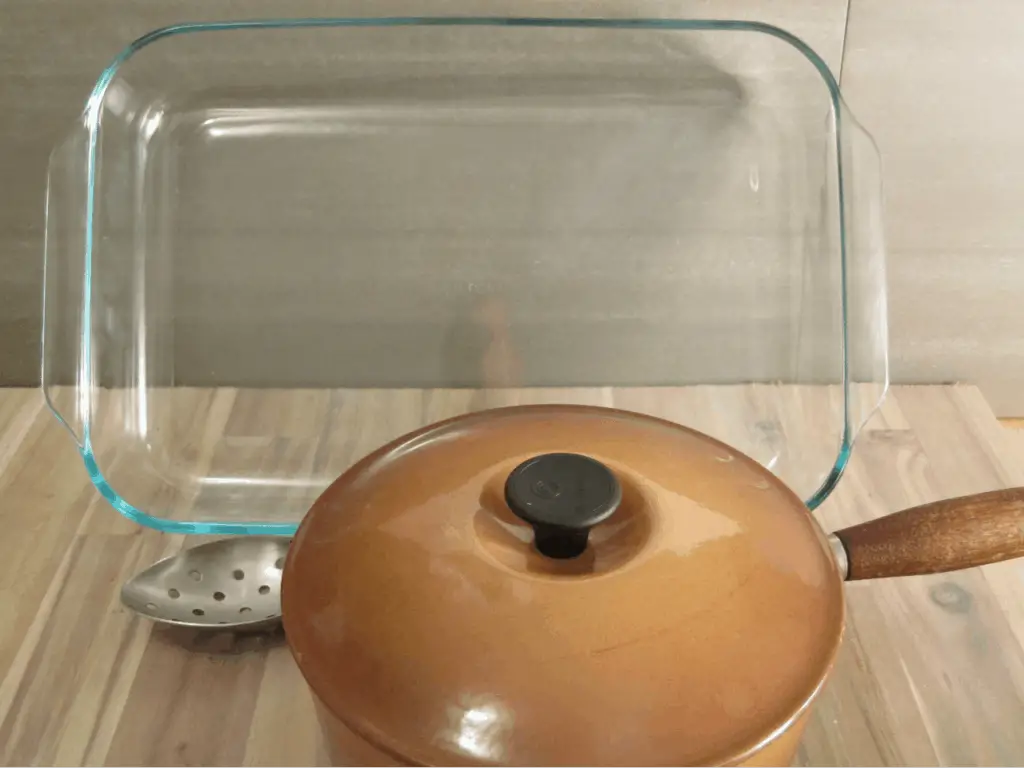
A glass tray
A glass casserole tray or lasagna pan work well for this just as long as the beans can be spread out to a thickness of about 2 inches.
A container to soak the beans
The soy beans which are used to make natto are dry and need to be soaked before they are cooked to release some of the beans protective chemicals and to increase the hydration of the beans.
The container needs to be twice the size of the volume of beans you are soaking in it to accommodate the expansion of the beans as they absorb the water.
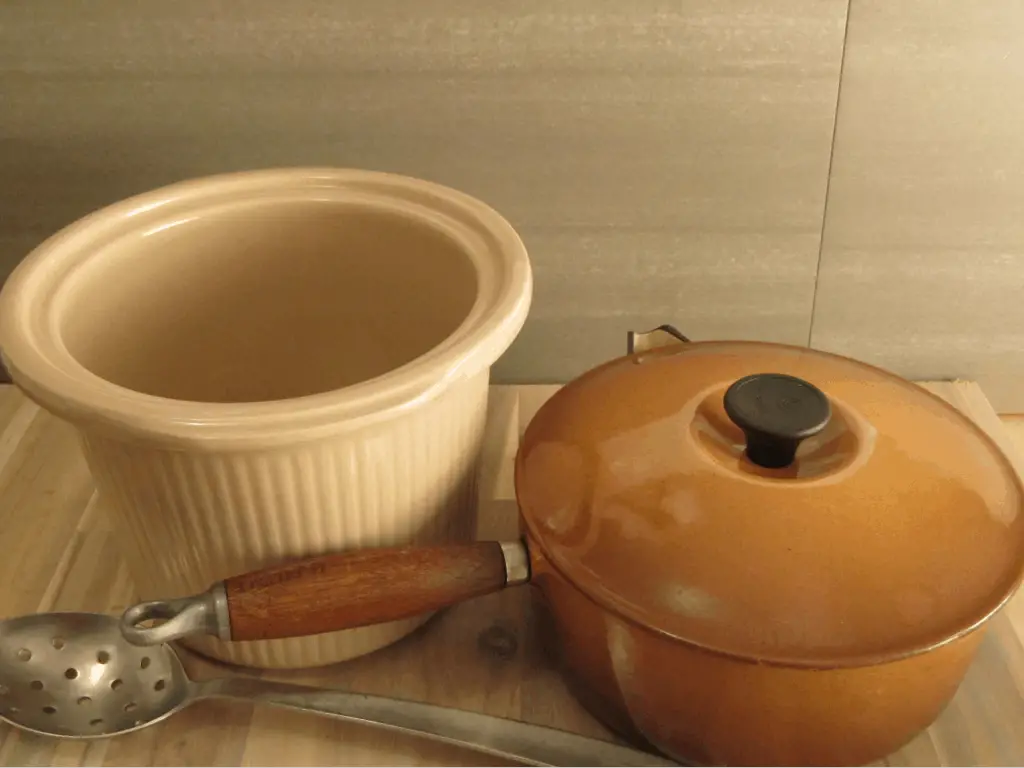
A pot large enough to cook the beans
The beans need to be cooked until they are soft. This can take up to 5 hours so the pot you use should hold a large amount of water to prevent the beans from boiling dry.
Plastic to cover the beans while they ferment
Plastic wrap works well for this. You can also use wax paper or a silicone cover. The idea is to keep the beans from drying out by limiting the evaporation of the liquid in the beans.
An incubation chamber to maintain the temperature for 12-24 hours
There are many ways you can incubate your natto:
Use a dehydrator
Use a cooler and hot water bottles
Build an incubation chamber
Purchase an incubation chamber
Equipment needed to make Koji
Koji is the basis for a wide variety of fermentations including saki, miso and soy sauce. It is a different type of fermentation which uses a single species of mold Aspergillus oryzae. This mold is the mold which breaks down complex carbohydrates into shorter chain sugars. This is in a controlled environment which requires some special equipment to ensure proper koji production.
A container to soak the koji base
Koji is made from either rice or barley and both need to be soaked for varying periods of time. The idea is to increase the hydration of the rice or barley to ensure the mold has enough water to grow.
The container should be non reactive and large enough to hold double the volume of the soaked rice or barley.
A steamer
When making koji you don’t want to saturate the rice of barley by boiling them. Boiling produces a mushy water saturated product which is too soft for the making of koji. Instead a steamer should be used. This will ensure the rice or barley is cooked but still have body and firmness to each of the grains.
Steamers come in a variety of styles from bamboo or wicker steamers to stainless steel versions. You will also need a piece of clean cotton cloth or muslin in the steamer to prevent the contents from leaking down into the water.
A temperature controlled incubator
All the other methods of fermentation depend on the environment or external forces to maintain a steady temperature but when making koji the koji mold will begin to make its own heat. This makes it difficult to maintain the steady temperature needed to produce good koji.
Insulated boxes or warm locations are not the best for koji growth as they cannot react to the heat the mold produces once it starts to grow quickly so you will need to either make or purchase a temperature controlled incubator which can maintain a steady temperature between 28-34℃.
Equipment needed to make Miso
Miso is a soy based fermentation which uses either rice or barley koji to convert the carbohydrates in the soybeans into simple sugars which the lactic acid bacteria then use to acidify the soybean rice mash. You can either purchase koji online or you can make your own.
Miso is an aged fermentation and therefore needs special equipment to ensure the miso matures correctly and produces a quality miso.
A large pot to cook the soybeans
The soybeans need to be cooked until they are soft which can take up to five hours so the pot needs to be large enough to hold enough water to not boil dry during cooking. It is best if it is large enough that no water needs to be added during cooking as this can increase the cooking time. A pot with a wide top helps to skim off the scum and soybean skins which float to the top.
A way to mash the beans and koji into a paste
There are several options here:
Your fist
For those who want to make only a small amount of miso your fist will work fine. Just mash the beans, salt and koji together until your arm feels like it will fall off.
A potato masher
This works for small batches of miso where you either can thoroughly mash the beans and rice together or you don’t care if there is the occasional whole bean in your miso. The gaps in the potato masher allow beans to pass through without being crushed so it can take a long time.
A meat grinder
This is the easiest method. All you need to do is mix the miso ingredients evenly together and run it through the grinder. Once the ingredients have been ground together further mixing is done to ensure the koji, rice and salt are evenly mixed and little or no air pockets exist in the packed miso.
A food processor
A food processor will make short work of the soybeans and can produce a very smooth paste. The trick is to not add the rice or salt until after the soybeans have been mashed or your miso will have no texture.
An air-tight aging container to store the miso while it ferments
Miso is an anaerobic lactic acid bacteria fermentation. The salt kills off most of the koji mold which has broken down a lot of the starches in the rice/barley koji. The addition of the koji adds enough enzymes to break down the starches in the beans and rice/barley mix eliminating the need for oxygen.
A container such as a food grade bucket, fermentation crock or glass jar will work just as long as there is a large enough opening to properly pack the miso into it and allow a weight of some form on the top.
Some form of weight for the top
Once the miso is packed into the container and sealed to prevent oxygen exchange it needs to be weighed down. In traditional miso making the weight was provided by rocks loaded onto the top of the fermentation.
You can use anything which will provide even pressure on the surface of the miso. Most people use a bag of salt which provides even pressure as well as added protection from mold growth.
How to Use Extra Vinegar Mother: Seven Great Choices
When you are making vinegar for the first time you have a choice of systems you can use. There are several methods to choose from with different types of equipment (for an explanation of the equipment you will need read What Equipment is Available to make Vinegar).
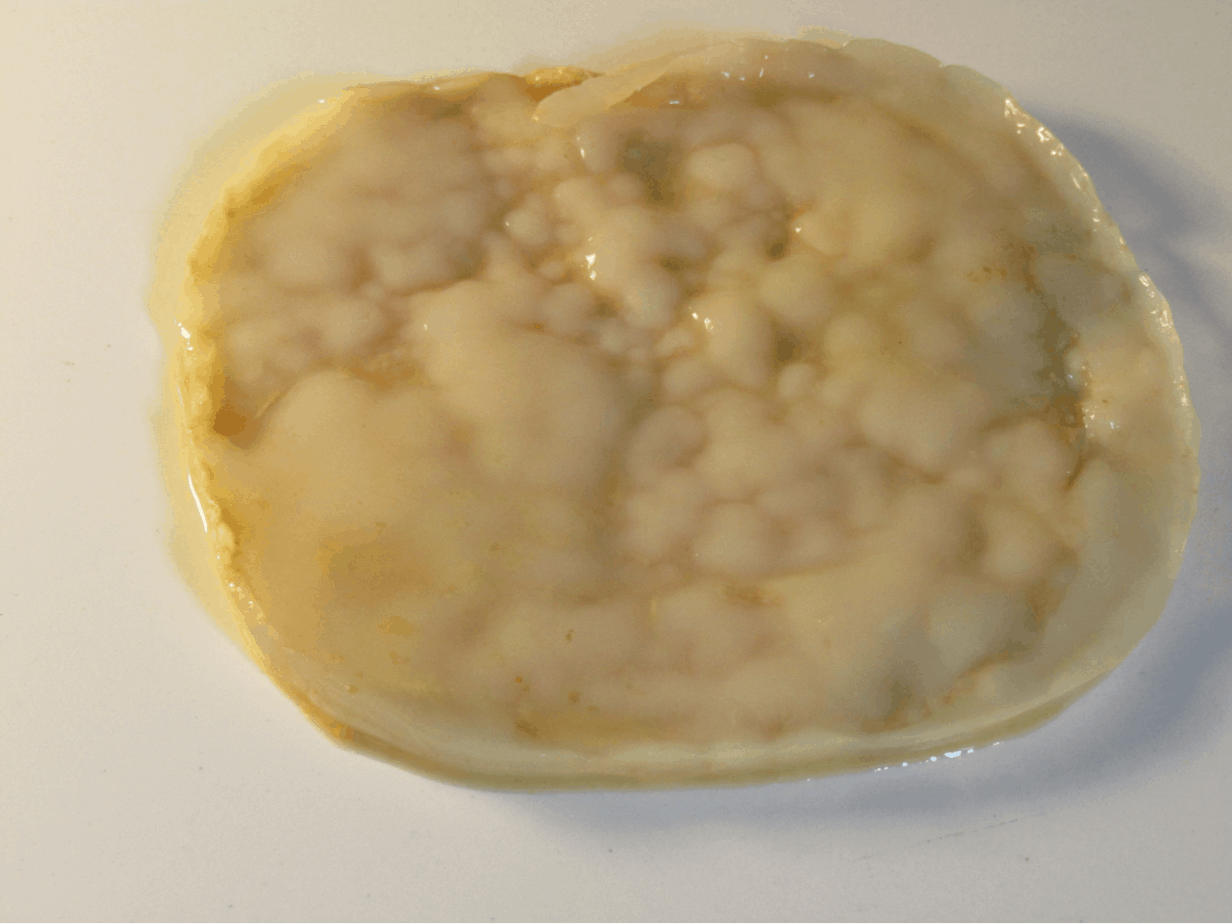
If you choose the jar method or the wooden barrel method you will be introduced to a growth which appears on the surface of the fermenting liquid. It will first appear as a light colored scum like substance and over time will thicken and form a pliable tough covering over the entire surface of the vinegar container. This is a vinegar mother and serves several purposes in making vinegar.
The problem is that every batch produces another vinegar mother and eventually your jar will be mostly vinegar mother rather than vinegar. Instead of just throwing them away, composting them or storing them forever here are some great ways to use some of these vinegar mothers.
Start a Different Type of Vinegar
This is a typical use of extra vinegar mothers, they provide an inoculation step which shortens the time needed to produce vinegar. The vinegar mother has active acetic acid bacteria in and around it which go to work as soon as they are exposed to the new liquid you want to convert into vinegar.
Steps to use a vinegar mother for a different batch of vinegar
Prepare the vinegar base
To use an already established vinegar mother you will need to start with a liquid base which has at least some alcohol in it to start. The vinegar mother has active acetic acid bacteria in and around it which need the energy supplied by the alcohol.
You can either:
Use prepared alcohol
Acetic acid bacteria grow well in an environment with an ABV between 5-12%. This makes it easy to make vinegar from beer, wine or cider which can be purchased at the store. Ensure the ABV is between the above range as without enough alcohol content the vinegar will not be acidic enough for long term storage and to high an ABV and it will not be able to grow properly.
Prepare your own
To prepare your own vinegar base you can use a finished alcoholic beverage such as hgher ABV content wine, or spirits and dilute it to the desired concentration or you can start with raw ingredients as you would for make vinegar starting with no alcohol.
Acidify the liquid
This step will protect the vinegar from mold growth. Molds love warm humid environments high in sugar or complex carbohydrates. This makes the edges of the liquid very susceptible to contamination.
To prevent this you can acidify the liquid before the mold can get a foothold. To do this just add some similar vinegar to the liquid or add some acidic acid powder which can be found at local wine making stores or online.
Add the vinegar mother to the liquid
The vinegar mother does not need to cover the surface of the liquid, float on the top or grow additional layers to be useful for making vinegar. The purpose of the vinegar mother is to inoculate the liquid with the acetic acid bacteria which naturally produce the biofilm and in turn forms the vinegar mother.
By adding some of a vinegar mother to the liquid the active acetic acid bacteria will immediately start to convert the alcohol into acetic acid and start producing biofilm which will become a new vinegar mother.
Why you want a vinegar mother
The vinegar mother in biology is called a pecille. Pecilles are formations of mostly cellulose which makeup a thick mat and house some forms of bacteria. It protects the surface of the vinegar from contamination and provides oxygen exchange with the air into the liquid for the acetic acid bacteria to use while converting the alcohol into acetic acid.
Concerns about using a vinegar mother to start a different type of vinegar
Flavor transfer
Although some of the flavors of the original vinegar will be included by the mother very little of it will transfer into the new vinegar so don’t worry about altering the flavor of your new vinegar.
Contamination from unwanted microorganisms
When you move a vinegar mother from one container from another you are performing a method of inoculation which has been used for centuries called backslopping.
Backslopping will transfer any microorganism from one fermentation to another so this is a valid concern.
To ensure you are not transferring unwanted things into your new vinegar taste the vinegar it came from before you use it. If it has unwanted flavors throw it away. You can always start your new vinegar without a mother.
Old vinegar mother is not active enough
When a vinegar mother matures its density increases and sometimes it will sink to the bottom of the container. This raises the concern that it is not active enough to be useful for making vinegar.
Using an older vinegar mother is not a problem as the acetic acid bacteria which produced the mother will still be present. Once they are introduced to a new batch they will begin to multiply and produce a new mother which will form at the top of the liquid.
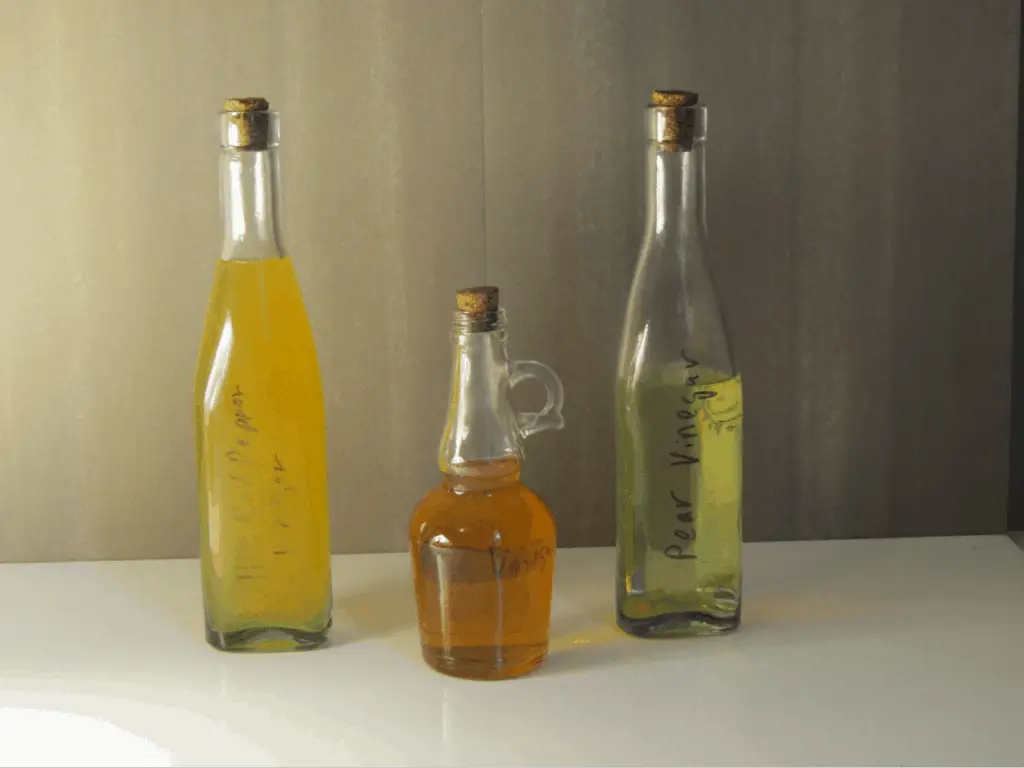
Some recipes to try
Red wine vinegar
A good vinegar for making rich soups, sauces and gravy this vinegar gets better with age either in glass containers or wooden barrels.
Stout beer vinegar
For those who like beer bread or beer barbeque sauce this is a natural. The deep color and flavor of this vinegar goes great with outdoor food or grilled meats
Homemade fruit wine vinegar
This vinegar can have a lighter flavor which is great for light salad dressings, chip dips and shrubs. The tangy flavor adds depth and interest to anything.
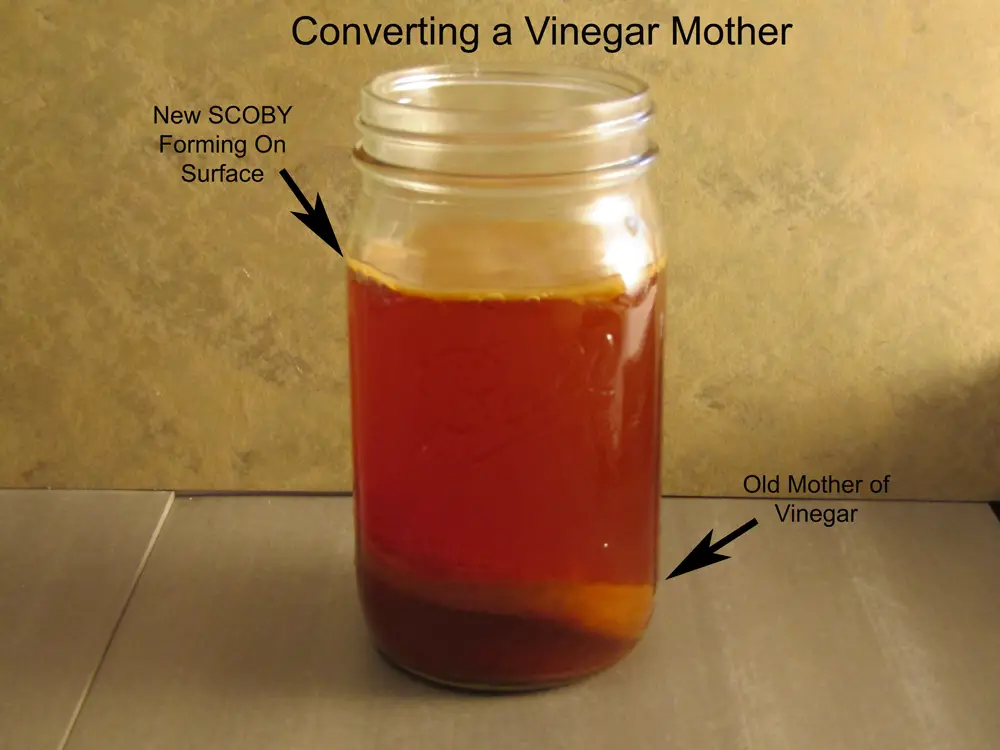
Use a vinegar mother to start some Kombucha
It may come as a surprise to some but a SCOBY and a vinegar mother are closely related. In fact they are made by the same family of acetic acid bacteria.
Vinegar is usually a longer process than making Kombucha taking months to years depending on the type and method you are using to make vinegar. As a result the microbial activity is different. Species of acetic acid bacteria will have different populations and some strains will be measurable where others will not. This does not mean that they are not present, it just means they are such a small population they are not detectable. Once the environment changes to favor their growth their population will grow and the others will decline.
After a few batches of Kombucha the microbial balance will have changed and you will have an official Kombucha SCOBY.
As mentioned above a vinegar mother is a form of a pecille. It is made up of mostly cellulose which the acetic acid bacteria cannot digest for food energy. The cellulose is a form of insoluble fiber which can be utilized by some of the gut microflora found in the human digestive system. It also contains some protein, fat and various vitamins and minerals.
In addition to that it helps to thicken the smoothie, adds an additional layer of tangy flavor and prevents it from separating as fast.
How to use vinegar mother in a smoothie
Prepare the vinegar mother
The next time you have an extra vinegar mother cut it up into inch square pieces and add it to a glass jar. Place the jar not the fridge with a little of the vinegar it came from with it.
Add some prepared mother into the blender
Each time you make a smoothie take one or two pieces out of the jar and add it into the smoothie.
Use a vinegar mother as a thickener
The structure of the cellulose which makes up a vinegar mother is long strings of connected carbohydrates which get entangled together and thickens as the mother ages. These cellulose molecules are very strong and resist being broken apart. This is good when you use it as a thickener as these long cellulose strings also entangle other particles such as the protein and fat found in the gravy, dip or sauce.
How to use a vinegar mother as a thickener
To use a vinegar mother for thickener pour the liquid into a high powered blender along with some of a vinegar mother and blend.
You can reheat the gravy or sauce afterwards if it’s too cool but don’t boil as the heat will destroy some of the heat sensitive vitamins and enzymes found in the vinegar mother.
Depending on the origin of the vinegar mother the flavor of the sauce or gravy will be enhanced with the original vinegar flavor. For a rich beef gravy use a red wine vinegar mother or if you want a lighter sauce use a fruit vinegar mother like Apple cider vinegar or pineapple. Each mother will add another layer of flavor so ensure it goes with the sauce or gravy you want to make.
Benefits of using a vinegar mother as a thickener
It is gluten free
It adds flavor
It makes it tangy
Provides extra vitamins and minerals
Helps with digestion
Provides insoluble fiber
Recipes using vinegar mother as a thickener
Beef gravy
Mexican chip dip
Miso dressing
Using a vinegar mother in quick breads
The acidic nature of the mother helps to add additional rising power to baking soda and baking powder for making biscuits, pancakes and muffins. This is the same effect you get when you use buttermilk or yogurt in quickbreads.
The additional acidity provided by the vinegar mother helps the reaction with the basic rising agent you use. This makes more CO2 which provides a lighter finished product.
How to use vinegar mother in quick breads
Place all liquid ingredients into a high powered blender
Add some vinegar mother
Blend until smooth
Add the dry ingredients and mix until just combined
Keep the acidic ingredients separate from the basic ingredients until the last mixing step. This helps to prevent the CO2 from escaping the batter before it is cooked. Making for a fluffier prohduct.
Recipes using some vinegar mother in quickbreads
Pancakes
Muffins
Gluten free baking with a vinegar mother
Gluten free baking is full of unnatural binders, industrially produced thickeners and flavors which cannot be considered healthy in anyone’s books. By replacing some or all of these chemicals you can still enjoy some baking while avoiding the gluten.
The addition of some vinegar mother helps to thicken the batter, add rising power and flavor the batter as well.
How to use a vinegar mother in gluten free baking
Place all the liquid ingredients in a high powered blender
Add some vinegar mother
Blend until smooth
Mix in the dry ingredients just until combined
Pour into the baking dish and bake
The liquid mix will be thicker and slightly acidic smelling. It will carry the flavor of the vinegar it was grown in so it can taste like red wine vinegar, apple cider vinegar or any other flavor you have made vinegar from.
Recipes using a vinegar mother in gluten free baking
Muffins
Pancakes
Chocolate cake
Grain free baking with vinegar mother
For some who want to avoid starch in any form thickeners and gluten free grains are out of the picture. When making grain free baking it can sometimes be difficult to get a fluffy product. This is because the batter has nothing to hold it together to trap the gas produced by the reaction of the acid in the batter and the basic soda .
Adding some vinegar mother helps in two ways
Acts as a thickener trapping more CO2
Adds additional acidity to the batter
How to use vinegar mother in grain free baking
Put all liquid ingredients into a high powered blender
Add some vinegar mother
Blend until smooth
Add the dry ingredients
Blend until combined
Pour into baking dish or fry pan
Recipes for using vinegar mother in grain free baking
Pancakes or waffles
Muffins
Pound Cake
What Equipment is Available To Make Vinegar? 5 Different Systems
When making vinegar at home you have a lot of options depending on how much money you want to spend, how long you are willing to wait and what type of vinegar you want to make.
There are basically five types of equipment for making vinegar which can be used: a jar with cloth covers, wooden barrels, two containers with fermenting materal, vinegar generators and submersion systems.
Each of these setups have their benefits and drawbacks which when considered can help you make a decision on which type you need.
Jars with cloth covers
This is the cheapest and most used method of making homemade vinegar. It produces vinegar which can be very good of any flavor. The equipment can be found right in your kitchen without purchasing anything besides the ingredients needed to make the vinegar.
Equipment description
One glass jar with a wide mouth opening
Fine woven cotton cloth
Elastic band
Making vinegar is a two-step process which requires the production of alcohol and then the conversion of the alcohol into vinegar. This means that you need two types of microorganisms in the liquid:
Yeast to make the alcohol out of the sugar in the liquid
Acetic acid bacteria to convert the alcohol into acetic acid
When you put a sugar solution into a jar naturally occurring yeast will begin to convert the sugar into alcohol. If you were to seal off the liquid from the air the alcohol level will continue to rise until it either kills the yeast in the liquid or the yeast runs out of digestible sugar.
By using a wide mouthed jar you are giving the acetic bacteria access to oxygen allowing it to grow and use the alcohol produced by the yeast to make acetic acid (vinegar).
The liquid also needs protection from collecting dust and bugs which is where the cloth and elastic band comes in. The cloth provides a barrier from outside contaminates but allows free oxygen exchange.
Benefits of using jars with cloth covers
Most inexpensive method
Jars of any type can be utilized. Wide mouth mason jars, old pickle or condiment jars and glass beverage containers can be used.
Any type of cotton cloth can be used just as long as the weave is small enough to prevent dust and insects from getting into the liquid. An old T-shirt, stained sheet cut into pieces or go all out and buy some cheese muslin with a tight weave.
Can be used for continuous vinegar making
Glass containers with a spout on the bottom allow vinegar to be drawn off at any time. These can be found for distributing beverages and come made from glass, ceramic and plastic. Do not use the plastic ones as they may not be meant for long term storage of acidic liquids and may leach chemicals into the vinegar.
Drawbacks of using jars with cloth covers
Takes a long time
This method relies on the oxygen exchange from the open top of the jar. The limiting factor being the amount of oxygen the liquid can absorb. The ratio between the surface area and the volume of liquid is the limiting factor. The higher the surface area the faster the vinegar will be ready.
Glass does not add flavor depth
Glass is impermeable and cannot impart any additional flavor to the vinegar. This is good and bad as some vinegar flavors can be harsh and sharp tasting which the glass cannot mitigate.
Wooden barrels
The wooden barrel method of making vinegar has been used traditionally throughout history. The wooden barrel was the cheapest and most reliable method of storage and shipping goods for centuries. Making vinegar in wooden barrels can be as easy as one barrel tipped on its side with holes drilled in the ends to let the air in or an elaborate system of different types of wood and sizes of barrels used.
Equipment description
Used barrels from the whiskey or wine industry make great vinegar barrels which can add additional flavors stemming from the type alcohol it was used before. You can also get new barrels which have a varying amount of toast which provides different flavors for your vinegar. The barrel must be in good shape without any signs of decay or damage.
A wooden barrel of any size or type of wood can be used to make vinegar with a few adaptations. A barrel used for making vinegar should have a bung hole in the side which allows the liquid to be added to the barrel and one hole on each end of the barrel to allow air flow. The holes are covered over with a fine mesh screen or cotton wool to prevent insects from entering.
The barrel is placed on its side and filled 2/3 full and left to ferment for 6 months to a year. Leaving the barrel 2/3 full helps the acetic acid bacteria to have access to oxygen which it needs to grow and convert the alcohol into acetic acid.
Benefits of using wooden barrels for vinegar making
Add additional flavor and complexity to the vinegar
Depending on the type of barrel you use the flavor of the vinegar will change. Using used whisky or wine barrels will add flavors which came from the original use. Which can provide great depth of flavor to any vinegar. Try to match the vinegar type to the barrel. Use old whisky barrels for apple or pear vinegar and use old wine barrels for grape wine vinegar. That way the flavors tend to match.
New wooden barrels of all wood species can be used including oak, cherry, chestnut and even cedar have been used. When making balsamic vinegar several types of wooden barrels are used throughout the process to add flavor and complexity to the finished vinegar.
Can be used to age vinegar over a long period of time
The typical example for long aged vinegar is balsamic vinegar which is regularly aged up to 25 years in consecutively smaller wooden barrels but other types of vinegar is also aged in wooden barrels like rice vinegar which has been stored in wooden boxes made from cedar and aged up to 20 years.
Higher volume of vinegar can be made
Wood is a strong material which can be used to make barrels of very large sizes without the worry of breakage. Barrel sizes and cost range can be found in the table below.
Can be used for continuous vinegar making
Most barrels come with a bung hole on the top and a spout on the bottom. This allows you to add additional sweet or alcoholic liquid to the top of the barrel and drain some finished vinegar from the spout when needed.
This will provide a continuous supply of vinegar without interruption or having to transfer large amounts of vinegar all at once.
Drawbacks of using wooden barrels for vinegar making
Requires a dedicated space
Wooden barrels are larger and are difficult to move around. Not like small glass jars which can be moved around in the pantry. They can be heavy and take up a fair amount of space so dedicated space for them is a must.
More expensive
Wooden barrels are not used for storage of commercial goods any longer so they cannot be found just lying around. If you want a useable wooden barrel you will have to buy one.
They can be purchased used form local wineries, directly from wooden barrel manufacturers or online.
Takes time
Wooden barrels also limit the amount of oxygen exchange because of the small holes which the air may travel through, no mechanical advantage and the ratio of surface area to volume is limited.
Different sizes and cost range for each
Barrel Size in Gallons
Barrel Size in litres
Cost Range in US dollars
0.26
1
$50 – $70
0.52
2
$60 – $85
0.78
3
$70 – $95
1.32
5
$90 – $130
2.11
8
$140
2.26
10
$125
3.9
15
$170 – $190
5.3
20
$160 – $210
6
23
$205
7.9
30
$225
10.55
40
$255
13
50
$285
18.4
70
$335
100
26.4
$410
53 used
200
$100
Two containers and wood chips
This is using the Boerhaave Process which was developed in the late 17th century. It can speed up the production of vinegar from months to weeks by increasing the surface area which the acetic acid bacteria have to grow.
The Boerhaave Process of making vinegar works by transferring the liquid from one container filled with sticks or vineyard cuttings to another. As the liquid flows down the filler it gets exposed to oxygen which the acetic acid bacteria use to convert the alcohol in the liquid into acetic acid.
Equipment description
The equipment is made up of two containers with a fine plastic mesh screen on the top like those used for making sprouts and some type of wood chips like those used for adding toast to wine or smoking meat.
The containers are filled loosely ¾ full with the wood chips and the screen is placed on top. You can also add a cotton cloth with an elastic band to keep out small insects if your screen is not small enough.
One of the containers is then filled with vinegar base. Then daily ¾ of the liquid is poured from one container into the other.
This increases the surface area which the liquid is exposed to oxygen helping the acetic acid bacteria to grow quickly and convert the alcohol into acetic acid.
Benefits of using two containers and wood chips
Faster than passive methods
Once the wood ships get saturated with the liquid and the yeast start to make alcohol acetic acid bacteria start to grow rapidly. The surface area which allows oxygen exchange increases drasticly as the wood chips become saturated with the acetic acid basteria.
Moving the liquid from each jar daily keeps the wood chips wet and prevents mold growth while the pH drops.
Can add different flavors without expensive equipment
The wood chips add flavor to the vinegar which are similar to those which can be achieved from using wooden barrels. Each type of wood chip will provide a different flavor. You can also use non-reactive materials like charcoal or add additional flavors by adding dried fruit or vegetables to the mix.
Drawbacks of using two containers and wood chips
Requires daily attention
You have to move the vinegar from one container to the other on a daily basis to prevent unwanted bacteria from growing in the wood chips because the environment at the beginning of the process is not acidic enough. Without the daily agitation of moving the liquid from one container to another mold or other unwanted growths can get a foothold and spoil the vinegar.
More space needed
You will have to find a larger space with easy access so you can move the liquid from one container to another easily. You also need twice the amount of space for the same amount of vinegar as it is now spread out between two containers rather than one.
Can be messy
The transfer from one container to the other can and will cause spills which need to be cleaned up. this method leads to more mess than the other methods just due to the daily pouring of liquid from one place to another.
Vinegar generators
Vinegar generators are a modern version of the Boerhaave Process method of making vinegar. It is designed to increase the surface area which the acetic acid bacteria can grow. This gives them greater access to oxygen helping them to grow and convert the alcohol into acetic acid. With the increased surface area the amount of time it takes to convert the alcohol into acetic acid is greatly reduced and the acetic acid content can be much higher.
Equipment description
A vinegar generator is made up of a collection tank on the bottom of another container filled with wood shavings, charcoal or flavorings. The liquid in the bottom container is pumped from the bottom container into the top one. Which then filters down through the top container back into the bottom one.
Benefits of a vinegar generator
Faster method than jars or wooden barrels
The surface area is increased just as it is using the two jar method. The filler used in the top container provides a good place for the acetic acid bacteria to grow and produce acetic acid quickly. This shortens the time required for converting the alcohol into vinegar.
Less effort required
The generator works automatically once it has been set up and filled with sweet liquid. There is no pouring from one container to another like the two jar method and you will not have to remember or be tied down to care for your maturing vinegar.
Can make different flavored vinegars
Just like the two jar method you can use different types of wood chips, non-reactive material or add dried fruit or vegetables to add different flavors.
Drawbacks of a vinegar generator
More expensive
A vinegar generator is made up of expensive parts:
Pumps
Stainless steel or acid resistant plastic containers
Hoses and fittings
Screens and filters
Whether you are going to make your own or purchase one it is going to cost you upwards of $100 – $400. Compared to a free glass jar with a cotton cloth this is considerably more expensive.
Requires a dedicated space
These machines are larger and require more space. Depending on the volume you are making they may require a dedicated floor space away from any living quarters. They also need to be kept warm so a cold garage will require more energy for heating the vinegar while it ferments.
Requires electricity
This is the first system which requires pumping liquid from one container to another. It requires some form of electricity to run the pumps and heater to keep your vinegar at optimum temperature.
Requires maintenance
Anything with moving parts will need regular maintenance. the hoses will need cleaning, pump servicing and regular deep cleaning to prevent vinagar spoilage.
Submersion vinegar making system
The submersion method of making vinegar is how most industrially produced vinegar is made. It can convert large amounts of an alcohol solution into vinegar in less than a day when the proper acetic acid bacteria are active. It does this by providing adequate amounts of oxygen to the alcoholic solution which encourages rapid growth of specific acetic acid bacteria called Acetobacter. This type of acietic acid is used because it does not produce much biofilm which hinders the efficiency of the equipment.
Equipment description
The equipment for using the submersion method is made up of large vats open on the top with a bottom aeration system which pumps air through the liquid. It requires pumps, hoses and air dispersal methods to evenly distribute the air throughout the vats. To maintain optimal vinegar production it must be temperature controlled.
The air has to be filtered to prevent unwanted particles from entering the vinegar and causing unpleasant flavors.
Benefits of the submersion method
Fast vinegar production
This system can make vinegar in a matter of hours to days depending on the temperature and air flow going through the liquid. As the air is pumped through the liquid it gives the acetic acid bacteria enough oxygen to grow at a super-fast rate which acidifies the liquid quickly.
Consistent results
This is a controlled process which when done correctly will produce consistent results. Making the same vinegar over and over with the same flavor. This is great for certain applications.
Drawbacks of the submersion method
Large dedicated space required
This is a professional piece of equipment meant for producing large amounts of vinegar in a short period of time. It takes up a large amount of space which must be dedicated strictly to the purpose of making vinegar.
High equipment cost
These start at $1500 for a small contained unit and just go up from there.
Requires electricity for heating and pumps
The electrical demand is high on these units as they need to push vast amounts of air through the alcoholic liquid and maintain a strict temperature range.
Needs regular maintenance
These units need to be cleaned regularly. During the vinegar making process some of the bacteria produce a biofilm which in the slower methods are prized and used to inoculate further batches but these same biofilms clog up filters, screens and pumps which reduce the efficiency of this type of vinegar making equipment.
Vinegar lacks flavor
The short fermentation time lowers the variation in flavor which makes slower fermented vinegars so flavorful. Since this process only a few types of acetic acid bacteria are used to produce the vinegar the flavor is thin.
Must start with an alcoholic solution
These systems are made to convert already fermented alcoholic liquids into vinegar. Using them with sugar saturated liquids like can be used in all the other methods will produce unsatisfactory results and damaged equipment.
Other equipment for vinegar making
Vinegar making can be started with a bare minimum of equipment and can make some great tasting vinegars from a wide variety of base materials. The challenge is that you will not know how your vinegar will taste until after it has been fermented and aged, which can be months from when you started it.
Occasionally a batch of vinegar will not taste that good. It may have a musty flavor, acidity too strong or too weak or the flavor is too strong or too weak. When this happens it is really disappointing because of all the work and time which went into it.
Some of this can be avoided with some testing equipment and the knowledge of how to use it.
Testing equipment used for vinegar making
Hydrometers
A hydrometer is used to measure the density of a liquid. It is used mostly in wine making to measure how much fermentable sugar is present in the liquid prior to fermentation. The more sugar in the liquid the higher potential alcohol of the wine.
In vinegar making it is used for the same purpose with an added step. When making vinegar which is meant to be aged or used for other preservation projects it must have a low enough pH to prevent spoilage or contamination from pathogenic bacteria. The hydrometer is used to ensure enough alcohol is available for the acetic acid bacteria to convert into acetic acid to ensure a low enough pH.
Equipment description
A hydrometer is a long glass tube with a weight on the bottom and a graduated scale contained in the glass. It comes with a long thin beaker which is used to hold a small amount of the liquid you are measuring.
Benefits of using a hydrometer
Ensures correct sugar levels in initial fermentation for desired acidity level
Measures the final sugar levels of the liquid to ensure fermentation is complete
Drawbacks of using a hydrometer
Requires knowledge to use correctly
Is susceptible to incorrect readings
Acidity testing kits
These are used to test is your vinegar has enough acidity for long term storage. Vinegar without the proper acidity content should not be stored for long periods of time. They can also be used to determine if the vinegar has finished converting the alcohol into acetic acid.
Equipment description
An acidity testing kit comes in a two types:
Paper strips with a color comparison chart
The paper strips are covered with a coating which reacts with the acid and changes color. The strips are dipped into the vinegar you are testing and the color the paper changes to is compared to the color chart to determine the liquids acidity level.
Benefits of using paper strips
Easy to use
No waste of vinegar
Fast results
Drawbacks of using paper strips
Hard to accurately read results
Electronic pH tester
These easy to use and come in a variety of styles and prices from less than $20 to more than $200 depending on your needs. To operate them you simply have to dip the tester into the vinegar and the display will tell you what the pH of the liquid is. Most of the more expensive ones can be calibrated accurately for those who want exact readings.
Benefits of the electronic pH tester
Very easy to use
Accurate results
No comparison needed
Drawbacks of the liquid chemical method
Requires a charged battery
Can get damaged if not cared for properly
Vinegar aging and storage
Once your vinegar has finished its primary fermentation you have options of how you are going to store it. Most vinegar gets better as it ages and will last indefinitely if it is stored properly. Vinegar is like wine which needs a controlled environment to age gracefully which includes proper storage containers for the type of vinegar you want, ideal ambient temperature and limited light exposure.
Glass jars
Not only can you ferment you vinegar in glass jars but you can age it in them as well.
Benefits of glass storage jars
Can be used to age and store vinegar over a long period of time
Do not impart any additional flavors
Jars can be cleaned easily
Drawbacks of glass storage jars
Potential for explosions from pressure buildup if the fermentation is not complete
Allows light to affect the vinegar
Must be sealed with non-metallic lids to prevent contamination
Glass bottles
Glass bottles are similar in use as glass jars. They are easily available and provide both short term and long term storage options
Benefits of using glass bottles
Come in various sizes for long and short term storage options
Come in a variety of colors for long term aging
Can be sealed with non-metalic tops
Some are meant to hold pressure lowering risk of explosions
Drawbacks of using glass bottles
Difficult to clean
Does not provide additional flavor complexity to the vinegar
Ceramic crocks
Ceramic crocks can be used to make and store vinegar. They are enameled stoneware containers which come in a variety of shapes and sizes. They can be found in hardware stores, specialty stores, antique stores and online.
Benefits of storing vinegar in ceramic crocks
Can hold large amounts of vinegar
Are non-porous preventing loss of volume
Are easily cleaned
Drawbacks of storing vinegar in ceramic crocks
They are heavy and subject to damage if not handled carefully
Difficult to seal for long term storage
Old crocks may have lead in the glaze which can leach into vinegar if damaged
Take up a lot of space
Wooden barrels
Wooden barrels are a great option for storage of your vinegar. They have been used for long term storage and aging various liquids for centuries and have proven to be a reliable method when done properly.
Benefits of using wooden barrels for vinegar storage
Come in 1 to 55 gallon sizes and up for small and large volume storage
Impart additional flavor characteristics depending on wood type and toast level
Are naturally resistant to unwanted microbial growth
Slowly concentrates the vinegar as it ages
Drawbacks of using wooden barrels for vinegar storage
Need a dedicated space
Need pretreatment for proper use
Are difficult to clean
Are more expensive than other methods
How Can I Make Thicker Homemade Yogurt? 11 Easy Ways
When you first start making yogurt at home you will want to know how to make yogurt which is similar the yogurt you can buy at the grocer. The thick tangy yogurt which makes for great toppings for fruit or can be made into dips and spreads.
Yogurt can be thickened by using a higher fat milk, heating your milk longer, fermenting it at a higher temperature, removing some whey or by adding thickeners or additional ingredients to increase the viscosity of the milk. Some of these methods can even be combined for extra thick yogurt.
If you read the ingredients on the back of a yogurt container you will find that the typical yogurt has a list of ingredients which are not from the cow. Instead the list could include:
Starch
Guar gum
Locust bean gum
Carrageenan
Pectin
Each of these ingredients is meant to improve the texture and thickness of the yogurt throughout its shelf life. Store bought yogurt has to go through a lot of handling with varying temperatures, storage times and transportation methods. This makes them susceptible to becoming disturbed causing it to be less thick.
Yogurt naturally thickens by the acidification of milk caused by the lactic acid bacteria found in the yogurt culture. The proteins found in the milk will come together and form a mesh like structure which loosely holds their shape when disturbed. The ultimate thickening potential of the yogurt depends on the amount of protein found in the milk, the thickness of the milk before frementaiton and the addition of thickeners which thicken the liquid found in the milk.
Increase fat content
For a creamier thicker yogurt try increasing the percentage of fat in the milk you use to make your yogurt. Skim milk makes a runny yogurt with low viscosity whereas whole milk will produce a yogurt which is thicker. Try this recipe for making heavy cream yogurt and see how much thicker your yogurt can be.
For very creamy viscous yogurt use half and half or whipping cream. This makes for a yogurt which is great for desserts, dips and gravies without the need for thickeners. The added milk fat makes yogurt which has a smooth texture making it good for making frozen yogurt as the water content in the yogurt is lower which helps to prevent crystallization in the yogurt as it freezes.
Benefits of using a higher fat milk
No extra processing needed
Produces a rich tasting yogurt without gluten
Drawbacks of using higher fat milk
Yogurt will have a higher caloric content
Tends to separate faster when heated
Why a higher fat milk makes thicker yogurt
Less water in the milk
The amount of water in the milk is effected by the fat content. The fat in the milk displaces the water in the milk. As the fat content goes up the water content goes down making for a thicker creamy yogurt.
Fat keeps the protein evenly dispersed
Yogurt thickens when the protein in the milk forms a mesh like structure which holds together in loose bonds. The fat in the milk helps to keep these bonds loose by keeping the protein pliable.
Fat is more viscose than water
Fat is just thicker than water, it flows slower which gives it a thicker consistency. The viscosity of a liquid depends on the size of the molecule in the liquid and since the fat molecule is much larger than that of the water it moves slower causing the yogurt to be thicker.
Use a different species of milk
Cow milk has a very steady amount of protein in it which allows it to thicken only so much but other species of milk have a different ratio of protein to fat and water. There are two species which are used regularly to make yogurt:
Sheep milk
Sheep milk has the highest amount of protein over goat and cow milk giving it the most potential to thicken. The fat content is also higher than that of goat or cow with the added benefit of being naturally homogenized sheep milk resists the tendency to separate into whey and milk solids. This gives the yogurt a creamy texture.
Finally the amount of water in the milk is the lowest as the protein and fat content is higher. With less water the yogurt is more viscous and holds together better. This helps it to be thicker even after it has been stirred.
Benefits of using sheep milk for making yogurt
No additives needed
Milk does not need special processing
Produces smooth and creamy yogurt
Drawbacks of using sheep milk for making yogurt
Sheep milk is hard to find
High caloric content
Flavor different from cow milk yogurt
Goat milk
Goat milk yogurt can be used for stronger flavored dips, drinks and sauces. The goat flavor is prevalent and has a strong after taste which some do not like so it may not be acceptable for some recipes.
Goat milk is higher in protein than cow milk. This gives it more potential to thicken than cow milk. It is naturally homogenized making it resistant to separating into whey and milk solids. The fat content is also higher than that of cow milk increasing its viscosity and making the yogurt naturally thicker.
Benefits of using goat milk to make yogurt
No additives needed
Milk does not need special processing
Produces smooth and creamy yogurt
Drawbacks of using goat milk for making yogurt
Higher caloric content
Only one fat content available
Flavor different from cow milk yogurt
Strong after taste
Why using a differnt species of milk can make thicker yogurt
Naturally homoginized milk has smaller protein molcules in it which are evenly dispursed throughout the milk. This along with the lower amount of water in either sheep or goat milk provides a better environment for the lactic acid bacteria to evenly acidify the milk. With smaller protein particles the yogurt tends to form a better protein structure which holds the yogurt together better.
Heat milk longer
Although heating the milk when making yogurt is important for a number of reasons there two effects on the milk which helps to make your yogurt thicker. Heating your milk to at least 180 F. is imperative to ensuring a successful yogurt incubation. To learn more aobut why it is important to heat your milk prior to incubating it for yogurt read this article.
Breaks down the proteins into smaller particles
There are several types of protein found in cow milk and all of them have varying size and shape. When you heat the milk up some of the larger proteins break down into smaller particles and get more evenly dispersed throughout the milk. This effect causes the structure of the thickened proteins in the milk to be spread out more helping to keep the smooth texture associated with yogurt.
Removes some of the water
Water is the least viscous liquid in milk. When you heat the milk up some of that water evaporates causing the remaining milk to be thicker. This is similar to why sheep and goat milk make thicker yogurt.
Benefits of heating the milk to make thicker yogurt
No added ingredients
Extra heating further pasteurizes the milk
Drawbacks of heating the milk to make thicker yogurt
More time needed to make yogurt
Higher chance of scorching the milk
Loss of low temperature enzymes
Use a different yogurt starter
The store bought direct set packets which are often used to make yogurt have specific bacterial species in them which makes yogurt which is much like the store bought version but there are other types of yogurt starter from all around the world. These starters can be direct set types or heirloom types and will ferment milk in a wide variety of flavors and thicknesses.
Each of these types are made with different species in the culture. The bacterial strains affect the proteins in the milk differently, breaking down some more than others and providing an environment conducive for the whey, fat and protein to remain combined causing the yogurt to become thicker.
Since each starter will make a different tasting yogurt you may have to try a few to find one you like with the consistency you desire.
Benefits of using a different starter culture
Easy to use
Can be direct set or heirloom culture types
Adds variety of flavor to your yogurt choices
Drawbacks of using a different starter culture
May have to try several types before you find one you like
Direct set types require purchasing the starter regularly
Heirloom types require constant care
Remove some of the whey
The whey is the liquid which forms on the top of a container of yogurt after it has fermented. This liquid is mostly water, bacterial culture and protein (the stuff protein powders are made from). By removing the whey from the yogurt you concentrate the solid protein and fat and end up with a thicker yogurt.
Some types of yogurt are made this way traditionally and commercially. The Greek yogurt at most grocers are usually normal yogurt cultures with some of the whey removed but other types have also traditionally been made this way.
How to remove the whey
Buy a Greek style yogurt making kit
These are fairly cheap and can be found in most kitchen stores, large department stores or online (Here is an Amazon link for your conveinence). Basically they have a basket on the top with a fine mesh on the bottom. The basket fits into a container which catches the whey as it drains out.
All you do is load the basket with yogurt and let the whey drain into the container below.
Use a coffee filter over a jar
This works for small amounts of yogurt.
The method
Fill a coffee filter with yogurt and place it over a jar
Put the jar in the fridge and let it drain for 12-24 hours
Scrape the thickened yogurt into a container and put it back into the fridge.
Hang it in a piece of tightly woven cotton cloth
Use this method when you have a lot of yogurt to thicken.
Spread the cloth over a large bowl with the edges overhanging the bowl
Pour the yogurt into the middle of the cloth
Gather the edges of the cloth together and tie them together with a piece of string
Hang the yogurt over the bowl for 8-24 hours
If you are going to hang the yogurt for longer than 8 hours store it in a cool location
Let the yogurt separate naturally and pour off the whey
As the yogurt ages it continues to acidify. When this happens the protein and fat condense more and forces the whey out of the solids. This whey will form on the top of the jar which can be carefully poured off.
When you make yogurt if you let it ferment for longer than normal the lactic acid bacteria will continue to acidify the milk. This makes the protein in the milk to form closer and stronger bonds forcing the whey to collect on the top or bottom of the jar.
Once you have a large enough collection of whey pour some off the top or spoon the yogurt off the top and refrigerate it. As it cools it will thicken evenly.
Benefits of removing some whey to make thicker yogurt
You can use any type of yogurt starter
You can decide how thick you want your yogurt
Drawbacks of removing some whey to make thicker yogurt
Takes time for the whey to drain out
Have to do something with the whey
Total amount of yogurt is less
Increase Fermentation Temperature
The theory for this is the various species which grow well in a warm environment tended to make thicker yogurt than those which did not grow as fast. Another idea is the protein and whey have a shorter time to separate during the fermentation because the acidification happens quickly at warm temperatures.
Traditional yogurt cultures will make thicker yogurt at a higher temperature. A range of 30-45˚C has been tested and it was found that yogurt on the upper range 40-45 ˚C was the thickest. At 40˚C the yogurt displayed good texture and thickness but tended to get ropey (the yogurt held together in strands) closer to 45˚C.
Whatever the reason if you have a warm location to ferment your yogurt or you have a temperature controlled yogurt maker try making your next batch at a warmer temperature to see if you like it.
Benefits of fermenting at a warmer temperature
No added ingredients
No special preparations needed
Yogurt ready in a shorter timeframe
Drawbacks of fermenting at a warmer temperature
Need a temperature controlled yogurt maker
Yogurt will have a different taste
Yogurt texture may not be to your liking
Use powdered milk
To make powdered milk the milk is sprayed into a heated chamber in a fine mist. The heat evaporates the liquid in the milk and a powder is left to settle in the container. Powdered milk has a high level of protein and depending on the source can contain some fat as well.
By adding some powdered milk to your fresh milk while making yogurt you can effectively increase the amount of protein in the milk. As the powdered milk rehydrates it also absorbs some of the water in the milk making for thicker milk.
It is the protein in the milk which forms the gel causing milk to thicken. An increased ratio of protein to other components in the milk will make for a thicker yogurt. Powdered milk is a good source of protein which will not substantially alter the flavor of the yogurt.
Powdered milk has a different flavor than fresh milk so do not add too much or the flavor will be effected negatively.
Benefits of adding powdered milk to thicken yogurt
Remains a dairy product
Easy to do
Drawbacks of adding powdered milk to thicken yogurt
Can change the flavor
Cannot be used in non-dairy yogurt
Increased cost
Using gelatin to thicken yogurt
Gelatin is made by reducing collagen found in animal products into smaller protein particles. Once the collagen has been broken down it is tasteless and can be used to gel in a wide variety of foods including yogurt.
To use gelatin to thicken yogurt add the powder to the milk when it is cold and stir it constantly while it heats up. To ensure the gelatin is properly dissolved you have to heat the milk to at least 50 C. or 122 F. for at least 5 minutes. Once you have reached temperature make the yogurt normally.
As the milk cools the gelatin will form a gel in the liquid of the yogurt, the lactic acid bacteria will also help to break down some of the collagen and integrate it into the milk protein. Once the pH of the yogurt gets below 4.0 the protein solidifies and thickens the milk.
Although gelatin is tasteless it dies have a texture which can be a grainy, rubbery texture if too much is added. It can form a layer on the top or bottom of the liquid. Be careful to not overdo the amount of gelatin.
Benefits of using gelatin to thicken yogurt
Easy to add while heating milk
Cheap and easy to store
Can add more or less depending on desired thickness
Drawbacks of using gelatin to thicken yogurt
No longer a pure dairy product
Changes the texture of the yogurt
Once heated it becomes liquid again
Use starch to thicken yogurt
Starch has been used as a thickener for a wide variety of foods including gravies, sauces and pie fillings but is can also be used to thicken yogurt. There are several types of starch which can be used including:
Flour
Cornstarch
Pectin
Tapioca
Each of these provide different textures, flavors and need to be used in varying amounts.
The starch forms long strings of starch which get entangled together causing the liquid in the milk to gel. Since the lactic acid bacteria cannot breakdown the carbohydrate in the starch they remain in the yogurt and continue to provide thickening power throughout the life of the yogurt.
This is the usual way yogurt from the grocer is thickened as it provides long term thickening power and is fairly cheap to use.
Benefits of using a starch to thicken yogurt
Can adjust the amount for the desired thickness
Cheap to use
Uses common ingredients
Drawbacks of using starch to thicken yogurt
May not be gluten free
Adds carbohydrates to a protein (can be harder to digest)
Must be heated longer to form starchy strands
Use agar to thicken yogurt
Agar is made from a red algae and comes in powdered, granules or sheet forms. It can be used to thicken any water based liquids which includes milk. It forms a gel with the water found in the liquid and can also contain water in pockets making the solution semi-solid.
It does not need heating to activate but can stand heating without affecting its ability to thicken. It is relatively flavorless and adds little color.
To use it simply dissolve some into the milk before heating it.
Benefits of using agar to thicken yogurt
Is vegetarian and vegan
Is not affected by low pH
Will keep for a long time
Drawbacks of using Agar to thicken yogurt
Should not be used with heirloom yogurt cultures
Can be more expensive and hard to find
Is a highly processes food
Use xanthan gum to thicken yogurt
Xanthan gum is a carbohydrate created by a specific bacteria through fermentation. It is made industrially for use in commercial products like salad dressing, sauces and dips, in shampoo and conditioners and also in pest control products. To thicken yogurt with Xanthan gum add it to the milk before heating and treat the milk normally.
Benefits of using xanthan gum to thicken yogurt
Does not need extra processing
Can withstand low pH values without breaking down
Maintains its thickening properties throughout a heat range
Drawbacks of using xanthan gum to thicken yogurt
Is a highly processed industrial product (uses lots of energy)
Can cause digestive upset in some people
Cannot be used regularly with heirloom types of yogurt culture
Urban Fermentation is a participant in the Amazon Services LLC Associates Program, an affiliate advertising program designed to provide a means for sites to earn advertising fees by advertising and linking to Amazon.com. We also participate in other affiliate programs which compensate us for referring traffic.