Kefir grains are very hardy and versatile. They can be used to make kefir from a wide variety of milk types which includes:
- All types of cow’s milk
- Goat’s milk and Sheep’s milk
- Nut milks
- Seed milks
- Grain milks
Each of these types of milks produce kefir which has unique characteristics and can be used for a variety of purposes. The following chart includes the type of milk, some of the main characteristics of kefir made from this type of milk and some recommended uses for each type.
| Type of Milk | Main Characteristics | Recommended Uses |
| Skim | Thin consistency Tangy Sweet | Drink plain Cereal milk Smoothies |
| Low Fat 1% | Thin consistency Tangy Sweet | Drink plain Cereal milk Smoothies Milk shakes Baking |
| 2% | Thicker consistency Smooth texture Tangy | Drink plain Cereal milk Smoothies Milk shakes Baking Cream cheese Whey production |
| Whole Milk | Yogurt like consistency Smooth texture Less acidity | Smoothies Milk shakes Baking Cream cheese Whey production Hard cheese Light fat ice cream Gravies and dips Fruit rollups |
| Light Cream | Creamy consistency Smooth texture Less acidity | Milk shakes Whey production Ice cream Gravies and dips Cream soups Cream dressings Soft kefir cheese Hard kefir cheese Thickener for cream soups Topping for fruit Dips Baking |
| Heavy Cream | Thick creamy consistency Low acidity Neutral sweetness | Cream cheese Hard cheese Ice cream Gravies and dips Cream soups Cream dressings Dessert topping |
| Organic | Better omega-3 to omega-6 fat ratio Less industrialized processes used Healthier cows | Organic milks comes in all fat contents just as milk which is non-organic. Use the recommendations for the milk fat content above for reference. |
| Goat Milk | Less sweet than cow’s milkS trong after-taste Consistent smooth texture Naturally homogenized | Strong flavored smoothies Cream cheese Hard cheese Salad dressing Gravies and dips |
| Sheep Milk | Less sweet than cow’s milk Sweeter than goat’s milk Pleasant tangy flavor | Drink plain Smoothies Cereal Baking Cream cheese Hard cheese Salad dressing Gravies and dips |
| Almond Milk | Medium fat Tangy flavor Thin consistency | Smoothies Cereal Baking Drink plain |
| Cashew Milk | Medium fat Tangy flavor Thin consistency | Smoothies Cereal Baking Drink plain |
| Sunflower Milk | High fat Tangy flavor Thin consistency | Smoothies Cereal Baking Drink plain |
| Pumpkin Seed Milk | Medium fat Tangy flavor Thin consistency | Smoothies Cereal Baking Drink plain |
| Soy Milk | Meduim fat Tangy flavor Thin consistency | Smoothies Cereal Baking Drink plain |
| Rice Milk | No fat Tangy flavor Thin consistency Low protein | Smoothies Cereal Baking Drink plain |
| Oat Milk | No fat Tangy flavor Thin consistency Low protein | Smoothies Cereal Baking Drink plain |
Detailed description of Milk types used to make Milk kefir
Each type of milk makes a kefir with different textures, tastes and thicknesses which are good for different things. Typically the higher the fat content the thicker the kefir. The more sugar in the milk the tangier the kefir. Following is a detailed description of each type of milk in the above chart. The description will include the fat and sugar content, what it is best used for and why each use is recommended.
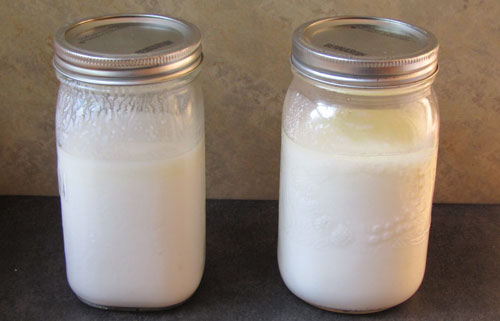
Dairy milk kefir
Dairy milk kefir is the natural environment for milk kefir. It is where the grains were first discovered and used as a method of preserving fresh milk over a longer period of time. The grains were fed daily with milk daily from fresh milk and the kefir was consumed throughout the day. The grains therefor grow the best in this type of milk.
Today we consume mostly cow’s milk which is sold with a variety of fat contents from the least amount of fat, sold as skim milk to the most amount of fat, sold as heavy cream or whipping cream. Although the differences between these types of milk is the varying amount of fat and lactose the protein content remains consistent throughout the types.
Skim milk kefir
Using skim milk to make your feed your kefir grains produces a thin drinkable kefir which is sweeter than the other types and depending on the ambient temperature can be very fizzy.
Average lactose content of skim milk: 5.2%
Skim milk has the highest sugar concentration of all the types of milk with 5.2% lactose content. It is this sugar that is converted into alcohol, lactic acid and CO2. If skim milk kefir is fermented for longer than 24 hours it can become very tangy as the lactose in the milk gets consumed and converted into acetic acid and lactic acid.
Average fat content: 0.007oz/3.5oz or 0.2g/100g
The kefir grains do not have any known bacterial species which utilize milk fat as energy so some of the fat in the milk gets included in the kefir grains but most of it will remain in the milk providing you with a healthy fat source.
Best uses for skim milk kefir
Using skim milk to feed your kefir grains produces a thin drinkable kefir which is sweeter than the other types. Its best uses are in drinks due to its consistency and texture.
- Drink plain
- Cereal milk
- Smoothies
It can replace milk in baking recipes and due to its acidic nature helps quick breads to rise well. The tangy flavor adds interest to biscuits, pancakes and muffins.
Low fat (1%) milk kefir
As the amount of fat increases the amount of lactose by volume decreases. This makes the kefir less digestible to the kefir grains as they do not have the ability to digest fat.
Average lactose content: 5.0%
Low fat milk has a lower amount of lactose making it a little less sweet than skim milk as the remaining lactose in the milk will be lower after a 24 hour ferment. The yeast will be less active in this type of milk due to the lower amount of easily fermentable sugars. This will provide less alcohol to the acetic acid in the culture and produce less acetic acid which is tarter and harsher than lactic acid.
Again if you are lactose intolerant you will have to either ferment this type of milk longer or use a higher fat content milk to avoid the lactose in your kefir.
Average fat content: 0.035oz/3.5oz or 1.0g/100g
The higher fat content in this milk will help the growth of the kefir grains as it is one of the components of the grains. It will also provide a higher amount of Omega-3 fatty acids which are a healthy form of fat.
Best uses for low fat milk kefir
Low fat kefir will produce a kefir which is creamier than skim milk kefir. The texture is less grainy as the coagulated proteins in the kefir get mixed in with the fat found in the milk. This makes a great kefir for smooth drinks and cooking.
- Drink plain
- Cereal milk
- Smoothies
- Milk shakes
- Baking
2% milk kefir
Milk kefir made with 2% milk makes a good all round milk kefir. The amount of lactose in the milk is balanced with the fat content allowing the grains to grow steadily while providing you with a very versatile kefir.
Average lactose content: 4.9%
As the amount of lactose goes down the kefir becomes less sweet after a standard 24 hour ferment but it will be less tart as the lactic acid bacteria do not have as much lactose to produce lactic acid. There is still plenty of fuel for the culture to grow in this type of milk making it a good choice for continuous kefir making without concern for the health of your grains.
For those who are lactose intolerant this is a good choice for making kefir as once the species in the grains balance out they do a good job of reducing the amount of lactose in the kefir. You may have to still adjust the fermentation time, ratio of kefir grains to milk or ambient temperature to produce get a kefir which you can tolerate. For more information about how to adjust your kefir for taste, consistency and remaining sugars read this article here.
Average fat content: 0.18oz/3.5oz or 5.0g/100g
This is a good amount of fat for healthy kefir grains. Kefir grains are made up of fats, proteins and insoluble fiber. With this balance the grains have enough fats (lipids) to help provide structure and flexibility to the grain.
The higher fat content makes the kefir smoother and less grainy than lower fat milk which makes it a good kefir to drink plain.
Best uses for 2% milk fat kefir:
This is a very versatile kefir. It is creamy with a smooth texture and nice flavor due to its lower lactose content. It can be used in a wide variety of drinks, baking and general cooking with excellent results.
- Drink plain
- Cereal milk
- Smoothies
- Milk shakes
- Baking
- Cream cheese
- Whey production
Whole milk kefir
Whole milk kefir is what traditional kefir would have most been like. The milk is taken as is from the cow and not added to or taken from. Most cow milk has altered amounts of fat vs lactose content which has changed what the resulting kefir would be like.
Average lactose content: 4.8%
As the lactose content continues to fall the flavor gets less tangy in a standard 24 hour ferment. This is because there is less lactose available for the yeasts and lactic acid bacteria to convert into alcohol and lactic acid.
Average fat content: 0.28oz/3.5oz or 8.0g/100g
This is the highest fat content milk for regularly making kefir. The grains are happy in this type of milk as they still have enough lactose to grow but they are slowed by the high fat content in the milk. There is a high amount of omega-3 fatty acids in this type of kefir which makes it good for you as well as easier to digest.
Best uses for whole milk kefir:
Whole milk kefir is smooth and creamy and a thick consistency reminiscent of yogurt with a more full bodied flavor. It can be used as a replacement for yogurt once it has been refrigerated until cool. It does not separate as fast as lower fat milks and produces less whey.
- Smoothies
- Milk shakes
- Baking
- Cream cheese
- Whey production
- Hard cheese
- Light fat ice cream
- Gravies and dips
- Fruit rollups
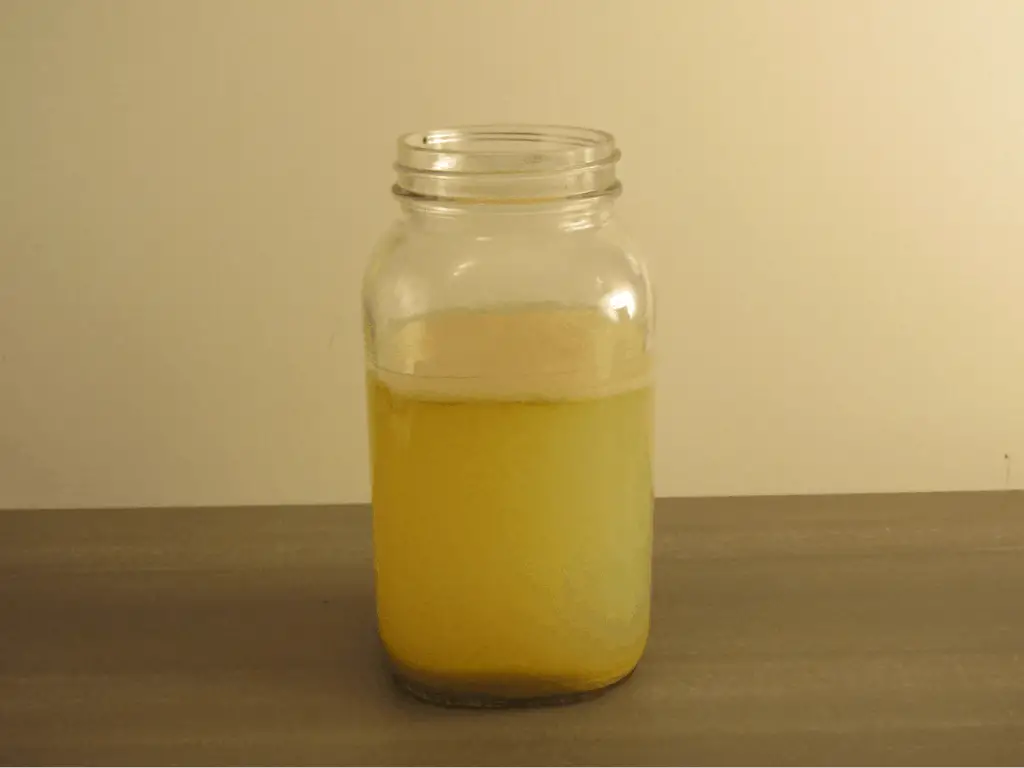
Half and half
The thick consistency of half and half cream slows the mobility of the microorganisms found in the kefir grains. This slows the rate which they acidify the milk because it takes them longer to reach the undigested lactose still available in the cream. To ensure complete fermentation of this it any other thick creamed dairy product it is a good idea to stir the kefir a few times during the 24 hour fermentation time.
Average lactose content: 4.2%
With the reduced amount of lactose in half and half cream the yeast and lactic acid bacteria have less food available making it harder to acidify the milk quickly. When using this type of milk to make kefir do not use the same grains for a long period of time as it may weaken the culture and make it vulnerable to contamination.
If your grains are healthy they will have no problem converting the cream into thick tangy kefir although if you want to increase the tang you may have to add more grains or ferment it longer.
Average fat content: 0.007oz/3.5oz or 0.2g/100g
The high fat content if this dairy product is what makes the kefir such a creamy rich product. The resulting kefir is smooth and less acidic then others. The fat content acts as a buffer for the acidity in the kefir which adds to its appeal.
Best uses for half and half kefir:
This milk makes a kefir which is very creamy and thick. It does not set like lower fat kefir tends to and produces less whey as the milk solids in the cream is higher than the others. It has a naturally smooth texture and buttery flavor.
- Milk shakes
- Ice cream
- Gravies and dips
- Cream soups
- Cream dressings
- Soft kefir cheese
- Hard kefir cheese
- Topping for fruit
- Dips
- Baking
Whipping cream
Whipping cream can be used to make a very thick and creamy kefir occasionally. The microorganisms in the grains find it hard to mobilize it such a thick product so to ensure the milk if fully fermented be sure to stir the grains around in the jar a few times during the ferment.
After 24 hours taste the kefir before straining the grains to ensure the kefir has enough tang for you.
Average lactose content: 2.9%
The low lactose content in the whipping cream makes for a kefir which has less tang than the other types. The lactic acid bacteria have less food to use for fuel and as a result produce less lactic acid. Whipping cream kefir makes for a great topping for those who are lactose intolerant as the remaining lactose in the kefir is very low after a 24 hour ferment.
Average fat content: 0.105oz/3.5oz or 3.0g/100g
With the high fat content in whipping cream the lactose content is very low even though the food energy found in the finished kefir is high. Since the kefir grains do not harbor many microorganisms which can digest the fat in the cream the resulting kefir still maintains its high fat content.
Best uses for whipping cream kefir:
- Cream cheese
- Hard cheese
- Ice cream
- Gravies and dips
- Cream soups
- Cream dressings
- Dessert topping
Organic
Organic milk comes in a full range of fat content just like regular milk, the difference is what the cows eat to make the milk. There are many definitions of organic milk depending on where you are in the world. Organic milk is milk which has been produced by cows which eat a more natural diet without the addition of antibiotics and food additives.
The resulting milk has a better ratio of omega-6 to omega-3 fatty acids.
Best uses for organic milk kefir:
Organic milk can be used for any of the above uses. The fat and lactose content vary depending on the type so it can be used for any of the above uses.
Milk from other animals
Goat milk kefir
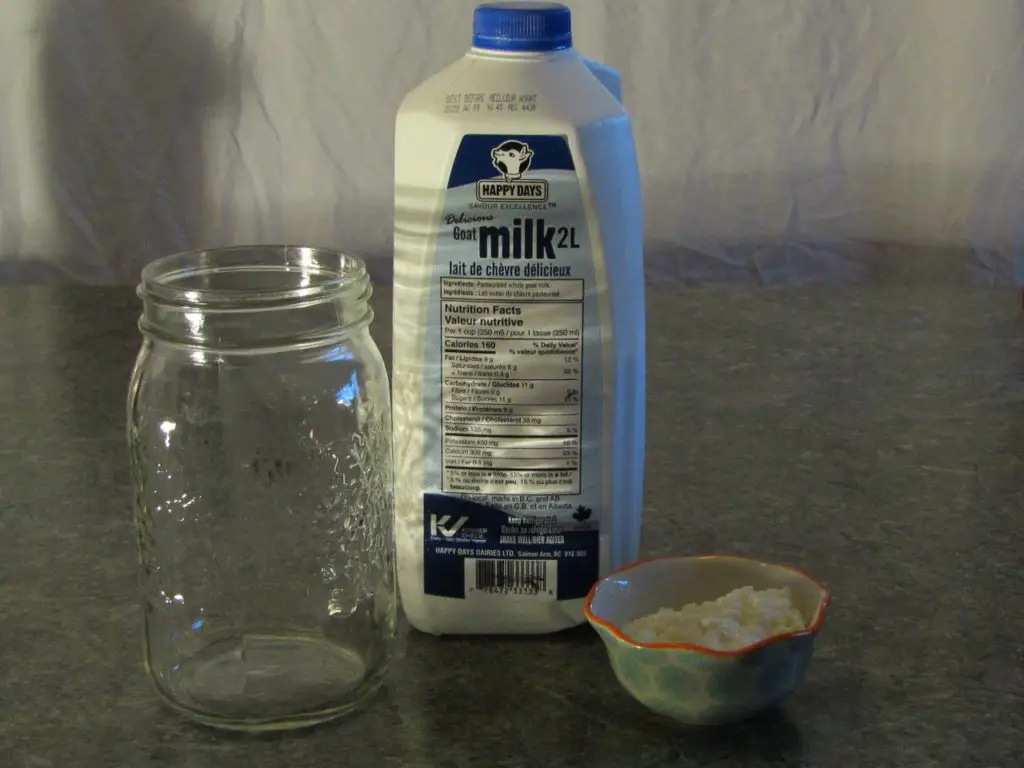
Goat milk is naturally homogenized and comes with only one fat content. The milk itself takes on the flavor of the diet the goats have been eating while producing the milk so it can vary from very strong gamey flavor to mild and creamy flavored.
Average lactose content: 4.20%
With a lower amount of lactose than some cow milk types with a lower amount of fat naturally. This switch makes it great for those who want to lower their caloric intake. The grains have enough lactose to grow well and produce consistent kefir.
Average fat content: 0.148oz/3.5oz or 4.20g/100g
The fat content in goat milk is lower than that of whole cow milk which makes for a thinner kefir. The kefir has a smooth texture because the fat particles are smaller and naturally homogenized preventing the protein in the milk from forming a grainy texture.
Best uses for goat milk kefir:
Goat milk kefir has a stronger flavor than cow or sheep milk kefir. It is good for providing depth of flavor to meals.
- Strong flavored smoothies
- Cream cheese
- Hard cheese
- Salad dressing
- Gravies and dips
Sheep milk kefir
Sheep milk has a lower amount of sugar than cow milk with a high fat and protein content. This makes for a kefir which is smooth and creamy. The protein dispersed throughout the milk makes the kefir thicker naturally than cow milk but it does not gel like yogurt but rather thickens.
Average lactose content: 4.76%
Less lactose then cow milk but more than goat makes sheep milk kefir less tangy with a milder after taste then goat milk kefir. The yeast and lactic acid bacteria have ample food to maintain the grains and quickly acidify the milk.
Average fat content: 0.2.5oz/3.5oz or 7.0g/100g
The fat content in sheep milk is higher in proportion to goat or cow milk. Since like goat milk it is naturally homogenized the kefir produced is very creamy and buttery flavored.
Best uses for sheep milk kefir:
- Drink plain
- Smoothies
- Cream cheese
- Hard cheese
- Dips and sauces
Non-Dairy milk
Kefir grains can also be used to ferment non-dairy milks with varying results. The microorganisms found in the kefir grains are best at using the lactose in the milk as food energy but they can and will use other types of sugar as well.
The type of sugar found in nuts and seeds is sucrose. This is an easily fermentable sugar and the yeast in the kefir grains have no problem digesting it. The lactic acid bacteria can also use sucrose as food energy but are at a slight disadvantage. The yeasts tend to overtake a fermentation which has easily available simple sugar.
The protein found in nuts is a solid form and requires liquefying to make it similar in texture to milk. This requires a high powered blender or industrial processer. Protein of this type will not thicken like animal milk does.
Animal milk thickens as the acidity in the milk increases and acts on the protein. This causes the protein to begin to solidify. The proteins in nut and seed milks do not have the same properties so they do not thicken although they do separate from some of the liquid in the milk.
Almond milk kefir
Almond milk kefir is a good choice for those who cannot have dairy products as if it is made properly it performs closely like skim or low fat milk kefir does. The low amount of sugar found in the almonds requires the addition of some type of sugar if you are going to ferment almond milk for a longer period of time but if you can switch between regular milk and almond milk the grains will not suffer.
Sugar concentration of almond milk
Commercial almond milk comes in a variety of types. The unsweetened version according to the label does not have any sugar in it, whereas sweetened varieties have 2.24 grams of sugar per 100ml of almond milk.
If you are making almond milk kefir with unsweetened almond milk you need to add some form or sugar for the yeast and lactic acid bacteria to eat. Otherwise the milk will not acidify properly and can go off.
Homemade almond milk can have as much as 4.4 grams of sugar in 100 grams of nuts. This is enough for the grains to use as energy but it is still a good practice to add a little sugar to ensure your grains have enough easily fermented sugar.
Fat content in almond milk
There is about 3 grams of fat in 240 ml of almond milk which provides enough fat to help smooth out the texture of the kefir once it has been fermented. The fat does not get incorporated into the grains as easily as milk fat and there is substantially less biofilm around the grains after fermenting almond milk indicating the grains do not grow well in almond milk.
Best uses for almond milk kefir:
Almond milk kefir has a nice tang to it which can vary depending on the amount of extra sugar added and the length of time it is fermented. The added sugar will help the lactic acid bacteria to acidify the almond milk through the production of lactic acid.
- Smoothies
- Cereal
- Baking
- Drink Plain
Cashew milk kefir
Cashew milk is a creamy thick milk substitute which when made into kefir can be quite sweet and tangy. The consistency is closer to milk kefir although still thinner than whole milk kefir. Commercial cashew milk does not contain any sugar (according to the label) which makes it a poor milk for making kefir without adding additional sugar.
The nuts themselves have 6g of sugar per 100g of nuts
Best uses for cashew milk kefir:
- Drink plain
- Smoothies
- Cereal
- Baking
Sunflower milk kefir
Sunflower seeds come in a variety of forms
- Roasted
- Flavored
- Salted
- Raw
To make sunflower seed kefir you will need to start with raw sunflower seeds. Once the seeds are cooked the sugar in the seed turns to starch making it unavailable to the yeast and lactic acid bacteria.
Average sugar content: 2.0%
The low sugar content of sunflower seeds requires the addition of some sugar to feed the grains and properly acidify the kefir. The resulting kefir is also a little higher in alcohol as the yeast grows rapidly when using simple sugars like glucose and fructose (the usual forms of sugar found in the seeds and added sugar).
Average fat content: 1.75oz/3.5oz or 50g/100g
With half of the seed by weight being fat sunflower seeds are a high source of dietary fat. This makes for a creamy type of kefir with a thin texture due to the lower ratio of protein available to thicken the kefir.
Best uses for sunflower milk kefir:
- Drink plain
- Smoothies
- Cereal
- Baking
Pumpkin seed kefir
With its different greenish color and unique flavor pumpkin seed kefir is one of the most interesting types of non-dairy kefir. It has an earthy flavor with a smooth finish and no bitterness which can be found in some non-dairy kefirs.
Average sugar content: 9.3mg per 100g
The low sugar content in pumpkin seeds requires the addition of sugar for the grains to properly acidify the kefir. Pumpkin seeds are particularly low in sugar content unless they are sprouted. Once they are sprouted the enzymes in the seed convert the carbohydrate into simple sugar for energy as the seed grows and puts down roots.
Depending on the type of pumpkin seeds you are using you may have to adjust the amount of sugar you need to add.
Average fat content: 0.75oz/3.5oz or 21.4g/100g
The higher amount of fat in pumpkin seeds makes a kefir which can be smooth with a thin consistency. The protein in the pumpkin seed milk does not thicken well as the kefir grains acidify the milk which makes for a kefir which is ideal for drinks and non-dairy milk replacement.
Best uses for pumpkin seed milk kefir:
- Drink plain
- Smoothies
- Cereal
- Baking
Bean based milks
Beans have been used to make plant based milk for centuries. These include soy milk, yellow pea milk and even peanut milk. Beans are notoriously hard to digest because the sugar in the beans is mostly Raffinose which is a trisaccharide. Humans do not have the ability to digest this sugar but lactic acid bacteria found in the kefir grains break it down readily.
Soy Milk kefir
With its high protein content and wide variety of vitamins and minerals soy milk has the potential to be a healthy milk alternative. Soy milk has several anti-nutrients in it which can make it not the best choice for some people but if you ferment your soy milk into soy kefir you remove many of these anti-nutrients as well as break down the hard to digest sugars making the nutrients much more available to you.
Sugar concentration in soy milk
Fat content in soy milk
Best uses for soy milk kefir
- Drink plain
- Smoothies
- Cereal
- Baking
Grain based milks
Grain based milks do not make good candidates for making kefir. The carbohydrate in the grain whether it be rice, millet or oats are complex carbohydrates which the yeast and lactic acid bacteria cannot break down and use for energy.
For the energy in the grain to become available to the yeast and lactic acid bacteria the carbohydrate chains need to be broken down into smaller sugars. This process is called saccharification and requires special enzymes which the yeast and lactic acid bacteria do not have.
There is also very little fat content in grains which makes the resulting kefir thin and runny. Kefir made from commercial grain based milks can have a thicker texture but this is due to the thickeners which are added to the milk to make it more palatable and resist separation. Most of these thickeners are not naturally occurring in the grain.
Still if you cannot have other forms of kefir this could be an option for you. These kefirs are best used for smoothies or poured over cereal rather than cooked with as they do not have much structure.
The acidity will help to rise quick breads and the live yeast and lactic acid bacteria in the milk can act as a leavening agent if they are active enough.
Rice milk kefir
There is very little naturally occurring sugar in the rice so to feed the kefir grains sugar is added. Commercial rice milk is made from brown rice and brown rice syrup but homemade rice milk is sweetened with a wide variety of sources such as:
- Cane sugar
- Coconut sugar
- Beet sugar
- Honey
- Tree sap syrups
Each of these adds their own flavors and textures to the milk and once it is fermented will provide a lower pH reminiscent of kefir without the thickening effect from the proteins in the milk.
Fermentable sugar content
None. Any fermentable sugar in rice milk kefir needs to be added from other sources. For the starch in the rice to become available to the yeast and lactic acid bacteria they must be broken down into smaller carbohydrate strains.
Average fat content: 0.035oz/3.5oz or 1.0g/100g
The low fat content in rice milk provides a thin consistency. Which does not thicken well due to the low protein content in the rice milk (0.3g/100g).
Best uses for rice milk kefir
- Smoothies
- Cereal
- Drink plain
- Milk replacement for quick bread baking
Oat milk kefir
Although oat milk is recommended as a healthy plant based milk it does not transfer well to oat milk kefir. Again the starches in the milk are not available to the yeast and lactic acid bacteria making in necessary to add sugar in some form for the grains to use as energy.
Because the sugar added boosts the yeast activity and over time slows the lactic acid bacteria down oat milk kefir can be higher in alcohol than normal milk kefir. To combat this you could keep the ambient temperature lower. This will slow the growth of the yeasts a bit giving the lactic acid bacteria a chance to compete.
Best uses for oat milk kefir
- Smoothies
- Cereal
- Drink plain
- Milk replacement for quick bread baking