Urban Fermentation

Recent Posts

What Happens When Yogurt is Incubated Too Long


Mason jar of yogurt

So you forgot about your yogurt and it has been in the incubator for longer than you usually ferment it for.  You wonder if it is still good or will I get sick or worse from eating it, how long is too long to leave yogurt in an incubator or should I just throw it out and start again.

The longer yogurt ferments the less lactose remains and the lower the pH the yogurt will have.  This has the effect of making yogurt taste sour and may cause it to separate between curds and whey.  Unless there is mold growth or other signs of spoilage it is safe to consume over fermented yogurt.

As the yogurt incubates the pH of the yogurt continues to drop making the yogurt more and more sour.  For two more reasons why your yogurt is sour read Three Resons Why Your Homemade Yogurt is Sour.  There you will learn what you can do to adjust your yogurt making to get exactly what you want.

How long is too long to incubate Yogurt

This is an interesting question which requires a broader answer than X number of hours is okay but once you get to Y number of hours it is ruined.  Yogurt is produced by a living active culture of various bacterial species mostly made up of lactic acid bacteria.  They consume the lactose in the milk as food and produce lactic acid. If you want to know more about lactose free yogurt check this article here.

After 48 hours the yogurt will be too tart to eat plain. The longer the yogurt incubates the less lactose is left in the milk and more lactic acid which makes the yogurt increasingly sour.  After 48 hours it will be difficult to keep the yogurt from separating due to the low pH.  

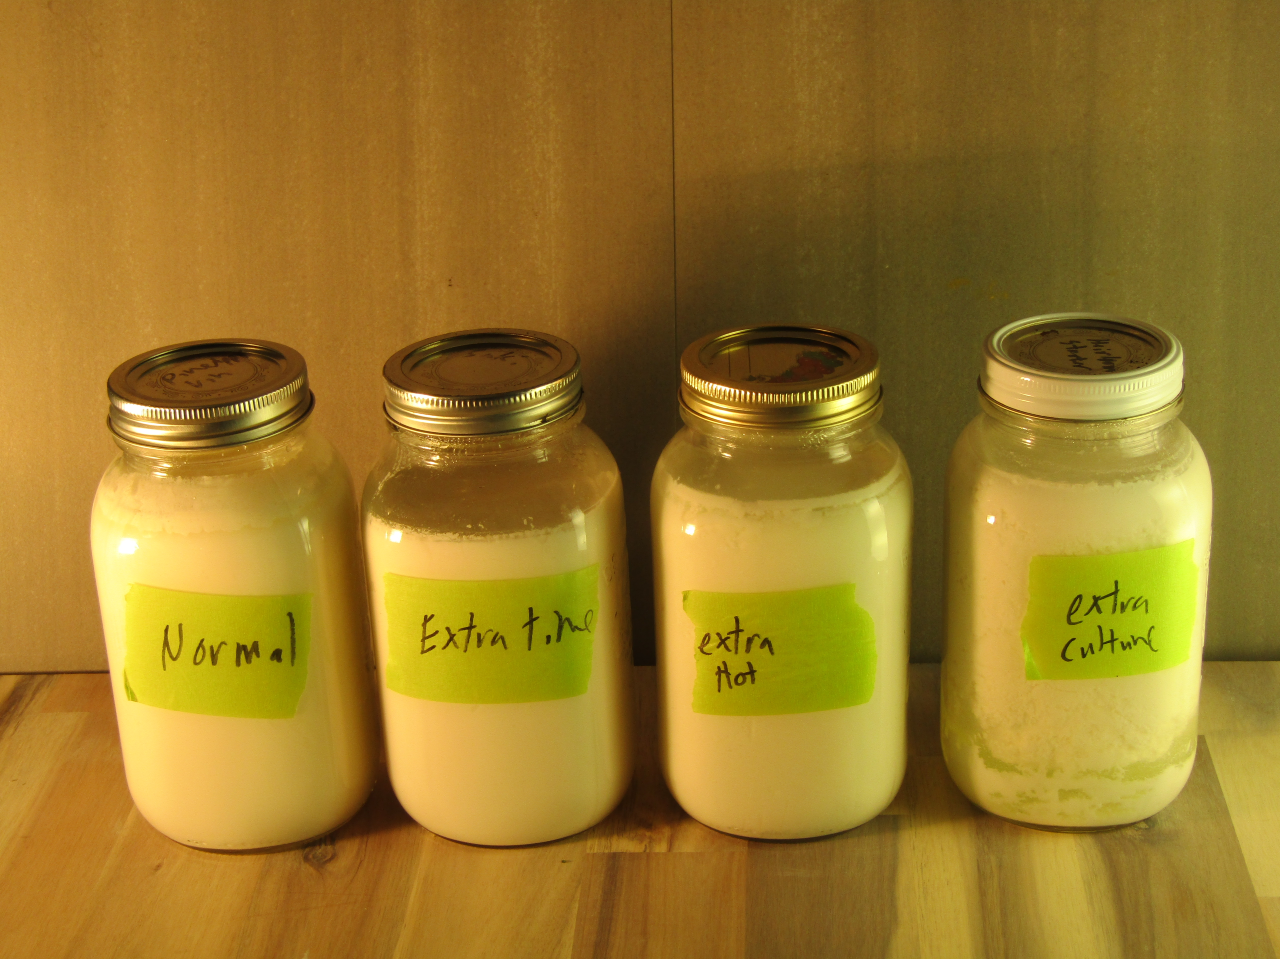
Depending on the purpose of the yogurt the ideal incubation time will vary.   For an indepth explanation and step-by-step instructions of how to make yogurt using three differnet methods read “Three Simple Ways to Make Homemade Yogurt“.

Incubation time for sweet creamy yogurt

6-8 hours

This yogurt is great for fruit toppings, smoothies or just to eat with a spoon.  The lactic acid bacteria has had a chance to lower the pH to below 4.6 where the proteins in the milk begin to form a loose matrix causing it to gel.  Most of the liquid in the milk remains associated with the protein so has a soft creamy consistency.

Incubation time for yogurt with lower lactose content

12-24 hours

Yogurt made for a lower lactose content needs to be incubated for a longer period of time.  This allows the lactic acid  bacteria to consume more of the lactose in the milk making it easier to digest for those who are lactose intolerant.  The resulting yogurt will be less sweet and quite sour as there will be less sugar and more lactic acid in the yogurt.

This is the incubation time recommended for those who are lactose intolerant.  Although at this point there is still lactose in the yogurt it is drastically reduced.  Checkout this article if you want to learn how to make low or no lactose yogurt.

Incubation time for unrefrigerated conditions

24-36 hours

The longer the milk is incubated the less lactose and more lactic acid.  Lactic acid bacteria are acidophilic which means they grow best in acidic environments.  This makes them very tolerant to the low pH conditions of long incubated milk.  

As the milk continues to acidify the proteins begin to disassociate with whey in the milk, a process called Syneresis.  This causes it to separate into curds and whey.  By draining this whey off the yogurt becomes thicker, more like cheese which will last longer in unrefrigerated conditions. 

There are several ways to make super thick yogurt besides the draining off of the whey (the basis for Greek yogurt). Check this article out for many other options

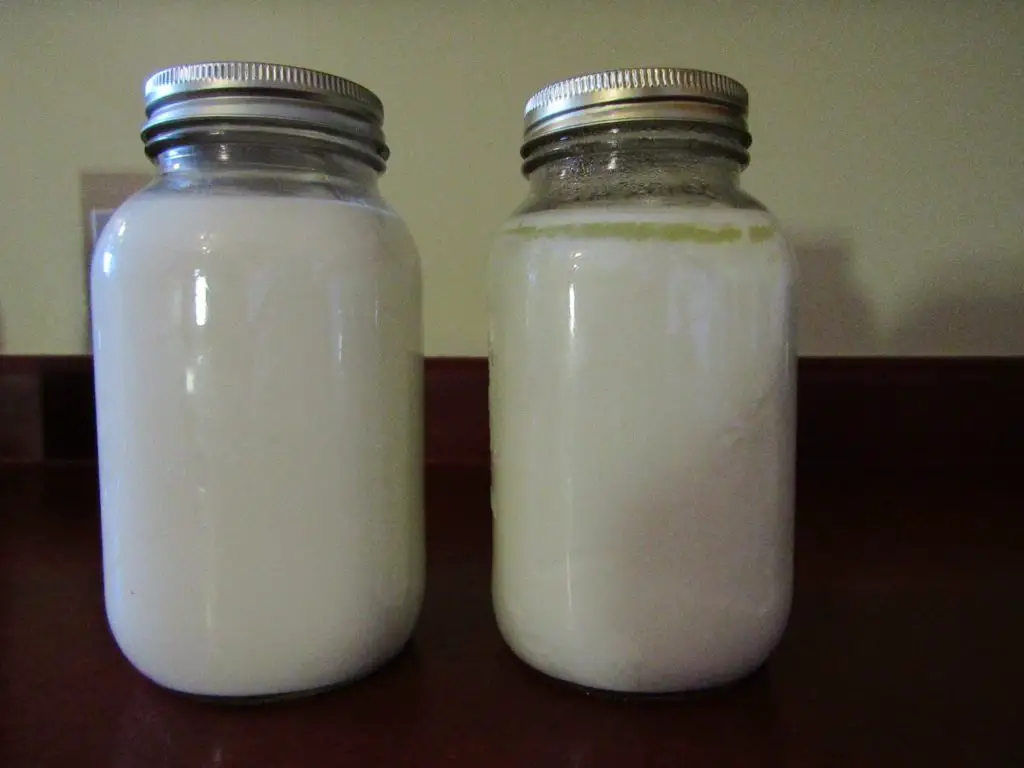
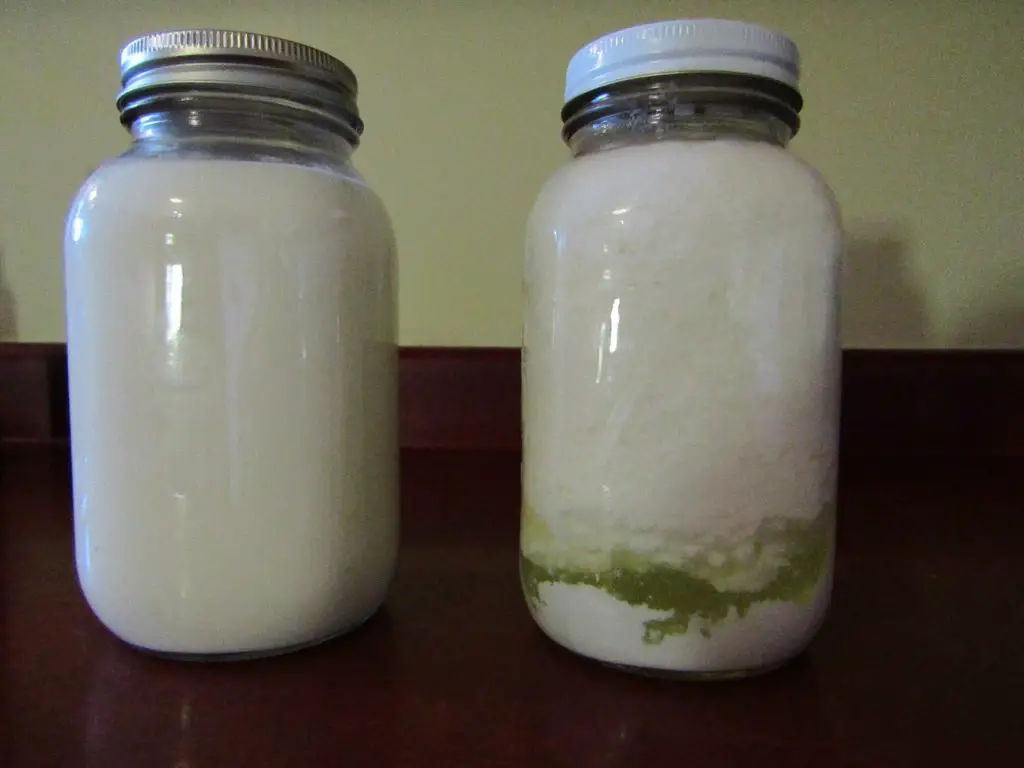
36-48 hour yogurt and beyond

36-48 hour yogurt is highly acidic with little lactose left in it for the lactic acid bacteria to consume.  This makes for very tart yogurt which will be hard to keep from separating.  It is great for making tangy cheese spread, cheesecake and gravies.

It is hard to keep the yogurt from separating at this point as the proteins in the milk will have a strong attraction to each other forming dense clumps which expel the liquid whey.  You can either use the yogurt as is by stirring it or blending it into smoothies, gravies or dips or you can drain off the whey by hanging it.

Effect of Incubation Time on Yogurt Thickness 

From the time you add the yogurt culture to the cooled pasteurized milk it will begin to acidify.  It is this acidification which is responsible for the change in thickness of the yogurt.  

The structure of milk protein is made up of three forms of milk caseins, one of which is found on the surface of milk micelles.  Micelles are structures which give a solution solubility.  Once the pH drops to 4.6 the surface caseins lose their ability to repel one another causing the milk to gel.

The longer the milk is incubated the lower the pH and the stronger the bonds get between the micelles.  The structures will continue to grow forming a matrix throughout the milk producing yogurt.  Once the milk has thickened it will continue to form stranger and stronger bonds until the liquid in the milk can no longer remain in suspension.  When this happens it dissociates itself with the solids and the yogurt separates.

The length of time the yogurt incubates affect its thickness to a point.  Once it reaches the stage where the liquid can no longer remain in suspension it will break down.

Effect of Incubation Time on Yogurts Tartness 

The tartness of yogurt is affected by two things.  The amount of lactose and the amount of lactic acid in the yogurt.  The less lactose and the more lactic acid the tarter the yogurt will be.

Incubation time affects the tartness of yogurt by allowing the lactic acid bacteria more or less time to consume the lactose and produce lactic acid.  In the first stages of incubation the lactic acid bacteria grow quickly which consumes much of the lactose producing lactic acid.  This will lower the pH of the yogurt from 7 to 4.6 in 4-8 hours depending on the temperature and amount of culture used.  Once the amount of lactose in the milk drops below the amount needed to support the lactic acid culture their population will begin to fall.  This slows the rate the yogurt acidifies taking it longer to lower the pH further.  

Effect of Incubation Time on Yogurt Culture

Yogurt cultures have a wide variety of lactic acid bacterial species in them.  Commercial yogurt is made up of two main types: Lactobacillus bulgaricus and Streptococcus thermophilus but heirloom style yogurts have a vast number of species which makeup the consortium.  

Each species has different energy needs and will grow at different rates depending on the temperature, pH and availability of food.  Each species of LAB has a different doubling time which is the amount of time it takes for the bacteria to double its population.  This affects the composition of the culture to favor the fast growing bacteria over the slower ones while there is food availability.

Once the pH begins to drop the most acid tolerant species begin to have the upper hand and can continue to multiply where others are hindered in their growth.  Long incubated yogurt gives the best chance for all species to be able to influence the composition of the yogurt.

Does Kombucha Need to Breathe?


two mason jars of fermeting kombucha one with a cloth top and another with an airlock

When someone is asking this question they are usually wondering if they can seal the fermentation container for the first fermentation and restrict the microorganisms in the culture access to oxygen   doing this essentially cuts off their air supply which affects various microorganisms differently.

Kombucha Fermented without oxygen is less tangy and more alcoholic. Acetic acid bacteria, which requires oxygen to grow, gives kombucha its sharp tangy flavor which would be missing without oxygen.  The yeast species survive with or without oxygen but produce more alcohol in anaerobic conditions. 

There are three main fermentation microorganisms in a kombucha culture which all react to the presence of oxygen in different ways.  Acetic acid bacteria (AAB), lactic acid bacteria (LAB) and yeast.  Each of these species of microorganisms contribute to the flavor of kombucha and their exposure to oxygen will affect their growth.

Why Kombucha Cannot be Made Using an Airlock

Airlocks are  great for making alcohol because yeast becomes less efficient in anaerobic environments which produces more alcohol. The acetic acid bacteria in the culture cannot grow without oxygen which prevents them from consuming the alcohol and producing vinegar. When it comes to kombucha this is not usually what you want.

Airlocks are designed to let carbon dioxide to escape from the container but prevent any oxygen from entering.  This will raise the alcohol level, reduce the tangy flavor produced by the acetic acid bacteria and increase the sour flavor from lactic acid bacteria.

Kombucha needs oxygen to maintain a balance of acetic acid bacteria, lactic acid bacteria and yeast species.  All of which add to the flavor and health properties of this ancient drink.

How Oxygen Affects Acetic Acid Bacteria in Kombucha 

Limited Oxygen Alters Kombucha Flavor

The familiar tang of kombucha is produced by the acetic acid bacteria found in the culture.  These bacteria produce vinegar as a byproduct of their respiration which acts to acidify the liquid.  The lower pH prevents unwanted bacteria and mold growth that can cause spoilage of the kombucha.  

Without AAB the flavor will be less tangy and more yeasty with different esters and flavor components which taste and smell more like beer or sour depending on the lactic acid content.

Higher Alcohol Content

Acetic acid bacteria are important for keeping the alcohol content of kombucha down.  They do this by consuming the alcohol which the yeast produces to make acetic acid.  It is exactly the same process which converts alcoholic beverages into vinegar.  

This is why when making wine or beer you want to restrict the fermentations access to any oxygen.  Without the oxygen the alcohol produced remains in the liquid rather than being used as fuel.

Slow SCOBY Growth

The subspecies of AAB, gluconobacter, is credited with the production of cellulose.  This cellulose is what makes up the structure of the SCOBY which helps protect the fermentation from contamination and contains many of the bacterial cultures needed to make kombucha.  

Without oxygen there would be little if any SCOBY growth.  The SCOBY will most likely sink to the bottom of the container where the aerobic bacteria found in and on it will die or go dormant making it no longer valuable for starting another batch.

How Oxygen Affects Yeast Species in Kombucha

Various yeast species live in a kombucha culture.  All of which produce various flavors and esters which produce the rich flavor found in most mature kombucha cultures.  In winemaking the yeast is a main component of the terroir of a vineyard and is unique to each location, year and current weather conditions.  The same is true with kombucha making with the exception that the yeast culture tends to mature the longer it has been used.  

Kombucha made in an aerobic environment provides a low ABV level in the primary fermentation stage.  This helps the yeast species which are not alcohol tolerant to thrive and compete with more alcohol tolerant species helping to maintain a balanced, stable culture.

When yeast is placed into an anaerobic environment its respiration alters to compensate.  When it does this it becomes less efficient which produces more alcohol.  As the alcohol level increases and the low alcohol tolerant yeast species become stressed they die off.  This die off does two things:

Produces a yeasty flavor in the kombucha

The yeasty flavor found in some alcoholic beverages is the product of dead yeast bodies found in the liquid.  This is prevented in the winemaking by racking the wine and leaving the lees in the bottom of the carboy but in beer and kombucha where it is desirable to carbonate the beverage yeast becomes a flavor component.

Too much contact with the lees in kombucha produces a highly yeasty flavored beverage which can be unpleasant.

Raises the Alcohol Content in the Kombucha

Most yeast species found in kombucha cultures are not very alcohol tolerant with an upper end of about 4% ABV.  Once this level has been reached they begin to die off and are replaced by high alcohol tolerant yeast species, the main player being Saccharomyces cerevisiae.  This is the yeast most often found in alcoholic fermentations like wine and beer.  It has an alcohol tolerance of up to 18-20% before it dies off.

How oxygen affects the Lactic Acid Bacteria in Kombucha

Lactic acid bacteria in kombucha is usually only active at the bottom of the kombucha container where the oxygen level is the lowest and there is less competition for food from the acetic acid bacteria.  Yeast species are also present in this environment so they are kept under control and do not produce large amounts of lactic acid.

Produces a sour flavor

When kombucha is fermented in an anaerobic environment the lactic acid bacteria has a chance to compete with the yeasts directly throughout the fermentation which produces different flavors not usually found in kombucha.  Lactic acid has a sour flavor rather than the usual tangy flavor produced by AAB.   

Can Kombucha Get too much Oxygen?

Although oxygen is needed for kombucha fermentation it is possible for it to get too much oxygen.  

When kombucha has too much access to oxygen the balance of the various microorganisms change.  Yeast reproduce rapidly in the presence of oxygen and can quickly overwhelm the culture. Some highly acid tolerant species of acetic acid which grow exceedingly fast quickly convert the alcohol produced by the yeast into vinegar.

As a result the kombucha will take less time to reach the proper sweetness but will lack the depth of flavor which the other microorganisms provide.  It is like comparing industrially produced red wine vinegar with aged balsamic vinegar.  The kombucha just does not have enough time to mature.

How Your Kombucha May Get Too Much Air

Surface area too large

When making kombucha it is good to use a wide mouthed vessel so there is enough surface area for oxygen to be absorbed into the liquid and carbon dioxide can escape.  If the depth of the container is less than the diameter of the opening then the surface area is too large.  Either add more liquid or restrict the airflow around the container.

Too Much Airflow

By placing your kombucha fermentation by an air vent or heating grate the air movement can lead to a high level of oxygen exchange especially if it is warm air.  The old carbon dioxide laden air coming off the surface of the SCOBY is replaced too quickly with fresh oxygen laden air.

Remedy this by either moving your kombucha fermentation elsewhere or covering the vent or heating grate.  You could also use a thicker cloth on the surface of the container or use a container with a narrower opening.

Can Plastic Containers be used in Fermentation


White plastic bucket

When you first start to ferment your own foodstuffs there is always the question about what can be used for the various fermentations you want to try.  It seems like there are always more things to ferment then there are containers so the question arises “Can I just use old plastic containers?”.

Plastic containers can be used for short term, low temperature fermentation. Use food grade plastic containers which are BPA free and discard any with interior scratches or other damage which could harbor unwanted bacteria and mold.

Plastic containers are used in a wide variety of fermentation applications from primary buckets for wine and beer making to plastic tubs for making greek yogurt.  These  containers are tough, can survive dropping and are light enough to make them easy to move. 

They also have their drawbacks as well such as:

  • Plastic is soft and easily damaged
  • Not all plastic is food grade
  • Plastic chemicals can leach into fermentations
  • Plastic is porous 
  • Repetitively using one time plastic containers is not recommended 

Plastic containers are tough 

This is a great benefit of most plastic containers but is extra beneficial when considering food grade containers.  Containers meant for holding liquid or semi-liquid foods are pliable and strong.  

The long chain polymers which makeup the structure of a plastic container make them very strong for their size and weight.  They are pliable and bounce back to their original shape when bumped or dropped.  This makes them good for holding large amounts of liquid which is heavy and hard to manage.  

Plastic containers are light

As compared to glass or ceramic containers plastic is very light. The material itself is lighter than glass or stone making a plastic container of the same size and thickness lighter than the comparable glass or stone container.  This reduces the amount of weight of a full container.  Something to think about when you have a small location for fermenting projects which need to be moved around.  

As compared to glass or ceramic containers plastic is very light.  Plastic is made up of very long and intertwined carbon chains which are held together with very strong chemical bonds.  This makes them stronger for the amount of material which is used to make them.  

Plastic containers will not shatter 

Plastic is pliable and will bend when moved around.  When put under pressure the container can burst but will not shatter into a thousand sharp little pieces which resemble shrapnel from a hand grenade.  When dropped they can break by splitting down the side making a hole in the container.

Glass or ceramic on the other hand when dropped tend to shatter into several pieces some of which are very small and hard to see.  Each piece has sharp edges which can get into the skin.  If a glass bottle bursts it can cause serious injury due to flying glass which can travel very long distances.

Plastic containers are cheap and are readily available

Plastic is the choice for bulk food transport.  Buckets of all sizes can be found which hold anything from margarine (another form of plastic!), olives, potato salad and almost anything else which is semi-solid in nature.  They are usually available for the asking from grocers, restaurants and wholesale distributors which break down large quantities into smaller saleable sizes.   

They can be found in a variety of shapes from square, round, barrel shaped, wide mouthed or small mouthed and usually have a replaceable lid which can be reused a few times without worry.

Plastic is soft and easily damaged

Although the container itself is strong and resistant to breakage it can be damaged easily by a sharp object.  This includes metal utensils, sharp rocks, seed pits or even hard sharp plastic objects.  

When a plastic container is scratched it makes a long grove which can hold food particles, moisture and dirt.  Once these are exposed to the air they can easily get infected with unwanted bacteria and mold.  This can cause at best off flavors in the fermentation and at worst serious illness.  

Not all plastic is food grade

Plastic comes in a wide variety of types which all can look the same even though their chemical makeup is different.  Buckets which hold construction materials can look and act like food grade buckets but are dangerous to use to store food in the long term.

Another consideration is that most plastic bottles are not meant for reuse.  Plastic pop bottles, water bottles and plastic yogurt tubs are all designed for one time use before recycling (hopefully).  To use them more than once they need to be thoroughly cleaned as they can have odd shapes which can harbor unwanted bacteria and mold.

Plastic does not taste good

It is true that fermented foods are sold in plastic containers but they are only put into the container once the fermentation process is complete.  They are then kept in a cool dark location for only a short period of time.  Fermentations such as soy sauce or balsamic vinegar which can be aged for a long time are not placed into plastic containers until they are bottled for sale.  

Other products like olives, sauerkraut and pickles are also fermented in large vats commercially until they are transferred into smaller containers which may include plastic pails or customer sized jars.  Their exposure to the plastic is kept to a minimum due to the flavor transfer of new plastic products.

Plastic is not impenetrable and the plastic molecule is subject to damage and breakdown when exposed to light, heat and acidic or basic chemicals.  This can impart unwanted flavors in a fermentation which cannot be removed.  

There is lots of debate as to the source of such flavors which include: 

micro-particles 

Micro-particles can come from the manufacturing process and the chemical breakdown of the plastic itself.  Nothing is completely stable and this includes plastic.  It is damaged from agitation, scraping action and chemical processes.  

Each of these break off tiny particles of plastic which get included in the fermentation which is being fermented in it.  Depending on the length of time the food is kept in the container, how much agitation it gets and the age of the plastic will determine how much plastic is included in the food.

Plastic microparticles are becoming a serious environmental problem.  The plastic molecule itself is difficult to break down and few organisms have the ability to use the long carbon chains for energy so they build up in the environment which can be dangerous to wildlife and human health

Chemical break down

As mentioned above most fermentations sold commercially are not made in plastic containers but rather in large vats made of stainless steel, glass, ceramic or wood.  Once the active fermentation is complete they are put in salable containers which could include plastic.  

When plastic is exposed to heat, light and acidic conditions they release chemicals which are detrimental to health. It has been found that plastic containers put under normal use stresses leach estrogenic chemicals into the liquid it holds. 

This is a hotly debated topic with lots of money supporting the use of plastic containers for storage and transport of food but anyone who has left a water bottle in the sun for a few hours knows the water will take on a plastic flavor.  This flavor can have only one source, the container itself.

Active fermentations create agitation, heat and acidic reactions which also react with the plastic container.  The plastic flavor will depend on the type of fermentation and the length of time it is exposed to the plastic.

Plastic is porous

Although plastic seems to be impenetrable it is actually quite porous.  In fact it took quite a long time for manufacturers to produce a plastic bottle which could hold carbon dioxide long term.  T

This is why plastic containers can get stained beyond the point of cleaning.  The color containing liquid has seeped into the plastic and stained it.  This makes it hard to clean properly, holding previous chemicals in its structure.  

This means that the history of the container is very important when using reused or scavenged containers.  Containers which were used to hold caustic or poisonous chemicals should not be used.  Without a complete history of the container you cannot be certain that it has only been used for its intended purpose.   

Repetitively using one time plastic containers is not recommended 

Plastic food containers can be found in a variety of places.  You can find them free from grocers, from purchased processed foods you have finished and you can purchase them new for a special purpose.  Reusing one time plastic containers can lead to unhealthy or unsatisfactory results.  

One time use containers can be difficult to clean, breakdown quickly or transfer flavors from previous foods which were stored in them.  To safely use these types of container wash them thoroughly, ferment similar foods they previously contained and discard containers with stains or interior damage.

Why Salt is Used for Vegetable Fermentation: 3 Good Reasons


a small mason jar holding a spoon and salt

This is one of the frequently asked questions about vegetable fermentation. It comes from the idea that salt is unhealthy.  Although there are many studies regarding salt in our diets the debate regarding its effect on human health is still not decided but when it comes to lacto fermentation it is a necessary ingredient which helps improve the final product.

SaIt prevents spoilage bacteria from growing on the vegetables in the container which cause off flavors, removes some of the water from the vegetable which keeps them crisp and enhances the flavor of the final product.  

Without salt, vegetable fermentations would be dicy to eat, mushy and bland.  Not something you would want to put into your mouth.

How salt prevents the growth of spoilage bacteria

Salt has been used to preserve food for centuries.  Its properties help to reduce the growth of microorganisms in food in several different ways.  

Reduces the amount of freely available water

For microorganisms to grow they need freely available water.  Water helps to maintain proper chemical concentrations within the cell and is used in many biologically important processes.  Without water there would be no life on earth.

With the addition of salt to a vegetable fermentation the amount of freely available water is reduced.  The salt dissolves into the water and reacts with it making some if it unavailable to the various microorganisms found in the fermentation.  

Lactic acid bacteria are more salt tolerant than the spoilage bacteria which are found on the vegetables and therefore have the upper hand in the culture, easily out competing the unwanted microbes.

Disrupts the membrane of microorganisms

With a high enough salt concentration salt can cause the membranes of a cell to rupture.  This is caused by crystallization of the salt within the cell.  Once the cell has solid salt particles in and around the cell’s membrane the sharp edges of the crystal causes damage to the cell which hinders its growth or destroys the cell.

Some species of lactic acid bacteria have been found which have special genes which are activated when they are in a salty environment.  These genes help the lactic acid bacteria to alter their makeup to be more salt tolerant quickly.  Some species have been found which can survive in a 15% brine solution which is five times the recommended salt concentration used for vegetable fermentations.

Reduces the amount of oxygen available 

When the salt fully dissolves into the liquid brine which the vegetables are submerged in, the salt draws out water from the vegetables into the brine.  As this happens any bubbles which are trapped are dispelled.  This leaves less available oxygen for the aerobic microorganisms and further hinders their growth.

Since lactic acid bacteria are anaerobic, meaning they grow best without oxygen they can out compete the spoilage bacteria in this type of environment.

Forces the living cell to expend energy dispelling salt

Having too much salt within the cell prevents normal biological reactions.  Although microorganisms have the ability to remove the salt, this activity takes energy.  The more energy the unwanted cells have to expend on removing unwanted salt the less energy is left for growth.

How salt improves the texture of fermented vegetables

Nobody likes a mushy pickle or soft sauerkraut.  Salt is the ingredient which most influences the texture of a vegetable fermentation.  There are other techniques which help to improve the texture like adding tannins from oak leaves, tea or grape leaves but without the addition of salt these improvements would be too little and too late to make any noticeable difference.

Reducing the sugar content within the vegetable

As the water in the cell is drawn out of the cell, sugar which is dissolved into the water also comes out of the vegetables.  The sugar content in the vegetable drops leading to less microbial action within the vegetable.  Since lactic acid bacteria cannot convert starch into energy but need simple sugars less respiration happens within the vegetable.

The products of respiration of lactic acid bacteria are lactic acid and CO2.  The main culprit of  mushy vegetables is the CO2 which is produced within the vegetable.  This gas expands within the vegetable and breaks down the structure which holds the vegetable together.  The result is a softer pickle or mushy sauerkraut. 

With less sugar within the vegetable less CO2 is produced in the vegetable itself which makes for a firmer crisper end product.

Lowering the amount of available oxygen under the brine

Most spoilage microbes are aerobic meaning they need oxygen to live.  These spoilage microbes produce flavors within the fermentation which are unpleasant, making the fermentation inedible.  

At the beginning of a fermentation culture these microbes grow with the lactic acid bacteria if they have access to oxygen.  This is why you want to keep the vegetables under the brine (especially at the beginning) but even if you keep the vegetables under the brine salt is necessary to ensure spoilage does not happen.  

The salt draws out water from within the vegetable dislodging any small bubbles which cling to the sides of the vegetables and get trapped within crevasses.  This happens faster than the lactic acid bacteria can acidify the environment which improves the final flavor of the fermentation. 

Dehydrating the vegetable within the salt solution 

As mentioned previously the salt draws out liquid from the vegetable essentially dehydrating the vegetable.  As the water content of the vegetable goes down the texture of it improves.  With less water in the vegetable it becomes crunchier. 

How salt improves the flavor of fermented vegetables

Salt is the most popular flavor enhancer in the world.  It is added to almost everything we eat from sweet treats to savory dishes.  It is even a major ingredient of condiments which are added to food to adjust it for flavor.  

There are many theories as to why we have a strong attachment to salty foods which range from past uses of salt for food preservation to our biological need for salt.  Recently several studies have been done which focus on how salt affects our taste.

Attaches to bitter flavors

When salt is dissolved in water it breaks down into its component parts and reacts with other chemicals found in its vicinity.  When salt is added to a food with a bitter taste it reacts with these components causing the food to taste less bitter.  As the bitterness is eliminated the sweet flavors are left making the food taste sweeter.  

Intensifies umami flavor

With the addition of more salt the sweet flavors are also masked and the umami flavor is enhanced.  This is the flavor we find so appealing in soy sauce and miso.  These two foods are highly salted but are very popular for their unique flavor and interest they add to our food.   

How to reduce the amount of salt safely in fermented vegetables 

Lower the temperature

Temperature control is a major part of lacto fermentation.  Most vegetable fermentations taste better, have better texture and color when fermented in temperatures between 60℉/15℃ and 65℉/18℃ .  If you ferment your vegetables at the lower end of the temperature range you can reduce the amount of salt you use to the lower range.  Since the recommended salt concentration for lacto fermentation is between 2%-3% fermenting at 60℉/15.5℃  will allow you to reduce the salt to 2% by weight.

This reduction is due to the lack of mold growth at lower temperatures.  Mold grows poorly at temperatures below 70℉/21℃ so keeping your fermentation cool eliminates the damage done from these types of spoilage microorganisms.

inoculate the fermentation

One of the main reasons why salt is added to a fermentation is to prevent the growth of spoilage bacteria while the lactic acid bacteria grow to high enough numbers to dominate the culture.  This can also be accomplished by inoculating the vegetables with an active culture.  This gives the wanted bacterial cultures a head start and can dominate the culture quicker.

To do this just add some brine from a previous batch of lacto fermented vegetables.  The active culture in the brine will quickly dominate the environment and prevent the growth of spoilage microorganisms.

Acidify the vegetables

One of the main reasons why spoilage microorganisms do not grow well in lacto fermented cultures is because of the low pH in the container.  It is the lactic acid bacteria which produce lactic acid in these types of fermentations but it takes some time for the bacteria to grow and produce enough lactic acid to help.

The salt is added to help hinder spoilage microorganisms while the lactic acid increase in population.  If you want to lower the amount of salt you use you can add some acidity to the vegetables when you pack them into the jar.  

You can either use vinegar, acetic acid powder or lactic acid powder if you can find it.  Be sure not to use very much to prevent making an overly acidic fermentation.

How to Store Homemade Vinegar


three containers of vinegar

When you first start making homemade vinegar there are always those residual concerns about contamination and getting sick or worse from homemade vinegar.  The idea that random bacteria which are present in the environment can safely ferment a mixture or sweetened water and fruit goes against the idea of food safety in our current society.

The truth is that making vinegar at home does not take anything to chance and the procedures which are used ensure a safe and great tasting product.  Once it has reached the desired flavor profile it should be stored properly to preserve the great flavor and tanginess which makes those great dressings and sauces.

To store homemade vinegar place it in a sealable tinted glass container and place it in a cool dark location while not in use.  Homemade vinegar if aged properly will have little bacterial activity due to its low pH and lack of fermentable sugars.  This prevents spoilage bacteria and mold growth.

Storing homemade vinegar seems like an easy thing to do but unless it has been aged properly you may end up in trouble.  There are several things to understand about homemade vinegar before you seal it in a glass container.

The pH must be below 4.0

The world health organization (WHO) have stated that for vinegar to be safe for storage it must have a pH of 4.0 or lower.  This is because the lower pH inhibits the growth of unwanted bacteria and mold.  The unwanted bacteria can come in the form of pathogenic bacteria as well as just spoilage bacteria which can give your vinegar an unpleasant flavor.

The best way to ensure a low pH is to ensure the starter liquid has enough sugar for the yeasts to produce adequate alcohol.  The alcohol in the liquid is converted by the acetic acid bacteria into acetic acid (vinegar).  Without adequate alcohol the vinegar will not reach the safe pH level of 4.0.  

Ways to ensure your vinegar pH is lower 4.0

Check the specific gravity of the liquid before and after it is fermented

The specific gravity of a liquid is a measurement of how dense the liquid is compared to plain water.  The higher the specific gravity the denser the liquid.  When dealing with sweetened liquids it tells the user how much sugar has been dissolved into the water.

 When the specific gravity of a liquid is checked before and after the primary fermentation a calculation can be done to determine the approximate ABV of the liquid.  Acetic acid bacteria need between 5-10% ABV to drop the vinegar pH to below 4.0. 

Add additional sugar during the aging process

When making fruit vinegar from fresh fruit the first step is to load a jar with fruit, sugar and filtered water.  Once the jar is full, the mixture is stirred daily to encourage the naturally occurring yeasts to begin to grow and convert the sugar into alcohol.  You will know this is happening when the mixture begins to bubble.

Once this step is complete the fruit is strained off and the liquid begins an aging process where the yeasts continue to produce alcohol and the acetic acid bacteria convert this alcohol into acetic acid.  Since the yeasts are still very active they will continue to make alcohol as long as there is sugar available for them to use as fuel.  

By adding additional sugar at this stage you can be sure that the yeasts will be able to produce enough alcohol for the acetic acid bacteria to lower the pH to below 4.0. 

Use a pH checker before bottling

A pH checker is mostly used by pool owners to ensure the proper chemical balance to keep the pool free from bacterial growth.  They can also be used to check the pH of any other liquid.  Although the pH of the vinegar is only one indicator to consider regarding when to bottle your vinegar for storage, it will tell you if it can be stored without refrigeration.

Once your vinegar has reached a pH of 4.0 you can be sure it will keep for a long time in a sealed environment.

Start with an alcohol content between 5%-10%ABV

With an alcohol concentration between 5%-10%ABV the acetic acid will have enough alcohol to reduce the pH to below 4.0.  You can ensure you have the appropriate alcohol level by either starting with an alcoholic beverage which has an alcohol content within the above range or you can make your own.

To make your own you will need some additional equipment and more patience as you will have to wait for the yeasts to complete their job of fermentation before you convert it into vinegar.

Little fermentable sugar available

Besides the concern that the vinegar will spoil through lack of proper acidity levels another concern is carbonation within bottled vinegar.  Carbonation happens when the yeast continues to convert the sugar in the liquid into alcohol and CO2.  

If the vinegar is bottled too quickly this CO2 can build up quite substantially and burst the bottle, causing at best, a big mess but at worst it can cause serious injury from flying glass.  When a bottle which is not meant to hold pressure explodes shards of glass are sent in all directions like a hand grenade.  Worse still is that a glass bottle pressurized to the point of exploding has a greater chance of fracturing when it is disturbed like when it is being moved from one place to another.

To prevent this from happening there are a few choices

Ferment your vinegar for a long time

As the vinegar ferments the yeast in  the liquid will continue to convert any available sugar into alcohol but as the available sugar drops so does the yeast population which in turn then uses less of the sugar which is available.  As this process continues less and less sugar is available but less of the available sugar is being used.

You want to ferment the vinegar until the action of the yeast is low enough that the production of CO2 will not cause a problem.  Sometimes this can be a very long time depending on the amount of sugar in the original liquid, the type of yeast species which are in the vinegar and the temperature at which the vinegar is fermented.  

If you ferment your vinegar long enough the yeast population will drop low enough to facilitate safe bottling.  

Measure the sugar content before bottling

This is done by using the above mentioned hydrometer which will determine the dissolved solids in the liquid.  Since it is the sugar which is used by the yeast during the fermentation process, determining the difference between the starting and ending specific gravity needs to be known to accurately determine if enough of the sugar has been consumed.

If you don’t know the beginning specific gravity of the vinegar you cannot use this method.

Test the yeasts activity before bottling

This is the method used by most home vinegar makers but it is the least reliable.  The method is to fill one bottle with vinegar you think is ready for storage.  Place the bottle somewhere out of direct sunlight and wait a week.  Then open the bottle and if there was no CO2 buildup then the vinegar is safe to bottle.

This will work if you have made a small amount of vinegar which you intend on using quickly.  If you are wanting to store your vinegar for a longer period of time this method has some serious flaws:

The CO2 buildup is dependant on a number of factors

The temperature of the room 

Yeast species are more active in warmer temperatures so if you performed this test while the ambient temperature was lower than the highest temperature the room you are going to store your vinegar in, this could lead to CO2 build up and explosions.  

The effectiveness of the bottles seal

Pressure has a way of finding any exit it can.  It will leak out of a pin hole, through a seal not properly tightened or through a gap made by a little piece of debris on the sea of the lid.  Just because one bottle did not carbonate does not mean that all the bottles you fill will have the same result.

How good your senses are

For this test to work you need to be able to detect any CO2 build up which may have occurred in the week or two you performed the test.  This means you need to be able to hear or feel the smallest amount of CO2 escaping from the bottle when you open it.

When it comes to avoiding explosions and possible serious injury you should rely on more definitive tests.

Warnings and safety precautions for this method

Bottles to use with this method

If you are going to use this method for storing your vinegar then use bottles which are made to withstand pressure.  Swing top bottles are great for this as they are designed to hold pressure, can be reusable and are widely available.

Vinegar alcohol level will be higher

When making vinegar the method is aerobic, meaning that oxygen is required for the acetic acid bacteria to grow.  It is not to inoculate the vinegar with acetic acid (although some acetic acid species will arrive that way).  Acetic acid bacteria exist everywhere, the method of preventing their growth is to limit their access to oxygen.  This is why wine is made in air locked containers.

When you pre-maturely bottle the vinegar you are placing the vinegar back into an anaerobic environment which inhibits their growth.  The yeast on the other hand can switch their respiration from aerobic to anaerobic and in most cases produce more alcohol without the presence of oxygen.

By bottling prematurely you will have slowed the growth of acetic acid bacteria and boosted the alcohol producing yeast!  Probably not what you want.

Keep in a cool dark location

Once your vinegar is ready for storage a cool dark location will help it to age gracefully.  Like fine wine, vinegar is not an inert liquid.  Chemical reactions are constantly occurring while it is being stored.  These reactions are influenced by heat and light in a negative manner.  

Keeping your vinegar away from heat and light reduces the speed at which these reactions occur.  This helps to smooth out the flavor of the vinegar giving it a mature even flavor as the different flavor components blend together.

Use darkly tinted bottles

Storing your vinegar in dark tinted bottles helps prevent light from entering the bottle and affecting the vinegar just like storing red wine in tinted bottles improves the flavor of long aged wine. 

Ideal temperature range

Vinegar just like wine benefits from a steady cool temperature to age gracefully.  A range of 10 and 15 °C (50 and 59 °F) will provide a nice environment for the vinegar to mellow out and mature.  Try to keep the temperature even without rapid changes in temperature that will negatively affect the vinegar flavor.

No need to pasteurize 

Properly fermented homemade vinegar does not need pasteurization.  The microbial action in the vinegar is very low due to the lack of food energy and low pH.  Like any living thing spoilage bacteria need food energy to survive and most microorganisms rely on simple sugars.  Since the aging process of your vinegar is designed to lower both the pH of the vinegar and the available food energy there is not much left for spoilage microorganisms to grow on.

The other consideration is the difficulty newly introduced microbes have in gaining a foothold in an established environment.  It is like a new business trying to break into a saturated market, there is just not enough resources for them to grow.  

How long vinegar can be stored

Vinegar with a low enough pH and protection from sunlight and debris from entering the vinegar will last indefinitely.  In fact some of the best vinegars are aged for 5 years or more.  Just like fine wine vinegar can improve with age.  

Aging in the bottle is different from aging in wood or open containers.  When aging in open containers the vinegar still has access to oxygen and will be more active at converting any alcohol into acetic acid.  Although this slows considerably as the available sugar is consumed by the alcohol producing yeast.

Balsamic vinegar methods have been developed which entail aging grape musk vinegar in a series of wooden barrels over a long period of time.  This both concentrates the liquid and adds additional flavors to the vinegar.  Balsamic vinegar must be at least 5 years old before it can be considered balsamic vinegar.  It can be aged 25 years or longer and gets more viscous and flavorful every year.

Unless you have access to a large cool location you probably will not age any vinegar this way but you can age it in the bottle in a dark location in the basement or crawlspace if you have one.  Once you learn how to make vinegar in small batches you may want to make a larger batch to have enough to age over a longer period of time.  

Keep a log of the characteristics of the vinegar as it ages. You will notice that it changes over time and its uses may change from cooking vinegar to drinking vinegar. 

Is the Clear Liquid on Top of Yogurt Edible


Four mason jars fulll of yogurt

Opening a container of yogurt to find a layer of yellowish clear liquid sitting on the top of it is one of those things which begs to the question “Should I eat this or just throw it out?”, especially if you have made it yourself.  The clear liquid which forms on the top of yogurt may be off putting to some but it is a normal part of yogurt.

The clear liquid on the top of yogurt is whey which is made up of water, liquid milk protein, lactose and lactic acid bacteria. It contains vitamin B1, B2, B5, B12, calcium, magnesium and other trace vitamins and minerals.  It is also low in saturated fat and contains 2 grams of protein per cup.

If you are nervous about eating yogurt with whey on top, thinking that it has gone off or is somehow past its prime, set your mind at ease.  The separation of whey from the solid protein in the yogurt is normal and not a sign of spoilage.  

Why liquid separates from yogurt

As yogurt ferments the lactic acid bacteria acidifies the milk.  Once the milk has reached a pH of 4.6 the proteins in the liquid part of the milk begin to thicken forming a gel like structure.  As the pH drops the liquid part of the milk is forced out of the solid curds and because it is less dense it floats to the top of the container.  The lower the pH the more whey which will be forced out of the solids of the milk. 

Yogurt which has been fermented longer than 6-12 hours is prone to separation due to the lower pH as the lactic acid bacteria continue to acidify the milk.  The lower the pH the greater chance it will separate.  If you ferment your yogurt longer than 12 hours be careful not to disturb the yogurt while it is warm.  Carefully place it in the fridge and let it cool before using it as any jaring or disturbance in the structure of the yogurt can cause it to separate.

Some commercial yogurt has additional thickeners and gelling agents mixed in with the yogurt to make it thicker and survive transportation and handling without losing its texture and structure.  These additives do a great job of holding the solids in the yogurt in a semi-solid form but the liquid components of the yogurt will separate and float to the top, even if the pH is still in the higher range.  

To learn more about the many ways you can make yogurt with full step-by-step instructions and full explanations follow this affiliate link for one of the best books on the topic called  “Homemade Yogurt and Kefir“.

How to prevent yogurt from separating

The main reason your yogurt has separated is its pH has dropped lower than 4.6  when this happens the solids in the milk disassociate with the liquid whey.  This causes the whey to rise to the top of the container.  

The low pH can be caused by a longer fermentation time, fermenting at too high a temperature or using too much starter.  Each of these will help the lactic acid bacteria in the culture to acidify the milk to a higher degree.  

How Temperature affects Whey Separation in Yogurt

A jar of normally fermented yogurt and a jar of yogurt fermented at a hot temperature.  
Hot  temperature yogurt has separated.

There are two types of yogurt cultures on the market:

Thermophilic – Requiring temperatures above room temperature 

Mesophilic – Is active at room temperature

Each has an optimal temperature range in which the yogurt culture is most active but both types are made up of several species of lactic acid bacteria.  Each of these species have a different temperature range which they can reproduce.  

The majority of the species found in these cultures grow faster in warmer temperatures so if you ferment your yogurt at too high a temperature you encourage the growth of the lactic acid bacteria which in turn produce more lactic acid.

Higher temperatures also affect the chemical properties of the milk itself making the casein proteins more attractive to each other.  This helps the yogurt to gel faster but also will hasen the whey separation from the milk solids. To prevent this from happening lower the temperature to the lower range fermentation range recommended by the culture you are using.  This will slow the growth of the lactic acid bacteria and produce a more stable yogurt.

Alternatively you could ferment your yogurt for a shorter period of time (in fact this is one of the methods talked about in “Four Easy Ways to Shorten Yogurt Incubation Time (Fast Yogurt )

How Long Fermentation Time Affects Whey Separation in Yogurt

A long fermentation time gives the yogurt culture a longer period to acidify the milk.  At the beginning of a fermentation period there are few lactic acid bacteria in the milk but because the milk is full of fermentable sugar the lactic acid bacteria multiply quickly.

Once they have reduced the milks pH to 4.6 or so the milk will start to coagulate forming a gel like structure.  Once this happens the proteins in the milk will continue to form connections with other milk proteins and slowly disassociate with the liquid in the milk.  As this happens the whey will rise to the top of the container.

You can prevent this from happening by shortening the fermentation time.  Watch the milk carefully and once it starts to gel remove it from the incubator and refrigerate it.  Keep a log to track the fermentation time and temperature to help you make decisions for future batches.

How Extra Yogurt Culture Affects Whey Separation in Yogurt

Normally fremented Yogurt vs using extra culture

As mentioned above the number of active lactic acid bacteria in a culture determines how fast the yogurt will acidify.  Heat will increase the rate of growth, time will give the lactic acid a chance to multiply but if you start with a higher amount of active lactic acid bacteria then you are short circuiting the growth period.

With a high number of lactic acid bacteria in a milk sample the bacteria will quickly consume the fermentable sugars and acidify the milk faster.  Additionally if you are using a previous batch of yogurt it will already have a lower pH which will instantly lower the pH of the milk it was added to. 

Only use the recommended amount of starter found on the package or two tablespoons of cultured yogurt as a starter.   

Alternate ways to prevent yogurt separation

Use a higher fat content milk  

The higher fat content requires that there is less water in the milk leading to less separation.  High fat milk makes a creamier yogurt which does not have the same structure as normal yogurt.  It is softer and smoother than low fat milk which is good for making rich toppings or desserts. 

Add thickeners to the milk prior to fermentation

There are several types of thickeners you can use which you can read about in this post but basically the idea is that the liquid in the milk will be included in the matrix with the addition of a thickener which prevents its separation. 

What to do about the whey separating from yogurt

Small amounts of whey separating from your yogurt is normal and expected.  It forms on the top of the container or in divots left when you scoop some of the yogurt out.  For larger amounts of whey you have two options.

Stir the whey back into your yogurt

Whey is full of beneficial vitamins and minerals as well as live probiotics which help your digestive system maintain an even keel.  Per cup it will provide 20% of the RDI of B2, 7% B12 and contains 25% of the recommended calcium in a natural form with 6% the magnesium.  nutrition facts

By stirring in the whey back into your yogurt you are improving the nutritional value of the yogurt but also retaining the texture.  Although the whey will separate again if you leave it alone for a while, stirring the whey back into the yogurt will work fine if you consume it immediately after.  

The yogurt may be tangier than normal but that is just an effect of the lower pH and not a sign of spoilage.  If it is too tangy for you add some honey, use it on top of fruit or make it into a smoothie or shake.

Pour the whey off the top of your yogurt

If you choose to  pour the whey off the top the remaining yogurt will be thicker and creamier.  It will have a higher fat content and fewer simple sugars which are removed with the whey.  This makes for a great yogurt for topping fruit, cereal or making into thick dips.

Greek yogurt is made by removing some of the whey intentionally before packaging to make a thicker product.  The yogurt is placed in a filter where the liquid whey drains off and the solids which are made up of solid proteins and fat remain behind.  

How to remove whey from yogurt

If you like a thicker yogurt then you can intentionally remove some of the whey from your homemade yogurt by hanging it for 8-24 hours.  The solids will remain behind as the liquid whey drains away into a container.

Instructions:

  1. Place a clean cotton cloth over a bowl
  2. Pour the yogurt into the center of the cloth
  3. Gather the edges of the cloth and tie a string around them to form a bag
  4. Hang the bag over the bowl for 8-24 yours depending on how thick you want your yogurt
  5. Remove the yogurt from the bag and place into the fridge
  6. Pore the whey into a container and place it in the fridge

Use whey for baking

Whey is a weak acid which reacts quickly with the baking soda or baking powder used in quick breads.  This creates more CO2 as the basic ingredients react with the acidic ingredients in the recipe.  This makes for more bubbles and causes the batter to rise more, making a lighter fluffier product.

Whey can be used to make biscuits, muffins, pancakes and waffles.  Any type of quickbread baking where the raising agent is some type of soda as it is the basic soda which reacts with the acidic whey to give the extra rising power.

Add whey to smoothies

There are two ways you can use whey in smoothies.

  1. Make the whey into ice cubes and use with fresh fruit smoothies

Simply pour the whey into ice cube trays and freeze.  When you want to make a smoothie place two or three cubes into the blender along with the fresh fruit and blend until smooth

  1.  Use refrigerated whey with frozen fruit 

Replace the liquid in your normal smoothie recipe with whey.  Add the frozen fruit and blend until it is smooth.

Add whey to soups or stews

Whey adds a tangy flavor to soups and stews due to its lower pH.  It is great for replacing some of the liquid in soups, adding complexity to any soup recipe.

The acidity will help tenderize the meat in stews, producing a rich thick stew without having to add thickeners to the base.  

Drink whey 

Whey can be drunk plain or added to fruit or vegetable juice.  The tangy flavor is a pleasant addition to freshly juiced vegetable juice like carrot-ginger or celery and apple.