
This post contains affiliate links.
Although alcohol is a necessary ingredient in making vinegar you don’t have to start with an alcoholic solution to make great vinegar. Vinegar made by simultaneously producing alcohol and acetic acid have a different flavor than those which start with a 6-10% ABV liquid. The variety of yeast species is more varied providing greater base of esters and enzymes which help the acetic acid bacteria to grow and add additional flavors to your homemade vinegar.
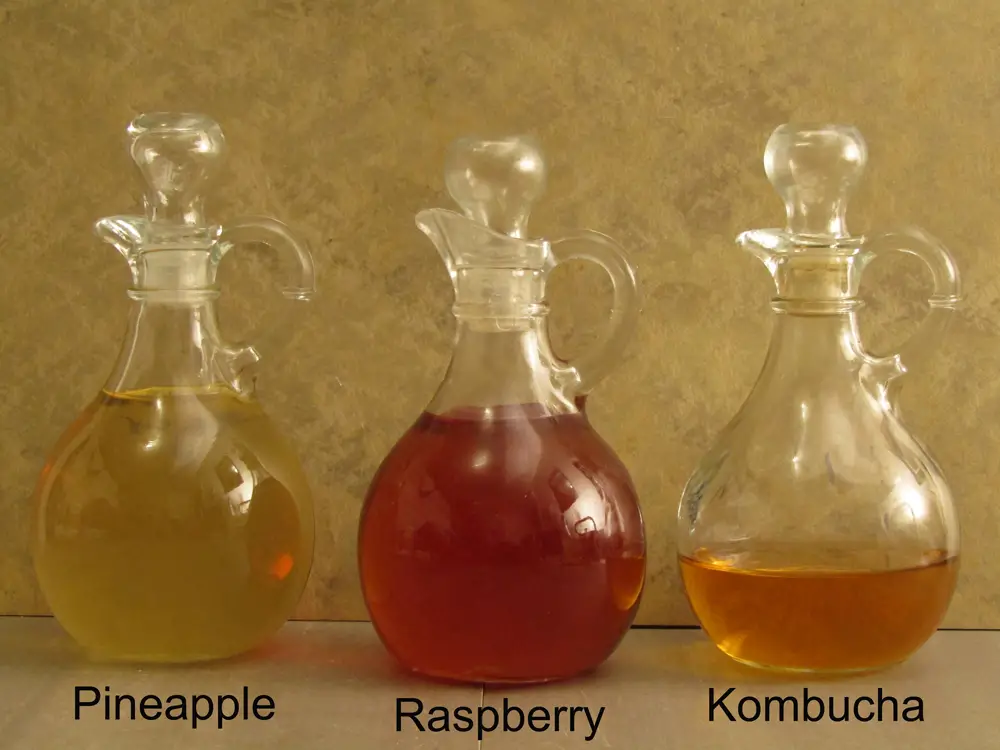
This method of making vinegar will allow you to make vinegar from any fruit or vegetable you have around. It can be made from scraps or whole, fresh or frozen produce. You no longer have to be limited by what is available in the store. You can make apple, pear, pineapple, peach and plum or any other type of vinegar you want.
You can even make vegetable vinegars like carrot, beat or hot pepper (hot peppers are actually a fruit but usually used as a vegetable). Only your imagination and bravery will limit the varieties you can make.
To make vinegar you will need the assistance of two microbial families
Yeast
Yeast use sugar for their respiration producing ethanol and CO2. They are found naturally occurring in our environment and can grow rapidly when placed in the right environment.
The ethanol is what feeds the acetic acid bacteria helping them to rapidly dominate the vinegar culture but yeast also provides vitamins which were not found in the original food and make minerals more available to you as they break down the food.
Acetic acid bacteria
Acetic acid, the acid which is found in vinegar, is produced by acetic acid bacteria which is a family of bacteria made up of four types, Acetobacter, Gluconacetobacter, Gluconobacter and Komagataeibacter. They are found everywhere, on our food, surfaces, skin and in the air.
The method for making vinegar from almost anything
Making vinegar can be done in many ways (link to vinegar making methods post) but here is a method which will produce great vinegar from anything you can imagine without the need for starting with an alcoholic base.
Wash your equipment
You will need:
- One gallon container (a large pickle jar will work great)
- Cutting board
- Kitchen knife
- Clean porous cotton cloth with an elastic band
Starting with clean equipment is one of the keys to making quality vinegar. Clean equipment will reduce the chance of contamination and off flavors in your homemade vinegar. It is not necessary to sanitize your equipment which requires either toxic chemicals or high heat which is difficult to accomplish.
Run your equipment through the dishwasher with the dry cycle on and clean all surfaces with soap and water. Rinse everything well with water to remove any soap residue. Air drying is the best way to prevent unwanted microbes from re-contaminating your equipment.
Once your equipment is clean and dry keep it confined to the space you have cleaned.
Prepare the ingredients
You will need:
- Four to eight cups of fruits and/or vegetables
- Filtered water
- Sugar
You can use any fruit or vegetables to make vinegar with this method but it is important to know that the flavors in the original food will come through in the final vinegar so choose something you like.
The amount of flavor the vinegar has will be determined by how much of the base ingredient you use at the start. Some fruits like pineapple and mango have a strong flavor so they can be over-powering if you use too much whereas fruits like peaches, strawberries or raspberries have a more delicate flavor which requires more fruit for the flavor to be noticeable in the finished vinegar.
Carefully inspect your ingredients for mold or rotten bits.
Either throw rotten berries away or cut out spoiled bits of larger solid fruits and vegetables. Any mold or rotten bits will taint the flavor of the vinegar so it is important to remove as much of this as possible.
Wash the ingredients in cool filtered water.
Tap water is treated with chlorine to prevent microorganisms from contaminating the water. This is great when preventing water borne diseases but will kill wanted microbial species found on your ingredients. These microbial species are what nature uses to breakdown the ingredients back into soil. You want them to break down the sugar in the food and make alcohol and acetic acid.
Load the ingredients into your jar and fill ¾ with filtered water.
There are some fruits which do not need added water like grapes, oranges and other juicy fruit but most fruits are hard to get enough liquid out of them to make vinegar. If you have a juicer you can make vinegar with only the juice of the fruit but if you don’t have a juicer you can still make vinegar with whatever base you choose.
Adjust the sugar content
To make vinegar which has enough acetic acid to be able to protect itself from unwanted microbial growth you need to add enough sugar. The sugar is used by the yeast to produce alcohol which in turn is used by the acetic acid bacteria to produce acetic acid.
Without enough sugar the yeasts will not produce enough alcohol fast enough for the acetic acid bacteria. You want a potential ABV of at least 5%. If you were fermenting the sugar with high producing yeast species like Saccharomyces cerevisiae you can use less sugar to produce alcohol but when you are simultaneously producing alcohol and acetic acid the alcohol level never gets very high.
Most naturally occurring yeast species only have an alcohol tolerance of 3-4%ABV but since the acetic acid bacteria are using the alcohol in the liquid while the yeast is making it the alcohol level does not rise above this level. A low alcohol level allows yeasts with a low tolerance to alcohol to continue to live. These yeasts are not as efficient at producing alcohol so you will need more sugar for the same amount of alcohol you need for the target acetic acid.
If you have a hydrometer you can use it to test the amount of sugar you have in the liquid. You want a reading of 1.052 or higher.
Without a hydrometer you can just use a ratio of 3 ¼ cups of sugar per gallon of pure water. This will produce a higher reading on a hydrometer but will work for all food bases you are using no matter what its sugar content it has.
Secure the cloth over the lid with the elastic band to prevent contamination.
Agitate the mixture
Stir every 12 hours for the first week. Before you go to bed and when you get up. Once you see active bubbles coming from the mixture you can reduce the stirring to once a day.
There are several reasons why you will want to stir the mixture regularly
- Add oxygen for the natural yeast and acetic acid bacteria to grow rapidly
- Prevents mold growth on the surface of the liquid
- Helps the flavors of the fruit or vegetable to enter the liquid
- Mixes any solids which have settled on the bottom of the jar keeping them in play for the main ferment
This is an important step. You want the acetic acid bacteria and yeast to dominate the culture quickly. Some methods of vinegar making use a vinegar mother and some finished vinegar to pre-acidify the liquid before fermentation. This helps to prevent mold growth.

This method only uses the naturally occurring yeast and bacteria to make your vinegar giving in a pure fresh flavor but requires more work but it does require care and attention.
Strain the solids
After about ten days taste a piece of the solids in the mix. If it still has flavor leave it for another day or two and test again. Once it does not have much flavor left it is time to strain out the solids.
Pour the mixture through a clean cloth into another container and squeeze out as much juice as you can. Wash the original container and pour the liquid back into it.
Secure the cloth with the elastic band and place in a warm location to ferment.
Ferment the liquid
This step requires patience! You will have to let it ferment for at least a month and up to six months. During this step the yeast will reduce the amount of sugar in the liquid substantially and the acetic acid bacteria will convert the available alcohol into acetic acid.
A vinegar mother will most likely form on the top of the liquid forming a cellulose mat which protects the liquid from contamination. This mat will continue to grow the longer it is left alone.
On the bottom dead yeast cells will form a layer of sludge on the bottom along with any solids which passed through the straining process. This layer is called lees and can be used for a variety of things. After a month if you are impatient you can start checking the clarity of the vinegar.
Once it is clear it is time to filter out the lees.
Filter the vinegar
Filtering your vinegar helps to prevent your vinegar from becoming yeasty or musty. The lees are dead yeast bodies which break down over time. This adds flavors to your vinegar which are unpleasant giving it an off flavor.
To prevent this you need to remove the lees from the container once the main amount of the yeast cells and solids have settled to the bottom of your container. The best way to do this is to syphon the clear vinegar into another container. If you don’t have a syphon just carefully remove the mother and pour the liquid into another clean container slowly to not disturb the lees in the bottom.
At this point you can use your vinegar. It will have a sharp vinegar flavor which can be a little harsh. It is great for salads and sauces which need a little bite.
As it ages it will lose some of the harshness and will improve with age. Try some now and put the rest away to age.
Age the vinegar
Vinegar with an acetic acid content above 5% will last indefinitely. The acidity protects it from contamination and the low food availability slows microbial action. You can use it at any time but keep some in reserve to age over a period of years to compare the flavor as it matures.
Aging vinegar can be done in a number of ways. Some vinegar is aged in wooden barrels giving it a rich smooth flavor and some is aged in ceramic pots or glass jars.
Whatever your budget will support will work. Put your vinegar somewhere out of the way but will get some air circulation as the acetic acid bacteria still need some air to live. As the vinegar ages it will lose its sharp flavors and mellow out as the volatile chemicals react with the air and other ingredients in the liquid.
Some vinegar like balsamic vinegar is aged for very long times so don’t worry that it will go off or begin to taste bad. Balsamic vinegar cannot be sold as balsamic vinegar unless it has aged five years. Some balsamic vinegar is aged over 25 years or more in wooden casks made from various types of wood.
You will probably not get to this level but try to keep some back to sample later as it ages.
Store it correctly
Once it has reached a flavor profile you like you can slow the changes down by storing it in a cool place. Keep it at a steady temperature will help it to age gracefully and continue to improve. The ideal temperature to store vinegar is between 10-15˚C.
Some people advocate pasteurizing vinegar before bottling but if you age your vinegar it will not need this step. After a year of aging there will be very little fermentable sugar or alcohol left in the vinegar and is perfectly safe to bottle without pasteurization.
Consume it
This is the best part! Vinegar adds tang to any recipe and with additional flavors you can mix up your recipes from red wine vinegar and apple cider vinegar.
Vinegar is a great addition to salads, soups, sauces and marinades. Can be made into a shrub (a mixture of vinegar, fruit and sugar) for a refreshing afternoon drink.
Make vinegar from starchy foods
Fruit of vegetable vinegars are easy to make because of the available sugar found in the fruit of vegetable are easily fermentable by the yeast found naturally in the environment but starchy foods like rice or grains cannot be broken down by the yeast.
If you want to make vinegar from starchy foods you have to add a step to the process.
Saccharification
This is the process of break the bonds which hold the strings of sugars together in a carbohydrate. This is done using different methods depending on the type of starch which is being used.
Rice
The most common way saccharification is used on rice is by using a mold called Aspergillus oryzae or koji mold. The rice is inoculated with Aspergillus oryzae and kept in a warm humid room for two to three days where it uses the rice starch for food while breaking the bonds which hold the starches together and making the sugar available to yeast action.
Barley
Barley is one of the main ingredients in beer and has a saccharification method of its own.
The Barely is soaked until it sprouts at which point it is dried and toasted. Once toasted it is boiled in hot water until all the starch in the barley is converted to sugar. It is then filtered and used to make b
Once the starches have been broken down into sugar it can be used to make vinegar. The yeast will convert the sugar into alcohol and the acetic acid bacteria will use the alcohol to make vinegar.