
This post contains affiliate links.
When making vinegar at home you have a lot of options depending on how much money you want to spend, how long you are willing to wait and what type of vinegar you want to make.
There are basically five types of equipment for making vinegar which can be used: a jar with cloth covers, wooden barrels, two containers with fermenting materal, vinegar generators and submersion systems.
Each of these setups have their benefits and drawbacks which when considered can help you make a decision on which type you need.
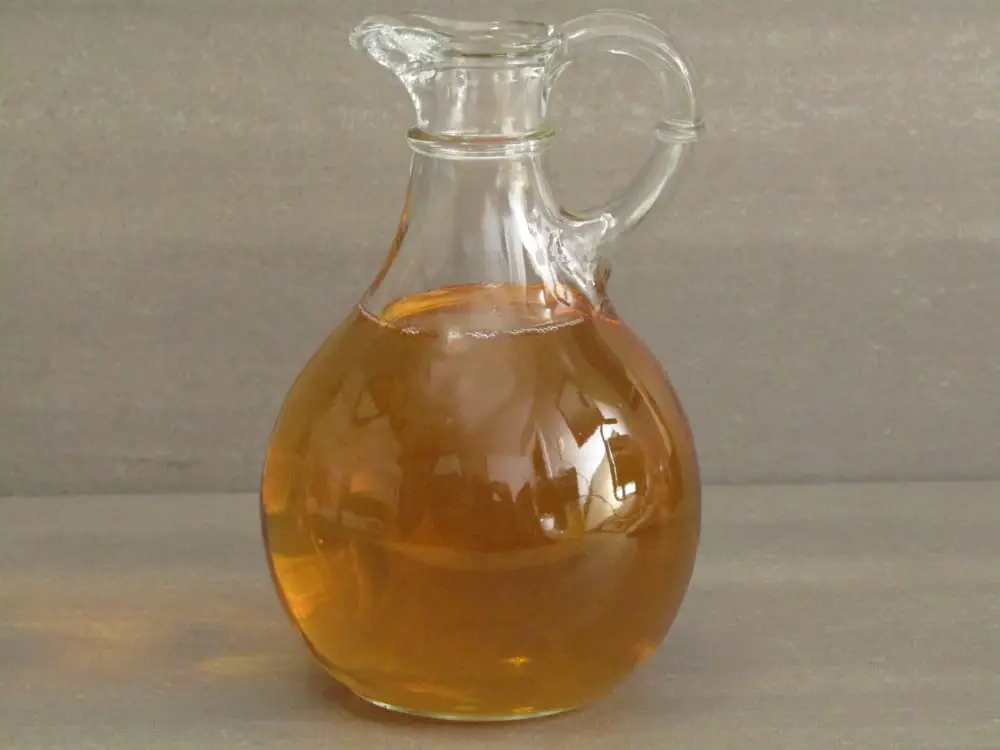
Jars with cloth covers
This is the cheapest and most used method of making homemade vinegar. It produces vinegar which can be very good of any flavor. The equipment can be found right in your kitchen without purchasing anything besides the ingredients needed to make the vinegar.
Equipment description
- One glass jar with a wide mouth opening
- Fine woven cotton cloth
- Elastic band
Making vinegar is a two-step process which requires the production of alcohol and then the conversion of the alcohol into vinegar. This means that you need two types of microorganisms in the liquid:
- Yeast to make the alcohol out of the sugar in the liquid
- Acetic acid bacteria to convert the alcohol into acetic acid
When you put a sugar solution into a jar naturally occurring yeast will begin to convert the sugar into alcohol. If you were to seal off the liquid from the air the alcohol level will continue to rise until it either kills the yeast in the liquid or the yeast runs out of digestible sugar.
By using a wide mouthed jar you are giving the acetic bacteria access to oxygen allowing it to grow and use the alcohol produced by the yeast to make acetic acid (vinegar).
The liquid also needs protection from collecting dust and bugs which is where the cloth and elastic band comes in. The cloth provides a barrier from outside contaminates but allows free oxygen exchange.
Benefits of using jars with cloth covers
Most inexpensive method
Jars of any type can be utilized. Wide mouth mason jars, old pickle or condiment jars and glass beverage containers can be used.
Any type of cotton cloth can be used just as long as the weave is small enough to prevent dust and insects from getting into the liquid. An old T-shirt, stained sheet cut into pieces or go all out and buy some cheese muslin with a tight weave.
Can be used for continuous vinegar making
Glass containers with a spout on the bottom allow vinegar to be drawn off at any time. These can be found for distributing beverages and come made from glass, ceramic and plastic. Do not use the plastic ones as they may not be meant for long term storage of acidic liquids and may leach chemicals into the vinegar.
Drawbacks of using jars with cloth covers
Takes a long time
This method relies on the oxygen exchange from the open top of the jar. The limiting factor being the amount of oxygen the liquid can absorb. The ratio between the surface area and the volume of liquid is the limiting factor. The higher the surface area the faster the vinegar will be ready.
Glass does not add flavor depth
Glass is impermeable and cannot impart any additional flavor to the vinegar. This is good and bad as some vinegar flavors can be harsh and sharp tasting which the glass cannot mitigate.
Wooden barrels
The wooden barrel method of making vinegar has been used traditionally throughout history. The wooden barrel was the cheapest and most reliable method of storage and shipping goods for centuries. Making vinegar in wooden barrels can be as easy as one barrel tipped on its side with holes drilled in the ends to let the air in or an elaborate system of different types of wood and sizes of barrels used.
Equipment description
Used barrels from the whiskey or wine industry make great vinegar barrels which can add additional flavors stemming from the type alcohol it was used before. You can also get new barrels which have a varying amount of toast which provides different flavors for your vinegar. The barrel must be in good shape without any signs of decay or damage.
A wooden barrel of any size or type of wood can be used to make vinegar with a few adaptations. A barrel used for making vinegar should have a bung hole in the side which allows the liquid to be added to the barrel and one hole on each end of the barrel to allow air flow. The holes are covered over with a fine mesh screen or cotton wool to prevent insects from entering.
The barrel is placed on its side and filled 2/3 full and left to ferment for 6 months to a year. Leaving the barrel 2/3 full helps the acetic acid bacteria to have access to oxygen which it needs to grow and convert the alcohol into acetic acid.
Benefits of using wooden barrels for vinegar making
Add additional flavor and complexity to the vinegar
Depending on the type of barrel you use the flavor of the vinegar will change. Using used whisky or wine barrels will add flavors which came from the original use. Which can provide great depth of flavor to any vinegar. Try to match the vinegar type to the barrel. Use old whisky barrels for apple or pear vinegar and use old wine barrels for grape wine vinegar. That way the flavors tend to match.
New wooden barrels of all wood species can be used including oak, cherry, chestnut and even cedar have been used. When making balsamic vinegar several types of wooden barrels are used throughout the process to add flavor and complexity to the finished vinegar.
Can be used to age vinegar over a long period of time
The typical example for long aged vinegar is balsamic vinegar which is regularly aged up to 25 years in consecutively smaller wooden barrels but other types of vinegar is also aged in wooden barrels like rice vinegar which has been stored in wooden boxes made from cedar and aged up to 20 years.
Higher volume of vinegar can be made
Wood is a strong material which can be used to make barrels of very large sizes without the worry of breakage. Barrel sizes and cost range can be found in the table below.
Can be used for continuous vinegar making
Most barrels come with a bung hole on the top and a spout on the bottom. This allows you to add additional sweet or alcoholic liquid to the top of the barrel and drain some finished vinegar from the spout when needed.
This will provide a continuous supply of vinegar without interruption or having to transfer large amounts of vinegar all at once.
Drawbacks of using wooden barrels for vinegar making
Requires a dedicated space
Wooden barrels are larger and are difficult to move around. Not like small glass jars which can be moved around in the pantry. They can be heavy and take up a fair amount of space so dedicated space for them is a must.
More expensive
Wooden barrels are not used for storage of commercial goods any longer so they cannot be found just lying around. If you want a useable wooden barrel you will have to buy one.
They can be purchased used form local wineries, directly from wooden barrel manufacturers or online.
Takes time
Wooden barrels also limit the amount of oxygen exchange because of the small holes which the air may travel through, no mechanical advantage and the ratio of surface area to volume is limited.
Different sizes and cost range for each
| Barrel Size in Gallons | Barrel Size in litres | Cost Range in US dollars |
| 0.26 | 1 | $50 – $70 |
| 0.52 | 2 | $60 – $85 |
| 0.78 | 3 | $70 – $95 |
| 1.32 | 5 | $90 – $130 |
| 2.11 | 8 | $140 |
| 2.26 | 10 | $125 |
| 3.9 | 15 | $170 – $190 |
| 5.3 | 20 | $160 – $210 |
| 6 | 23 | $205 |
| 7.9 | 30 | $225 |
| 10.55 | 40 | $255 |
| 13 | 50 | $285 |
| 18.4 | 70 | $335 |
| 100 | 26.4 | $410 |
| 53 used | 200 | $100 |
Two containers and wood chips
This is using the Boerhaave Process which was developed in the late 17th century. It can speed up the production of vinegar from months to weeks by increasing the surface area which the acetic acid bacteria have to grow.
The Boerhaave Process of making vinegar works by transferring the liquid from one container filled with sticks or vineyard cuttings to another. As the liquid flows down the filler it gets exposed to oxygen which the acetic acid bacteria use to convert the alcohol in the liquid into acetic acid.
Equipment description
The equipment is made up of two containers with a fine plastic mesh screen on the top like those used for making sprouts and some type of wood chips like those used for adding toast to wine or smoking meat.
The containers are filled loosely ¾ full with the wood chips and the screen is placed on top. You can also add a cotton cloth with an elastic band to keep out small insects if your screen is not small enough.
One of the containers is then filled with vinegar base. Then daily ¾ of the liquid is poured from one container into the other.
This increases the surface area which the liquid is exposed to oxygen helping the acetic acid bacteria to grow quickly and convert the alcohol into acetic acid.
Benefits of using two containers and wood chips
Faster than passive methods
Once the wood ships get saturated with the liquid and the yeast start to make alcohol acetic acid bacteria start to grow rapidly. The surface area which allows oxygen exchange increases drasticly as the wood chips become saturated with the acetic acid basteria.
Moving the liquid from each jar daily keeps the wood chips wet and prevents mold growth while the pH drops.
Can add different flavors without expensive equipment
The wood chips add flavor to the vinegar which are similar to those which can be achieved from using wooden barrels. Each type of wood chip will provide a different flavor. You can also use non-reactive materials like charcoal or add additional flavors by adding dried fruit or vegetables to the mix.
Drawbacks of using two containers and wood chips
Requires daily attention
You have to move the vinegar from one container to the other on a daily basis to prevent unwanted bacteria from growing in the wood chips because the environment at the beginning of the process is not acidic enough. Without the daily agitation of moving the liquid from one container to another mold or other unwanted growths can get a foothold and spoil the vinegar.
More space needed
You will have to find a larger space with easy access so you can move the liquid from one container to another easily. You also need twice the amount of space for the same amount of vinegar as it is now spread out between two containers rather than one.
Can be messy
The transfer from one container to the other can and will cause spills which need to be cleaned up. this method leads to more mess than the other methods just due to the daily pouring of liquid from one place to another.
Vinegar generators
Vinegar generators are a modern version of the Boerhaave Process method of making vinegar. It is designed to increase the surface area which the acetic acid bacteria can grow. This gives them greater access to oxygen helping them to grow and convert the alcohol into acetic acid. With the increased surface area the amount of time it takes to convert the alcohol into acetic acid is greatly reduced and the acetic acid content can be much higher.
Equipment description
A vinegar generator is made up of a collection tank on the bottom of another container filled with wood shavings, charcoal or flavorings. The liquid in the bottom container is pumped from the bottom container into the top one. Which then filters down through the top container back into the bottom one.
Benefits of a vinegar generator
Faster method than jars or wooden barrels
The surface area is increased just as it is using the two jar method. The filler used in the top container provides a good place for the acetic acid bacteria to grow and produce acetic acid quickly. This shortens the time required for converting the alcohol into vinegar.
Less effort required
The generator works automatically once it has been set up and filled with sweet liquid. There is no pouring from one container to another like the two jar method and you will not have to remember or be tied down to care for your maturing vinegar.
Can make different flavored vinegars
Just like the two jar method you can use different types of wood chips, non-reactive material or add dried fruit or vegetables to add different flavors.
Drawbacks of a vinegar generator
More expensive
A vinegar generator is made up of expensive parts:
- Pumps
- Stainless steel or acid resistant plastic containers
- Hoses and fittings
- Screens and filters
Whether you are going to make your own or purchase one it is going to cost you upwards of $100 – $400. Compared to a free glass jar with a cotton cloth this is considerably more expensive.
Requires a dedicated space
These machines are larger and require more space. Depending on the volume you are making they may require a dedicated floor space away from any living quarters. They also need to be kept warm so a cold garage will require more energy for heating the vinegar while it ferments.
Requires electricity
This is the first system which requires pumping liquid from one container to another. It requires some form of electricity to run the pumps and heater to keep your vinegar at optimum temperature.
Requires maintenance
Anything with moving parts will need regular maintenance. the hoses will need cleaning, pump servicing and regular deep cleaning to prevent vinagar spoilage.
Submersion vinegar making system
The submersion method of making vinegar is how most industrially produced vinegar is made. It can convert large amounts of an alcohol solution into vinegar in less than a day when the proper acetic acid bacteria are active. It does this by providing adequate amounts of oxygen to the alcoholic solution which encourages rapid growth of specific acetic acid bacteria called Acetobacter. This type of acietic acid is used because it does not produce much biofilm which hinders the efficiency of the equipment.
Equipment description
The equipment for using the submersion method is made up of large vats open on the top with a bottom aeration system which pumps air through the liquid. It requires pumps, hoses and air dispersal methods to evenly distribute the air throughout the vats. To maintain optimal vinegar production it must be temperature controlled.
The air has to be filtered to prevent unwanted particles from entering the vinegar and causing unpleasant flavors.
Benefits of the submersion method
Fast vinegar production
This system can make vinegar in a matter of hours to days depending on the temperature and air flow going through the liquid. As the air is pumped through the liquid it gives the acetic acid bacteria enough oxygen to grow at a super-fast rate which acidifies the liquid quickly.
Consistent results
This is a controlled process which when done correctly will produce consistent results. Making the same vinegar over and over with the same flavor. This is great for certain applications.
Drawbacks of the submersion method
Large dedicated space required
This is a professional piece of equipment meant for producing large amounts of vinegar in a short period of time. It takes up a large amount of space which must be dedicated strictly to the purpose of making vinegar.
High equipment cost
These start at $1500 for a small contained unit and just go up from there.
Requires electricity for heating and pumps
The electrical demand is high on these units as they need to push vast amounts of air through the alcoholic liquid and maintain a strict temperature range.
Needs regular maintenance
These units need to be cleaned regularly. During the vinegar making process some of the bacteria produce a biofilm which in the slower methods are prized and used to inoculate further batches but these same biofilms clog up filters, screens and pumps which reduce the efficiency of this type of vinegar making equipment.
Vinegar lacks flavor
The short fermentation time lowers the variation in flavor which makes slower fermented vinegars so flavorful. Since this process only a few types of acetic acid bacteria are used to produce the vinegar the flavor is thin.
Must start with an alcoholic solution
These systems are made to convert already fermented alcoholic liquids into vinegar. Using them with sugar saturated liquids like can be used in all the other methods will produce unsatisfactory results and damaged equipment.
Other equipment for vinegar making
Vinegar making can be started with a bare minimum of equipment and can make some great tasting vinegars from a wide variety of base materials. The challenge is that you will not know how your vinegar will taste until after it has been fermented and aged, which can be months from when you started it.
Occasionally a batch of vinegar will not taste that good. It may have a musty flavor, acidity too strong or too weak or the flavor is too strong or too weak. When this happens it is really disappointing because of all the work and time which went into it.
Some of this can be avoided with some testing equipment and the knowledge of how to use it.
Testing equipment used for vinegar making
Hydrometers
A hydrometer is used to measure the density of a liquid. It is used mostly in wine making to measure how much fermentable sugar is present in the liquid prior to fermentation. The more sugar in the liquid the higher potential alcohol of the wine.
In vinegar making it is used for the same purpose with an added step. When making vinegar which is meant to be aged or used for other preservation projects it must have a low enough pH to prevent spoilage or contamination from pathogenic bacteria. The hydrometer is used to ensure enough alcohol is available for the acetic acid bacteria to convert into acetic acid to ensure a low enough pH.
Equipment description
A hydrometer is a long glass tube with a weight on the bottom and a graduated scale contained in the glass. It comes with a long thin beaker which is used to hold a small amount of the liquid you are measuring.
Benefits of using a hydrometer
- Ensures correct sugar levels in initial fermentation for desired acidity level
- Measures the final sugar levels of the liquid to ensure fermentation is complete
Drawbacks of using a hydrometer
- Requires knowledge to use correctly
- Is susceptible to incorrect readings
Acidity testing kits
These are used to test is your vinegar has enough acidity for long term storage. Vinegar without the proper acidity content should not be stored for long periods of time. They can also be used to determine if the vinegar has finished converting the alcohol into acetic acid.
Equipment description
An acidity testing kit comes in a two types:
Paper strips with a color comparison chart
The paper strips are covered with a coating which reacts with the acid and changes color. The strips are dipped into the vinegar you are testing and the color the paper changes to is compared to the color chart to determine the liquids acidity level.
Benefits of using paper strips
- Easy to use
- No waste of vinegar
- Fast results
Drawbacks of using paper strips
- Hard to accurately read results
Electronic pH tester
These easy to use and come in a variety of styles and prices from less than $20 to more than $200 depending on your needs. To operate them you simply have to dip the tester into the vinegar and the display will tell you what the pH of the liquid is. Most of the more expensive ones can be calibrated accurately for those who want exact readings.
Benefits of the electronic pH tester
- Very easy to use
- Accurate results
- No comparison needed
Drawbacks of the liquid chemical method
- Requires a charged battery
- Can get damaged if not cared for properly
Vinegar aging and storage
Once your vinegar has finished its primary fermentation you have options of how you are going to store it. Most vinegar gets better as it ages and will last indefinitely if it is stored properly. Vinegar is like wine which needs a controlled environment to age gracefully which includes proper storage containers for the type of vinegar you want, ideal ambient temperature and limited light exposure.
Glass jars
Not only can you ferment you vinegar in glass jars but you can age it in them as well.
Benefits of glass storage jars
- Can be used to age and store vinegar over a long period of time
- Do not impart any additional flavors
- Jars can be cleaned easily
Drawbacks of glass storage jars
- Potential for explosions from pressure buildup if the fermentation is not complete
- Allows light to affect the vinegar
- Must be sealed with non-metallic lids to prevent contamination
Glass bottles
Glass bottles are similar in use as glass jars. They are easily available and provide both short term and long term storage options
Benefits of using glass bottles
- Come in various sizes for long and short term storage options
- Come in a variety of colors for long term aging
- Can be sealed with non-metalic tops
- Some are meant to hold pressure lowering risk of explosions
Drawbacks of using glass bottles
- Difficult to clean
- Does not provide additional flavor complexity to the vinegar
Ceramic crocks
Ceramic crocks can be used to make and store vinegar. They are enameled stoneware containers which come in a variety of shapes and sizes. They can be found in hardware stores, specialty stores, antique stores and online.
Benefits of storing vinegar in ceramic crocks
- Can hold large amounts of vinegar
- Are non-porous preventing loss of volume
- Are easily cleaned
Drawbacks of storing vinegar in ceramic crocks
- They are heavy and subject to damage if not handled carefully
- Difficult to seal for long term storage
- Old crocks may have lead in the glaze which can leach into vinegar if damaged
- Take up a lot of space
Wooden barrels
Wooden barrels are a great option for storage of your vinegar. They have been used for long term storage and aging various liquids for centuries and have proven to be a reliable method when done properly.
Benefits of using wooden barrels for vinegar storage
- Come in 1 to 55 gallon sizes and up for small and large volume storage
- Impart additional flavor characteristics depending on wood type and toast level
- Are naturally resistant to unwanted microbial growth
- Slowly concentrates the vinegar as it ages
Drawbacks of using wooden barrels for vinegar storage
- Need a dedicated space
- Need pretreatment for proper use
- Are difficult to clean
- Are more expensive than other methods