Urban Fermentation

Recent Posts

Benefits of glass jars for fermenting vegetables


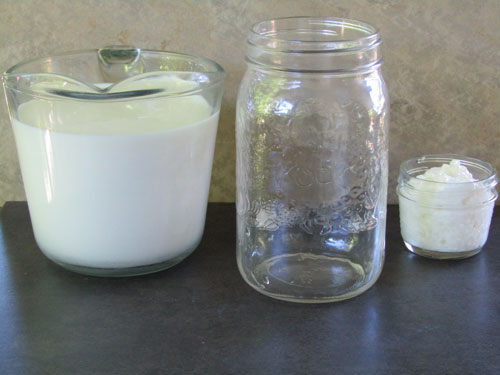
Glass jars are a fermenters best friend.  They are easy to clean, can be sterilized and are nonreactive to the various acids which are produced during fermentation.  They also come in all shapes and sizes so the size of jar can match the amount of vegetables put in it.   They are easy to come by as they are still used regularly to contain canned foods from the grocer and can still be purchased from retailers for canning and other purposes.

First and most important

Glass is a brittle material which can break into tiny pieces which are sharp and can cause serious injury.  When using glass containers for fermentation follow these guidelines to avoid injury.

Only use jars meant to hold pressure for a carbonated fermentation

This is not usually a concern when fermenting vegetables because carbonating vegetables is not appropriate.  Carbonation requires a bottle which is designed to hold pressure.  These are usually bottles which hold carbonated beverages not vegetable ferments.

Using bottles not meant for pressure can be dangerous as the pressure has been known to burst the bottle and send shards of glass flying.   Only use bottles which are designed to withstand pressure for carbonating liquids

Ensure the proper seal is used while the fermentation as active

Although Mason jars and other glass containers are used for fermenting everything from sauerkraut to vinegar they do not perform well under pressure.  When fermenting vegetables there is a fair amount of CO2 gas which needs to escape.  This can be accomplished using a number of methods:

  • Burp the jar regularly to release the pressure
  • Use a bag of water to allow gas to flow out but not back in to the jar
  • Use a fermentation lid which allows gas to flow out but not back in
  • Use a jar with a lid which releases pressure once it reaches a certain level

Once the fermentation has slowed and you are happy with the flavor you can store it in the fridge with a normal lid.

Inspect jars for imperfections in the glass

This includes scratches, pits, cracks or thin walls everywhere or in localized places.  Scratches and pits can harbor spoilage bacteria which can wreck a fermentation.  Cracks are signs of weakness in the jar and even if it does not leak (which it probably does) will lead to breakage and loss of a batch (not to mention the mess which will result).

Thin walls are especially troublesome because they make the jar susceptible to breakage without warning.  This usually happens when hot liquids are poured into the jar or a full jar is being transported from one place to another.  Only use tempered glass jars for hot liquids and minimize the number of times the jar is moved.

Now for the benefits

Can be easily cleaned

Glass jars are hard enough to withstand most kitchen scouring pads without scratching which makes them a good choice for reusable containers for fermenting.  Having a smooth surface is important for fermentation because it helps to keep the container free from lurking spoilage bacteria which can destroy a batch. 

Glass jars are nonporous so they can also be soaked in cleaning solutions and not absorb chemicals which can hinder bacterial growth as well and add unpleasant flavors to the ferment.  They can also be put in the dishwasher as they will not melt, deform or breakdown.

Can be sanitized using a number of methods

Sanitization using chemicals:

The chemical means usually uses chlorine or potassium or sodium metabisulfite.  Chlorine is simply bleach and potassium and sodium metabisulfite can be found at your local wine making store.

To use these simply dilute the chemical in water and rince the jar with the solution. If you are using bleach it is a good idea to rince with filtered water after the bleach solution or let the jar dry for an hour or two to let the chlorine dissipate.

Sanitization using heat:

Sanitizing in the dishwasher:

The dishwasher is unable to raise the temperature enough to destroy all microorganisms which is the definition of sterilization.  To do that it would need to pressurize the chamber and raise the temperature to at least 121 degrees Celsius or 250 degrees Fahrenheit.  The following procedure will sanitize the jars which will destroy most microorganisms but not all.

  • Clean out the food trap in the bottom of the dishwasher and then run the dishwasher empty on the pots and pans cycle to reduce the amount of food particles circulating in the dishwasher.
  • Load the jars into the dishwasher and choose the pots and pans cycle with heat dry option chosen (some dishwashers have a sanitize option).
  • When the dishwasher has finished its cycle remove the jars by only touching the outside of the jar.

Sanitizing on the stovetop:

  • In a large canning pot or stock pot place a wire rake on the bottom and about an inch of water
  • Place the jars into the pot and bring the water to a boil
  • Boil the jars for 5 minutes being careful to not boil the pot dry
  • Remove the jars carefully from the pot to cool

Can be sterilized

Although it is not necessary to sterilize your fermentation containers it is nice to know that glass can be sterilized through the use of the oven.  Unlike other containers commonly used for fermentation glass can be heat sanitized because it can withstand high temperatures without distortion or weakening the container.  Sterilization needs a temperature of at least 250 degrees F. 

Sterilizing glass jars in the oven

  • Preheat the oven to 250 to 270 degrees F
  • Place the clean jars into the oven right-side up
  • Heat the jars for 10-15 minutes until they are up to temperature
  • Turn the oven off and let the jars cool before removing them to a dry surface

Are non-reactive

Glass does not react with the chemicals which are placed in it and it is nonporous.  Unlike plastic which is porous and absorbs some of the liquid which is placed into it or metal which reacts with acidic liquids.  This makes glass reusable for a variety of ferments without the concern for off flavors or odors persisting from prior fermentations, cleaning solutions or reactions with the container walls.

Are easy to come by

Glass jars can be salvaged from your recycling bin, purchased at garage sales, second hand stores or if you are in a hurry from retail stores.   You will be surprised how many you find if you keep your eyes open.  They hold tomato sauce, pickles, condiments and all sorts of other things.  Glass mason jars are everywhere once you start looking.  

Since they are easily cleaned you can get glass jars from any source just as long as you wash them thoroughly and inspect them before you use them the first time. 

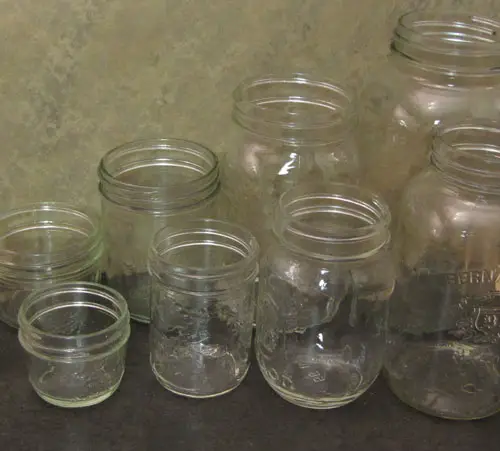
Come in a variety of shapes and sizes

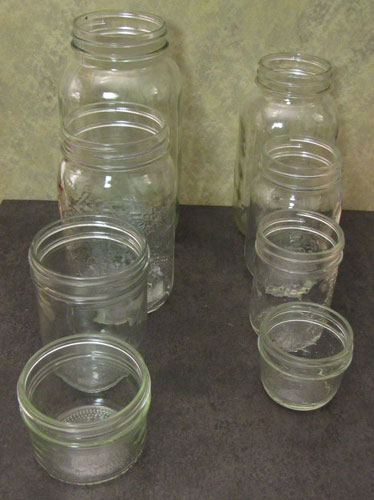
The humble Mason jar alone comes in at least 7 different sizes from a 4oz jar to a half a gallon as well as in two different styles, wide mouth and small mouth.  These jars are great for beginning fermenters as they are strong and durable with many choices for lids which include:

  • cloth and an elastic band for aerobic ferments
  • plastic backed metal lids
  • reusable plastic lids
  • special fermenting lids which let the CO2 gas escape and not build up pressure

Jem jars have a different sized lid between the two Mason jar types but uses the same principle for sealing the contents. They can be used just like Mason jars for fermentation

Next there are all the jars which can be salvaged from the recycling which range from tiny glass jars which hold honey, jam or jelly jars which are sold at specialty stores to gallon jars which pickles come in.  You will find jars which are round, square and hexagonal.   Be careful to only keep jars which are easily cleaned and do not have decorative shapes.  Decorative jars are usually cheap glass which can break easily.  Stick with jars meant for foods like pickle jars, glass water bottles, jam and honey jars.  If it was sold as a container for a food item then it will be safe for home fermentation.

Large glass containers which are used for beverages with a spout at the bottom can be used.  They come in sizes from half a gallon to over 3 gallons and more.  Just be careful to inspect these jars carefully as the glass may not be high quality and vary in thickness or be too thin for repeated use.

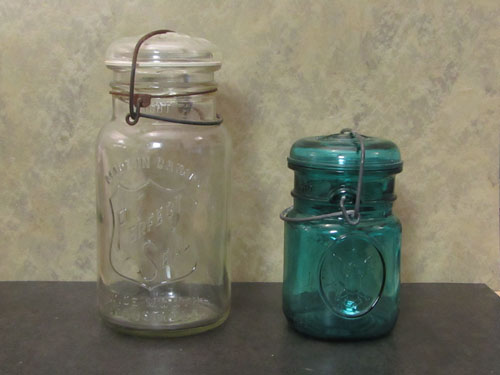
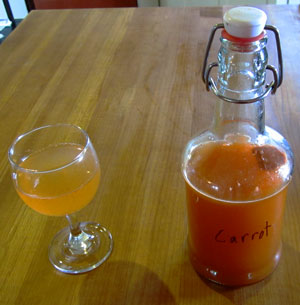
Then there are old style canning jars which have a glass lid and a rubber seal.  They are held tight with a wire arrangement simmilar the current Fido type jars.  These are great for holding a finished fermentation in a decorative and functional container but because of the chance of pressure buildup in the initial stages of fermentation reserve these rare containers for less risky purposes.

The Fido jars are fantastic jars for fermenting vegetables as they maintain an anaerobic environment (without oxygen) while letting the CO2 gas which builds up to escape before the pressure is high enough to burst the jar.  They have a rubber seal which if it is washed properly can be reused. 

The seal can easily be replaced with a new one if it starts to get brittle, still has the smell of a fermentation after being washed or is damaged in some way.  The seals are inexpensive and available at most hardware stores or online.

Glass jars are environmentally friendly

This seems a little counter intuitive because the amount of energy it takes to make a glass jar is higher than containers made out of plastic but there is more to being environmental friendly then energy usage at production time.

Reusability

Glass jars can be reused indefinitely if they are taken care of properly.  The glass is tough and withstands some abuse from cleaning, storing and dropping the jars.  To properly care for your jars to increase their usable lifespan follow these guidelines:

  • Wash the jars immediately after use with a bristle brush

Dirty encrusted jars are more likely to be thrown away just because of the effort it would take to clean them.  To avoid this wash the jars right after they are emptied. 

  • Replace the lid on the jar before storage

Jars which have chipped edges are unusable because they no longer seal properly.  This can lead to spoilage bacteria entering the ferment and destroying a batch.  By replacing the lid on the jar the lip protected from damage.

  • Avoid rapid temperature changes

Glass is an amorphous solid which reacts differently to temperature changes then a normal solid would.  Placing a hot jar on a cold surface or a hot liquid into a cold jar can cause it to shatter.  Jars meant for canning are safe most of the time but other jars salvaged from the recycling may not be.  To avoid this either preheat the jar or cool the liquid before putting them together

Recyclable

Once a jar has outlived its usefulness as a fermenting vessel it is recyclable.  The glass in the jar can be used to make new glass jars saving energy and the environment.  It takes less energy to manufacture new jars from old glass then from raw materials.  Another benefit is less sand needs to be dug up and transported to the glass processing plant.

Less damage to the environment

If all else fails and the jar gets thrown away and lands in a land fill it does not poison the ground.  It will eventually breakdown into sand again.  If it ends up in the ocean it will sink and get broken down by wave action (which is how the sand was made in the first place) unlike plastic which continues to poison the environment long after its useful life has passed.

The Differences Between Miso and Soy Sauce


Miso and soy sauce are both made with soybeans, are fermented with koji and lactic acid bacteria and usually take months to years before they are ready for consumption.  So what are the differences between miso and soya sauce?

MisoSoy sauce
PasteLiquid
Most commonly Used to make soupMost commonly used as a condiment
Made with rice or barleyMade with wheat
Fermented in an anaerobic environmentFermented in an aerobic environment
Is not usually pasteurizedUsually pasteurized
The whole bean is consumedOnly the liquid component is consumed
Aged as little as 30 daysMust be aged at least 6 months to a year
Koji mold arrested before it sporulatesKoji mold grown until is sporulates
Must be made naturallyCan be made through chemical processes
Nutrient profileNutrient profile
Partial substrate pre-fermentationTotal substrate pre-fermentation

Product Consistency

Miso is a fermented soybean paste which is most famous for flavoring Miso soup.  It is thick and can be used to thicken sauces while adding umami flavor. 

Soy sauce is a liquid which is used as a condiment.  It is usually added to food to adjust the flavor to suit the diner.  It also has umami flavor but also adds a salty flavor to the food.

Ingredients:

Miso mainly contains soybeans, rice and/or barley and salt.  Some types of miso only contain soybeans while others include seaweed in the ingredient listing.  Miso has also been made using other beans besides soybeans but few are made commercially.  Miso Master makes a chickpea and rice miso which has less salt and more rice koji then traditional miso.

The ingredients of soy sauce vary depending on the location, ethnicity, company values and type of soy sauce being made.

The first and cheapest method of producing soy sauce uses a chemical process to break down the proteins and starches in the soybeans.  The ingredient listing for this type of soy sauce is long and reads like a chemical supply company catalog (not a recommended food item). 

Soy sauce is traditionally made with soybeans, wheat, water and salt but each ethnic group has variations.

  • Chinese soy sauce is traditionally made with mostly soybeans but may use wheat as a culturing medium to grow the koji prior to the initial fermentation of the soybeans.
  • Japanese soy sauce is made with roughly half soybeans to wheat.
  • Korean soy sauce was originally a byproduct of fermented soybean paste a product which closely resembles miso from Japanese culture.  The liquid from a mixture of soybeans, salt and water.
  • Other traditions include using rice rather than wheat, several different types of sugar are also used including molasses or palm sugar after the fermentation process is complete.

Fermentation methods

Both Miso and Soy sauce start with an aerobic fermentation step.  This step is where the mold Aspergillus oryzae is grown to produce enzymes which break down the sugars in the fermentation making them easily available to lactic acid bacteria and yeasts.

Once the miso koji is complete it is mixed with the soybean and rice mixture and packed into fermentation containers and sealed to prevent oxygen exchange, making it an anaerobic fermentation.  Miso under goes fermentation from lactic acid bacteria which convert the sugars in the soybean mash into lactic acid, CO2 and ethanol.  The yeast Zygosaccharomyces rouxii is also present and converts the sugars into CO2 and ethanol.

Due to the thick nature of the soybean mash this process is slow and can take years for completion.  This is why white miso is sweater but less complex then red miso.

The process for the second fermentation of soy sauce includes the addition of water and salt.  The mixture is poured into fermenting containers and stirred daily making it an aerobic fermentation.  The yeast Zygosaccharomyces rouxii and acidic acid bacteria convert the sugars in the soybean mixture into acidic acid, ethanol and CO2.

As the mixture is still fairly thick it requires daily stirring for the first stage of fermentation.  As the sugars are consumed it is stirred less often but still requires attention to prevent mold growth and even distribution of available sugars.

Pasteurization

Pasteurization is the destruction of active microorganisms through the use of heat.  It is used to preserve foods, stabilize flavors and prevent further fermentation.

Miso usually does not undergo pasteurization.  If it is kept in an anaerobic environment and will continue to ferment and develop a richer more complex flavor.  If used without cooking it will have live probiotic bacteria in it.  If used in cooking like in miso soup the probiotic bacteria are mostly destroyed.

Soy sauce is usually pasteurized after it has been pressed from the soybean mash.  There are several reasons why this is done including:

  1. Halting the fermentation to produce a specific flavor profile
  2. Allowing it to be shelf stable (not requiring refrigeration)
  3. Allowing additional flavoring and thickeners such as palm sugar and tapioca flour

Not all soy sauce is pasteurized.  Some brands offer an unpasteurized version of their soy sauce as well as several artisanal soy sauce makers in japan produce exclusively unpasteurized soy sauce.  It is expensive and has a different flavor than the usual store bought version.

How much of the soybean consumed

When making miso the soybeans are mashed up and packed into aging containers.  Once the fermentation is complete there is no waste product left behind as the miso is simply transferred into smaller containers for sale.

When making soy sauce the fermenting soybean mash is pressed once the fermentation period is complete.  This removes the solids from the mash and producing the thin liquid which we know as soy sauce.  The remaining solids are made up of unfermented starches and fiber which is high in protein.  This byproduct is usually sold as high value livestock feed.

Nutrient Profile

Although Miso and Soy sauce are made from the same basic ingredients the nutritional profiles are different.  Both have a high amount of salt with soy sauce having a higher amount per hundred grams, miso has more fiber then soy sauce, over twice the amount of calcium whereas soy sauce has more niacin then miso. 

For specific and in depth information refer to the following table.

Nutrients Miso  Soy Sauce 
 Amount Unit DV Amount Unit DV
Alanine0.5 G 0.536 G 
Arginine0.784 G 0.405 G 
Ash12.81 G 17.82 G 
Aspartic acid1.171 G 0.882 G 
Calcium, Ca57 MG4%20 MG2%
Calories198 KCAL 60 KCAL 
Carbohydrate25.37 G9%5.57 G2%
Carotene, beta52 UG 0 UG 
Choline72.2 MG 38.4 MG 
Copper, Cu0.42 MG47%0.135 MG15%
Cystine0 G 0.107 G 
Docosanoic acid0.05 G 0 G 
Eicosenoic acid0.025 G 0 G 
Fat6.01 G8%0.1 G0%
Fiber5.4 G19%0.8 G3%
Folate19 UG 18 UG 
Folate, DFE19 UG5%18 UG4%
Folate, food19 UG 18 UG 
Fructose6 G 0 G 
Glutamic acid1.915 G 2.411 G 
Glycine0.447 G 0.435 G 
Heptadecanoic acid0.01 G 0.008 G 
Heptadecenoic acid0.03 G 0 G 
Hexadecanoic acid0.75 G 0 G 
Histidine0.243 G35%0.215 G31%
Iron, Fe2.49 MG14%2.38 MG13%
Isoleucine0.508 G36%0.487 G35%
Leucine0.82 G30%0.735 G27%
Lysine0.478 G23%0.731 G35%
Magnesium, Mg48 MG12%40 MG10%
Maltose0.2 G 0.2 G 
Manganese, Mn0.859 MG37%0.499 MG22%
Methionine0.129 G 0.167 G 
Methionine + Cysteine0.129 G12%0.167 G16%
Monounsaturated fatty acids1.118 G 0.017 G 
Niacin0.906 MG6%3.951 MG25%
Octadecadienoic acid2.479 G 0.039 G 
Octadecanoic acid0.2 G 0.003 G 
Octadecatrienoic acid0.405 G 0.005 G 
Octadecenoic acid1.043 G 0.017 G 
Pantothenic acid0.337 MG7%0.376 MG8%
Pentadecenoic acid0.02 G 0 G 
Phenylalanine0.486 G 0.534 G 
Phenylalanine + Tyrosine0.838 G48%0.876 G50%
Phosphorus, P159 MG23%130 MG19%
Polyunsaturated fatty acids2.884 G 0.044 G 
Potassium, K210 MG4%212 MG5%
Proline0.619 G 0.806 G 
Protein12.79 G26%10.51 G21%
Riboflavin0.233 MG18%0.152 MG12%
Saturated fatty acids1.025 G5%0.011 G0%
Selenium, Se7 UG13%0.8 UG1%
Serine0.601 G 0.483 G 
Sodium, Na3728 MG162%5586 MG243%
Sugars6.2 G 1.7 G 
Tetradecanoic acid0.015 G 0.015 G 
Thiamin0.098 MG8%0.059 MG5%
Threonine0.479 G46%0.407 G39%
Tocopherol, alpha0.01 MG 0 MG 
Tryptophan0.155 G55%0.181 G65%
Tyrosine0.352 G 0.342 G 
Valine0.547 G30%0.524 G29%
Vitamin A87 IU2%0 IU0%
Vitamin A, RAE4 UG 0 UG 
Vitamin B120.08 UG3%0 UG0%
Vitamin B60.199 MG15%0.2 MG15%
Vitamin E0.01 MG0%0 MG0%
Vitamin K29.3 UG24%0 UG0%
Water43.02 G 66 G 
Zinc, Zn2.56 MG23%0.43 MG4%

Aging time

Not all miso types are long aged.  Miso can be aged for as little as 30 days for really sweat white miso.  This type of miso is used for sweat sauces and dessert recipes. 

The length of commercially prepared miso varies between six months to two years but usually red miso is aged a year before it is packaged and sold.

There are two methods used to make soy sauce.  The chemical process which can take only a few days and the traditional method which takes at least six months. 

Since the chemical process does not produce an acceptably fermented product and needs to be adjusted with unnatural flavor enhancers and coloring agents it will not be considered here.

Traditionally brewed soy sauce is a natural fermentation process which takes at least six months before an acceptable product is produced.  Some artisanal soy sauce brewers will ferment their soy sauce for a year to two years and once it has been pressed it can be aged for long periods of time.  As it ages it turns into a syrupy dark liquid reminiscent of balsamic vinegar.

Mold sporulation

Miso koji is made with the same mold as is used in soy sauce but the amount of time it is left to grow is different. 

For miso the mold is used to produce enzymes which then act on the starches in the soybean mash and convert them into sugar.  The koji which is produced in the first stages of miso production is used before the mold sporulates.  Sporulation produces a green color over the substrate and in miso produces bitter flavors which are not wanted.

Soy sauce koji is fermented for a minimum of three days and is not finished until mold sporulation occurs.  The soybean and wheat mixture has a green hue which indicated the mold has reached maturity.  It is at this point that the koji mixture is moved to the second fermentation stage by adding water and salt which stops the mold fermentation and instigates the yeast and acidic acid fermentation.

Methods of production

The production of these two products is a commercial enterprise.  It is done to make a product which is saleable and profitable.  In order to do that there are several methods which different companies have used to produce both of these products.

Miso is still (thankfully) an all-natural process.  The soybeans are usually non-GMO, although this is an important thing to check before you buy.   The soybeans are fermented with the traditional bacterial, yeast and mold cultures and use the usual rice or barley.

Soy sauce is not so lucky.  Chemical processes have been used to break down the starches in the soybeans quickly.  This process skips the koji making step and in its place a bath in a strong hydrochloric acid solution is used to break down the starches.  It is like bathing the soybeans in digestive acid.  The resulting mash then ferments quickly and can be made in a few days.

This process does not produce a quality product and needs to be colored, and flavored to make it palatable.  Some companies will mix naturally fermented soy sauce with soy sauce made with this process to improve sales and consumer acceptance.

As consumers are becoming more aware of the detrimental effects of chemical additives in their food naturally fermented soy sauce has become more popular even though these types are more expensive.

The traditional way of making soy sauce uses soybeans, wheat, water and salt which are fermented together for at least 6 months.  The resulting mash is then pressed to extract the liquid which is then bottled and sold as soy sauce.

Koji Fermentation Methods

Although miso and soy sauce are started the same way with a koji fermentation step the methods are different.

Miso koji is made with rice or barley and in some cases soybeans.  It is then used to stratify the starches in the main soybean mash.  The starches in the mash are broken down by the enzymes which were produced in the koji fermentation stage and the few additional enzymes which are produced throughout the remainder of the fermentation process.

Soy sauce is made by mixing the koji mold with all of the soybeans and wheat mixture to produce the koji.  It is then fermented until it sporulates.  This produces a high amount of sugars which are used by the yeasts and acidic acid bacteria to further break down the soybeans and wheat.

Why is Miso so Salty?


Miso takes a long time to ferment and age to reach its best flavor profile.  During this time the soybean mash mixture goes through several stages of maturation.  This gives unwanted micro-organisms time to grow on the miso and spoil it.  Salt is used For two reasons:

  • To prevent any of these micro-organisms from gaining a foothold in the ferment while the lactic acid bacteria acidify the mash. 
  • To stop the growth of Aspergillus oryzae mold which produces the koji

The salt in the miso acts as a food preservative by reducing the available water  in the miso by binding to the water molecules.  This makes it harder for spoilage microbes to begin to grow in the miso.

Miso is made with a multi-step process which includes a pre-inoculation step where the mold Aspergillus oryzae is grown on a rice or barley substrate to make koji.  The active koji is then added to the warm soybean and rice/barley mash and thoroughly mixed.  Salt is then added into the mash before it is packed into ageing containers and sealed. It is then aged for at least a month to up to several years.

Once the salt is added the Aspergillus oryzae mold growth is arrested but the enzymes which convert the starches in the soybeans into sugars are still present.  These enzymes convert the starches from the soybean mash into sugars.   These sugars are then used for fuel which the salt tolerant lactic acid bacteria and the yeast Zygosaccharomyces rouxii use as energy for growth.  With enough available sugars and a salty environment they quickly dominate the fermentation preventing the spoilage of the miso.

Depending on the type of miso being made more or less salt is added.  White miso which is aged the shortest amount of time usually contains the least amount of salt.  Red miso which can be aged for up to two years or more needs more salt to prevent spoilage.

Salt levels of each type of miso

Not all types and brands of miso contain the same amount of salt.  The ingredient variations, amount of time it is aged, the brand and the aging conditions all affect the amount of salt in the miso.

The following chart shows some of the popular brands and their salt content in milligrams.

Miso brand salt content
tbsn tsp 100 g
Shiro Miso 860 287 5059
Dashi miso soybean paste 830 277 4882
Awase 860 287 5059
Hikari
Hikari Organic Miso Paste 719 240 4229
Organic Miso White 719 240 4229
Organic Miso Red 733 244 4312
Organic Mild Sodium 600 200 3529
Organic Saikyo Sweet 470 157 2765
Enjuku Koji Miso Reduced Sodium 578 193 3400
Hikari Kome Koshi Miso 782 261 4600
Hikari Inaka Miso 748 249 4400
Hikari Dashi Iri Miso 884 295 5200
Cold Mountain Miso
Light Yellow Miso (Shinshu Shiro Miso) 1020 340 6000
Red Miso (Aka Miso) 1020 340 6000
Mellow White Miso 660 220 3882
Mellow Red Miso 660 220 3882
Kyoto White Miso 420 140 2471
Kyoto Red Miso 1020 340 6000
Organic Ville
Organic Brown Rice Miso 720 240 4235
Orgainc Red Miso 747 249 4394
Organic Saikyo Sweet Miso 413 138 2429
Amano
Aka Miso 510 230 3000
Genmai Miso 660 220 3882
Mugi Miso 660 220 3882
Shiro Miso 510 170 3000
Shirakiku
Dashi-iri Awase Miso 830 277 4882
Average 717 241 4216

Overall the amount of sodium in miso is fairly consistent.  Some brands like Cold Mountain Miso have a higher sodium content in some types of miso but also offer lower sodium miso.  With an average of 717mg per tablespoon of all the types in the table.  This indicates that you shouldn’t choose your miso by the amount of salt but rather by its taste and versatility.

Miso has a wide flavor spectrum.  Different types are better for some recipes so don’t be limited by only using one type of miso, instead have a variety on hand for different uses.  The light sweet Miso is great for sweet sauces and desserts whereas mature red miso is better for soups and marinades.

Does the amount of sodium in Miso limit the amount I should eat?

The concern with eating a lot of miso is the sodium content.  Miso requires a high percentage of salt to be added to inhibit the growth of unwanted micro-organisms during its long fermentation and aging time.  During the fermentation and maturation of the miso various vitamins and other compounds are produced which are vital for our health, as a result, miso has been labeled a super-food with high health building effects.  For an in depth chart on the nutritional value of miso can be found in the post Natto vs Miso.

It is well known that a diet high in salt can have detrimental effects on cardiovascular health, but are all high sodium content foods bad for the heart?

There have recently been several studies on the effect of miso and cardiovascular health which indicate that not only does the salt content in the miso not affect the blood pressure but that miso helps to lower the heart rate.  The study showed that individuals which ate a higher amount of miso soup had lower heart rates.  Another study showed a lower blood pressure from eating miso over the same amount of raw salt while reducing the chances of a variety of cancers.

These studies show that simply reducing the amount of salt added to the diet is not the way to cardiovascular health.   That is a knee jerk reaction which may or may not lead to a healthy lifestyle.

Salt content of Miso soup compared with other popular soups

Miso has a reputation for having a high salt content but what about other popular soups like Chicken Noodle or French onion.  Here is a list of popular soups along with their sodium content.

  Popular Soup Sodium Content
Soup name Store Bought Home Made
Pho 384 384
Borscht 940 591
Split Pea 680 420
Chicken Noodle 890 523
Mulligatawny 640 617
Gazpacho 739 650
Minestrone 746 400
Hot and Sour 876 1250
Miso 998 515
Manhattan Clam Chowder 1000 925
French Onion 1028 703.6
Vegetable Beef 890 240

As you can see Miso Soup does not contain the most amount of sodium of all the soups on the list and if you make it yourself you can control the amount of sodium by adding more or less miso, include or exclude other high sodium content ingredients such as seaweed or soy sauce both of which are also high in sodium.

What is The Difference Between Natto and Miso


Both Natto and Miso are made from the same main ingredient, soya beans, and they are both fermented food products but that is where the similarities stop.

NattoMiso
Short fermentation time  < 24 hoursLong fermentation time (months to years)
Bacterial cultureMold culture
Temperature range  38-42 degrees CelsiusTemperature range 15–25 degrees Celsius
Whole beansMashed beans
Contains only soya beansMay contain other ingredients
No added saltHighly salted
No umami flavorHas umami flavor
Aerobic fermentationAerobic and Anaerobic fermentation
NutrientsNutrients
Traditionally a breakfast mealTraditionally made into soup

Short fermentation time vs long fermentation time

Natto is made in less than a day

The beans are soaked for 3-5 hours until they are doubled in size then they are streamed or cooked in a presser cooker until they can be squished between two fingers.  Once they are cooked they are inoculated with a starter and incubated anywhere between 16-20 hours.

Once the fermentation time is over the beans can be refrigerated, frozen or eaten immediately although the flavor is better once it has aged 48-92 hours.

Miso can be made in a week to several years

When making miso it takes three days just to start the fermentation process.  The soya beans and rice or barley are inoculated in a controlled environment before they are mashed together and placed into aging tanks where they remain for at least a week to several years depending on the type of miso being made.

Yeast culture vs Mold culture

There is just one culture used to produce Natto

Natto is fermented with Bacillus subtilis which is a yeast culture which propagates through spores.  It is commonly found on grass especially straw. Natto used to be made by wraping hot steamed soybeans in straw and waiting a day. It is now made by using some finished natto as a starter or from spores of Bacillus subtilis.

There are several types of microorganisms which are required for the production of miso.

The first is Aspergillus oryzae, which is a mold used to produce the enzymes needed to convert the starches in the rice, barley or bean starter into sugars. Once Aspergillus oryzae has produced enough of these enzymes it is called koji. At this point the koji is mixed with the miso mash and a high amount of salt which slows or stops the action of Aspergillus oryzae. At this point lactic acid bacteria and the salt tolerent yeast Zygosaccharomyces rouxii take over the fermentation using the sugars produced by the enzymes from the koji for energy.

Warm temperature vs cooler temperature

Natto is fermented above normal room temperature in the range of 37-53 degrees Celsius.  For best results maintaining a temperature of 40-50 degrees Celsius is ideal.  This provides an environment for the culture to grow rapidly and dominate its environment giving little chance for pathogenic bacterial cultures to grow.

Miso fermentation is a multi-step process with varying temperatures which mimic the atmospheric temperature of the traditional fermentation time.

The first step is to make koji which needs a temperature of 28-38 degrees Celsius.

Next the koji is mixed with steamed rice and soya beans and fermented at about 10 degrees Celsius where it ages for a varying period of time depending on the type of miso.  Traditionally the miso would be kept in open air locations so as the ambient temperature fluctuated through the seasons the miso fermentation temperature would also fluctuate.

Whole beans vs mashed beans

The preparation of the beans for both natto and miso is basically the same.

  • Soak the beans until they are double in size from the dried beans.
  • Steam or boil the beans until they are soft enough to squish between two fingers.

They begin to vary when the beans are inoculated with the starter culture.  For natto the beans are left whole and the bacillus subtilis has to penetrate the bean structure to find its energy.  This is why natto made with small beans is preferred to natto made with larger beans.  The bacterial culture has more surface area to grow on while the space between the beans allows adequate oxygen for the bacteria to multiply quickly.

If the beans were mashed the available surface area would be only the edge which is exposed to the air.  This would slow the fermentation down considerably and allow other cultures to take hold and grow.

Miso is made by mashing the beans and adding the culture to the mashed beans.  This provides the koji adequate contact with its food source to grow rapidly and dominate the culture.  Once the fermentation is complete the miso is a paste which is added to other dishes as a flavoring or condiment.

Contains only soya beans vs contains other ingredients

Natto is made with only soya beans with no added ingredients.  Although the bacterial culture which is used to make natto is also used to ferment other types of beans or seeds the resulting fermentation is not called natto.

Miso is made with a variety of ingredients depending on the type of miso being made.

Some popular miso types and thier base ingredients

Miso nameingredients
Shiro Miso or White misoSoya beans and rice
Shinshu Miso or yellow misoSoya beans and rice
Aka Miso or red misoSoya beans and rice
Mugi Miso or barley misoSoya beans and barley
Hatcho Miso or Mame MisoSoya beans only

Miso contains rice flour which is used to spread the culture evenly throughout the bean mash.  The technique for evenly mixing the koji into the mash is to inoculate some steamed rice with the culture and let it grow until it sporalates.

Once this happens the rice flour is mixed in and sifted out.  This will attach the culture to the rice flour which is then mixed in with the miso mash.

No added salt vs Added salt

Salt is usually used in fermentation recipes to prevent unwanted bacterial growth.  Such fermentations like sauerkraut, fermented vegetables and kimchi all use salt as a preservative while the intended bacterial culture grows.

Miso uses salt in a high percentage.  This is because of its long fermentation time with varying temperatures.  The salt inhibits the growth of unwanted molds which can give the miso an off flavor. 

Natto is a fast ferment and does not require added salt to prevent spoilage.  The culture Bacillus subtilis grows quickly when put into the proper growing environment preventing the growth of unwanted cultures.

Aerobic vs Aerobic and Anaerobic

Natto is an aerobic fermentation which means the bacterial culture which turns soya beans into natto need the presents of oxygen to grow.

The original method of making natto is to wrap the cooked soya beans in straw and store in a warm place for 24 hours or so.  No starter culture was added as the bacterial culture which makes natto is prevalent in nature, especially on straw and other grasses. The culture would grow rapidly in the presents of oxygen and insulated from the straw.

To make miso is a multi-step process which includes the culturing of koji, which is an aerobic process.  Rice is inoculated after it has been soaked and steamed and then fermented for up to 3 days.  The koji is then used to inoculate the rice and soya bean mash.  It is then packed into aging containers and sealed tightly to prevent access to oxygen.

Nutrient differences

Although Natto and Miso are both made from soya beans the nutrient content is vastly different.  In some cases Miso has a nutrient which Natto doesn’t such as Beta Catotene and in other cases Natto has a nutrient which Miso doesn’t such as Vitamin C.

They both contain the same amount of fiber at 19% of the daily value but vary widely in other cases such as the presents of iron makes up only 14% of the daily value whereas natto contains 48%.

To complicate the issue you need to take into account the normal serving sizes of miso and natto.  Miso is usually eaten as a condiment or in Miso soup and a serving of a tablespoon would be typical.  A tablespoon of miso weights approximately 17 grams well below the calculated 100 gram values below.

Natto is sold in 40-50 gram packages which is then added to rice for breakfast.

All calculations below are for 100 g serving size.

MisoNatto
Nutrient Amount Unit DV Amount Unit DV
Alanine0.5 G 0.798 G 
Arginine0.784 G 0.909 G 
Ash12.81 G 1.9 G 
Aspartic acid1.171 G 1.956 G 
Calcium, Ca57 MG4%217 MG17%
Calories198 KCAL 211 KCAL 
Carbohydrate25.37 G9%12.68 G5%
Carotene, beta52 UG 0 UG 
Choline72.2 MG 57 MG 
Copper, Cu0.42 MG47%0.667 MG74%
Cystine0 G 0.22 G 
Docosanoic acid0.05 G 0 G 
Eicosenoic acid0.025 G 0 G 
Fat6.01 G8%11 G14%
Fiber5.4 G19%5.4 G19%
Folate19 UG 8 UG 
Folate, DFE19 UG5%8 UG2%
Folate, food19 UG 8 UG 
Fructose6 G 0G 
Glutamic acid1.915 G 3.337 G 
Glycine0.447 G 0.646 G 
Heptadecanoic acid0.01 G 1.168 G 
Heptadecenoic acid0.03 G 0G 
Hexadecanoic acid0.75 G 0 G 
Hexadecenoic acid0 G 0.031 G 
Histidine0.243 G35%0.512 G73%
Iron, Fe2.49 MG14%8.6 MG48%
Isoleucine0.508 G36%0.931 G67%
Leucine0.82 G30%1.509 G55%
Lysine0.478 G23%1.145 G55%
Magnesium, Mg48 MG12%115 MG29%
Maltose0.2 G 0 G 
Manganese, Mn0.859 MG37%1.528 MG66%
Methionine0.129 G 0.208 G 
Methionine + Cysteine0.129 G12%0.208 G20%
Monounsaturated fatty acids1.118 G 2.43 G 
Niacin0.906 MG6%0 MG0%
Octadecadienoic acid2.479 G 5.476 G 
Octadecanoic acid0.2 G 0.393 G 
Octadecatrienoic acid0.405 G 0.734 G 
Octadecenoic acid1.043 G 2.399 G 
Pantothenic acid0.337 MG7%0.215 MG4%
Pentadecenoic acid0.02 G 0 G 
Phenylalanine0.486 G 0.941 G 
Phenylalanine + Tyrosine0.838 G48%1.497 G86%
Phosphorus, P159 MG23%174 MG25%
Polyunsaturated fatty acids2.884 G 6.21 G 
Potassium, K210 MG4%729 MG16%
Proline0.619 G 1.403 G 
Protein12.79 G26%19.4 G39%
Riboflavin0.233 MG18%0.19 MG15%
Saturated fatty acids1.025 G5%1.591 G8%
Selenium, Se7 UG13%8.8 UG16%
Serine0.601 G 1.121 G 
Sodium, Na3728 MG162%7 MG0%
Sugars6.2 G 4.89 G 
Tetracosanoic acid0 G 0.031 G 
Tetradecanoic acid0.015 G 0 G 
Thiamin0.098 MG8%0.16 MG13%
Threonine0.479 G46%0.813 G77%
Tocopherol, alpha0.01 MG 0.01 MG 
Tryptophan0.155 G55%0.223 G80%
Tyrosine0.352 G 0.556 G 
Valine0.547 G30%1.018 G56%
Vitamin A87 IU2%0 IU0%
Vitamin A, RAE4 UG 0 UG 
Vitamin B120.08 UG3%0 UG0%
Vitamin B60.199 MG15%0.13 MG10%
Vitamin C0 MG0%13 MG14%
Vitamin E0.01 MG0%0.01 MG0%
Vitamin K29.3 UG24%23.1 UG19%
Water43.02 G 55.02 G 
Zinc, Zn2.56 MG23%3.03 MG28%

Traditionally a breakfast meal vs Made into soup

The traditional Japanese use for natto is as a breakfast meal.  Made up of warm rice, natto, soya sauce and chives.

Miso is used traditionally to make miso soup, used in sauces or as a condiment for main course meals.

How much alcohol is in homemade kombucha


Kombucha Soda

Due to the variability and fluid characteristics of homemade kombucha it is difficult to determine what the final alcohol content of it will be.  There are some methods which can give a good idea to the potential percentage but without expensive measuring equipment exact measurements are impossible to determine.

Factors which affect alcohol percentage in homemade kombucha.

The sugar concentration

The amount of sugar dissolved into the tea will determine how much alcohol the yeasts can make.  The more sugar the higher the potential alcohol content the kombucha can have.  The sugar concentration in a liquid is measured using a hydrometer which measures the specific gravity of a liquid compared to that of water.

In wine or beer making this is straight forward as the only cultures which are promoted are specific yeasts which produce a known amount of alcohol but when it comes to kombucha the yeast cultures are fluid and may change depending on time of year, location and history of the scoby.

The active yeast cultures in the kombucha

It is the yeasts in the kombucha culture which convert the sugar into alcohol and carbon dioxide.  There are thousands of different yeast cultures which all have different characteristics.   Some produce high amounts of alcohol where some produce little.

The amount of alcohol found in kombucha is dependent on the types of yeast present in the starter and surrounding area.  Some yeasts like Saccharomyces cerevisiae produce high amounts of alcohol where others like Metschnikowia pulcherrima produce organic acids and carbon dioxide.  This influences the amount of sugar which will be converted into alcohol.

Most yeasts can tolerate an alcohol content between 8-13% which is higher than kombucha will reach given the typical sugar concentration of the sweet tea.

The ambient temperature of the room

Kombucha starter is made up of a collection of bacteria and yeasts which consume the available energy in the form of sugar and convert it into different byproducts.  Yeasts produce alcohol, bacterial cultures produce organic acids and two of the most prevalent are lactic acid and acidic acid.

Lactic acid bacteria use the sugar in the sweet tea as energy and are therefore are in direct competition with the yeasts for food energy.  This leaves less sugar for the yeasts to use for production of alcohol.

The ambient temperature of the room is important because most lactic acid bacteria are happy at cooler temperatures whereas the yeasts are most active at higher temperatures.

Since it is the yeasts which produce the alcohol when the temperature of the kombucha culture is conducive for its growth then the yeast will consume more of the sugar producing more alcohol.

The amount of active acetic acid bacteria

Acetobacter is the bacteria which is the bane of the wine and beer making industry.  It converts alcohol into acidic acid spoiling the wine (or converting it into red wine vinegar).   With a culture which has a high amount of acetobacter active in it the alcohol content will be lower due to the conversion of the alcohol to acidic acid.

It is the Acetobacter xylinum which is believed to be the bacterium which synthesizes the cellulose which makes up the SKOBY and is one of the most prevalent bacteria in kombucha.

Length of fermentation time

The fermentation time affects the alcohol content in two ways.  The alcohol content will rise until it reaches a peak determined by the amount of sugar in the solution, the type of yeast and the amount of other active bacterial cultures which are competing for the sugar.

Once it hits its peak it will begin to decline as the acetic acid bacteria convert the alcohol to acetic acid.

In the short term the yeasts will grow fast producing a large amount of alcohol and carbon-dioxide, after a few days they will reach a maximum population and start to saturate the kombucha.  This will last a week or so until the yeasts and other microorganisms have consumed most of the freely available sugar.

Then the fermentation will slow and the amount of alcohol the yeasts produce will slow.  It is at this time that the acetic acid bacteria will really start to grow.  They will have their energy source, alcohol, and oxygen which they need of growth.  This is when the kombucha begins to taste like vinegar and when the alcohol level begins to level out and drop.

Amount of surface area exposed to the air

The acetic acid bacteria in the kombucha need oxygen to grow.  If the container used to make it has a wide mouth and is covered with a thin cloth which allows air to flow freely through it the acetic acid bacteria will have the greatest chance of growing and converting the alcohol into acidic acid.

When making wine or beer the fermentation is done in an anaerobic environment which reduces the chance of acetobacter from growing and converting the alcohol into vinegar.  This is done by placing the maturing wine or beer into a carboy with an air lock.  Kombucha is made in an aerobic environment for the main fermentation.  This adds the traditional tang to it but it also helps to reduce the alcohol content.

If the kombucha is second fermented into a soda the yeasts get another chance to grow and convert sugar into alcohol.  It is then that the alcohol content can rise substantially if too much fermentable sugars are added.

Ways to reduce the amount of alcohol in homemade kombucha

Kombucha is a dynamic drink which contains a wide variety of microorganisms in it which react differently to changes in their environment.  To reduce the amount of alcohol in your kombucha is simple but each change will change its flavor so you may have to experiment a bit to get what you want.

Limit sugar concentration

Lowering the sugar content is an obvious method as it is the food which the yeasts use to grow, but to make kombucha safely you need at least 50g of sugar per liter of tea.  This will provide enough energy for the bacteria and yeasts to grow fast enough to keep any pathogenic bacteria from entering the culture.

Control fermentaiton time

Extending the fermentation time will lower the alcohol level once the yeasts have reached its maximum population level.  The alcohol will be consumed by the acetic acid bacteria but they will produce acidic acid.  Fermenting your kombucha too long will produce kombucha vinegar which is not pleasant to drink (although it does have other uses).

Maintain a temperature range of 22-30 Degrees Celcius

Keeping the temperature below 30 degrees helps the lactic acid bacteria to compete with the yeasts for the available sugar.  This prevents the yeasts from using all the sugar to make alcohol which lowers the potential alcohol concentration.

Controling the alcohol content during second fermentation

  1. Limit the amount of additional sugar added
  2. Reduce the fermentation time before refrigeration
  3. Keep the temperature below 30 degrees Celsius

Is it possible to get drunk on kombucha?

Store bought kombucha is considered non-alcoholic with an alcohol concentration of 0.5% so the likelihood of getting drunk on it is slim to none.

Homemade kombucha on the other hand can have an alcohol concentration of up to 3% so it is possible if you made a dedicated effort to drink excessive amounts of it.   The concentration of the alcohol makes it difficult the raise your blood alcohol level above 0.08 even at a concentration of 3%.  Concentration is important because alcohol is absorbed into the body faster at higher levels, as the concentration drops so does the speed which it is absorbed.

There are two ways the alcohol can get into your blood stream.

  1. Through the stomach wall
  2. Absorbed by the small intestine

The stomach absorbs only a small percentage of the alcohol especially at lower concentrations.  This is why the effects of alcohol are not felt as quickly or severely if it is taken with food.   When you eat something with your drink the stomach digests the food for a while before passing it to the small intestine.  This slows the absorption of the alcohol.

The small intestine absorbs the remaining alcohol which is passed through the portal vein to the liver.  The liver will breakdown the alcohol at a rate of about one standard drink per hour which is defined as a beverage which contains 0.6 fl. Oz. or 14 grams of pure alcohol.  If the liver cannot break down all the alcohol sent to it the blood alcohol level will begin to rise.

To get 0.6 fl. oz. or 14 grams of pure alcohol with an alcohol level of 3% (the high end) you would have to drink 19.4 fl. Oz. of kombucha every hour for a sustained period of time.  This is why it is hard to get drunk on lower alcohol concentration drinks like kombucha.

Warning:  Even the smallest amount of alcohol can affect your reactions.  It is not recommended that you drink any alcohol while operating equipment including a vehicle.  Instead drink your homemade kombucha at home with a meal at least an hour before you drive.

Three ways to make kefir an illustrated step by step guide


Kefir has gained in popularity recently as a healthy alternative to milk. It is drinkable, slightly fizzy, tangy milk product which can be used to replace milk in any recipe. On top of that it is easy to make, has health benefits and tastes good as well.

To make kefir you have the choice of three different methods, depending on your level of commitment and your life circumstances will determine which method you will settle on. Each has their benefits and drawbacks. Start with the first method and work your way down the list as the first method takes the least amount of commitment and cost.
Then if you want to move down to the second and finally you may find yourself ordering yourself a set of kefir grains.


Use store bought kefir as a starter


This method will produce a kefir which is very similar to the store bought kefir which is sold in the dairy section at the grocer. It is blander then homemade kefir made the other two ways but still has an element of the unexpected.


The benefits:


Save Money
Kefir can cost up to four times the cost of milk by volume which makes this method so cost efficient. All you need to buy is one bottle of kefir and a large gallon/4 liter jug of milk. Which is substantially cheaper than just buying the same amount of pre-made kefir.


Learn if you like making your own
At this point you probably know what kefir tastes like, buy it at the grocer and consume it regularly. The next level is to start making your own but making kefir takes commitment and learning.


When you start making kefir with store bought kefir you will learn if you like doing it, some of the things you need to watch for and what it looks like when it is ready. Like anything, making kefir has a learning curve and as simple as it seems to those of us who make it there are some things to watch for.
Once you have made a few batches like this you will know if making it yourself is something which interests you.


The drawbacks:


Fewer range of bacterial cultures
Store bought kefir is fermented with a few of the cultures which are found in the original kefir found in kefir grains. These are the main cultures which can convert the milk to the slightly thickened yogurt like product you find at the store. With fewer cultures it is easier to maintain a stable fermentation environment which produces kefir which is consistently the same.
Consistency is something both grocers and consumers want. The grocer can store it the same, know its shelf life and treat it the same. The consumer knows what it will taste like, know how long it will last and how it will react in recipes.


But with fewer bacterial cultures the kefir starter is weaker and needs to be treated carefully to ensure it makes nice tasty good for you kefir. This means that the starter should only be used once for each batch of kefir, the jars and lids need to be carefully cleaned before use and the milk needs to be the freshest possible.
This will help to avoid spoilage of the kefir as it ferments at room temperature.


The method:


Equipment:

  • One glass jar or food grade plastic container with a lid


Steps:

  • Fill your container 1/4 full of fresh store bought kefir.
  • Fill the jar to about one inch below the top with fresh milk.
  • Place a lid on the container and shake it until the kefir is thoroughly mixed.
  • Place the kefir in a warm location in the kitchen to ferment.
  • After 24 hours or so your kefir will have thickened.
  • Place it in the refrigerator and drink within a week.


Kefir made this way is not as robust as the kefir made with kefir starter powder or kefir grains and needs special care. Once it has thickened the milk it needs to be refrigerated and consumed quickly. This is due to the limited number of cultures which are present in the kefir.

Kefir made with powdered kefir starter


Kefir starting powder can be purchased at most health food stores or online and makes a good tasting kefir which resembles store bought kefir to a high degree. It is sweet and can be a little fizzy depending on when you drink it.


The benefits:


Easy to make
Making kefir this way you don’t have to be concerned so much about the kefir going off when you follow the instructions. The powdered kefir starter is made from dehydrating some actively fermenting kefir. This gives the kefir you make a high amount of cultures making it a stronger and less prone to spoilage.


Can be started and stopped at any time
The packets for making kefir this way can be stored in the fridge for a long time and still work perfectly fine. This means that you can make a batch of kefir when you want to use it and not have to do anything in the meantime.


Cheaper then store bought kefir
Again the package will cost you less than $10.00 and you can make several gallons of kefir with it. This initial outlay of money is displaced by the savings of purchasing milk rather than pre-made kefir.

Drawbacks:


The number of cultures in the kefir powder is limited
The kefir which is used to make the powder has to be strictly controlled and therefore the number of cultures have to be kept to a number which is manageable. This makes the resulting kefir weaker than that made with kefir grains.


The volume from one packet may not fit your consumption
One packet of kefir starter is designed to make a specific volume. This volume may be more or less than you need so you may end up with kefir getting old in the fridge which can make it sour and not so good for drinking or you may not have enough for your needs.


The method:

Equipment:

  • One glass jar or food grade plastic container with a lid
  • Stainless steel saucepan
  • Food thermometer


Steps:

  • Warm the milk to 180 degrees on the saucepan.
  • Fill a jar with the correct amount of milk.
  • Pitch the starter and stir until it is combined.
  • Place the milk in a warm location in the kitchen.
  • Check on the kefir in 12-24 hours to determine whether it is to your liking.
  • Once it reaches the level of tartness you like refrigerate.


Kefir made with kefir grains


Making kefir with kefir grains requires the highest amount of learning and commitment to making kefir. It provides the highest amount of variability in the finished kefir and contains the highest amount of cultures in the finished kefir. There are an infinite number of ways to ferment kefir with kefir grains which produce unique flavors and textures.


In this section you will learn a simple basic technique to produce a kefir which mostly resembles store bought kefir.


The Benefits:


Highest number of cultures
The highest number of cultures of any of the three methods and may be the highest number in any fermented culture. Kefir made with grains has been found to contain up to 60 different cultures which all work together in a symbiotic relationship. This makes the kefir grains and the resulting kefir a very stable and strong culture which can resist pathogenic bacterial invasion.
This makes the kefir healthy and last a long time.


Unlimited kefir
Kefir grains will continue to make new kefir as long as they are fed on a regular basis. This means that you can make as much or as little kefir as you like. You just have to control the ratio of kefir grains to milk ratio.


Cheaper than store bought
The cost of the grains is you were to purchase them online or from a health food store is more expensive than the powdered kefir starter but in the long run since they will make kefir continuously forever the cost is essentially pennies per glass.


Highly versatile
Kefir made with grains can be made to your liking. You can make it sweet and fresh by fermenting it for a shorter period of time or you can ferment it longer leaving less lactose. It can be made in a cooler kitchen making a slower ferment which in sourer or in a hot kitchen making a yeasty ferment.


It can be made for drinking or double fermented for an acidic kefir used for smoothies, baking or in salad dressings. You can make this type of kefir into cheese, sourdough starter and to jumpstart a lacto-fermentation.


Equipment:

  • One glass jar or food grade plastic container
  • A piece of cotton cloth which will fit the top of the jar


Steps:
If you have purchased a packet of dehydrated kefir grains you will have to rehydrate them and activate them.


Activating dehydrated kefir grains:

  • Start with a clean jar and place the grains in the jar with 1 cup of milk.
  • Place the cloth on the jar and seal with the elastic band.
  • Place it in a warm location in the kitchen
  • Leave it alone for 24 hours
  • Strain out the kefir grains. The milk may not have thickened but it will still have some of the cultures which make kefir in it so you can still use it in recipes calling for milk.
  • Pour the same amount of milk into a fresh jar and add the strained kefir grains.
  • Continue this until the milk starts to thicken.
  • Once it starts to thicken you can start adding more milk ½ cup at a time until you reach the amount of kefir you want in a day.


Starting with an active set of kefir grains


Equipment needed:

  • Two glass jars with sealable lids
  • One piece of cotton cloth with an elastic band or sealer ring
  • A strainer and container to catch the strained kefir


Steps:

  • Put the activated kefir grains into one of the jars and fill the rest of the jar with milk leaving about one inch of room.
  • Put the cloth on the jar and secure with the elastic band or sealer lid
  • Place the jar in a warm place for 24 hours or so.
  • Once the kefir has thickened to your liking take the cloth off the jar and put the lid on
  • Give the jar a shake
  • Pour the kefir through the strainer into the catch bowl
  • Tap the strainer on the side of the catch bowl until all the kefir has drained through
  • Pour the new kefir into the same jar it came from and put the grains into the second clean jar
  • Fill the jar with milk as before, secure the cloth and put it back in the same warm location.
  • Put the lid back on the freshly made kefir and put it in the refrigerator.


Benefits of making kefir this way has many


Easy cleanup
Old dried kefir is like cement if left on a jar to dry so if you reuse the jar without washing it you are going to make more work for yourself. This method requires you to wash the new jar every two days making for less cleanup and you will always be fermenting your kefir in a clean jar.


You will know how much kefir you use a day
Using only two jars you will know if you have left over kefir you did not use from the previous day’s batch.
This will indicate to you when you are making too much kefir and can adjust your production before you end up with a fridge full of highly fermented kefir (which isn’t a bad thing sometimes). If you find yourself with extra kefir you can just add less milk to the grains just be careful to keep the milk to grains ratio to about 1:10 at the beginning. Once you have made kefir for a while feel free to experiment with this ratio.


It is fast and easy to do
Most instructions on how to make kefir include pushing the kefir through the strainer with a spatula or wooden spoon. This takes time, brakes up the kefir grains into smaller pieces and is messy.
By just tapping the strainer on the side of the bowl the kefir will flow through the strainer faster and with less mess and effort. It should not take more than a minute to move your kefir along rather than the five minutes it takes to massage it through using a spatula.


Myths about making kefir with grains


Kefir which has separated has over fermented

Kefir made with kefir grains can be made any way you prefer it. Some people like their kefir fresh and sweet. This is the closest thing to store bought kefir you can make. It has a high amount of lactose left in it which makes it sweet and because of the action of the yeast and lactic acid bacteria is slightly fizzy.

Kefir which has been fermented longer where more of the lactose has been consumed is not over fermented it is just different then store bought.
Many people like fermenting their kefir longer than 24 hours just to remove more lactose before they use it.

You should never use metal utensils when making kefir

Healthy kefir grains will have a layer of biofilm which acts as a protectant from environmental dangers including metal ions and pathogenic bacteria. This means that the kefir grains are not damaged by contact with metal utensils, at least not to a noticeable amount.
The short contact the grains have with a metal spoon or sieve will not affect the performance of the grains one iota.


This does not mean that you should make kefir in a metal container. Kefir is an acidic fermentation driven by too families of bacterial cultures, lactic acid bacteria and acidic acid bacteria. These cultures can produce acid with a PH of 3.2 which is easily low enough to react with a metal container.


This does two things:

  • It destroys the container as the metal is eaten by the acid made by the kefir
  • It increases the amount of metal in the kefir


Stick with using glass or if you have to plastic (there is some research about micro-plastic contamination).

Kefir grains are living things


I know this is confusing but let me simplify it.
Kefir grains are the houses which the cultures that produce kefir live in. The kefir grains are made up of proteins, lipids and carbohydrates which the cultures knit together to form a protective barrier from the environment.
Saying the grains are alive is like saying an apartment building is alive. It’s not the building, it is the residents in the building which are alive.
When you hear someone say (including me) that the grains are healthy or unhealthy it is the cultures in the grains which is being referenced not the grains themselves.