Urban Fermentation

Recent Posts

Differences of Kombucha and Apple Cider Vinegar Simpley Explained


Bottle of kombucha and apple cider vinegar

Kombucha and apple cider vinegar are both well known as healthy, versatile fermented liquids.  They are used for some of the same reasons whether it be their health effects or taste. This leads to the inevitable question:  Which is better, apple cider vinegar or kombucha?

Apple cider vinegar and kombucha are both fermented with yeast and acetic acid bacteria.  This gives them a similar vinegar taste but they are different in acid content, fermentation medium and physiological effects.

Acetic acid bacteria are prevalent in the environment and are therefore present in both kombucha SCOBYs and apple cider vinegar mothers.  These bacteria are responsible for the vinegar taste found in both these popular fermentations and the production of the SCOBY in a kombucha brew or the vinegar mother in the case of apple cider vinegar.   

The medium which is used for making apple cider vinegar and kombucha is different.  Apple cider vinegar is made from apple juice, apples soaked in sugar water or pre-made apple cider.  Kombucha is made with sweetened tea as the medium.  The sweetener can be anything from normal cane sugar, honey or tree sap syrup, each will produce a unique flavored kombucha.

The physiological effects of apple cider vinegar and kombucha are vastly different.  Kombucha is fermented for a comparably short period of time (7-14 days) as compared to apple cider vinegar (6-8 weeks).  This makes for different compounds, probiotic makeup and health effects.

Is Kombucha the same as apple cider vinegar?

Kombucha and apple cider vinegar are two different fermentations but they do have similar compounds.  This is because the bacteria culture which ferments these two fermentations are similar in makeup but they are definitely different products.

Apple cider vinegar has a higher acidic content, has little probiotic activity and is lower in sugar than kombucha.  It is not meant to be consumed directly like kombucha, instead it needs to be diluted to make it consumable.

Apple cider vinegar is not meant to be consumed directly but should be diluted in other liquids, used as an ingredient or sprinkled over food as a condiment.  The acidic nature of apple cider vinegar makes it unpleasant for most people to enjoy straight as well as it can have negative effects on the teeth and throat if consumed this way regularly.

Kombucha is meant to be consumed as a drink.  It has a lower acidity level which makes it pleasantly tangy and can come in a wide variety of flavors.  Unless it is fermented especially for a high acid level it will not become acidic enough to be considered vinegar although over fermented kombucha can be used like a weak vinegar.

Can Kombucha replace apple cider vinegar?

Kombucha is typically made with tea sweetened with white sugar at a ratio of 1cup of sugar to 1gallon of tea.  This sugar concentration is not high enough to produce enough acetic acid to be considered vinegar.  

Kombucha which has been fermented normally makes a poor substitute for apple cider vinegar but if it is fermented past the normal 7-14 days it can become overly acidic and not suitable for normal consumption.  At  this point it can be used as a substitute for apple cider vinegar.

If you want to replace apple cider vinegar with kombucha then you can leave your kombucha to ferment for a month.  After thirty days the yeast and acetic acid bacteria in the culture will have converted most of the sugar in the kombucha into vinegar and can now be used as a replacement for vinegar in many recipes.  Here are a few options:

Salad Dressing

This simple salad dressing can be made with kombucha rather than apple cider vinegar with the exclusion of the sweetener. 

ingredients: 

  • ½ cup Kombucha
  • ¼ cup Olive oil
  • Salt and pepper to taste
  • Honey (optional)
  1. Put all the ingredients into a small bowl and whisk until emulsified together.  
  2. Taste and adjust for flavor.
  3. Pour into a bottle or over the salad

This makes a nice dressing for those who don’t like an overly acidic dressing. 

Morning tonic

Apple cider vinegar is often used as a morning tonic diluted with water or some type of juice.  This helps to lower the vinegar concentration and adds flavor while still getting the benefits of the apple cider vinegar.

Kombucha can be consumed in the morning just like apple cider vinegar without having to dilute it as it is not highly acidic.  Instead of second fermenting your kombucha which carbonates and flavors it, just leave some in a jar and place it in the fridge.  In the morning pour yourself a little and drink it normally.

By storing it in the fridge the fermentation will slow down and maintain the kombucha at a lower acid level for a longer time.  

Why does Kombucha taste like apple cider vinegar?

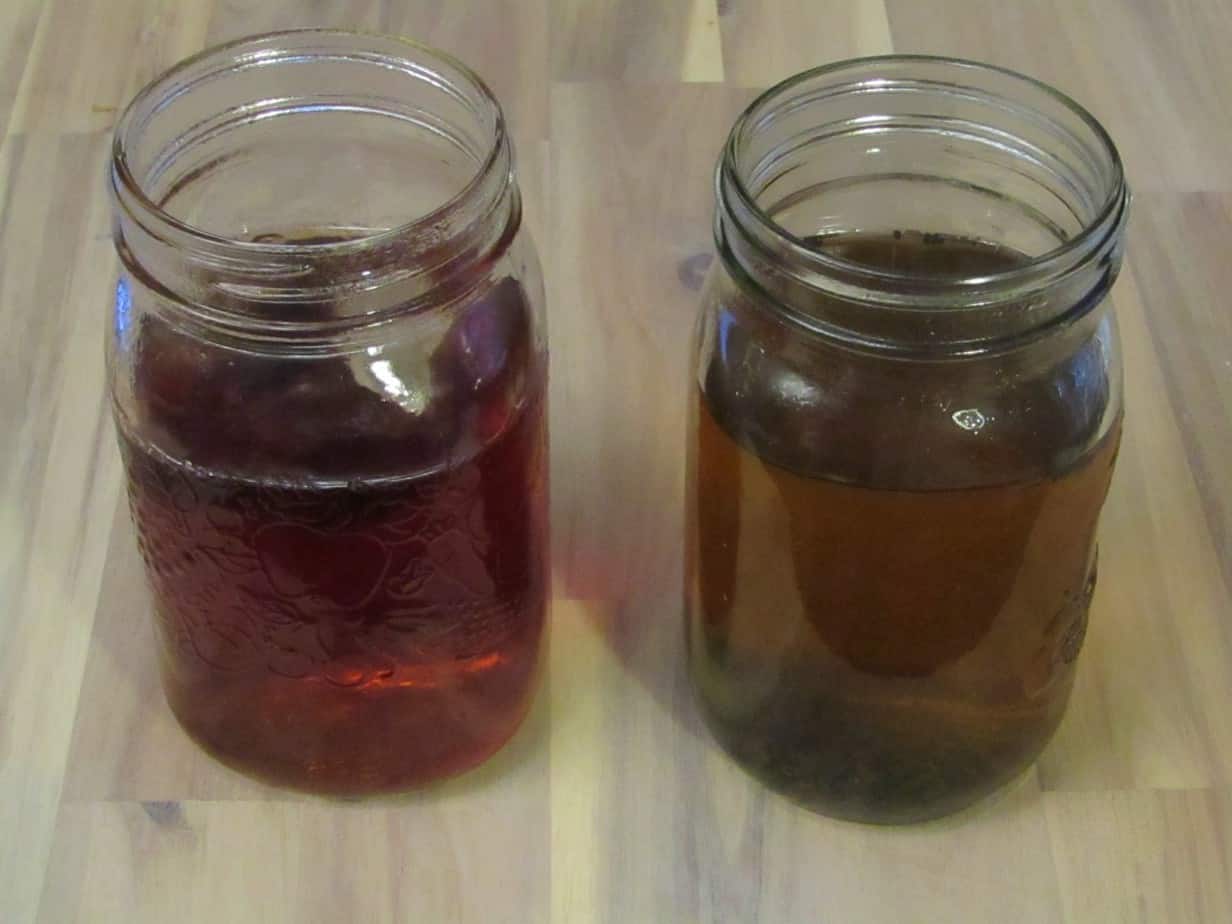
Kombucha does have some of the same flavors which are found in apple cider vinegar.  The tangy flavor, fruity aroma and similar color of the two liquids help to connect the flavor of apple cider vinegar with kombucha in our brains.

Kombucha and apple cider vinegar contain many of the same organic acids and aromatic compounds made by the yeasts and acetic acid bacteria which ferment these two liquids. Flavors like acetic and citric acid are present in both giving them similar taste and aroma.

Organic compounds found in apple cider vinegar and kombucha

CompoundApple cider vinegarKombucha
acetic acid
citric acid
formic acid
lactic acid
malic acid
succinic acids
glucuronic
gluconic
tartaric
malonic 
Data compiled from here

Yeasts found in apple cider vinegar and kombucha fermentation

Yeast speciesApple cider vinegarKombucha
Saccharomyces bayanus
Saccharomyces cerevisiae
Schizosaccharomyces pombe
Lachancea cidri
Dekkera anomala
Hanseniaspora valbyensis
Candida oleophila
Candida . sake
Candida . stellate
Candida . tropicalis
H. uvarum
Kluyveromyces marxianus
Metschnikowia pulcherrima
Pichia delftensis
P. misumaiensis
P. nakasei
Brettanomyces bruxellensis
Torulaspora delbrueckii
Zygosaccharomyces bailii
Rhodotorula mucilaginosa
Data complied from https://research.kombuchabrewers.org/wp-content/uploads/kk-research-files/yeast-ecology-of-kombucha-fermentation.pdf  ” target=”_blank” rel=”noreferrer noopener”>here and here

The short fermentation time for kombucha helps kombucha to provide a variety of live bacterial cultures.  Some of these are considered probiotic but in reality they rarely take up residence in the gut.  This does not reduce the value of kombucha as the transient bacterial cultures have beneficial effects on the gut .

Apple cider vinegar has a long fermentation time which produces a vinegar with little or no live bacterial cultures.  This is because as the vinegar is aged the bacteria consumes the sugar in the liquid producing acetic acid.  As the food source diminishes so does the population of the bacteria.

Can kombucha and apple cider vinegar be consumed the same day?

Apple cider vinegar and kombucha are both high in acetic acid due to the aerobic fermentation using acetic acid bacteria that provides many of the same organic acids (with some variation).  

There are no chemical reactions which occur between apple cider vinegar and kombucha which affect human physiology.  This means that they do not interact together to produce toxic levels of any compound and can be consumed separately or together in the same day.

Acetic acid, the most prevalent organic compound in apple cider vinegar and kombucha, has a low toxicity.  You would have to consume vast amounts of both apple cider vinegar and kombucha to have any toxic effects from either one of them.  

Since apple cider vinegar and kombucha  don’t have any negative interactions with one another, you could have as much as you wish without experiencing any negative effects.

How To Easly Use Mason Jars to Make Kombucha


Two mason jars of kombucha tea

Mason jars are everywhere.  They can be found in thrift stores, hardware stores, grocery stores and online.  With their prevalence they have been used for a variety of things which they were not meant to be used for, such as fermentation.  

Mason jars are ideal for making small batches of kombucha.  The thick glass sides make them robust and non-reactive to its contents, are easily cleaned and come in a variety of sizes.  They do not perform well for second fermentation as the seals are not designed to hold pressure.

Kombucha can be made in a variety of containers like plastic food grade containers, ceramic fermentation crocks and stainless steel fermentation vessels but the best choice is a glass container designed to preserve food.  Enter the mason jar.

How to use mason jars for kombucha

Mason jars are prevalent today, they can be found everywhere from the grocery store to thrift stores.  The most common sizes are the quart jar and the liter jar but they also come in two liter and gallon sizes.

Use as your primary fermentation vessel

Mason jars are perfect for using as your primary fermentation vessel if you are only making kombucha for yourself.  The larger half gallon and gallon sizes are harder to find but once you have them will last a long time if they are taken care of.  

They come with graduated markings on their sides to help in measuring out the ingredients and are designed to hold hot liquids unlike most drink dispenser glass containers which may have thin glass on the sides which can break easily.

Test new kombucha recipes

The smaller sizes are great for testing new recipes as the small amount of kombucha needed to start one of these jars is small and you will only need a little SCOBY to introduce enough gluconobacter bacteria to promote SCOBY growth.  This makes it a low risk venture to try different types of tea, steeping times, types of sugar and fermentation times.   

Transport kombucha starter

Quart sized jars make great containers to pack and transport a kombucha starter.  You can easily put a SCOBY and some starter kombucha in one of these jars and take it with you on longer trips when you don’t want to be without it or for passing a starter on to someone else.

Age some kombucha to vinegar

Once you have been making kombucha for a while you will experience a time when a batch gets left a little too long or the temperature was a little hotter than normal and the batch became too sour to drink enjoyably.  All is not lost!  Pour the sour kombucha into mason jars, add a little more sugar and age it to vinegar.

Kombucha is a fermentation which includes all three of the most prevalent fermentation microorganisms: Acetic acid bacteria, lactic acid bacteria and yeast species.  This makes for a very interesting full bodied vinegar which can be used for a variety of purposes like salad dressings, marinades and sauces.

Since the amount of sugar used to make drinkable kombucha is insufficient to produce enough acid for a good vinegar you should add more sugar for the culture to convert into acetic and lactic acid.  

Choose the right size of mason jar for your needs

Several different sized mason jars

Mason jars come in tiny 4 oz jelly jars all the way up to one gallon containers.  To determine the ideal size you will have to do some math.  

  1. Determine how many bottles of kombucha you currently consume on a daily basis
  2. Multiply the volume of bottle by seven
  3. If you second ferment your kombucha, subtract the amount of volume you add for your flavoring method.
  4. Add in the volume you need from reserved kombucha starter (about 10%)
  5. Add in a little for the SCOBY volume

You now have the minimum sized jar you will need to make a weekly amount of kombucha.  

The most common are the quart size jars which are a little small for most avid kombucha drinkers.  The four quart or liter jars provide enough kombucha for most people’s weekly kombucha habit..

Cleaning mason jars for kombucha fermentation

The kombucha fermentation container needs to be clean before you start your first batch of kombucha.  Wash it by hand with soap and hot water.  Scrub any food residue from the inside and outside of the jar.  If there is any hard water buildup remove them by soaking in white vinegar.  Rinse thoroughly to remove any soap residue and let air dry.  

If the jar is new you can run it through the dishwasher to remove any manufacturing residue.

Do not worry about sanitation as it is not realistic to achieve in the home kitchen and the kombucha culture if taken care of properly is strong enough to resist any pathogenic or spoilage microorganisms if your kitchen is clean.

Benefits of mason jars for kombucha fermentation

Designed for repetitive use

We are inundated with one time use of manufactured products and packaging.  We purchase coffee, bottled water and grocery items in containers which are pitched after one time use.  Even glass bottles which most kombucha is sold in are not recycled but crushed to form a covering for landfills to keep the light waste particles down.

Mason jars on the other hand are designed for reuse.  They are strong enough to withstand abuse, do not break down in the sun and do not leach chemicals into the food we store in them. 

Can hold hot liquids

Glass containers which are not meant to hold hot liquids are prone to cracking when hot liquids are put in them .  This is because their sides are not uniform and or have thin glass in places.  This makes them susceptible to cracking when heated quickly (like when hot liquids are poured into them).

Mason jars are designed for this exact purpose so you can make the tea for your kombucha in the same jar as you are going to use to ferment it.  Simply boil the water, pour it over the tea bags or through a tea strainer and steep it as long as you like.  Once the tea is strong enough remove the tea bags or strainer add sugar and let cool before adding the SCOBY and reserved kombucha.

Are easy to clean

Mason jars come in two mouth sizes: large and small but both sizes are large enough to easily access the inside of the jar to clean.  The glass is smooth and does not absorb its contents even if it has been left for years.  

For easy cleaning they can be placed in the dishwasher or washed in the sink with mild soap and water.  For deep cleaning where food particles are stuck to the sides they can be soaked in hot water and soap or washed with an abrasive scrubby without worry of scratching the surface.

Do not use metal scouring pads as they can leave scratches instead use a bamboo handled bristle brush (biodegradable)

Drawbacks of using mason jars for making kombucha soda

Although mason jars are great for the primary fermentation of kombucha the secondary fermentation process has some inherent characteristics which make mason jars a poor choice.  

Mason jars are not designed to hold pressure and will produce flat kombucha soda at best or at worst may explode, which can be dangerous and messy.  The acidic nature of the liquid can rust the lids and rings, tainting the flavor of the kombucha making it undrinkable.

Mason jars are not designed to hold pressure

Mason jars are great primary fermentation vessels but make poor secondary containers as they are not meant for holding pressure.

The standard sealer lid is designed to hold pressurized air out of the jar not in the jar.  The rings which hold them on are only necessary for a short while while the contents of the jar cool down.  Once the air in the jar has cooled and the pressure dropped the vacuum produced keeps the jar sealed.

Second fermentation of kombucha produces carbon dioxide which pressurizes the jar from the inside.  Two things can happen in this situation:

The jar could burst

If the ring on the jar is tight enough it can actually seal the pressure into the jar but mason jars are not meant to hold pressure.  This can cause explosive results which can be dangerous and messy.

The gas could escape

This is the more likely event.  The carbon dioxide gas which carbonates the kombucha will escape leaving your kombucha only lightly carbonated.  This is disappointing as most people like the carbonation level to be similar to that of soda pop.

If you are going to make kombucha soda get some swing top bottles which are made to hold pressure.  They can be purchased at beer making stores online at Amazon.  Be careful to get bottles meant for fermentation as there are swing top bottles which are decorative or designed to hold hot sauce or other non-carbonated liquids.

Another option is to save swing top bottles from other carbonated beverages.  They are getting more and more available.

The sealers may rust

The sealers on mason jars are thin metal with a thinner plastic coating on them.  They are meant to be thrown away after one use.  The volatile components of the kombucha can evaporate into the headspace of the jar and through the seal.  The edge of the sealer tends to start to oxidize (rust) as the acidic volatile components are released into the air.

Not only does this destroy the sealer but it also can contaminate the kombucha giving it a metal flavor which is not really pleasant.   

Alcohol in Fermented Ginger Ale: Easy Ways to Limit it


Glass of ginger ale with a straw and a piece of fresh ginger

All fermented foods have some amount of alcohol in them.  Even lacto-fermented vegetables have some yeast growing in the culture which produces alcohol.  Commercially produced ginger ale does not contain any alcohol as it is made using an entirely different process than the traditionally made ginger ale.

Fermented ginger ale has some alcohol in it ranging from trace amounts up to 12% ABV or higher.  When made with acetic or lactic acid bacteria only trace amounts of alcohol are present.  If it is made with yeasts the ABV can be as high as 12% depending on the amount of sugar and oxygen exposure.

The method is important.  There are three main ways to make ginger ale:

  1. Using acetic acid bacteria – Ginger Bug, Water Kefir, Kombucha
  2. Using lactic acid bacteria – Whey, fermented vegetable juice, lacto-fermented ginger 
  3. Using wild or commercial yeast – Wine or Beer yeast

Each of these methods produce varying amounts of alcohol and flavors.  By providing the environmental conditions for each of these types of microorganisms to thrive you can control the properties of the ginger ale which includes the amount of alcohol.

Alcohol Content of Ginger Ale Made With Ginger Bug

Acetic acid bacteria are the bacteria which produce vinegar from alcohol.  They need oxygen for respiration so when the ginger ale is in the primary fermentation the yeast and acetic acid bacteria work synergistically converting the available simple sugar into alcohol and then into acetic acid.  

Ginger Bug is an aerobic yeast and acetic acid ferment.  It is a low alcohol version of fermented ginger ale.  It typically has an ABV between 0.5%-2.0% depending on sugar content during primary and second fermentation.  

Ginger bug has a wide variety of yeast species which can produce only a low alcohol concentration.  The presence of Saccharomyces cerevisiae, which is the yeast species that produces high alcohol levels, is small until the second fermentation.  Once it is placed into a sealed container it can multiply rapidly depending on the available sugar.

For low alcohol Ginger Ale use small amounts of sugar during the second fermentation (or none at all) and ferment it only for a short time before refrigeration.  This gives the yeast little chance to produce alcohol.  It is in the second fermentation that the yeast starts to produce large amounts of alcohol.  This is because the environment for the growth of the Saccharomyces cerevisiae is perfect while the acetic acid bacterial growth is inhibited from lack of oxygen.

Alcohol Content of Ginger Ale Made With Water Kefir Grains

Water kefir grains are a symbiotic collection of bacteria and yeast which form small nodules within the liquid it is fermenting.  They are made up of mostly yeast and lactic acid bacteria although there are some lactic acid bacteria present.

Ginger ale made with water kefir grains will have trace to 2.0% ABV due to the combination of yeast and acetic acid bacteria in the grains.  This is because the yeasts are low alcohol producing and acetic acid bacteria consume alcohol in the liquid, producing vinegar which lowers the alcohol level.

Use a cup of water kefir for a half gallon batch of ginger sugar liquid.  

Ferment it for 5-7 days depending on how tart you want the ginger ale to be.  Once the primary fermentation is complete you can either strain out the ginger and bottle into swing top bottles to carbonate or leave the ginger in.

Check the carbonation after 3-4 days and refrigerate the bottles to slow the fermentation.  

Alcohol Content of Ginger Ale Made With Kombucha

Kombucha is another yeast and acetic acid bacteria symbiotic fermentation which utilizes low alcohol yeasts which cannot grow in high alcohol solutions.  This naturally limits the alcohol level of the fermentation.  With the presence of acetic acid bacteria which uses the alcohol in the liquid which further reduces its ABV.

Ginger ale made with kombucha has an alcohol content between 0.5-3% ABV depending on the sugar content added to the second fermentation.  Acetic acid bacteria growth is limited when it is placed into an anaerobic environment leading to increased alcohol content.  

Kombucha which is flavored with ginger has the additional flavors of the tea which is the base for kombucha.  Using kombucha as a starter for ginger ale produces a different beverage as the flavor of the tea is not noticeable.  To use kombucha as a starter for ginger ale use a cup of kombucha for a half gallon batch of ginger sugar liquid and ferment it just like you would kombucha.  

You may get a SCOBY growing on the surface of the container during primary fermentation.  This is normal: let it ferment for a week to ten days (longer if you like it tart or if your kitchen is cool) and bottle it by adding a little sweetener to swing top bottles.  Store it in a warm location for 3-5 days until it reaches the carbonation level you want, then refrigerate.

Alcohol Content of Ginger Ale Made With Lactic Acid Bacteria

Lactic acid bacteria are prevalent in the environment.  They are the bacteria which produce fermentations such as sauerkraut and yogurt.  Lactic acid is very tart and acts as a great inhibitor of spoilage bacteria found in these types of foods.

Lactic acid bacteria do not produce measurable amounts of alcohol so ginger ale made with these bacteria species contain only trace levels of alcohol.  They are anaerobic microbes, growing best in sealed containers to limit oxygen exposure.

The trace amounts of alcohol in this type of ginger ale comes from the everpresent yeast found in the environment.  Yeast is a type of fungi which can change its respiration from aerobic to anaerobic and therefore able to survive with or without oxygen.  This makes it difficult to eliminate yeast growth.  This is where the trace amounts of alcohol come from.

There are several ways to start this type of ginger ale.  Each of these methods require an active culture of lactic acid bacteria to prevent the growth of unwanted bacteria. 

Use whey to make ginger ale

Whey can be acquired from making greek yogurt and saving the liquid which comes out of the yogurt.  Whey is full of active lactic acid bacteria which will convert the simple sugars in the ginger sugar liquid and convert it quickly into lactic acid forming a tart ginger tonic.

To use whey to make ginger ale start by making greek yogurt to get enough whey to begin the fermentation process.  You will need about ¼ cup of whey for the following recipe.

Use lacto-fermented vegetable juice to make ginger ale

Lacto-fermented vegetables are a great source of active lactic acid bacteria.  Fermented vegetables are usually not fermented to completion as this leads to soft vegetables.  Once the vegetables have reached the desired texture they are refrigerated to slow the fermentation down.  

The remaining sugar in the vegetables keeps the lactic acid bacteria active providing a great source of lactic acid bacteria.  Simply strain the liquid from around the vegetables.  You will need about ¼ cup or so for the following recipe.

Use lacto-fermented ginger to make ginger ale

Ginger root has a large amount of lactic acid bacteria present on it when it was harvested so the amount and variety of lactic acid bacteria found in a lacto-fermented ginger fermentation.  This makes it great for making healthy ginger ale.  

Start by making some lacto-fermented ginger.  You will need to start this 2-10 days before you start your ginger ale as the lactic acid bacteria needs time to become active.  Once the ferment is active it can be used by adding some of the ginger with some of the liquid surrounding it to the ginger sugar liquid.

For a half gallon batch use ¼ cup of ginger and liquid for the starter to the ginger ale. 

How to Make Lacto-Fermented Ginger Ale

Ingredients:

Lactic Acid Culture Starter

2 quarts of water

1 cup sugar

½ pound fresh ginger

Equipment: 

Half gallon container with a lid or air lock

Wooden spoon

Kitchen knife and cutting board

6 swing top bottles

sipen

Instructions: 

If you are not using organic ginger, peel it.

Slice the ginger into thin slices 

Add the ginger, sugar and water to the jar and stir it until the sugar is dissolved

Add the whey and stir gently to mix the whey into the liquid

Place the lid or air lock

Place in a warm dark location

If you are using a lid burp the container daily for the next 5 days

Begin tasting the liquid after day 5 and once it reaches a pleasant tartness it is time to bottle

Siphon the liquid into the bottles and seal the lid

Place in a warm dark location for 2-3 days

Check the carbonation level after day three by popping the top of one of the bottles

If it has enough carbonation for you refrigerate otherwise leave for a few more days

Alcohol Content of Ginger Ale Made With Yeast 

Ginger Ale, made predominantly with yeast, produces a high alcohol content ginger ale or hard ginger ale.  It is made using the same principles of making alcoholic country wine.

Hard Ginger Ale can have an alcohol concentration between 4-12% ABV.  This is done by inhibiting the other fermentation microbes and providing the ideal growth conditions for the yeast as possible.  These conditions include a warm anaerobic environment with ample access to simple sugar.  

There is an unlimited number of recipes for hard ginger ale online which are all basically the same.  Since we are not focused on producing alcoholic beverages on this site.

Is Homemade Yogurt Safe to Eat?


Bowl of yogurt with some blueberries and pumpkkin seeds on a plate with a spoon

Yogurt has a long and interesting history which has only recently included commercial manufacturing.  For most of its existence it has been made by those who are consuming it.  There are a wide variety of heritage yogurts which have been cultured for hundreds of years coming from many parts of the world.

Yogurt can be made safely at home by maintaining a clean environment, using fresh milk and using an active starter.  When making yogurt with store bought yogurt always use fresh yogurt.  If a heritage yogurt starter is used ensure the conditions for the starter are met to ensure success.

Commercial yogurt is made with a few isolated bacterial strains of lactic acid bacteria which are easy to control and provide repeatable results making for a consistent product.  The drawback of this is that the culture is unstable and can be overwhelmed by unwanted bacteria and yeast.

Heritage starters are made up of many bacteria species and are very stable.  The culture is affected by the environment with the fluctuation of the population of the various species found in the culture.  This variability allows the culture to protect itself from unwanted microorganisms making heritage cultures very robust.

Unsure about your yogurt making skills? Then why not try improving your knowledge of how the process works with by following this affiliate link to the great book “Homemade Yogurt and Kefir” which includes a wide variety of techniques and recipes for anyones taste.

Is my homemade yogurt safe to eat?

While store bought yogurt can get moldy in a matter of a week or two in the fridge homemade yogurt tends to have a longer shelf life.  The difference is how they are made and the ingredients of each type.

Commercial yogurt is made up of only a few bacterial species with additives frequently included meant to improve consistency, maintain structure during transport and to add flavor or texture to the yogurt.  These additives are usually not digestible by the lactic acid bacteria but can only be used for food by molds and other fungi.  This makes it susceptible to spoilage.  The higher pH of commercial yogurt also makes it more susceptible to unwanted microorganism growth.

Homemade yogurt made from powdered starters or fresh commercial yogurt can be consumed safely for 2 to 3 weeks, watch for mold growth on the surface.  Heritage Yogurt has a longer shelf life as the wide variety of microorganisms which make up the culture resist contamination.

Yogurt made at home is perfectly safe to eat if it was made from fresh milk, inoculated with a healthy starter and incubated within the proper temperature range.  There are some things which can happen during the fermentation which cause it to be different from store bought yogurt.  None of the following differences are indications of spoilage.

Clear liquid on the surface

Yogurt with clear liquid on the surface is perfectly fine to consume.  For an in depth explanation of what it is and why it forms read this post but in short the liquid is called whey and is the water soluble part of the milk which was not included in the gelling milk as it formed yogurt.  It is full of protein, vitamins and minerals.  

Whey is what most dairy based protein powders are made from.  It is collected mostly from cheese making, filtered and freeze dried.   For a more detailed explanation of how this happens read “Is the Clear Liquid on Top of Yogurt Edible

Grainy texture 

Although grainy yogurt may seem strange, it will not hurt you if you consume it.  Grainy yogurt can form if the yogurt is incubated too long, at too high a temperature or with milk which has been scorched.

Sometimes when old milk is used which is close to going off the pH of the milk is dangerously close to curdling.  When yogurt is made it is pasteurized prior to inoculation which kills off any unwanted bacteria but because the milk is close to curdling the addition of the acidifying bacteria from the culture causes the proteins in the milk to associate strongly with each other forming the grainy texture.

The grainy texture is formed by the proteins in the milk becoming tightly bonded together expelling whey and forming small dense structures.  Grainy yogurt can be used for blended drinks, sauces or dips without worry and if the texture does not bother you you can still consume it with a spoon.

Curdled milk surrounded by clear liquid

The usual cause of this is over fermentation.  Lactic acid bacteria can produce enough lactic acid to lower the pH of the milk below 4.0.  This produces a strong bond between the various proteins found in the milk and expels the water soluble whey from the solids.  This produces a curdled milk product which is very sour.

Although it is still edible most people find the tangy flavor too much to consume normally.  Instead it can be used to make tangy cream cheese, spicy salsa dip or vinegar free salad dressing.

Stringy or ropey yogurt

Stringy or ropey yogurt is produced when certain lactic acid bacteria in the culture get over populated.  These bacterial species are found in most heritage starters and are usually kept in check by the other bacteria in the culture but sometimes the environmental conditions are just right for their growth.

If this happens you can still consume the yogurt by using it in baking goods, smoothies or blended cream soups.  You can continue using the culture which has made the stringy/ropey batch being careful to control the environment.  If it continues to produce stringy/ropey yogurt, get some new starter for your next batch.

Really sour yogurt

Sour yogurt is not something which most consumers are familiar with as store bought yogurt rarely gets overly sour before it begins to grow mold around its edges.  This is because yogurt manufacturers will ferment the milk for the shortest time possible and then add additives.  These additives are often starches which lactic acid bacteria cannot use for fuel.  Starches can only be broken down into shorter chain sugars by mold, not something you want in yogurt.

 Homemade yogurt when made with heritage starters will continue to acidify the milk until there is little sugar left.  This makes for very sour yogurt which can last a very long time.  This type of yogurt can be used to make tangy cream cheese, savory dips and sauces and used in baking.

How do you know if homemade yogurt is bad?

Like any other food yogurt can go off and should not be consumed.  Although it is rare to get food poisoning from yogurt it can become home to unwanted spoilage bacteria and yeast which make it unsuitable to eat.  

Yogurt which smells different, has fuzzy growths on the container or surface of the yogurt should be thrown out.  These are signs of spoilage bacteria getting a foothold in the yogurt.  Once such bacteria have a foothold they continue to spread throughout the yogurt.

Fuzzy growth on the top of the jar

Any colored fuzzy growth on the surface of a container of yogurt is an indication of mold growth.  Mold has a life cycle which includes four stages, spore, germ, hypha, mature mycelium.  The first two of these stages are done before there is any visible indication.  Fuzzy growth is an indication that the mold has reached a mature stage with extensive growth of mycelium throughout the yogurt.  

Some people scrape the mold off the surface and consume the yogurt on the bottom but this is not recommended as mold sends an extensive network of threads down into its food source to extract food energy.  These threads go very deep and cannot be seen.  Some molds produce toxins which are unhealthy to consume it is best to just throw the batch out and start again.

Green spots on the surface

Green spots found on yogurt shows the mold has progressed to the hypha stage of growth.  The mold has begun to send threads down into the yogurt to extract food energy.  This will taint the flavor of the yogurt as well as can cause sickness.  Throw it out and start again.

Can you get botulism from homemade yogurt?

Botulism is a form of food poisoning caused by Clostridium botulinum.  This bacterium is found in all environments throughout the world where it is found in the soils, on fruits and vegetables and on most surfaces.  When Clostridium botulinum is provided with an environment which favors its growth it can produce large amounts of toxin which can be lethal.

When making yogurt the conditions for the overgrowth of Clostridium botulinum are absent which makes it impossible for it to produce enough toxin to be harmful to humans.  It cannot survive in acidic conditions below a pH of 4.5 and have many competitors in the culture during the short acidification period of the yogurt.

Botulism became prevalent when methods of canning began to take off.  Canning relies on the destruction of all bacteria and spores which can grow in the canned food.  Since Clostridium botulinum has spores which are very hardy it can survive when most other bacteria cannot.  If this happens it can grow without any competitors and will produce ample amounts of toxin which if consumed can kill.

The culture which produces yogurt can easily outcompete Clostridium botulinum.  This eliminates the chance that it can produce enough toxin to cause any ill effects.  

Is homemade yogurt better for you than store bought?

Homemade yogurt does have many benefits which store bought yogurt does not have but to make such a broad statement would be wrong.  Yogurt of any type has been shown to have beneficial effects for most people.  Whether one is better than the other depends on several things.

Homemade yogurt has more or less lactose, fat and protein content depending on the milk used, incubation time and type of starter.  This is beneficial for those who cannot have regular yogurt.  Store bought yogurt is consistent, has the same vitamins, minerals and pre/probiotics and is conveniently available.

This means that if you are lactose intolerant then homemade yogurt will be better for you as you can control the amount of lactose left in the milk by lengthening the incubation time.  If you are on a high fat low carb diet then homemade yogurt can be made with high fat milk producing a thick custard like yogurt which can be used for sauces and dips (eliminating the need for thickeners).

On the other hand if you are short on time or inclination homemade yogurt is not a good option as it does take commitment.  In that case it is best to consume store bought yogurt as any yogurt is better than none.  

Store bought yogurt is made in a very controlled environment using only a few lactic acid bacterial species.  This can be beneficial to those who are sensitive to fungi because homemade yogurt cultures may have yeasts in them (a simple form of fungus) which can aggravate fungi sensitive people.

How Long to Steep Tea For Great Kombucha


Two mason jars of kombucha tea

Kombucha has been made at home all over the world with many different variations from the type of tea to the method of sweetener and yes how long to steep the tea prior to making the kombucha.  Most of this stems from personal taste as well as beliefs about the health benefits of different steeping times.

Tea will release its flavor compounds when steeped for 2-5 minutes but to benefit from the tannins, steeping time varies between bagged and whole leaf tea. The high surface area of bagged tea releases its tannins after five minutes whereas loose tea can take up to an hour.

There is a big difference between bagged and loose leaf tea even when it comes to making kombucha.  The flavor differences between bagged tea and loose leaf tea is considerable. Since the first aromatic compounds found in all types of tea lose their flavor quickly during fermentation the important compounds are those which are less volatile.  It is these compounds which make up the complex flavors found in kombucha. 

bagged and looseleaf tea on a plate
size of leaf particle sizes for bagged and looseleaf tea

There are three main compound families found in tea leaves which are released when they are added to hot water: volatile aromatic compounds, caffeine and tannins.  Each takes different amounts of time to be released into the hot water and has different effects. These three make up a component of the flavor of kombucha. For a better understanding of where the flavor of kombucha comes from and how you can alter it to suit your needs read this article here.

Or if you want an easy going method for making kombucha without a lot of strict measurements and instructions (after all it really isn’t that hard!) follow this link for my recipe and method.

Steeping time for bagged tea for making kombucha

Bagged tea is often made from finings from the manufacturing process.  The fininges are the broken bits of leaves, stems and discolored leaves which do not make the grade for loose leaf tea.  This produces inferior flavor from most loose leaf tea and shortens the brewing time due to the large surface area exposed to the hot water.

Steeping time for kombucha made from bagged tea ranges from 2 – 5 minutes depending on whether you are interested simply in the flavor or the health benefits from the tannins.  The shorter the steeping time the fewer tannins in the kombucha, lowering its antioxidant properties. 

Once you get past five minutes the compounds found in the leaves and water will have reached equilibrium (the concentration of each compound will be the same inside the leaf as outside in the water).  This means that after five minutes there will be no perceptible change in the flavor of the tea due to the less volatile components like caffeine and tannins.  The aromatic components react quickly with the oxygen in the water and degrade quickly.

Aromatic compounds 

The aromatic compounds found in tea leaves are more volatile and are the first to be released into the water.  This is why the smell of a freshly poured pot of tea is so great.  The compounds are easily released into the air with the steam which comes off the water providing us with this effect.  

Being the most volatile, they are the most short-lived flavor elements of tea.  During the long fermentation time of kombucha these compounds are mostly lost due to oxygenation.

Caffeine

Caffeine is the next compound to be released into the water.  In bagged tea which are mostly small broken particles of tea leaves and stems which do not make the grade for loose leaf tea the surface area of the contact with the water is high.  This leads to faster and more caffeine being released into the water.  Bagged tea takes 1-2 minutes to reach equilibrium (where there is as much caffeine in the water as in the leaves) at which point the level of caffeine in the tea remains constant.

Tannins

Tannins take the longest to reach equilibrium.  They are what adds most of the color to tea.  They can be quite bitter and astringent giving the tea a puckering effect when your tea is steeped longer.  It is the tannins in the tea which give tea its healthy reputation.  Tannins are known for a variety of health benefits which is, presumably, one of the reasons why people drink kombucha.

Just like caffeine tannins in bagged tea are released quickly into the water due to the high surface area contact with the hot water.  The tannins will reach equilibrium after five minutes of steeping, providing the most benefit of tannins in your kombucha.  After five minutes the level will not increase.  

It is important to note that not all types of tea contain the same amount of tannins.  Teas which are highly oxidized like black tea and oolong tea contain more tannins than either green or white.  This is because during the processing stages of black and oolong tea they are exposed to both heat and oxygen which oxygenates the leaves.  

Steeping time

If you are more interested in the flavor components of kombucha then the health benefits then steep your bagged tea for no longer than two minutes.  This will give the aromatic compounds and the caffeine enough time to go into solution into the water.

If you are interested in the tannins found in the tea, steeping time of five minutes is necessary to extract the most benefits.  After five minutes all the compounds in the tea will have reached equilibrium and some of the aromatic compounds will have dissipated into the air or will have been oxidized.  Steeping for a longer period will not affect the levels of caffeine or tannins.

Steeping time for loose leaf tea for making kombucha

Steeping time for kombucha made from loose leaf tea ranges from 2-60 minutes depending on whether you are interested simply in the flavor or the health benefits from the tannins.  Tannins in loose leaf tea may take up to 60 minutes to reach equilibrium as the leaf has a small surface area.

Aromatic compounds

The aromatic compounds in loose leaf tea reach equilibrium in 2-3 minutes depending on the type of tea, water temperature and water hardness.  Just like bagged tea the aromatic compounds are very volatile and do not last long in the tea.  Rather they either escape with the steam or they are oxidized and mellow into the other flavors found in the tea leaves.

This means that the steeping time for kombucha which captures the flavors of a fresh cup of tea is non-existent.  Kombucha is fermented for a minimum of 5 days in most cases and up to 60 days.  Since after one day the aromatic compounds are dissipated into the air or have oxidized they will not be discernible in the final kombucha.

Caffeine

Caffeine in unbroken tea leaves is slower to be released into the water than the small particles which make up most tea bags.  It can take 2-5 minutes for the caffeine to reach equilibrium depending on the water temperature and the type of tea (black, green, oolong, white).  

Tannins

The slowest of all compounds found in tea leaves to reach equilibrium.  It can take up to 60 minutes for this to happen.  Which means that as the tea steeps in hot water the tea will become darker and more bitter as more of the tannins  enter the water.

This means that the amount of tannins in the tea for your kombucha can be regulated and fine tuned to provide the best taste and health effects for your tastes.  Once the tea has steeped past 5 minutes no more caffeine or flavor compounds will be present but the tannins will continue to slowly increase.

Steeping time

Loose leaf tea can produce the best cup of tea over bagged tea bar none.  It can be made just like you like it steeped just the right amount of time to get the flavor and aroma you want in a hot cup of tea.  When it comes to kombucha the steeping time does not just vary depending on the flavor you are after but also the health benefits, flavor pairing during second fermentation and how you sweeten it.

Tea lovers have the most control over the components found in the loose leaf tea.  This is due to the slower rate of osmosis from the whole leaves.  Since the surface area of the whole leaves is drastically smaller than that of bagged tea the tannins take much longer to fully reach equilibrium (where the same concentration is in the water as in the leaves).  

The effect of heat on steeping time for making kombucha

Heat greatly affects the speed at which the various components of the tea leaves leach out into the water used for steeping.  The hotter the water the faster the tea will reach equilibrium but the components found in the tea are also affected by the type of tea used.  Black tea and green tea although they come from the same plant the components produced by processing are very different.

This is why the steeping temperatures of tea vary depending on the type of tea.  Black tea has less bitter astringent components in the leaves because during the processing process the leaves are fermented which breaks down some of these compounds.  Green tea is not fermented and retains most of the bitter and astringent compounds.

The result is that black tea will produce a mellower cup of tea than green tea made with the same temperature of water and as a result for tea drinkers green tea is usually made with cooler water so the flavor does not get too bitter.

When making tea the temperature of the water should be matched to the type of tea, length of steeping time and personal taste.  All tea comes from the same plant; the difference is the method they are harvested, processed, and stored.  It is these factors which produce the variation in flavor and health benefits.

Kombucha, on the other hand, benefits from the bitter astringent compounds found in the tea.  It is these compounds which provide some of the health benefits in the finished drink as well as providing a bolder flavor which will mellow during fermentation. 

Four Easy Ways to Shorten Yogurt Incubation Time (Fast Yogurt )


Four mason jars of yogurt

Fermentation is not a fast process.  There are no fermentation recipes found in microwave cookbooks so when I say fast I mean “faster than normal”.  To make yogurt fast you need to understand what it is you are trying to do.  Milk thickens to yogurt once the pH of the milk reaches 4.6 or lower.

To shorten the incubation time of yogurt, use more starter, increase the temperature, use low fat milk or pre-acidify the milk.  This will shorten the time it takes for the milk to reach a pH of 4.6 where the proteins will begin to gel.

Yogurt is made when lactic acid bacteria found in the starter consume lactose in the milk producing lactic acid which acidifies the milk.  When the milk reaches a pH of 4.6, proteins in the milk associate with each other causing the milk gel.  Once the milk has gelled it is considered yogurt.

Milk needs to have a pH of less than 4.6 before it will start to gel, therefore to produce yogurt quickly you want to use the sugar (lactose) in the milk as fuel and acidify it as fast as possible.  This is done by promoting the growth of lactic acid bacteria.

Incubate the milk at a higher temperature

The lactic acid bacteria which are present in the yogurt culture have a temperature range which they grow the fastest at.  The usual range given for yogurt culturing is between 110-115℉.  This produces a nice stable yogurt with good consistency but the goal here is not perfect yogurt but fast yogurt.  

At the higher temperature range and even above up to 120 the lactic acid bacterial doubling rate of some of the lactic acid bacteria decreases.  The doubling rate is the time it takes for the bacteria population to double, the shorter the doubling rate the faster the bacterial growth.  

As the population of the lactic acid bacteria increases so does the amount of lactic acid which is produced.  It is this acid which lowers the pH of the yogurt.  The more active bacterial cells producing lactic acid the faster the milk will gel.

How to ferment yogurt at a higher temperature

To be able to make this work you will need an active yogurt culture which can be either from store bought yogurt, yogurt made from powdered yogurt starter or by using a heritage yogurt culture.

  1. Warm the milk to 180 and maintain for 10-20 minutes

To understand why heating the milk is an important step of making yogurt read this post about the benefits of heating milk prior to fermentation.

.

  1. Cool the milk to between 115-120

The fastest way to accomplish this is to pour the milk into clean glass mason jars and place the jars in cool water.  Be careful not to use cold water as the difference in temperature of the milk and the cold water may crack the jar or cool the milk too fast.  

Slowly agitate the milk in the jars with a spoon and closely monitor the temperature.  Remove the jars for the cool water bath once the temperature reaches 125 or so as the temperature of the glass will continue to lower the milk’s temperature rapidly.

  1. Stir in the yogurt starter 

Once the temperature reaches 120 stir in the starter.  Use a whisk to ensure the starter is fully mixed in.  This will disperse the lactic acid culture evenly which helps all the bacteria cells to have access to enough lactose to begin to multiply.

  1. Place the lid and place the jars into your incubation chamber

An incubation chamber can be anything which has a controllable temperature and will maintain the temperature between 115 and 120 for at least 4 hours.  For incubation chamber ideas you can read this post.

  1.  Check the yogurt after three hours

Test the yogurt by tipping the jar slightly and watch to see if it has thickened at all.  If it has not thickened at all, leave it for another hour.  Once it has begun to thicken you will know the pH has dropped to 4.6 or below .  

  1. Cool the yogurt

Once the pH has reached 4.6 the milk proteins will begin to gel.  Cooling the yogurt will help to solidify the milk further making for a firmer creamier yogurt.  Cool for at least 2 hours before using the yogurt.

It is important to remember that not all of the species of lactic acid bacteria which are present in your starter will react well to a warm incubation temperature, especially if you are using a heritage culture which has a wide variety of bacterial species in it.  This may affect the texture, flavor and fragrance of the yogurt.  

To ensure your culture remains viable, reserve some of it out of the high temperature batch to culture normally.  This way you will not risk losing your heritage culture for the sake of one fast batch of yogurt.

Use more starter

The yogurt starter is the source of lactic acid bacterial species which ferments the milk sugar (lactose) and produces the lactic acid which lowers the pH of the milk causing it to gel.  In most yogurt recipes small amounts of yogurt starter are used to ferment a batch of yogurt.

The amount of starter ranges from a teaspoon for a quart to ¼ cup for the same quart container of milk.  How much you use is up to you, both will work with varying results depending on incubation temperature, type of milk and how you like your yogurt.

When you want to speed up the fermentation, increase the amount of starter.  This will increase the amount of active lactic acid bacteria in the milk, which in turn reduces the time it takes for the pH to drop to 4.6.  

How to use extra starter to reduce fermentation time of yogurt

The process of making yogurt with extra starter uses the same method as most yogurt making recipes with the exception of doubling or tripling the starter used.  Ensure you are using an active culture with a short lag time (not a powdered starter) as the activity of the starter is vital to fast fermentation.

  1. Prepare the milk as above

Follow the procedure for making yogurt outlined in the preceding section until you add the starter.

  1. Add double or triple the amount of starter you normally would use

The extra starter puts a larger amount of active lactic acid bacteria into the milk.  This shortens the amount of time it takes for their population to be high enough to begin lowering the pH of the milk.  

  1. Incubate the milk normally

Place the milk in your incubation chamber.  Incubate the milk between 110-115℉.  The higher population will grow rapidly within this range and quickly acidify the milk.  

Use high lactose milk

High lactose milk will provide easily fermentable sugars to the lactic acid bacteria.  This will help to lower the doubling time of the lactic acid bacteria which in turn reduces the amount of time it takes to lower the pH to 4.6.

Milk with a lower fat content has a higher lactose content in it.  Products like skim milk, 1% or other low fat milk products will ferment faster.  One of the important factors in fermentation of any type is the availability of food sources to the culture, when it is easy for the bacteria to access less energy is used to get the needed food and more energy is spent on growth.  

How to use high lactose milk to speed fermentation time

This method is as simple as using low fat milk during the yogurt making process.  The lactic acid bacteria will not have to work as hard to multiply and the pH will fall faster than higher milk fat content milk.

The yogurt will not be as thick as whole milk yogurt because of the lack of fat in the milk but it will gel at the usual pH of 4.6.  Once it has reached this level, place it in the fridge for an hour or two to cool before using it.

Pre-acidify the milk

Cow’s milk has a natural pH close to 7.0 which makes it neither acidic or basic.  This pH needs to be lowered to at least 4.6 before the milk will gel to produce yogurt.  This happens normally as the lactic acid bacteria use lactose in the milk and produce lactic acid as a byproduct but if you pre-acidify the milk with something the amount of time it will take to reach a pH of 4.6 will be greatly reduced.

The benefit of this is the fermentation time can be controlled by the amount of acid added.  The lower the starting pH the milk has the shorter the fermentation time.  

The drawback is the yogurt will have a different flavor and texture than normally made yogurt.  The addition of an acid will quickly lower the pH but has no effect on the lactose content.  The result will be either an overly sweet yogurt or a yogurt which will continue to ferment making it extremely tart.

You have to be careful to not add too much acid to the milk as if it lowers the pH too quickly the milk will curdle making it unusable for yogurt.  

  1. Acetic acid powder

Used for making certain types of cheese, acetic acid powder can lower the pH of milk quickly and curdle it without any lactic acid bacterial action.  One of the most known cheeses made with acetic acid is mozzarella.  When making yogurt only use a small amount of acetic acid to lower the pH a small amount leaving the lactic acid bacteria to finish the job 

  1. Liquid acetic acid 

Otherwise known as vinegar liquid acetic acid has been used to acidify food to help preserve it forever.  To use it to acidify milk prior to fermentation only use small amounts as it adds volume to the milk and will affect the texture of the yogurt.  

The vinegar will add flavor to the yogurt depending on the type of vinegar you use.  For the most unnoticeable flavor use distilled white vinegar.  Only use a small amount of vinegar otherwise the yogurt may become overly tart.

If you are using the yogurt for making dips and other creamy recipes then any type of vinegar will do but if you want it for putting on cereal or in smoothies consider using white vinegar which has the least amount of additional flavors.

  1. Powdered lactic acid

Powdered lactic acid can be found online and is used in the process of making Sake when the fast method is used.  It will not add different flavors to your yogurt as it is the acid which is produced by the lactic acid bacteria during fermentation.