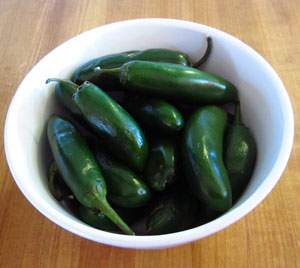
Jalapenos have a wonderful flavor as well as some nice heat making them a great addition to Taco salad, chili, sandwiches, scrambled eggs or any other recipe you want to spice up a bit.
This recipe is for naturally brined jalapeno peppers which makes them not only flavorful but also good for you as well. The fermentation process here uses lactic acid bacteria which acidifies the peppers while preserving them. The lactic acid bacteria are known for their health giving properties as well as bringing out the flavors of the food they are fermenting.
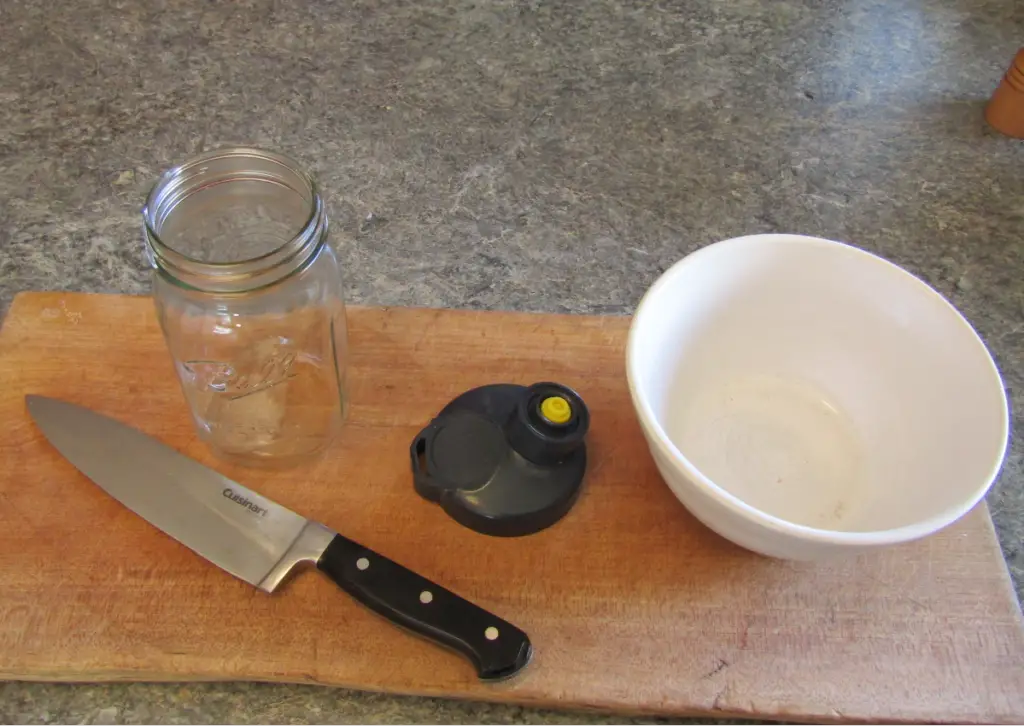
Equipment:
Kitchen knife
Cutting board
One jar with a sealable lid
Ingredients:
Jalapeno peppers
Salt
Filtered water
Instructions:
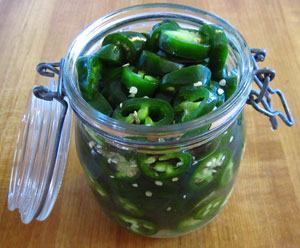
Cut the jalapenos into slices of your choice of thickness
Jam them into the jar
Make a brine of about 3% (two parts salt to 100 parts water by weight)
Pour the brine into the jar until the jalapenos are covered
Place the lid on the jar and put somewhere out of the sun
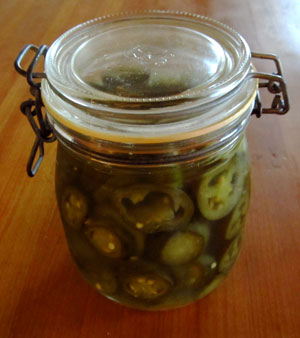
Burp the jar daily for about a week and to prevent mold or other unwanted growth tip the jar upside down daily to break the surface of the liquid and spread the brine around the inside of the jar
In about a week try a jalapeno slice. If it is to your liking then place the jar in the fridge.
I like the swing top jars depicted in the picture as I don’t have to burp these jars. They have a rubber seal which lets pressure out of the jar when it gets high enough but will not let any air into the jar.
This prevents any spoilage bacteria or mold from getting into the jar before the LAB have had a chance to acidify the environment. I still tip the jar upside down daily for a week to ensure the salt and lactic acid bacteria are spread around killing any spoilage organisms which may be present in the jar prior to closing the lid.
Note:
If you like to flavor of jalapenos but not the heat then slice the peppers lengthwise and remove the white pith which the seeds are attached to as this is where most of the heat of the pepper is. Once the pith is removed ferment the peppers as usual.
Most store bought salsa is preserved with vinegar and heat. This adds the acidity to the salsa which keeps it from spoiling and destroys any unwanted bacteria found in the salsa. When salsa is fermented the acidifying agent is the lactic acid which is produced by lactic acid bacteria. This recipe makes your salsa more digestible, better for you and can be adjusted to your taste (mild – spicy and slightly acidic to highly acidic).
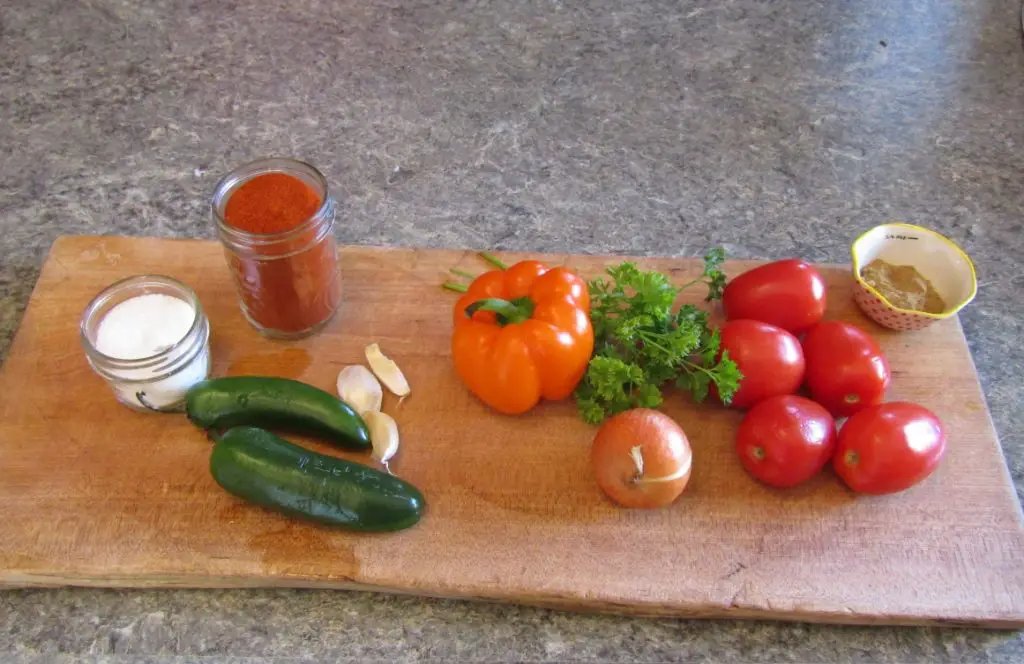
Equipment:
Cutting board
Kitchen knife
Flip top jar or mason jar with lid
Bowl
Ingredients:
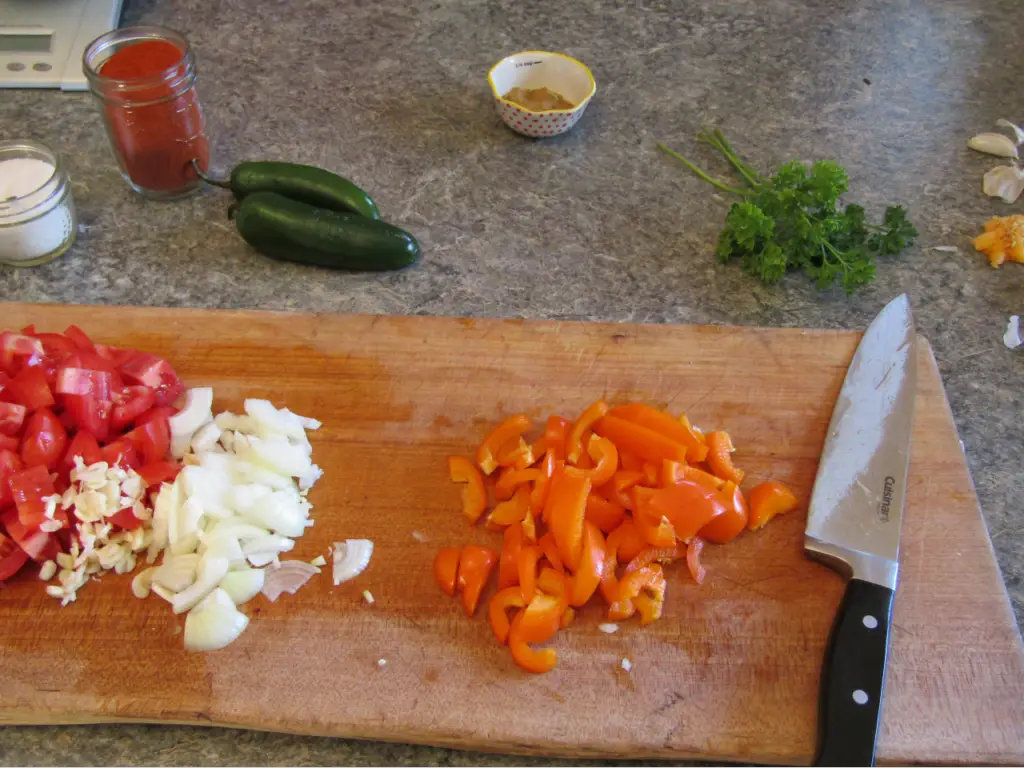
4-5 medium sized Tomatoes
2-3 Garlic cloves
One Bell peppers (any color)
1 onion
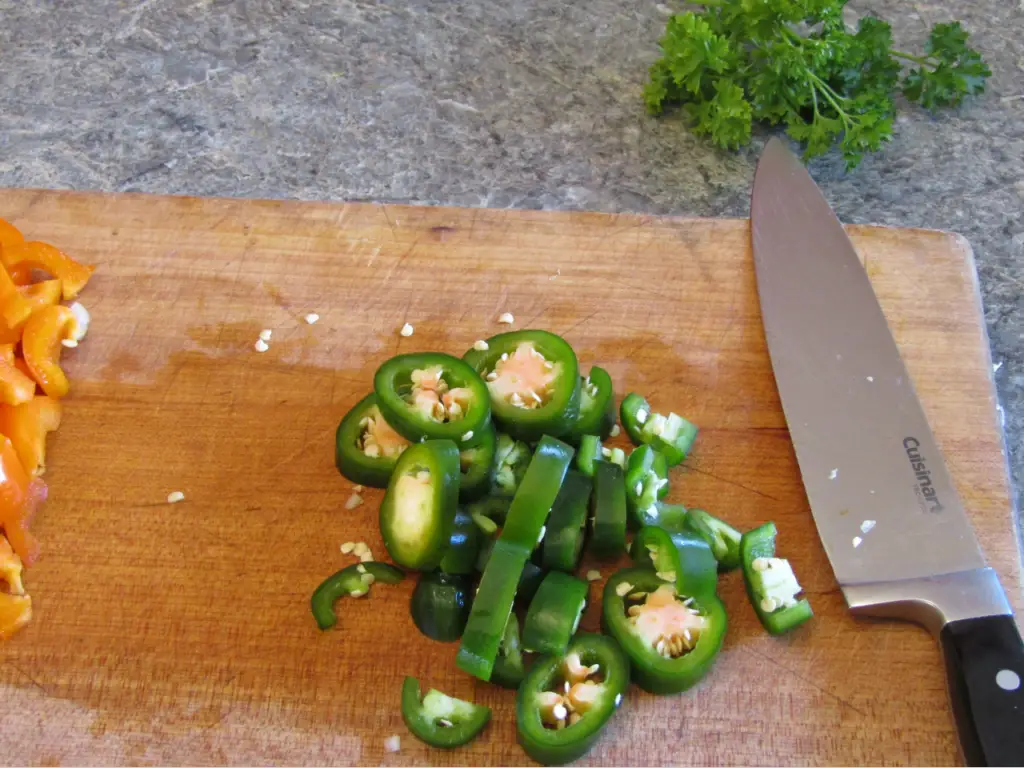
1-2 Hot peppers of your choice
1 Tbsp Paprika
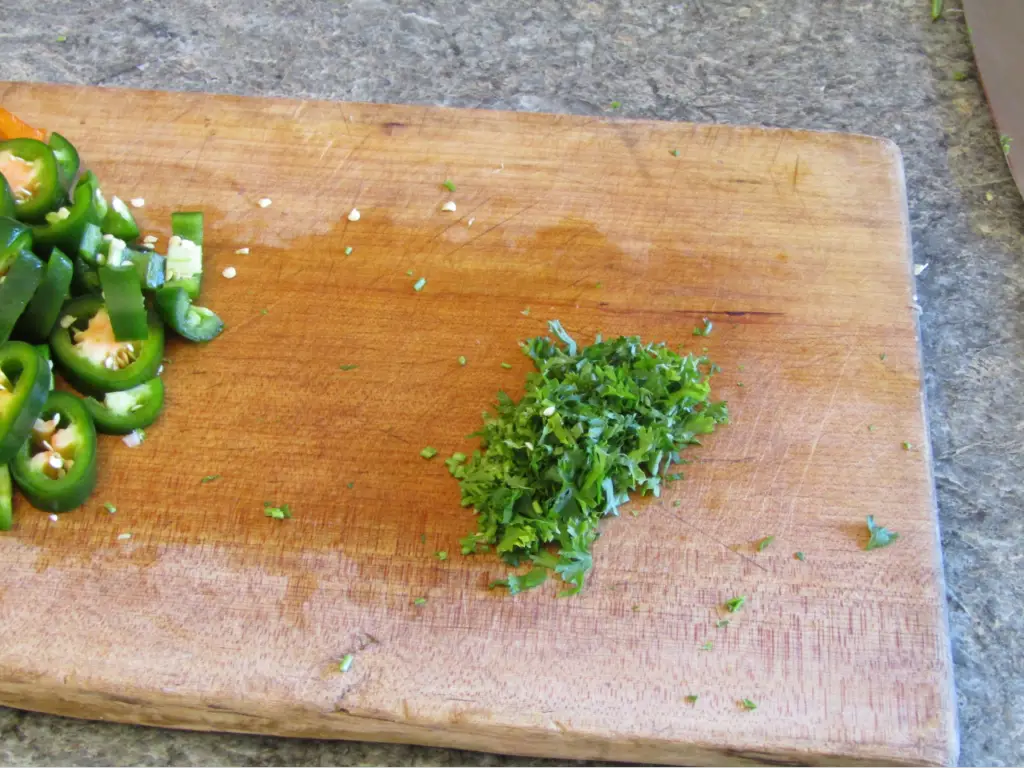
¼ Cup Cilantro or Parsley (not both)
1-2 Tbsp Cumin
2% salt by weight
Instructions:
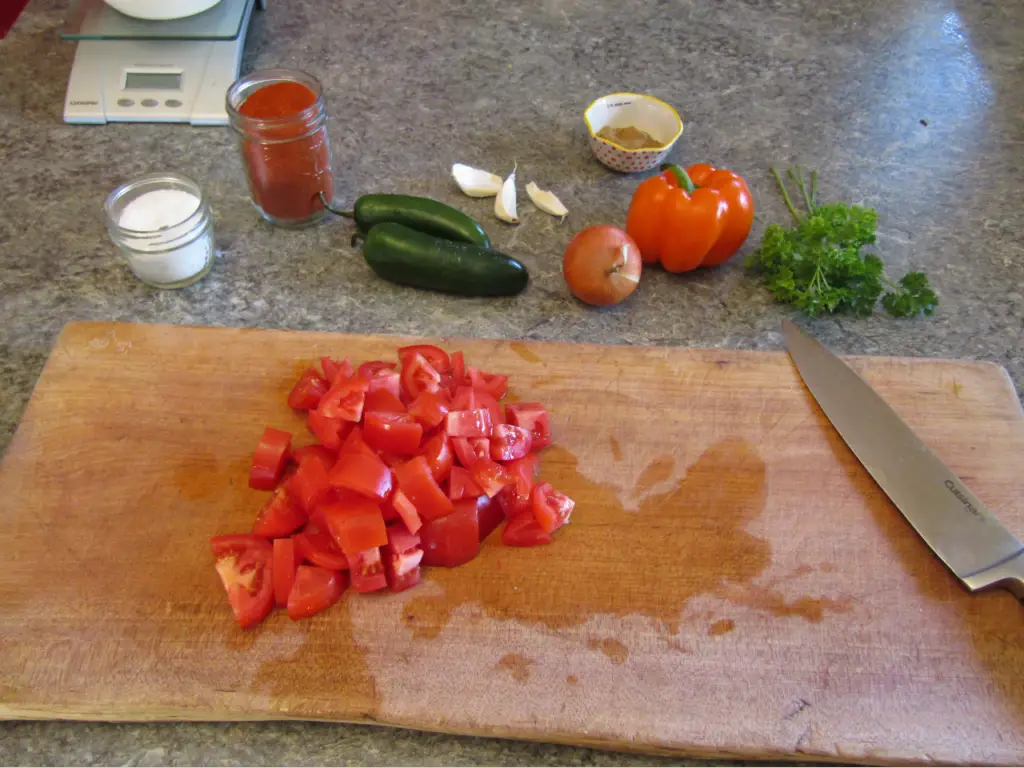
Cut tomatoes into cubes. For a thicker salsa use roma tomatoes as they have less liquid in them than the garden style tomato.
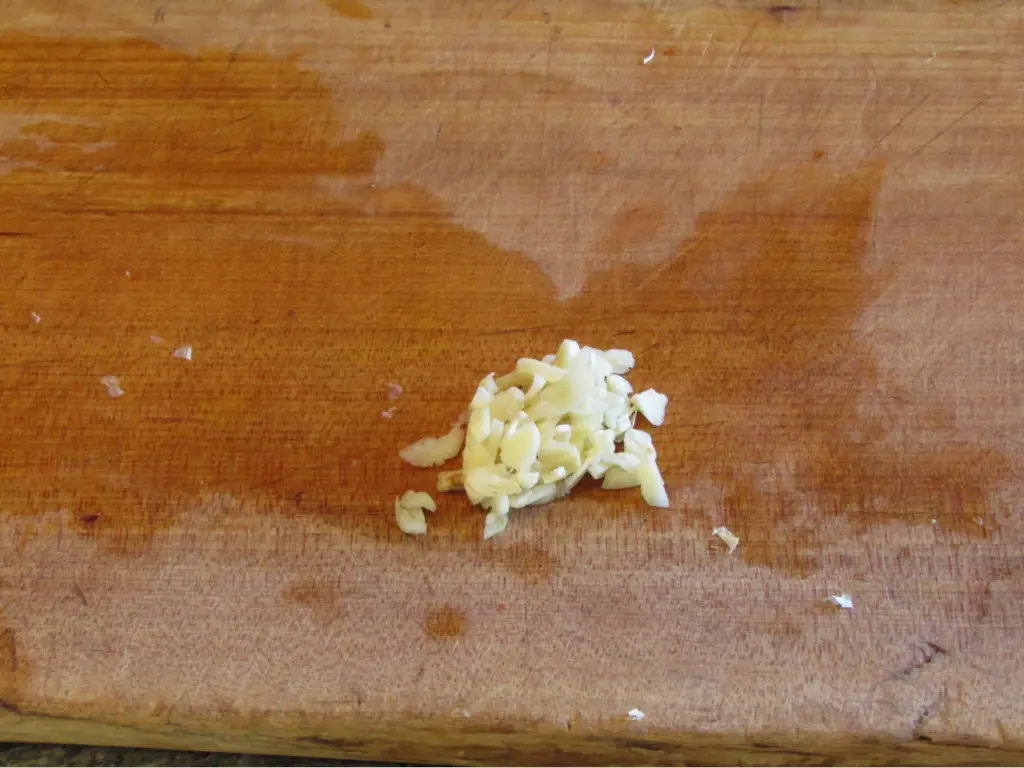
Crush and mince the garlic.
Slice and rough chop the bell peppers. Deseed peppers as the white pith of a bell pepper is thick and fibrous.
Remove the pith of the hot peppers if you want to lower the spice level in the peppers. Chop the hot peppers into small slices or chunks depending on the pepper used.
Finely mince the cilantro or parsley
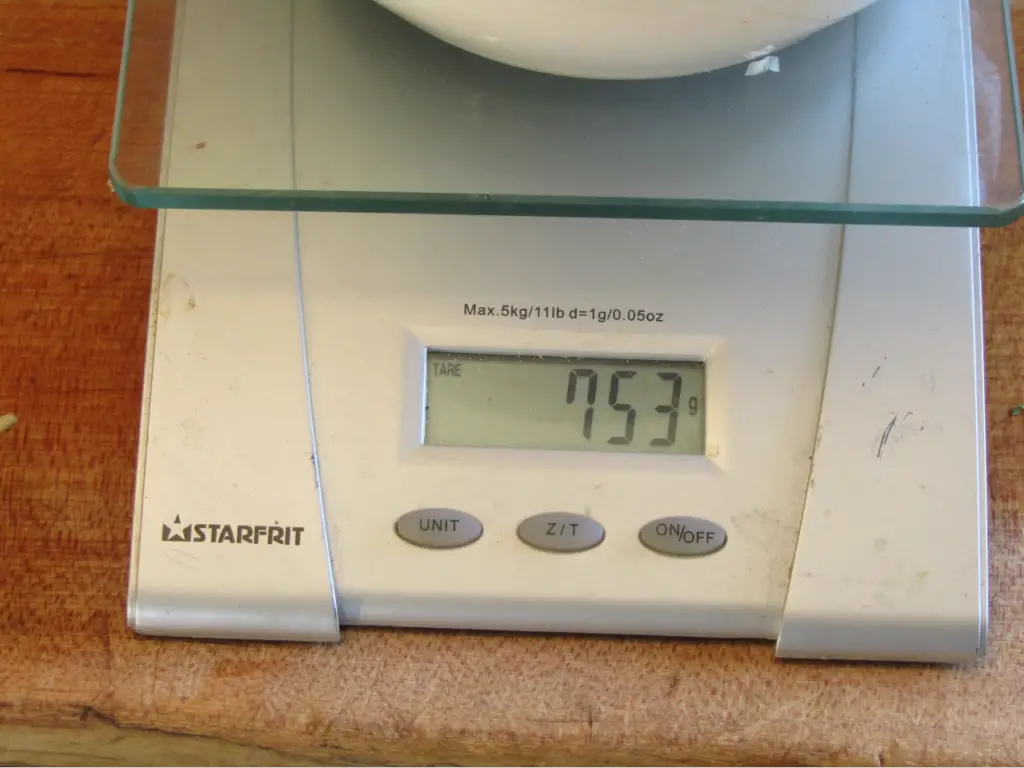
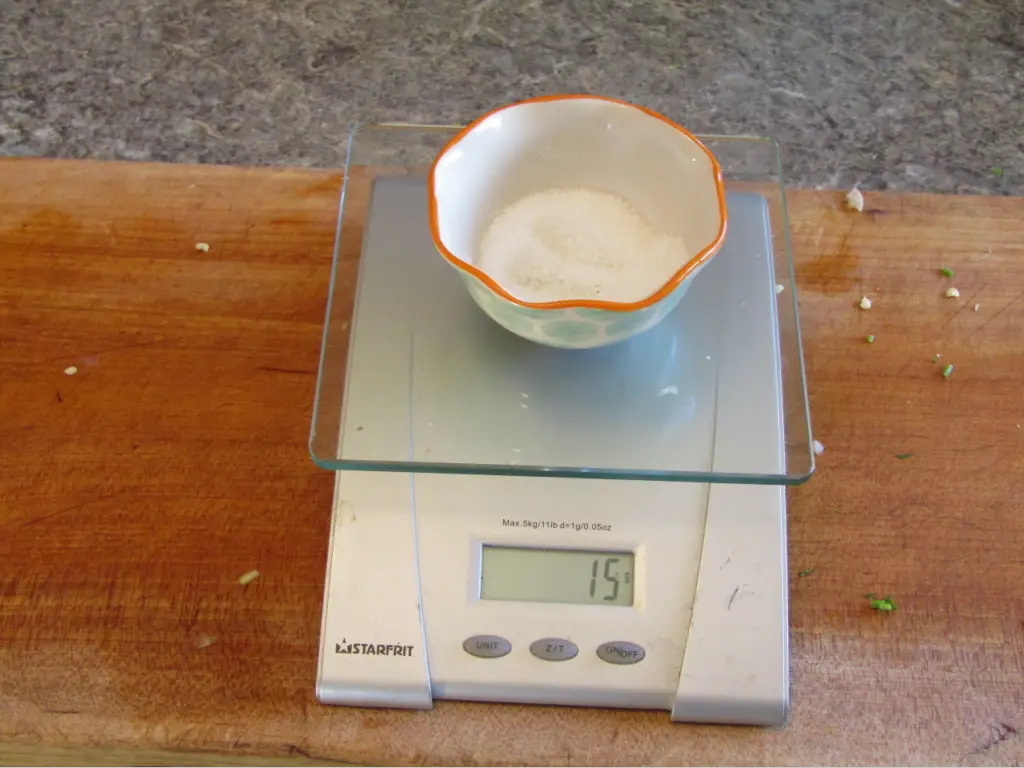
Tare to mixing bowl on the scale
place all chopped vegetables into the bowl
Add spices and mix well and weigh the bowl again
Calculate 2% salt by weight and add to the bowl
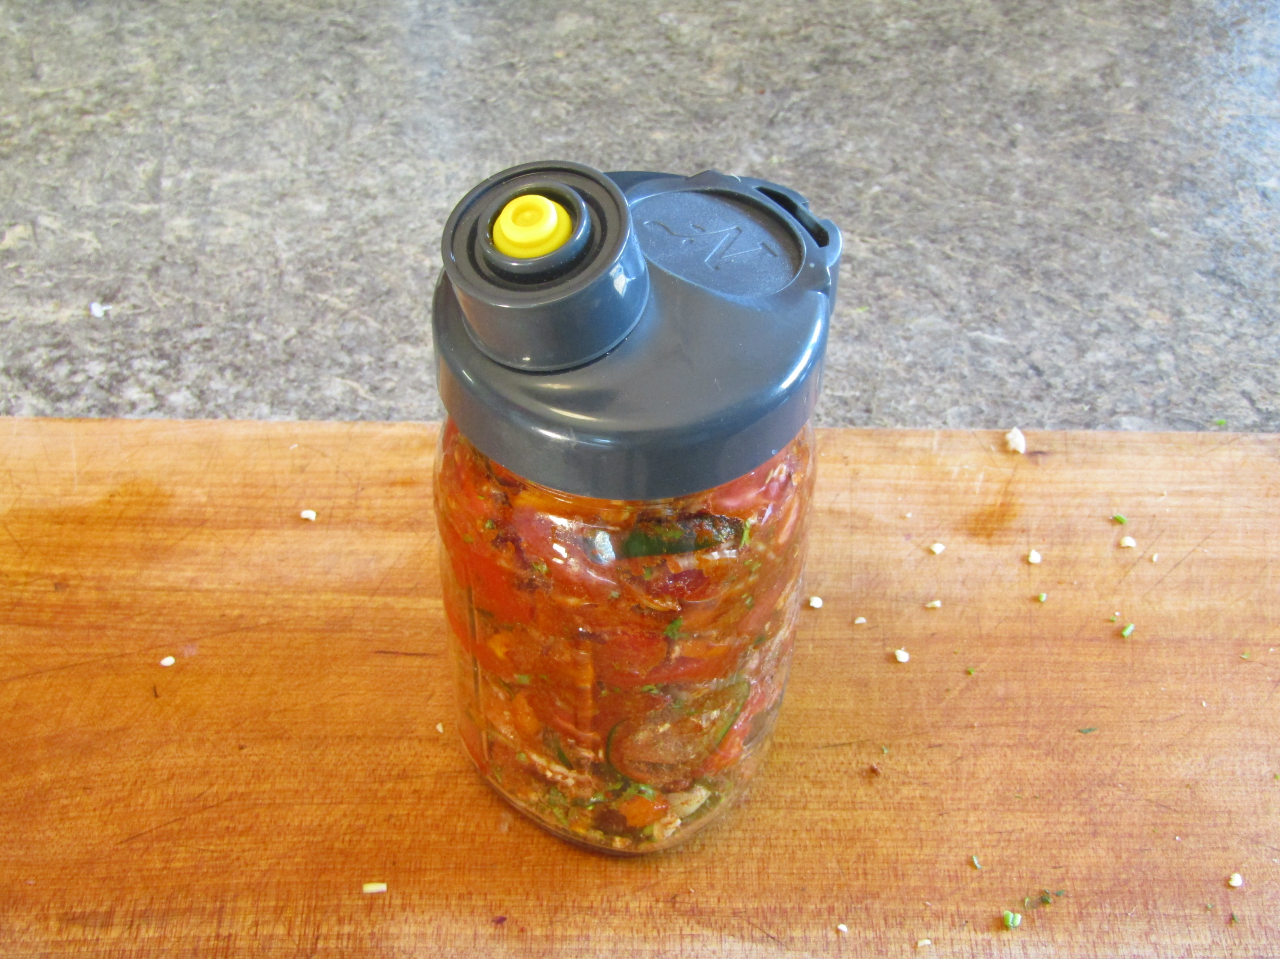
Mix thoroughly and pack into the jar
Seal the lid and store at 62-68℉ (16-20℃) for three days
If you are using a canning jar without an air lock burp the jar daily
After three days begin tasting the salsa when it reaches the acidity level you want refrigerate
The salsa will continue to ferment in the fridge slowly getting increasingly acidic so eat it quickly
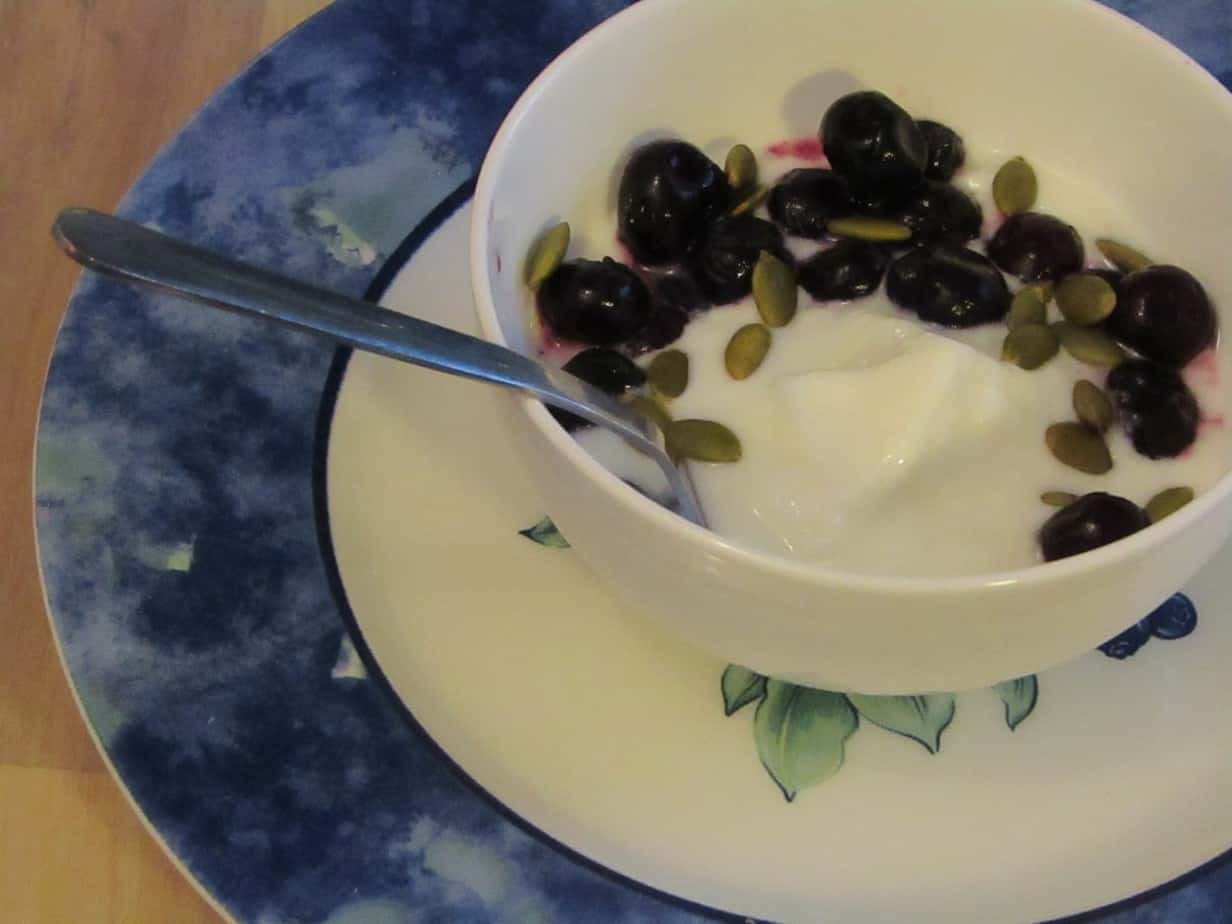
Taco salad is one of my favorite meals, it is spicy, creamy and full of flavors. Although taco salad can be difficult to digest in its classic form this recipe is full of probiotics and digestion helpers making it much easier to digest.
It uses lactic acid fermented jalapeno pickles, spicy kefir cream cheese, fermented salsa and guacamole made with fermented salted lemons. This is one recipe which is packed with a wide variety of fermented foods giving you a nice collection of probiotics and digestion helpers.
Ginger and Turmeric are in the same botanical family of zingiberaceae and as such are very similar in appearance. They are powerful flavor enhancers and have been used by health practitioners for centuries.
This tonic combines the two together with the addition of two fermented foods which may seem like overkill in the flavor department but wait until you try it.
Equipment:
High powered blender
Mason jar
Straw (optional)
Ingredients:
One thumb of fresh ginger (about a tablespoon’s worth) or one teaspoon of powdered
One thumb of fresh turmeric (about a tablespoon’s worth) or one teaspoon of powdered
¾ cup of tangy yogurt
¾ cup tangy kombucha (flavored or plain)
Honey to taste
Instructions:
Add all ingredients into the blender and blend until smooth
There is not an easy answer to this question as there are many factors which affect the length of time homemade yogurt will last. The temperature of the fridge, type of milk used, length of incubation time, how tangy you like your yogurt and the type of starter are just a few of the things which affect how long it will last.
Homemade Yogurt which was incubated 4-6hrs at 110℉ (43℃) with store bought yogurt used as the starter and kept at 37℉ (3℃) will be palatable for up to 2 weeks. After that it will be very sour as the lactic acid bacteria continues to acidify the milk.
Notice I said it would not be palatable after two weeks. That does not mean it has gone off or is in some way bad for you. Instead it means that you will probably not enjoy eating it due to its highly acidic nature. Yogurt is a live culture which continues to consume the sugar in the milk even when it is refrigerated, albeit at a slower pace. As the culture consumes the sugar it produces lactic acid which not only makes it less sweet but more sour as well.
How to Make Homemade Yogurt Last Longer
There are some things you can do to make your yogurt last longer if you find you are not consuming it fast enough.
Incubate it for the shortest amount of time needed
When milk is incubated into yogurt the starter culture is introduced and immediately begins to use the lactose in the milk as energy for its metabolism. As it does this it produces lactic acid which does two things:
It prevents the growth of spoilage bacteria
The WHO recommends a pH of less than 4.5 to prevent unwanted bacteria from growing in a fermented food. As the milk acidifies it slows the growth of these unwanted bacteria in the milk.
It encourages the proteins in the milk to associate with one another
As the milk acidifies the proteins in the milk begin to form loose bonds with each other forming a soft matrix of connections. This is why the milk thickens into yogurt as it acidifies.
If you incubate the milk until it reaches the minimum pH of 4.5 your yogurt will be nice and sweet. Refrigerating it at this point will slow the fermentation down and help it to be edible for longer.
Use Milk with a High Sugar Content
Not all types of milk contain the same amount of sugar. Milk with a low fat content like skim or 1% milk contains a high amount of lactose and protein. Yogurt made with low fat milk will have more sugar in it for longer Extending the period of time your yogurt will taste sweet and creamy but it also provides more sugar for the lactic acid bacteria to consume which eventually leads to sour yogurt.
Yogurt made with skim or 1% milk will be initially sweeter than milk made with whole milk but if you leave it in the fridge too long it will eventually become even more sour than yogurt made with whole milk. This is because the total amount of sugar available to the bacteria to produce lactic acid is higher. The more sugar, the more lactic acid and the more sour it can become.
Use a Heirloom Starter
Most people when they start out making yogurt use a little store bought yogurt as a starter and this works fine as the culture in the store bought yogurt will acidify the milk at home just like it does at the factory.
When you get a little more involved in making yogurt you will undoubtedly hear about heirloom starters. These are yogurt starters which have been perpetuated over a long period of time. The cultures are rich in various species and are very stable. Unlike the store bought yogurt starter which is made up of two to four known lactic acid bacteria species.
These cultures produce different flavors and textures of yogurt which enables them to remain edible for a longer or shorter period of time, depending on your taste. Some starters produce a very mild flavor while others can make a very tart yogurt in a short period of time. It all depends on the population and type of bacteria found in the starter.
Store in the coolest part of the fridge
Lactic acid bacteria will continue to be active over a wide range of temperatures. This is a good thing as a live culture is more robust, making it resistant to spoilage but it also continues to acidify the milk over time.
To slow this down, store your homemade yogurt in the coolest part of the fridge. This is usually towards the back at the top where the air from the freezer enters the refrigerator. The main part of the fridge will have temperatures which vary as much as 2 degrees.
Anything in the door will obviously be warmer as it has a wide surface area which is warmed repeatedly when it is opened and closed. Heat enters the bottom as there is less insulation on the bottom of the fridge and through holes which allow any liquid to drain into the evaporation pan.
Can homemade yogurt go bad?
We have all had the experience of opening a container of yogurt which has languished in the fridge for a week or two only to find little spots of green mold along the top, usually where the seal was broken and the yogurt was exposed to oxygen.
Homemade yogurt is susceptible to spoilage from mold growth when made without pasteurization, incubated at an incorrect temperature or in aerobic conditions. Once made mold growth may occur when stored above 4℃(40℉), exposed to oxygen or contaminated with food debris.
Lactic acid bacteria can prevent the growth of mold by producing acidic conditions, competing for food and actively destroying the toxins mold uses to protect itself. As most lactic acid fermentations are done in anaerobic conditions mold growth is hindered due to lack of oxygen. Homemade yogurt is one such fermentation.
Mold is persistent in the environment and can grow in a variety of temperatures, pH and in light/dark spaces. It is not possible to eliminate the presence of mold but it can be controlled by maintaining good systems and hygiene when making your own yogurt.
Pasteurize the milk just before inoculating it
Pasteurization of the milk when making yogurt does a variety of things (read about why it is important here), one of which is to prevent overgrowth of mold and other unwanted bacteria. Milk is pasteurized when it is bottled to varying degrees which extends the shelf life of the milk but even if milk is not opened and kept in the fridge it will not last very long.
To prevent these unwanted microorganisms from overtaking the milk and getting a foothold in your yogurt you need to heat it to 180℉, pour the milk into its incubation container and put a lid on it. This will limit the amount of mold and unwanted bacteria in the milk and give the lactic acid starter an open field to grow unhindered.
Use clean incubation containers and utensils
It is not necessary to try to sanitize or sterilize your containers. Just wash them in hot soapy water, rinse well and let air dry. Sanitization and sterilization are not really practical in a home kitchen anyway.
Clean equipment removes any foreign objects which may harbor unwanted bacteria and mold and kills or removes bacteria and mold spores which can cling to the surface of the container. The less unwanted microorganisms in the initial incubation the longer your yogurt will last.
Put a lid on your yogurt container
Mold, which is the main cause of yogurt spoilage, needs to have oxygen to survive and grow. Without oxygen it will remain dormant and not cause any difficulty. By placing a lid on the container during incubation and only opening it to serve your yogurt you will limit the amount of oxygen the mold has access to.
During the first stages of incubation the lactic acid bacteria will be exposed to oxygen which it will use to produce hydrogen peroxide. Once the excess oxygen has been used it will stop producing it but the hydrogen peroxide will remain. This is beneficial for two reasons:
Hydrogen peroxide is lethal to mold
It binds the oxygen in an unusable form for the mold to access
Since hydrogen peroxide is not something you want to be consuming in any volume you want to fill your incubation containers close to the top and place the lid on during incubation.
Incubate your yogurt between 108-115
Lactic acid has a wide temperature range, which is why it continues to sour as it ages in the fridge but when incubating milk there is a lag period before the lactic acid bacteria introduced into the milk begins to multiply rapidly.
When the temperature is too low this gives mold and other unwanted bacteria time to gain a foothold. This can give your yogurt an off flavor (which is the mycotoxins produced by the mold) and shorten the shelf life of the yogurt.
By incubating it in this ideal temperature range the lactic acid bacteria will grow rapidly leaving little time for unwanted microorganisms to grow.
Use clean serving utensils
Unwanted microorganisms are everywhere. They reside on dirt, food and in the air. By using clean utensils you minimize the amount of unwanted visitors from entering into your yogurt and causing spoilage.
Mold is the only microorganism which can break down carbohydrates and use them as fuel. If you use unclean utensils to serve your yogurt you will be introducing additional food which only mold (which is ever present) will be able to use, shortening your yogurt’s shelf life.
Don’t use starchy thickeners to make your yogurt firmer
Using cornstarch or other starchy thickeners are a great way to make thicker more firm yogurt but it will shorten the shelf life of your yogurt. Starch is a form of carbohydrate which the yogurt culture cannot use as fuel.
Lactic acid bacteria lack the enzymes to break down these long chain sugars and therefore have to leave them untouched. Unfortunately mold does have the enzymes needed to use starch for food.
With an abundance of food which is uncontested the mold has free range to grow. This is one of the reasons why store bought yogurt will begin to mold after one to two weeks in the fridge, they almost always contain some type of thickener like cornstarch, guar gum or other starchy thickener.
If you want to make thick yogurt with a starchy thickener use it within a week. Don’t use it as a starter after a couple of days of storage in the fridge to limit the growth of mold in the starter. If you want to make thick yogurt but can’t eat it quickly check this article out here about making thick yogurt several different ways.
10 ways to use overly sour yogurt
If you find yourself in the situation where you have left some yogurt in the fridge for a long time and it has become so sour that it is not palatable by itself you can still use it. First if you have left it in the fridge longer than three weeks check to see if there is any indication of spoilage from mold. Look for green mold spots along the surface of the yogurt or on the lid.
If you find any mold spots throw it out and wash the container thoroughly. If there is no evidence of spoilage then you can use your overly sour yogurt in any of the following recipes.
Tangy Onion and Garlic Chip dip
With the extra sour yogurt this chip dip adds another layer of flavor to the typical chip dip. The thick texture of the yogurt helps it to stick to the chip while adding a pleasant amount of sourness.
Fluffy Pancakes
There is nothing like a morning breakfast of light fluffy pancakes which can be difficult to achieve as pancakes are notoriously heavy and doughy. There are several reasons why this occurs such as overly beating the batter or making it too thick/thin but the main reason is the rising agent does not have enough power.
By replacing some of the milk with overly sour yogurt the rising agent will react faster and with more power, making the pancakes light and fluffy.
Creamy salad dressing
The sourness of the yogurt goes nicely with the olive oil for this cream dressing. Use it for potato, seafood or pasta salad. The thickness of the yogurt makes the dressing cling to everything and resists separation.
Sour cream cheese
Cream cheese is usually a mild flavored soft cheese used to spread on bagels or made into cheesecake but this version gives it a tangy sour flavor which is good for savory dishes. Add it to an omelet, use it in a sandwich or a wrap.
Sour cream cheese is easy to make and is a good base for many thick spreads of all types.
Creamy fermented salsa dip
This creamy dip is a great addition to taco chips and salsa. It can be served with guacamole sour cream and plain salsa to make a great variety dip platter served with taco chips and/or vegetables.
The fermented nature of the salsa adds another level of flavor with its salty umami flavor which cannot be matched using store bought or fresh.
Beef stroganoff
The high fat content of Beef Stroganoff makes sour yogurt a good addition. The fat is cut by the acid in the yogurt which adds a bit of tang bringing out the flavors of the beef more.
When using sour yogurt add the yogurt in just before serving and do not heat it again as it may separate.
Mustard and honey chicken marinade
Marinades need to have a few components to make them effective; acid, viscosity and flavor. The yogurt in this marinade provides some of the acid and thickener. The flavor of the mustard and honey on the slow cooked chicken makes this recipe a winner.
Tangy honey nuts
Any type of nut can be used to make these tangy nuts. The key is to slowly roast them until the coating has fully coated the nuts and hardened around them sealing in the flavors. With the addition of the sour yogurt these nuts take on a slightly acidic flavor making them totally addictive.
Savory biscuits
Biscuits made with sour yogurt are great for lunch or a mid-afternoon snack. They can be paired with sliced meat, heated with a little butter or served as an accompaniment with soup or salad.
Using sour yogurt makes them extra light and fluffy and adds to the flaky texture. This is due to the acid reacting with the rising agent giving it more power and maintaining the moisture better as the biscuits bake and cool.
Tumeric and ginger are a dynamic duo when it comes to health and flavor. They are both used in herbal medicine extensively and have been shown to have beneficial effects on the users health.
So what could be better but to add another beneficial component to the mix. And mix I mean as this recipe is made in less than a minute in the blender. When making this tonic remember to add the pepper as it is essential to get the most benefits from the turmeric.
Smoothies are a great way to have breakfast on the go. They are packed with vitamins and minerals providing you with great nutrition with the added benefit of being portable so you can have it on the way to work in the morning rather than stopping at the local drive through to wait in line to get a sugary pastery and a bad cup of coffee for breakfast.
You can improve the nutrients you get in the morning and gain some time when you add this kefir fruit smoothie to your morning routine. Kefir is a great source of vitamin B12, vitamin B2 and vitamin D. It also contains lactic acid which helps the digestive system maintain proper PH which can improve your digestion.
This recipe is highly flexible to your tastes so feel free to alter it to your tastes or food tolerances. It is here as a guideline for you to begin your experimentation of expanding the simple smoothie into a flavor sensation you look forward to having every morning.
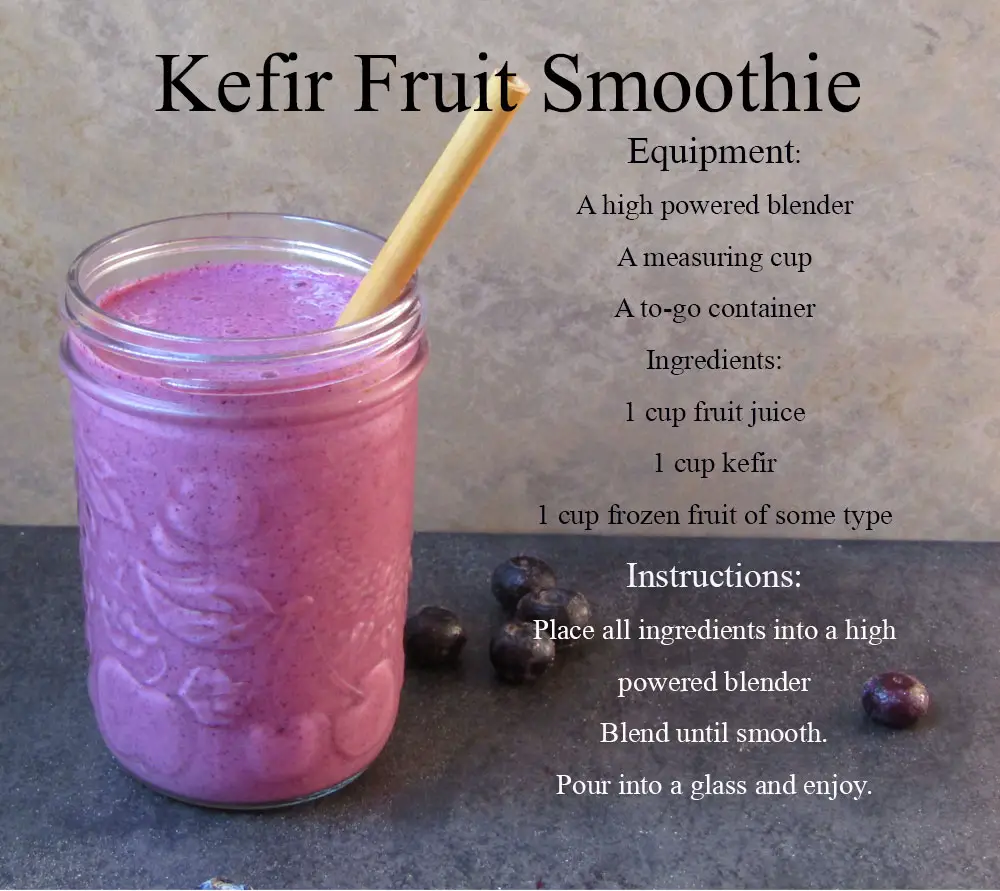
Equipment:
A high powered blender
A measuring cup
A to-go container
Ingredients:
1 cup fruit juice
1 cup kefir
1 cup frozen Fruit
Instructions:
Place all ingredients into your high powered blender and blend until smooth.
Pour into a glass and enjoy.
Urban Fermentation is a participant in the Amazon Services LLC Associates Program, an affiliate advertising program designed to provide a means for sites to earn advertising fees by advertising and linking to Amazon.com. We also participate in other affiliate programs which compensate us for referring traffic.