I am an advocate for fermentation I believe that it is a
healthy practice which has helped generations of people preserve food staples, infuse
flavors, derive health benefits and help digest hard to break down foods.
Since the widespread use of refrigeration we have become
lazy and commercialized. We want things
instantly without preparation. This led
to the rise of fast food and prepared meals which are full of chemicals, flavor
enhancers and various preservatives.
But the worst thing which has happened in my opinion is what
I call fear mongering advertisement. It
goes on in all areas of commercialization but with the most intensity in the
food industry.
As a result it seems we are afraid to eat anything which is not sealed in a plastic bag, frozen, canned or bought from a commercial source.
But most processed foods bought at a grocer are not as good for you as those which are home made.
This leads me to Kombucha. I love the way Kombucha makes me feel, I like the taste and I love that I can make it the way I like it. I can let it become tart, leave it sweet, flavor it in a second fermentation and even make it into vinegar.
Whatever your prefrence, making it yoursself gives you the greatest opportunity to have kombucha just as you like it.
That said here is a simple basic recipe for you to start with.
Equipment:
One glass jar (at least a quart)
Cloth to cover the jar with an elastic band to secure it
Ingredients:
Tea leaves or bags
Sugar
Filtered water
Raw kombucha
One SCOBY
Traditionally kombucha is made with black
tea but it can be made with any type of tea you choose, black, green, oolong,
white even herbal. Each of these
versions have different flavors and properties.
Your choice of sweetener is also up to
you. You can use white, brown,
unrefined, fructose or honey (don’t believe me then research Jun). The SCOBY does not care where it gets its
fuel from, it is sort of like asking what kind of wood a fire will burn. It must have calories in it (food energy) so
diet sugar substitutes will not work.
Instructions:
Make the tea. You can make it as strong or weak as you like. I use ½ cup of tea leaves per two gallon batch but feel free to experiment with the strength of the tea.
Add the sweetener while the tea cools. The amount of sugar in the tea will dictate the acidity the kombucha can achieve, you must add enough sugar to feed the culture enough so they can acidify the tea. Use at least a third of a cup of sugar per quart sized jar.
Strain out the tea leaves or remove the bags and pour it
into the jar.
Let it cool to room temperature, then add ¼ the volume of kombucha to the tea.
Place the SCOBY on top of the liquid then secure the cloth
with the elastic band.
Wait….
In about ten days or so the AAB will have converted some of the sugar into acetic acid. Begin tasting it by placing a straw under the SCOBY. When it is the desired tanginess you can pour out the finished kombucha and place into the fridge. Make a new batch by leaving ¼ of the kombucha in the jar with the SCOBY and add some more sweet tea.
You can drink the kombucha right away or make it into a
soda.
This is an extreme method of making vinegar. It only uses three ingredients and is similar to making any other fresh fruit vinegar. Jalapenos are the peppers used here but any other type of peppers can be used depending on the heat level you are comfortable with.
Equipment:
One liter Glass jar
Cloth with an elastic band
Stirring spoon
Kitchen knife
Cutting board
Gloves if using hot peppers
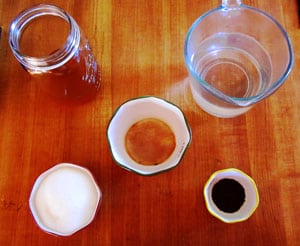
Ingredients:
½ kg (1.1 lbs) of peppers
2 cups white cane sugar
Enough filtered water to fill the jar leaving an inch of headroom
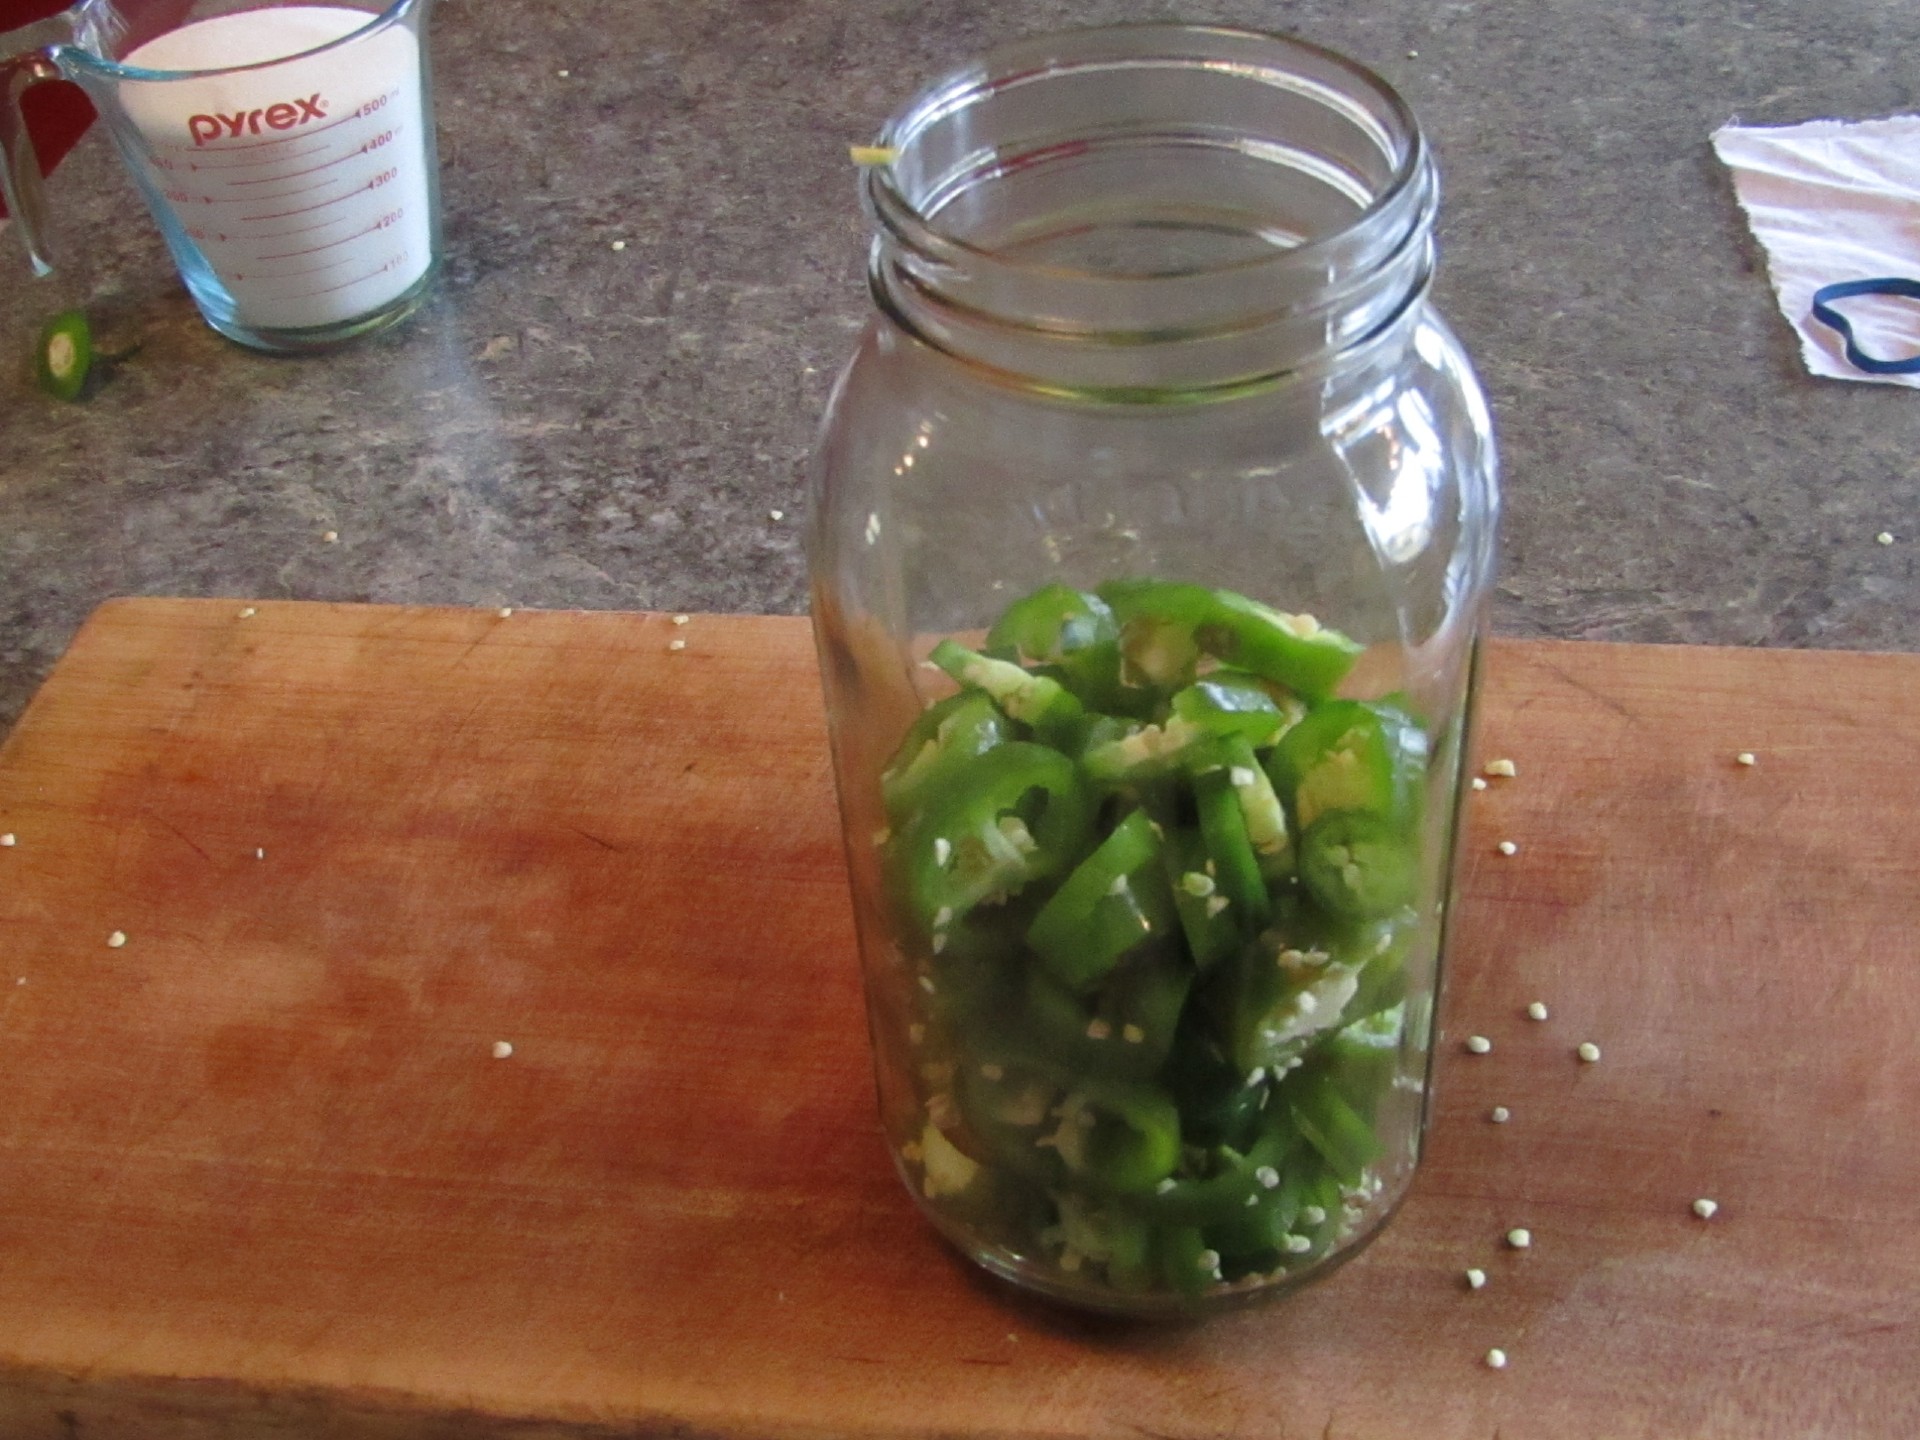
Instructions:
Chop the peppers into small pieces (you can remove the white pith for less heat)
Pack into the jar
Add the sugar and water
Stir to help dissolve the sugar
Place the cloth on the top secured with the elastic band
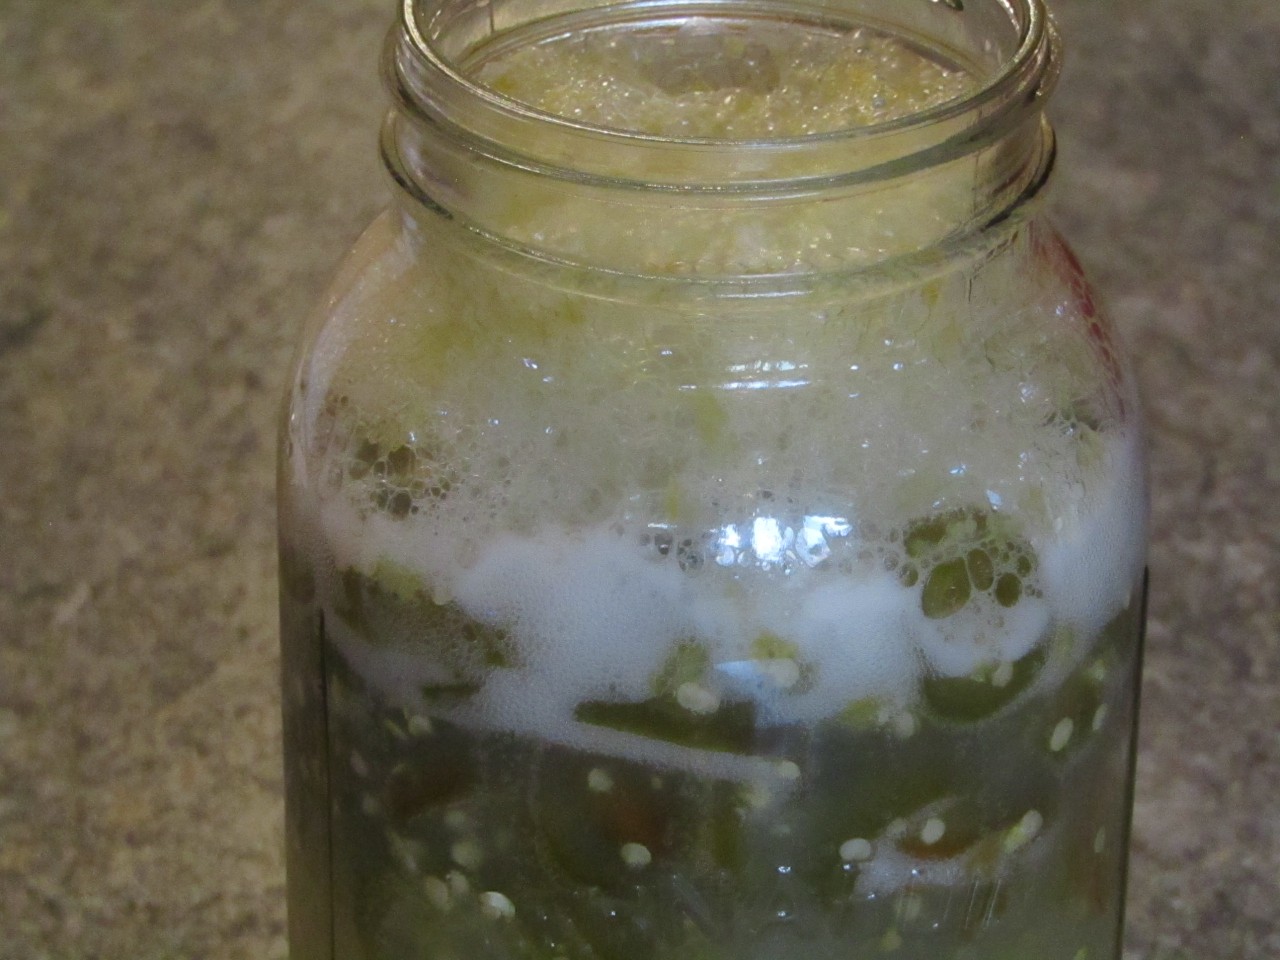
Stir the mixture every 12 hours until they start to bubble
Once active fermentation is present stir every 24 hours
When active fermentation slows down filter the liquid off
Place the liquid back into the jar and place the cloth
Stir the liquid daily for another two weeks as the acetic acid bacteria grow
Wait another two weeks before taste testing
When the vinegar has developed a tart flavor pour off some for immediate use
Continue to age the remaining vinegar for another 2-4 months
Pour the remaining vinegar into sealed jars and continue to age
Use as needed
Notes:
It may seem extreme to only use hot peppers but the fermentation process destroys some of the capsaicin in the peppers which reduces the heat
A vinegar mother may form on the surface of the vinegar. If you can help it do not disturb it as it helps to protect the vinegar from debris
The white pith found in the peppers is where most of the capsaicin is found so by removing it the vinegar will be less spicy
Now that your fermented peppers have been fermenting for a while and you like the texture and flavor, how do you keep them so they are available the next time you make tacos or need to add some heat to a spicy dish?
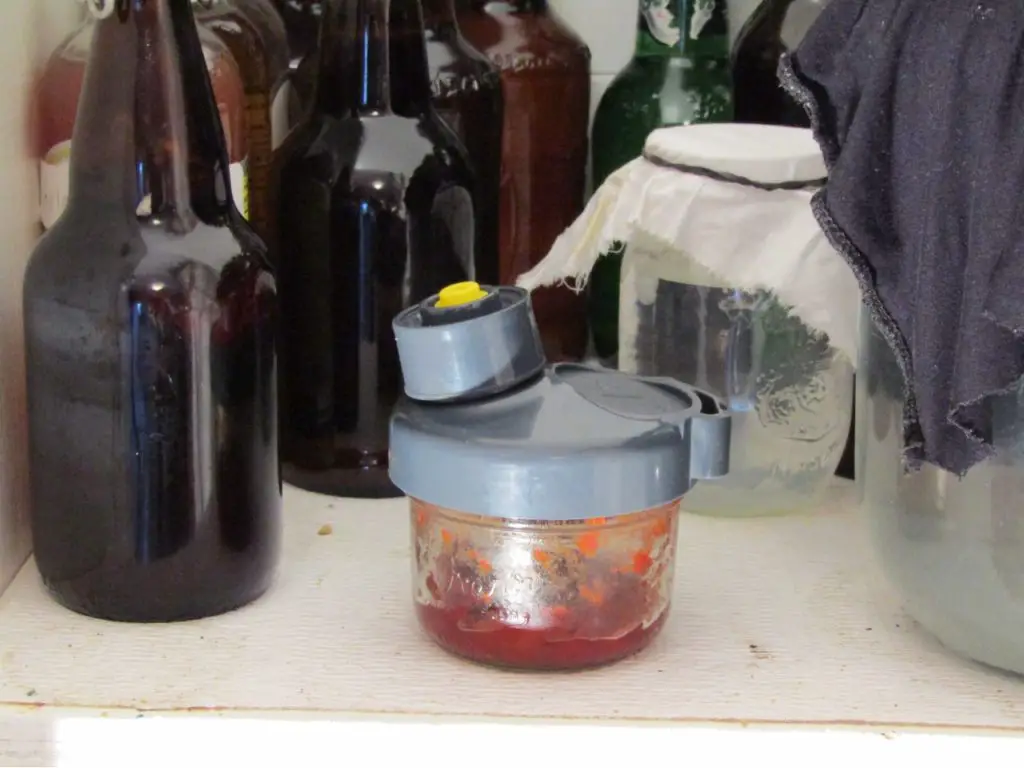
Store fermented peppers below 60℉ (15℃) in a dark location in an anaerobic environment. The cool temperature slows the growth of the lactic acid bacteria, the lack of light prevents damage from ultraviolet light and mold growth is hindered without access to oxygen.
Storing fermented peppers is similar to storing other fermented foods. They are affected by heat and light. By keeping them in a cool dark location your peppers will be good for years. As long as the container does not allow oxygen in the peppers. They will change slowly, developing a richer, more complex flavor. Once the peppers are exposed to oxygen mold and other spoilage microorganisms get a chance to grow spoiling the peppers.
Peppers can be stored in a variety of ways depending on what you want to use them for.
Storage of peppers for hot sauce
Hot sauce can be made with a variety of fermented peppers. Once the fermentation is complete the flavor of the peppers will begin to mature becoming more full and complex as the pepper fermentation is aged. The aging process can be done in a variety of ways.
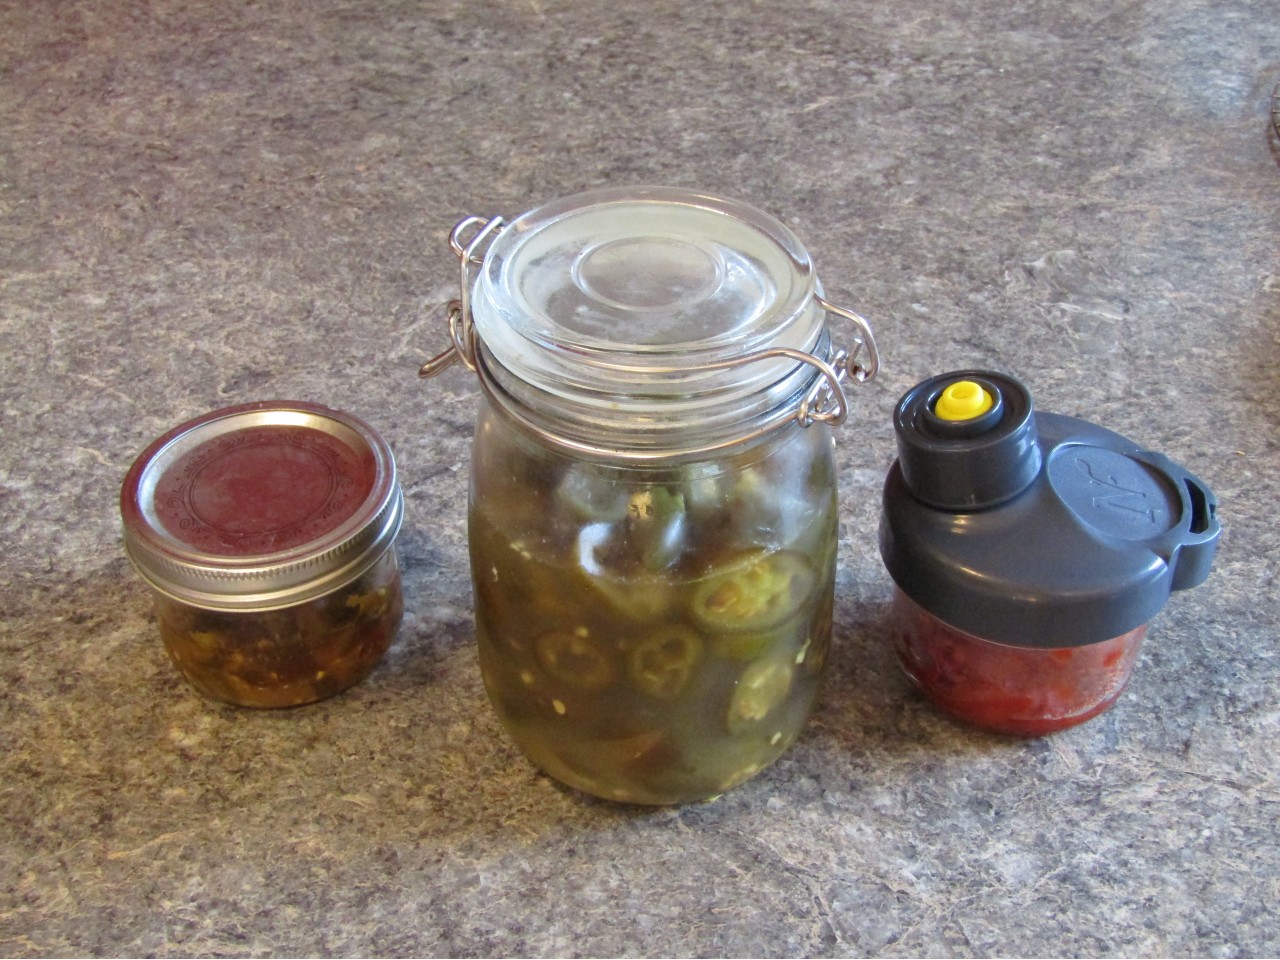
Store peppers in mason jars
You can store your peppers in glass containers such as mason jars but be careful to use a lid which is acid tolerant. The typical canning seal has a plastic coating which prevents the contents from eating the metal lid but they are fragile and can easily become damaged.
Another option is the plastic storage lids but these are not meant for long term storage. They do not seal properly and can let air into the jar which will lead to spoilage.
The third option is to use fermentation seals sold specifically for mason jars. There are a number of options which all provide a good seal and are resistant to corrosion. They can be found online or locally. They are great as they will allow built up pressure to escape but prevent oxygen from entering the jar.
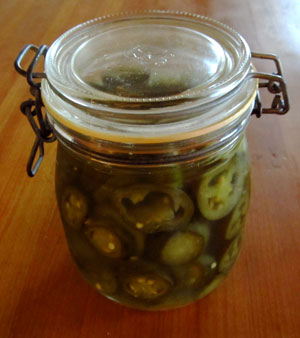
Store peppers in flip top jars
This is my favorite method of fermenting and storing my lactic acid fermentations (including fermented peppers). These jars are not meant for canning as the rubber seal is not good enough to prevent air from entering the vacuum produced by the canning process but they are great for lacto fermentation.
The flip top seal allows built up pressure from inside the jar to escape but since the pressure never gets strong enough outside the jar to pass through the seal the fermentation is protected from oxygen exposure. You also don’t need to transfer your peppers into storage containers, burp the jar or open the jar to inspect its contents.
Before you use one of these jars be sure to check the seal to ensure it is intact. To do this you can fill the container half full of water, seal it and shake. If water comes out, replace the seal and test again. If it still leaks you may have a chip in the jar’s rim and it will no longer be useful as a fermentation container. Use it for other purposes.
Store peppers in wooden casks
This is an expensive option but a fun one if you can spare the cash. Wooden casks used to be used for storage and transport of all types of goods. From wine, cheese and even dry goods they were packed in wooden barrels and shipped to all parts of the world.
The famous Tabasco sauce is made from a specific type of hot pepper, salted heavily and sealed into wooden casks to age for a minimum of three years. The wood of the cask adds a mellow flavor and the long aging time makes its flavor very complex.
To use a wooden cask you will need one which the lid is removable. Pack the cask full to within 1-2 inches with peppers mixed with salt, add a layer of salt on the top to prevent spoilage over the long fermentation time. You can age them as long as you like but if you want to get any benefit from the wooden cask leave it alone for at least six months. It takes time for the flavor of the wood to penetrate and enfuse with the peppers.
The Correct Temperature to Store Fermented peppers
During fermentation temperature control is vital to get the flavor profile you are looking for. Too hot and you get mostly lactic acid, too cold and you get lactic and acetic acid, alcohol and carbon dioxide. When it comes to storage the temperature is also important but for different reasons.
Storage temperature for pickled peppers
The temperature at which peppers are fermented affects their texture, color and flavor and will affect the final product. Different temperatures will produce different products. When storing fermented peppers you also need to keep in mind what the final produce is for them. Storing them for eating as pickled peppers is different from storing them for hot sauce.
For pickled peppers, store them below 60℉(15℃). This will help the peppers to maintain their structure and crispness. The low temperature slows the action of the bacteria and chemical reactions within the peppers which can break down the structure of the peppers.
This will slow the breakdown of the peppers and allow storage of them for a long period of time. By keeping the peppers cool all the chemical reactions slow within the container which keeps the peppers fresh tasting. The cooler the temperature the slower the changes in the container will occur.
Be sure to not freeze the peppers as this has negative effects on the structure of the peppers. Freezing will not make the peppers inedible but it will soften the texture as the ice crystals formed within the peppers will damage the structure of them, making them soft.
Storage Temperature for fermented pepper hot sauce
If your goal is to make a pepper hot sauce then a higher temperature will allow the breakdown of the peppers while they are aging.
Although bacteria and yeast do not have the ability to break the bonds which hold starch molecules together, the other reactions in the jar can when the temperature is too high. Once the starches are broken down the bacteria will use what it can for fuel. This causes the peppers to become soft and the pH of the peppers to continue to drop, leading to soft mushy sour pickled peppers.
This is ideal for making hot sauce. The pH is low enough to prevent any spoilage bacteria from growing, the soft texture of the peppers makes for a smooth sauce which needs little processing and the flavor of the sauce is developed and can be very complex.
For hot sauce store fermented peppers between 60-80℉ (15-26℃) in an airlocked container for at least six months. During the aging process the lactic acid bacteria population will decline, the organic acids and other compounds will mellow and the structure of the peppers will break down and soften.
The longer the aging time the more complex and interesting the flavors will become. Aging will not affect the spice level of the peppers much as the capsaicin (the compound which adds the heat) is not affected by the presence of acids. Ensure the aging container is an airlocked container as the presence of oxygen invites mold and other spoilage microorganism growth.
Do fermented peppers need to be refrigerated?
The refrigerator is a great food storage device which extends the life of foodstuffs through temperature control. Cooler temperatures slow the growth of microorganisms including the growth of mold but temperature is not the only factor which affects the shelf life of fermented peppers.
As long as the container is airlocked, fermented peppers do not need refrigeration. The process of fermentation will lower the available sugar and the pH to below 4.0 which prevents the growth of spoilage bacteria. Keep fermented peppers below 60℉( ℃) to slow microbial action.
Once you have opened your fermented pepper container it is a good idea to store the open container in the fridge. This is because once they have been opened they are exposed to oxygen which helps two types of microorganisms to get a foothold in the container.
Acetic acid bacteria
Lactic acid bacteria produce lactic acid to protect itself from other types of microorganisms. The acid inhibits the growth of many spoilage bacteria which compete with lactic acid bacteria for food and space. Once the food source for the lactic acid bacteria is used their population begins to drop.
When the peppers are exposed to oxygen acetic acid bacteria have a chance to grow. Acetic acid bacteria need oxygen to grow but their food sources are more varied. Some acetic acid bacteria have the ability to use lactic and acetic acid as a food source. When this starts to happen the pH of the peppers will start to rise which can lead to spoilage.
Mold
Once the container has been opened fresh air floods in providing needed oxygen for the growth of mold. Mold growth is inhibited by a low pH so it will only grow slowly at the beginning but as the container is repeatedly opened and fresh air allowed in the chances of mold growth increases.
By refrigerating the open container of peppers any spoilage bacteria will grow slower increasing the storage time of the peppers.
If the peppers have not been fully fermented the sugar content of the fermentation will be high enough to allow unwanted bacteria and mold to get a foothold and the pH may not be low enough to inhibit the growth of these unwanted microbes. If you like short fermented peppers, store them in the fridge to slow the fermentation down and protect them from spoilage.
Is homemade fermented hot sauce shelf stable?
Most homemade fermented hot sauce is not shelf stable. This is because we are an impatient group of people. We want to taste the results of our efforts of fermentation as fast as possible so we process our peppers before they are fully fermented.
There are two ways to make shelf stable fermented hot sauce:
Pasteurize the sauce to destroy the microorganisms
This method will produce a fermented hot sauce which is shelf stable until it has been opened. The pasteurization of the sauce will destroy the microorganisms found in the fermenting peppers. This will allow the hot sauce to remain relatively stable as long as the container remains sealed.
Pasteurization stops any microbial action, sugar levels and acid content remain the same and the chemical makeup of the sauce is altered through the cooking process, changing the flavor. It must be heated above 212℉ (100℃) for at least 10 minutes to destroy any hazardous bacteria still in the fermentation.
Fermentation does not kill unwanted bacteria but rather inhibits their growth. The environment produced by the lactic acid bacteria is uninhabitable for the spoilage bacteria and molds. By pasteurizing the sauce the action of the lactic acid bacteria is halted and unless all the spoilage bacteria and their spores are destroyed they may have a chance to begin to grow. This can cause high levels of toxins in the sauce.
Once the container has been opened it must be refrigerated. The action of pasteurization stops the growth of all microorganisms found in the hot sauce but once the sauce is exposed to oxygen the spoilage bacteria will have a chance to grow.
Aging the fermented peppers in an airlocked container
Most recipes for fermented hot sauce require the peppers and other ingredients to be fermented until the visible action of fermentation is complete. This can take anywhere from a month to six weeks but this does not mean that fermentation is complete.
The first stages of fermentation are dominated by species which produce carbon dioxide but as fermentation continues lactic acid bacteria species which only produce lactic acid begin to dominate. Therefore using carbon dioxide production as an indicator of microbial action is ineffective.
To ensure the fermentation is complete, ferment your hot peppers for at least two months before you process them into hot sauce. This will ensure that any available sugar found in the peppers will have been consumed. Then when you aerate the sauce by blending the peppers, store it in an airlocked container for another month or two.
The long aging time allows the lactic acid bacteria to consume all the available sugar found in the peppers and will lower the pH of the fermentation well below the safe level marker of 4.0 recommended by the WHO. Blending the peppers will break down some of the long chain carbohydrates making them available to bacteria and yeast, by fermenting your sauce another month or two this sugar will be consumed by the lactic acid bacteria making it shelf stable.
Can you ferment peppers for years?
Although many people and companies will leave their peppers in a fermentation container for a long time this does not mean that the peppers continue to ferment. For fermentation to continue the lactic acid in the fermentation needs a continuous supply of sugar. Once the available sugar is consumed the lactic acid bacteria will begin to die off. Although the population of lactic acid bacteria in the fermentation never truly reaches zero effectively the fermentation will stop after 6-8 months.
After this period the peppers will no longer be fermenting but rather aging. During the aging process the peppers’ flavor will change, becoming more complex and smooth. During the initial fermentation stage there are many compounds which are produced and in the early stages they remain the same but as the peppers are aged these compounds react with one another and become less harsh, which essentially mellows the flavor.
The storage container also has a big impact on the flavor of the peppers. Glass containers do not add anything to the flavor as they are not affected by the peppers but wooden casks will alter the flavor due to their porous nature. Peppers used to make Tabasco sauce are aged a minimum of three years in wooden casks before they are blended and made into hot sauce, sometimes they are aged five years. This long aging time allows the peppers to take on the flavors found in the wooden casks as well as mellow the harsh flavors produced by the initial fermentation.
To age fermented peppers you will need a nonreactive airlocked container and a cool dark location where it can stay undisturbed for the aging period. This could be a cool closet, garage cupboard or any other location where the temperature stays relatively cool and is out of direct sunlight.
Although glass jars do not add any flavor they are the most available and cheapest containers you can use. Mason jars can work once the main fermentation period is complete but unless they are tended regularly they can fail through corrosion of the seals or pressure buildup due to incomplete fermentation.
The best glass containers are the flip top rubber sealed jars sold for food storage. These are not recommended for canning as the pressure from outside the jar is too high for the rubber seal to withstand allowing air into the container which causes spoilage but when fermenting the pressure comes from within the container forcing any outside air out of the jar.
These containers are great as they will allow pressurized air from inside the jar to escape but will not allow outside air into the container. This eliminates the need to burp a container while the primary fermentation is occurring and allows long term aging of the peppers without concern of contamination.
If you want to add the rich flavor of wood into your peppers then you can use small wooden casks which are available online and can be packed with peppers and salt. When fermenting and aging peppers this way you will need to use a higher amount of salt to inhibit spoilage bacteria from growing. Wooden casks are slightly porous allowing the built up pressure from fermentation to escape but this also allows outside air to enter the container, especially over a long aging period. To prevent spoilage a high salt content should be used as most spoilage bacteria are not salt tolerant.
Now that your fermented peppers have been fermenting for a while and you like the texture and flavor, how do you keep them so they are available the next time you make tacos or need to add some heat to a spicy dish?
Store fermented peppers below 60℉ (15℃) in a dark location in an anaerobic environment. The cool temperature slows the growth of the lactic acid bacteria, the lack of light prevents damage from ultraviolet light and mold growth is hindered without access to oxygen.
Storing fermented peppers is similar to storing other fermented foods. They are affected by heat and light. By keeping them in a cool dark location your peppers will be good for years. As long as the container does not allow oxygen in the peppers. They will change slowly, developing a richer more complex flavor. Once the peppers are exposed to oxygen mold and other spoilage microorganisms get a chance to grow spoiling the peppers.
Fermentation is a slow food. You can’t whip up a batch of lactic acid fermented peppers, it takes at least a month before the peppers are ready so if you want to always have some fermented peppers on hand when you take a jar from storage replace it with a new batch. This will ensure you always have some ready when the refrigerated batch runs out.
Do fermented peppers need to be refrigerated?
The refrigerator is a great food storage device which extends the life of foodstuffs through temperature control. Cooler temperatures slow the growth of microorganisms including the growth of mold but temperature is not the only factor which affects the shelf life of fermented peppers.
As long as the container is airlocked, fermented peppers do not need refrigeration. The process of fermentation will lower the available sugar and the pH to below 4.0 which prevents the growth of spoilage bacteria. Keep fermented peppers below 60℉( ℃) to slow microbial action.
Once you have opened your fermented pepper container it is a good idea to store the open container in the fridge. This is because once they have been opened they are exposed to oxygen which helps two types of microorganisms to get a foothold in the container.
Acetic acid bacteria
Lactic acid bacteria produce lactic acid to protect itself from other types of microorganisms. The acid inhibits the growth of many spoilage bacteria which compete with lactic acid bacteria for food and space. Once the food source for the lactic acid bacteria is used their population begins to drop.
When the peppers are exposed to oxygen acetic acid bacteria have a chance to grow. Acetic acid bacteria need oxygen to grow but their food sources are more varied. Some acetic acid bacteria have the ability to use lactic and acetic acid as a food source. When this starts to happen the pH of the peppers will start to rise which can lead to spoilage.
Mold
Once the container has been opened fresh air floods in providing needed oxygen for the growth of mold. Mold growth is inhibited by a low pH so it will only grow slowly at the beginning but as the container is repeatedly opened and fresh air allowed in the chances of mold growth increases.
By refrigerating the open container of peppers any spoilage bacteria will grow slower increasing the storage time of the peppers.
If the peppers have not been fully fermented the sugar content of the fermentation will be high enough to allow unwanted bacteria and mold to get a foothold and the pH may not be low enough to inhibit the growth of these unwanted microbes. If you like short fermented peppers, store them in the fridge to slow the fermentation down and protect them from spoilage.
Is homemade fermented hot sauce shelf stable?
Most homemade fermented hot sauce is not shelf stable. This is because we are an impatient group of people. We want to taste the results of our efforts of fermentation as fast as possible so we process our peppers before they are fully fermented.
There are two ways to make shelf stable fermented hot sauce:
Pasteurize the sauce to destroy the microorganisms
This method will produce a fermented hot sauce which is shelf stable until it has been opened. The pasteurization of the sauce will destroy the microorganisms found in the fermenting peppers. This will allow the hot sauce to remain relatively stable as long as the container remains sealed.
Pasteurization stops any microbial action, sugar levels and acid content remain the same and the chemical makeup of the sauce is altered through the cooking process, changing the flavor. It must be heated above 212℉ (100℃) for at least 10 minutes to destroy any hazardous bacteria still in the fermentation.
Fermentation does not kill unwanted bacteria but rather inhibits their growth. The environment produced by the lactic acid bacteria is uninhabitable for the spoilage bacteria and molds. By pasteurizing the sauce the action of the lactic acid bacteria is halted and unless all the spoilage bacteria and their spores are destroyed they may have a chance to begin to grow. This can cause high levels of toxins in the sauce.
Once the container has been opened it must be refrigerated. The action of pasteurization stops the growth of all microorganisms found in the hot sauce but once the sauce is exposed to oxygen the spoilage bacteria will have a chance to grow.
Aging the fermented peppers in an airlocked container
Most recipes for fermented hot sauce require the peppersP and other ingredients to be fermented until the visible action of fermentation is complete. This can take anywhere from a month to six weeks but this does not mean that fermentation is complete.
The first stages of fermentation are dominated by species which produce carbon dioxide but as fermentation continues lactic acid bacteria species which only produce lactic acid begin to dominate. Therefore using carbon dioxide production as an indicator of microbial action is ineffective.
To ensure the fermentation is complete, ferment your hot peppers for at least two months before you process them into hot sauce. This will ensure that any available sugar found in the peppers will have been consumed. Then when you aerate the sauce by blending the peppers, store it in an airlocked container for another month or two.
The long aging time allows the lactic acid bacteria to consume all the available sugar found in the peppers and will lower the pH of the fermentation well below the safe level marker of 4.0 recommended by the WHO. Blending the peppers will break down some of the long chain carbohydrates making them available to bacteria and yeast, by fermenting your sauce another month or two this sugar will be consumed by the lactic acid bacteria making it shelf stable.
Can you ferment peppers for years?
Although many people and companies will leave their peppers in a fermentation container for a long time this does not mean that the peppers continue to ferment. For fermentation to continue the lactic acid in the fermentation needs a continuous supply of sugar. Once the available sugar is consumed the lactic acid bacteria will begin to die off. Although the population of lactic acid bacteria in the fermentation never truly reaches zero effectively the fermentation will stop after 6-8 months.
After this period the peppers will no longer be fermenting but rather aging. During the aging process the peppers’ flavor will change, becoming more complex and smooth. During the initial fermentation stage there are many compounds which are produced and in the early stages they remain the same but as the peppers are aged these compounds react with one another and become less harsh, which essentially mellows the flavor.
The storage container also has a big impact on the flavor of the peppers. Glass containers do not add anything to the flavor as they are not affected by the peppers but wooden casks will alter the flavor due to their porous nature. Peppers used to make Tabasco sauce are aged a minimum of three years in wooden casks before they are blended and made into hot sauce and sometimes they are aged five years. This long aging time allows the peppers to take on the flavors found in the wooden casks as well as mellow the harsh flavors produced by the initial fermentation.
To age fermented peppers you will need a nonreactive airlocked container and a cool dark location where it can stay undisturbed for the aging period. This could be a cool closet, garage cupboard or any other location where the temperature stays relatively cool and is out of direct sunlight.
Although glass jars do not add any flavor they are the most available and cheapest containers you can use. Mason jars can work once the main fermentation period is complete but unless they are tended regularly they can fail through corrosion of the seals or pressure buildup due to incomplete fermentation.
The best glass containers are the flip top rubber sealed jars sold for food storage. These are not recommended for canning as the pressure from outside the jar is too high for the rubber seal to withstand allowing air into the container which causes spoilage but when fermenting the pressure comes from within the container forcing any outside air out of the jar.
These containers are great as they will allow pressurized air from inside the jar to escape but will not allow outside air into the container. This eliminates the need to burp a container while the primary fermentation is occurring and allows long term aging of the peppers without concern of contamination.
If you want to add the rich flavor of wood into your peppers then you can use small wooden casks which are available online and can be packed with peppers and salt. When fermenting and aging peppers this way you will need to use a higher amount of salt to inhibit spoilage bacteria from growing. Wooden casks are slightly porous allowing the built up pressure from fermentation to escape but this also allows outside air to enter the container, especially over a long aging period. To prevent spoilage a high salt content should be used as most spoilage bacteria are not salt tolerant.
When you first start your fermenting peppers it can ba a little scary. After all you are doing something which most people would consider unsanitary practices, leaving peppers out on the counter for extended periods of time, but if it is done properly it is perfectly safe and produces some of the best flavors in the world.
In the beginning you may not have all the equipment which other fermentors have but do not let that stop you. Fermentation has been practiced for thousands of years, with and without airlocks so don’t let that stop you.
To safely ferment peppers without an airlock in anaerobically keep the peppers under a 2-3% salt brine within a temperature range of 60-85℉ (15-30℃) in a clean container. This will control the environment and encourage the growth of lactic acid bacteria.
There are several methods which can be used to keep your fermenting peppers safe from spoilage but all of them do the same thing: restrict the oxygen available to the bacteria and yeast.
Can you ferment peppers without an airlock?
Fermenting peppers without an airlock requires more attention to the process but is easily done. There are several methods which all have their own idiosyncrasies.
Using mason or repurposed jars to ferment peppers
When fermenting in a mason jar or some other glass container which is not meant for holding pressure then the jar must be burped (opened slightly to let pressure out) regularly. If this is not done then the pressure can build up enough to explode which can be dangerous and will make a big mess.
Use flip top jars to ferment peppers
These jars are my favorite method of fermenting vegetables. They are tough with thick glass sides which can stand a fair amount of pressure. The spring loaded lids with the rubber seals help prevent air from entering into the fermenting peppers while letting the pressure within the container escape if it gets too high.
This type of jar is not recommended for canning as the seals are not good enough to prevent air from entering into the vacuum produced by the canning process but they are great for fermentation as the pressure produced within the jar can escape without potential explosions while preventing air from getting back in.
The benefit of this is that the fermenting peppers will quickly consume any available oxygen in the container. This prevents mold growth and encourages the growth of lactic acid bacteria and because the container does not need to be opened to release pressure preventing any oxygen from entering the jar.
It is important to test the seal of any jar you use when fermenting to ensure the lid makes a positive seal. To do that fill the jar half full with water and turn the jar upside down and shake. If water escapes from inside the jar it needs a new seal.
Use a vegetable fermentation crock to ferment peppers
There are many types of crock on the market which can be used to ferment vegetables. They range from pickle jars which use weighted disks to hold the vegetables under the liquid to jars with water, a water seal which keeps the oxygen out of the jar.
Fermentation crocks which use weights to hold the vegetables under the liquid brine are the most common types found in stores or second hand. These are the hardest to use as they need constant care to ensure mold does not get out of hand during fermentation and storage.
Mold needs oxygen to grow, so the theory goes that if the food is held under the liquid where its access to oxygen is limited it will not grow. It will grow unfortunately on the surface of the container where it has access to its food source (any carbohydrate) and oxygen. To safely use these containers a higher amount of salt needs to be used, the surface of the liquid needs to be inspected regularly and any mold needs to be removed and the area cleaned. If the mold is left too long it can send long “roots” into the food in search for more food. This spoils the entire batch, can lead to sickness and will give the entire batch an off musty flavor.
Water sealed crocks have a trough at the top of the crock which the lid fits into. When the crock is fermenting peppers the trough is meant to be filled with water. This prevents air exchange between the environment and the inside of the crock but allows any built up pressure to be released. This prevents the need to constantly check the fermentation during the required fermentation time.
To use these crocks properly fill them up to the top leaving only an inch or two of head room after the weights have been added. Place the lid on the crock and add enough water to prevent air flow. Check the water level regularly to ensure it does not dry up. Once the fermentation period is up you can taste test the peppers easily by lifting the lid and removing one of the weights.
Use a wooden barrel to ferment peppers without an airlock
Wooden barrels used to be the main way goods were shipped and stored worldwide. They were cheap to manufacture, were durable and could be used for a variety of purposes. This made them great containers for fermenting vegetables including peppers.
There are many benefits to using a wooden barrel for fermenting peppers:
They are safer than using plastic containers
They add additional flavor to the peppers
They allow pressure to escape while preventing air exchange
What happens when peppers are fermented without an airlock
Airlocks are devices which allow one way flow of pressurized gas from inside a container out. This prevents the introduction of oxygen into the container. This prevents the growth of mold and other unwanted oxygen dependent organisms in the peppers.
Fermenting peppers without an airlock can be done in two ways, either in an airtight container or by aerobic fermentation.
What happens in an airtight fermenting container
When the container is airtight the fermentation produces CO2 gas which builds up within the container. Once the pressure gets high enough it will cause failure in the container at its weakest point. This could be the lid seal, a thin section of the container or a weakness in the wall of the container due to damage. When this happens the container will violently disintegrate and send pieces of container and peppers flying.
This is why it is important to release pressure from the container while it ferments daily until fermentation slows. Once it slows you can either burp the container occasionally or refrigerate it to slow any further fermentation.
What happens in a non-sealed fermenting container
These containers are like the standard crocks which can be found everywhere. They have a lid which limits the free flow of air to a certain degree but as the temperature fluctuates air is exchanged into and out of the container. This air exchange allows pressure within the container to escape, preventing pressure buildup and the associated damage it can cause but it also allows oxygen into the container which enables mold growth on the surface of the container.
Mold can grow in all sorts of environments including salty liquid, acidic conditions and a wide variety of temperatures. This makes it hard to prevent its growth. Its achilles heel is its dependence on oxygen.
Mold is pervasive in the environment and cannot be destroyed in the home kitchen so it will be present in the container already and only needs oxygen and a food source to grow. Unlike yeast and bacteria which can only utilize simple sugars for food energy, mold can use carbohydrates of all types including long chain starches which the structure of the peppers is made up of.
Mold will begin to grow on the surface of the container where it has access to oxygen and some type of food energy. In time it will send tendrils down into the container in search of more food energy and it can also begin to produce spores which then begin to grow on the surface of the container spreading out as it grows.
This is why it is important to keep the peppers under the liquid when using this type of fermentation container and to regularly check the fermentation for signs of mold growth.
Does pepper fermentation need to be airtight?
There are many ways to ferment peppers which include aerobic and anaerobic methods (with and without oxygen). Both of these methods do not use an airtight environment and in fact it is dangerous to ferment peppers this way.
It is not necessary to place peppers in an airtight container. An airtight environment prevents air exchange from the container which is dangerous as the pressure in the container can build substantially and explode the container. It is best to use one way airlocks to allow pressure escape.
When fermenting peppers it is important to use the method of fermentation which is appropriate for the end product.
When making pickled peppers an anaerobic environment is needed. This is when an airlock is needed which allows carbon dioxide to escape from the container and prevents oxygen from the atmosphere from getting in.
If the end product is a vinegar then an aerobic environment is needed to allow the acetic acid bacteria to grow. This will produce a two step fermentation where ambient yeasts will convert the sugars into alcohol which is then used to produce acetic acid (vinegar).
How to ferment peppers in an aerobic environment
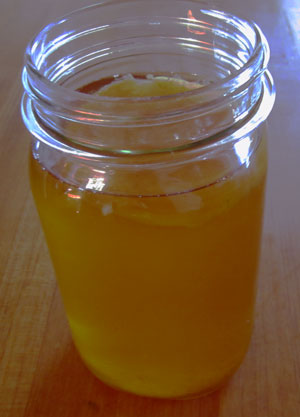
Fermenting peppers in an aerobic environment does not produce a pickle like ferment without oxygen but rather a liquid vinegar which can be very hot and flavorful. Since peppers are a fruit they have a fair amount of sugar in them but they will need added sugar to produce vinegar with enough acetic acid to store well (for a hot pepper vinegar recipe click here).
The process is just like making any other fruit vinegar. The yeast on the fruit and in the environment will ferment the sugar in the container which will then be converted into acetic acid by acetic acid bacteria. The heat of the vinegar will depend on the type of pepper you used and if you removed the pith from the inside of the peppers.
Three ways to make a homemade airlock for fermenting peppers
If don’t have access to an airlocked fermentation container then you can easily make one using one of the following methods:
The cork and hose method
If you have a container with a cork lid you can easily make an airlock with a piece of hose and a bottle of water.
Drill a hole in the cork lid slightly smaller than the hose
Jam the hose into the hole
Put the other end into the bottle
To use this setup:
Fill the container with hot peppers and brine and place the lid
Fill the bottle with enough water to cover the end of the hose
The pressure produced by the fermenting peppers will exit through the hose and create bubbles in the bottle but any air from the atmosphere will be prevented from entering the container by the water barrier.
Make a mason jar airlock
Mason jars are one of the favorite fermentation jars due to their utility, sizes and price but they don’t fit the airlocks which are found at the local fermentation store. They are meant for demijohns or larger carboys.
To make a normal mason jar lid work as an airlock you will need:
A standard metal mason jar lid which will fit your jar
A wine or beer fermentation airlock
A ⅜” drill bit and drill
A hot glue gun
instructions:
Drill a hole in the center of the mason jar lid
Jam the airlock into the hole
Use the hot glue gun to seal the plastic airlock with the metal lid on both sides
When the glue is cooled you can use it on any mason jar of the right size. When the lid starts to get old just heat the plastic up and pull the airlock out of the lid and insert it into a new one.
A plastic bag filled with water
This is the simplest method of making an airlock but it has its drawbacks. The idea is that a plastic bag filled with water will take on the shape of the container which you are using and that is mostly true.
When using a bag filled with water as an airlock be sure the bag is close to the size of the jar. Too large and it will wrinkle and let air in and too small and it will not fill the surface of the container. Also ensure it has no leaks otherwise the water will just leak into the ferment below diluting the brine and causing spoilage.
To use, fill the container leaving at least ⅓ of the container empty. Place the bag into the container and fill it with clean water until it covers the fermentation by a few inches. Smooth out any wrinkles along the sides and seal the bag.
Now as the fermentation produces carbon dioxide it will rise to the top and make its way along the bottom of the bag to the sides and escape. Any air will be blocked from entering the container.
Vinegar is one of the most versatile ingredients in the kitchen. It comes in many styles and brands, can be made from any food which contains sugar or alcohol and has been used to make everything from fluffy pancakes to salad dressings and yes it has many roles to play in fermentation.
Vinegar can be used at the beginning stages of fermentation to lower the pH of foodstuffs to below 4.6. This protects the fermentation from contamination by unwanted microbial growth such as Clostridium botulinum. In later stages it can be used to adjust the consistency and acidity of a finished product.
These are just a few of the ways vinegar is used in fermentation. It is a very versatile product and depending on the type of fermentation it is used in different ways.
Use Vinegar to Sanitize Fermentation Equipment
Vinegar is a weak acid which has a toxic effect on acidic sensitive microorganisms. These include organisms like clostridium botulinum, escherichia coli, staphylococci, and Salmonella spp. These bacteria are inhibited in acidic conditions below a pH of 6.0, since most vinegar has a pH below 3.0 it is effective as a sanitizer for most home fermentation.
To use vinegar for sanitation you can either dip a clean cloth into a bowl of vinegar and wipe the surfaces you want sanitized or pour the vinegar directly into the container and swish it around until all the surfaces are wet from the vinegar. Pour any excess vinegar out and let air dry.
Use Vinegar to Adjust the Consistency of a Finished Fermentation
When making fermented sauces such as hot pepper sauce, salsa or chutney it is sometimes necessary to alter the consistency. To do this most normal food preparation uses water or oils of various types but when fermenting it is important to maintain the acidic conditions found in the fermentation. By adding vinegar the acidic conditions can be maintained while allowing a more fluid product.
When using vinegar to alter the consistency of a finished ferment there are a few things to avoid:
Adding too much vinegar making it too fluid
When adding vinegar to alter the consistency be sure to add little amounts at a time. It is easy to add vinegar but once it is added it cannot be removed.
Using vinegar with alters the flavor of the ferment
Vinegar is not a benin flavor and each type of vinegar has a specific flavor profile. When using vinegar to alter the consistency use vinegar which will not alter the flavor too much.
Don’t use balsamic vinegar to thin out a hot pepper sauce as it will add a different flavor profile to the sauce. Instead use white vinegar, hot pepper vinegar or apple cider vinegar.
When making a barbeque sauce you can adjust the consistency with any number of vinegars like white, balsamic, mead or stout/porter vinegar. These add flavors which can go well with a barbeque sauce as well as adding to the flavor profile.
Use Vinegar to Dilute Some of the Salt in Highly Salted Fermentations
Some fermentations if left alone will be very salty. Hot peppers used to make tabasco sauce are highly salted because of their long aging time (they are aged in wooden barrels for a minimum of three years). Such fermentations cannot be consumed with such a high salt content so they must be diluted with some type of acid.
Vinegar is ideal for this as it is a naturally produced weak acid which can enhance the flavors of a hot sauce or other condiment while ensuring the fermentation remains below a pH of 4.6. Add enough vinegar to dilute the concentration of the salt until you like the flavor. Let the fermentation age for a week or so for the flavors to mature.
How to Ferment fruits and vegetables using vinegar
Use vinegar to lower the pH
A high percentage of spoilage bacteria are inhibited by acidic conditions. This includes Escherichia coli, staphylococci, and Salmonella spp. These bacteria are present in nature and are found on a wide variety of foods.
The use of vinegar at the beginning stages of fermentation prevents these bacteria from growing, preventing sickness or spoilage. Just add a little vinegar at the beginning of the fermentation to lower the pH, giving the wanted microorganisms a chance to dominate the fermentation.
Use vinegar to add flavor
Vinegar comes in all types of flavors. Made from anything from apples to grain alcohol. Each type will produce a different flavor acid level and color so depending on the flavor you are after choose your vinegar addition with the end product in mind.
Fermentations like Hot Fermented Salsa need a sharp fresh vinegar like apple cider, pineapple or hot pepper vinegar. Other fermentations like Italian tomato sauce can be flavored with a well aged balsamic vinegar which adds additional flavors which augment the sauce nicely.
Add small amounts of vinegar to the finished fermentation and stir. Taste after each addition so as to not over do the vinegar flavor. The flavor will continue to develop once the vinegar has been added so be careful not to add too much.
Use vinegar to clean the equipment
The low pH of vinegar can destroy the cell bodies of some unwanted spoilage and pathogenic bacteria. By using vinegar as a wiping solution to reduce the number of unwanted bacteria on the surfaces of utensils and containers the population of these uninvited guests is greatly reduced, giving the desired bacteria and yeast a chance to dominate a culture.
There are three levels of cleanliness which are usually spoken of (almost interchangeably) when it comes to fermentation.
Clean
Can be achieved through washing with soap and water and rinsing with clean flowing water.
Sanitized
Is achieved through heating or chemical means. This can be done through dipping equipment in a sanitizer liquid, wiping with clean cloths dipped in sanitizer or spraying.
Strealized
This requires high heat for extended periods of time. Once the equipment has been sterilized it must be treated especially carefully because contact with unsterilized objects will contaminate it again.
For vegetable fermentation having clean equipment is enough as the unwanted bacteria will be inhibited through environmental means. This is achieved with the addition of salt, placing the vegetables in an anaerobic environment and controlling the temperature.
For some fermentations which have a long fermentation time or a delicate flavor sanitized conditions can be beneficial. Sanitizing can be achieved using vinegar due to its acidic nature. The unwanted bacteria which can cause spoilage or illness are destroyed by the acidic nature of the vinegar.
To achieve a sanitized environment wash all equipment and surfaces with soap and water. Rinse well to remove any soap residue.
Fill a new spray bottle with distilled white vinegar and spray all surfaces. Allow to air-dry. Meanwhile soak a clean cloth in vinegar and wipe all equipment and containers with it. Let air-dry.
Use vinegar to add bacteria
Well aged vinegar has very little active acetic acid bacteria in it. This is because of the lack of food energy left in the vinegar after a long period of aging but young vinegar aged less than six months does have some active acetic acid bacteria which can multiply rapidly when provided with the right environment.
To add additional acetic acid bacteria into a vinegar fermentation use young vinegar to lower the pH at the beginning stages of fermentation. This will do two things:
It will lower the pH
Add some new acetic acid bacteria
Use vinegar to adjust consistency
Some fermentations turn out thicker than intended. This often happens when a sauce is blended for usage in a bottle. If it is too thick it can be difficult to pour. By adding some vinegar you can thin the consistency of the sauce.
Add small amounts of vinegar and blend. Test regularly for the consistency you are looking for. Once you have reached the desired viscosity you can filter the sauce to remove any solids or simply pour it into a bottle and refrigerate.
Can vinegar be fermented into alcohol?
Once a liquid has turned into vinegar it cannot be converted back into alcohol. Vinegar is a byproduct of the metabolism of alcohol into acetic acid by acetic acid bacteria whereas alcohol is produced from the metabolism of simple sugars into alcohol mainly by yeasts.
This is a one way process, alcohol cannot be made out of vinegar as the food energy which yeasts use (the microorganism responsible for most alcohol production) are simple sugars.
Acetic acid on the other hand can metabolize simple sugars, alcohol as well as acetic acid for growth. This is why wine and beer producers go through great lengths to avoid exposure.
Does Vinegar Stop Fermentation?
Vinegar is considered a weak acid and can be used to inhibit the growth of spoilage bacteria in the beginning stages of fermentation. This use leads some people to believe that it will kill all microorganisms which cause fermentation.
Vinegar does not stop fermentation as the yeast and bacteria which are responsible for fermentation are acid tolerant microorganisms. These include lactic acid bacteria which have an acid tolerance of 2.0 and yeasts which can survive in a pH of 2.2. To reach such low pH values the fermentation would become inedible.
Fermentation stops through the use for temperature treatments or lack of food energy. Temperature methods can be through heat treatments such as canning or through freezing. Refrigeration will slow the fermentation but not stop it.
Lack of food energy also will stop fermentation. This happens when the sugars found in the food are all consumed by the bacteria and yeasts. This is how many aged fermentations are produced such as wine, soy sauce and balsamic vinegar.
Why Homemade Yogurt Gets Slimy, Stringy or Ropey: Easy Fixes/Uses
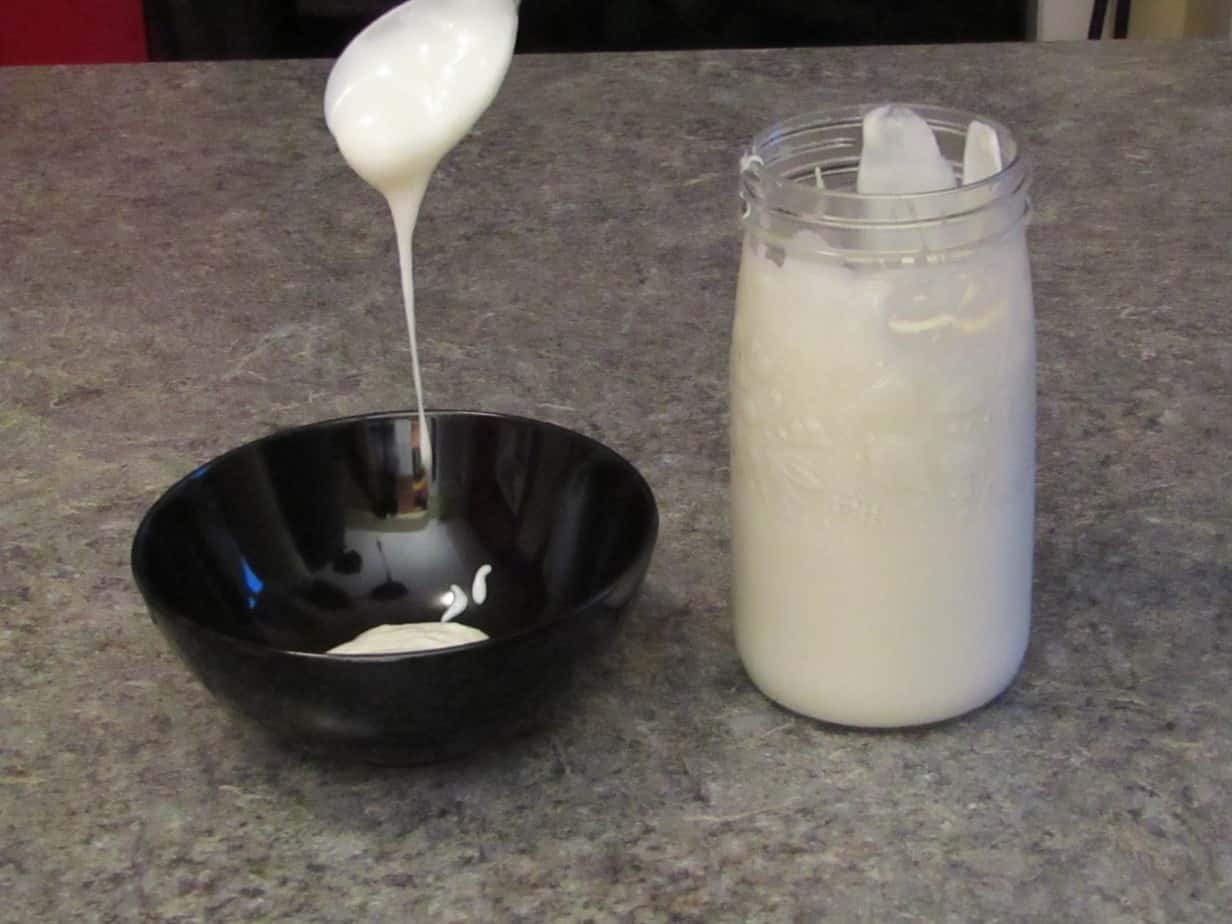
Once you have been making yogurt for a while you will probably have a batch or two which don’t seem quite right. Your yogurt may have gelled but it seems slimy or stringy. It holds together in long strings and sticks to the spoon.
Slimy yogurt contains excessive biofilms produced by the lactic acid bacteria in the starter culture. Biofilms are normally produced to protect bacteria from environmental damage but overproduction can happen if the temperature is lower than 47℃, the milk too sweet or the pH remains above 6.0.
The challenge with making yogurt is that it is a living culture which changes as its environment changes. When yogurt does not turn out as expected the first assumption is that the culture has been contaminated and/or the yogurt has gone bad. This is untrue as the various bacterial species found in yogurt culture have the capability to produce high amounts of biofilm (it is how they protect themselves from environmental conditions as well as infection).
If you take the advice of some uninformed “experts” not only will you throw out yogurt which can be used but you will not be able to learn the real reason why it has gone slimy on you. The environmental conditions can have as much influence on yogurt’s texture and characteristics as the makeup of the culture.
What to do to prevent slimy, stringy or ropey yogurt
The three things which make the greatest difference in the consistency of yogurt are the temperature of incubation, the makeup of the milk substrate and the rate the pH drops. Any one of these can lead to one or more of the lactic acid bacteria to overgrow and produce a higher than normal amount of biofilm.
How temperature influences the texture of yogurt
The temperature of the milk at inoculation time is an important part of making yogurt. There are two different types of yogurt cultures on the market:
Mesophilic
Mesophilic yogurt culture is made up of lactic acid bacteria which are capable of growing rapidly in milk at room temperature. There are many different types of yogurt cultures from all over the world which have been developed through history. Some types of mesophilic cultured milk products are meant to be highly stringy or ropey such as viili which is said to have a viscous texture (it doesn’t pour well) and holds together.
Thermophilic
Thermophilic yogurt requires temperatures above normal ambient temperatures to grow rapidly and without additional heat the culture will find it hard to produce good textured yogurt. It will take a longer time and the results will not be guaranteed.
If the temperature of the milk is not up to the correct temperature at the start of the inoculation then the species of lactic acid bacteria which are more active in lower temperatures will get a jump on the others. Oftentimes it is these species which can produce high amounts of biofilm.
To prevent this from happening, bring the temperature of the milk to the proper incubation temperature by either warming it in a warm water bath or pasteurizing it (which has other benefits). Once the milk is within the correct incubation range add the starter and stir.
How the makeup of the milk affects the texture of yogurt
Milk comes in a wide variety of types from low fat to whipping cream, powdered, canned and ultra-pasteurized. It is usually categorized by its fat content but when it comes to making yogurt the fat content is only half the story.
Lactic acid bacteria do not use fat as a food source, instead they use simple sugar like lactose, glucose, galactose and sometimes fructose. Lactose is the sugar which is found in milk and is made up of two molecules of sugar stuck together, glucose and galactose.
As the amount of fat in the milk decreases the sugar content increases. This increases the potential amount of lactic acid bacteria in the yogurt, which in turn increases the amount of potential biofilm which can be produced.
The addition of dehydrated milk (which is often done commercially) to the yogurt culture is done to improve the texture of the yogurt and it can have a positive benefit to the texture of the end product but it can also cause excessive biofilm production due to the high amount of sugar in the powder.
To prevent your yogurt from going slimy due to excessive sugar content use a higher fat content milk. This will slow the growth of the lactic acid bacteria a little and produce a thicker creamier yogurt.
How the pH of the milk affects the texture of yogurt
The lactic acid bacteria responsible for making the most biofilm and therefore producing a slimy texture are most active in a higher pH. It has been found that to produce the most biofilm a pH of about 6.0 is the sweet spot. The longer your milk is above this pH the stringier or ropey it will be.
The main reasons why it may take longer for the pH to drop are too low a temperature which was discussed above and not using enough starter culture. The starter culture inoculates the milk with specific bacteria strains which immediately begin using the lactose in the milk to grow.
Lactic acid bacteria produce the biofilm as a method of protection from environmental damage. Damage can come from pathogens growing in the same medium, since most unwanted microorganisms found in milk grow best in basic environments and work to maintain a basic pH. The longer the milk’s pH stays high the more biofilm the lactic acid bacteria will produce to protect itself.
To ensure this does not happen make sure you use enough starter to inoculate the milk. Some homemade yogurt makers like using very small amounts of starter to improve texture and to a certain degree this can work in some cases but with too little starter the lactic acid bacteria can struggle to acidify the milk fast enough
Use at least a tablespoon of culture for every cup of milk to ensure it will be able to quickly lower the pH and prevent the slimy, stringy or ropey texture.
Is it safe to eat slimy, stringy or ropey yogurt?
Yogurt with a slimy texture may not have the best feel in the mouth but it is not going to harm you. The slimy texture is not harmful although it can be unpleasant to use for a topping or to simply eat with a spoon.
Yogurt which is slimy, stringy or ropey is high in healthy biofilms. It helps probiotics to survive the stomach, can coat surfaces displacing pathogenic bacterial biofilm and helps colonization of probiotic bacteria by occupying vacant space allowing bacteria growth.
Biofilms produced by lactic acid bacteria are currently being studied for use in protecting industrial food processing equipment from contamination from pathogenic bacteria with positive results. The biofilms can adhere to surfaces which are occupied by pathogenic bacteria and displace them providing a healthier environment for the food to be processed.
They are also being used to help keep cows udders healthy from antibiotic resistant pathogens which affects the health of the milk. These studies are important for the scientific community to distinguish between good and bad biofilms. As long as your milk is fresh, your culture is robust and you work in a clean environment a batch of slimy yogurt will be perfectly fine for consumption.
What can I do with slimy, stringy or ropey yogurt?
Yogurt with a slimy texture may be fine and healthy for consumption but it may not be a pleasant experience. Especially if you are used to store bought yogurt which has been produced to have a consistent texture with the use of thickeners such as corn starch or guar gum. Homemade yogurt is not subject to the strict environmental controls which the dairy industry has to follow (for good reasons).
When you get a batch of yogurt which has a poor texture rather than throwing it away you can use it for:
Morning smoothie
The morning smoothie is a regular part of my morning. It includes a wide variety of ingredients but is great for using yogurt with poor texture. The blender does a great job of blending the ingredients together and it is impossible to tell if the yogurt had a slimy texture to it in any way.
Vegetable dip
Vegetable dip benefits from yogurt with a sticky texture like that of slimy, stingy or ropey yogurt. The biofilm is meant to stick to surfaces to enable the lactic acid bacteria to colonize areas. This sticky texture helps the dip to stick to the vegetable when dipped into the dip.
Quick bread
Quick bread includes such baked goods like biscuits, pancakes and muffins. All of which benefit from a viscous texture which helps to trap CO2, which makes for fluffier baking. Also the acidic nature of the yogurt gives the rising agent an added boost.
Yeasted bread
This is a great tip for those who like sourdough bread but can’t be bothered with culturing and caring for a starter. By adding a little yogurt to the dough the bread takes on a more sourdough flavor. The lactic acid bacteria in the yogurt grow quickly when mixed with the flour and a little water which produces ample CO2.
Use normal bakers yeast which is basically Saccharomyces cerevisiae (the yeast first isolated in wine production). The added lactic acid bacteria compete a little with the yeast and produces unique flavors reminiscent of sourdough bread.
Cream soups
Cream soups are usually made with fresh cream which is full of lactose, something which many people have a problem digesting. Avoid this by using yogurt which has been fermented for at least 24 hours. Yogurt with an unpleasant texture can be used for making cream soups by replacing the cream with yogurt and lowering the acidic ingredients.
Marinades
Marinades are usually a mixture of acidic ingredients with thickeners which help the marinade to stick to the meat. The thickener could be sugar, flour or fat. The acid helps the flavors in the marinade to penetrate the meat while the thickeners provide a way to keep the spices in contact with the meat.
The addition of slimy yogurt adds both the thickener and the acid. Yogurt with a sticky texture adheres to the meat well eliminating the need for carbohydrate filled thickeners. The low pH of properly fermented yogurt (about 4.0 depending on the incubation time) (internal link to 24 hour yogurt) adds the needed acid. All you need to add is the flavors and you are good to go.
Soft cheese
Soft cheese is easily made with yogurt by hanging it in a clean cloth above a bowl for 12-24 hours. The longer the yogurt hangs the firmer the cheese will become. Using yogurt with poor texture makes a good cream cheese for making icing, cheesecake or cheese dips.
Creamy icing
Creamy icing is a popular topping for carrot cake, muffins or any other sweet baked good. It is usually made with cream cheese which provides the thick texture to the icing. Yogurt can be used to make cream cheese yogurt in a two step process.
Hang the yogurt to make yogurt cream cheese
Make the icing with the thickened yogurt cream cheese
Using yogurt with an unpleasant texture helps the icing stick to the baking and adds a creamier texture to the icing which remains soft longer than normal cream cheese icing.
Gravy
Gravy is thickened with some type of starch which produces long strings of gluten. The gluten mixes with the juices in the bottom of the pan. Gluten forms stringy chains of carbohydrates which stick to the food it is poured on.
Slimy yogurt is full of biofilm which is designed to stick to the sides of surfaces to help the lactic acid bacteria to colonize a new area. This ability also helps gravy made with yogurt stick to your food. It thickens the gravy without the addition of carbohydrates.
Urban Fermentation is a participant in the Amazon Services LLC Associates Program, an affiliate advertising program designed to provide a means for sites to earn advertising fees by advertising and linking to Amazon.com. We also participate in other affiliate programs which compensate us for referring traffic.