Urban Fermentation

Recent Posts

The How and Why of Making Keto Yogurt


Like any diet regimen the keto diet restricts some foods while encouraging the consumption of others.  Keto is focused on the total number of carbohydrates which can be found in a food compared to the amount of protein and fat.  Yogurt can be a great addition to a keto diet if it has been incubated long enough, has no added sugar or sweetener and is not used in recipes which contain other sugars.

Homemade yogurt is a good addition to a keto diet if it is incubated 12-24 hours.  The longer incubation period lowers more of the lactose reducing the glycemic effect helping the body to stay in ketosis.  Plain yogurt is the only type which should be consumed on a keto diet as any additions will add sugar.

Keto yogurt contains many vitamins and minerals which are made more available through the incubation process as well as containing active lactic acid bacteria which can have a beneficial effect on digestion.   Although it does not have a permanent effect on the microbiome of the gut, it has a beneficial transient effect.

High fat keto yogurt

Ketogenic diets are focused on the reduction of carbohydrates in the diet and since milk contains sugar (lactose) in high amounts it is not recommended for a keto diet.  Whereas yogurt which has been incubated for a longer period of time (12-24 hours) has little remaining sugar.  By using high fat milk to make your yogurt you will also add additional fat to the yogurt.

Cream yogurt is a smooth and thick yogurt which is high in fat and low in lactose.  This type of yogurt is made with cream rather than whole or low fat skim milk.  Half and half works well with its 10% milk fat whipping cream can also be used which makes for a very thick spreadable yogurt.

The advantages of using high fat milk to make keto yogurt is that the incubation time is reduced to only 8-12 hours.  This is due to the lower amount of lactose in the milk at the start of incubation.  When making high fat yogurt it is important to use a very active yogurt starter and to use a little more starter than normal.  Since the starter does not have as much food (lactose) to multiply it needs to be thoroughly dispersed in the milk to be effective.

Alternative milk keto yogurt

Keto yogurt can also be made with alternative milk types such as goat sheep or buffalo milk.  The method is the same as making yogurt from cow milk.  Historically yogurt has been made from any type of milk a culture has available whether it be buffalo, camel or sheep, it has only been in the recent past that western society has gravitated to cow milk.

The difference between other milk and cow milk is, cow milk separates into the fatty cream and high carbohydrate skim milk whereas other milks don’t.  Goat, sheep and buffalo milk are naturally homogenized, preventing the fat and water from separating.  This can make for a more smooth and consistent yogurt.

Keto yogurt recipe

The main difference between regular and keto yogurt is the incubation time required to allow the lactic acid bacteria to consume the lactose in the milk to a degree that it will not provide an insulin rise.  This means that your keto yogurt will be a little tangy once it has completed its incubation time.  

Equipment:

  • Double boiler
  • Thermometer
  • Yogurt incubator
  • Non-metallic container (mason or some other glass jars works well)
  • Whisk
  • Spoon 

Ingredients:

  • Milk of your choice
  • Yogurt starter (how to choose the best yogurt starter)

Instructions:

  1. Add water to bottom of double boiler and your milk into the top
  2. Heat until the milk is 180 degrees, stirring occasionally
  3. Maintain 180 degrees for at least 20 minutes
  4. Remove the milk from the heat and pour it into your glass container
  5. Cool to below 120 (ideally 115)
  6. Place the lid on the jar and place into the incubator
  7. Leave to incubate 12-24 hours
  8. Place yogurt in the fridge to cool for 2 hours before using

How to make extra strong vinegar


Five types of extra strong vinegar in a variety of bottles

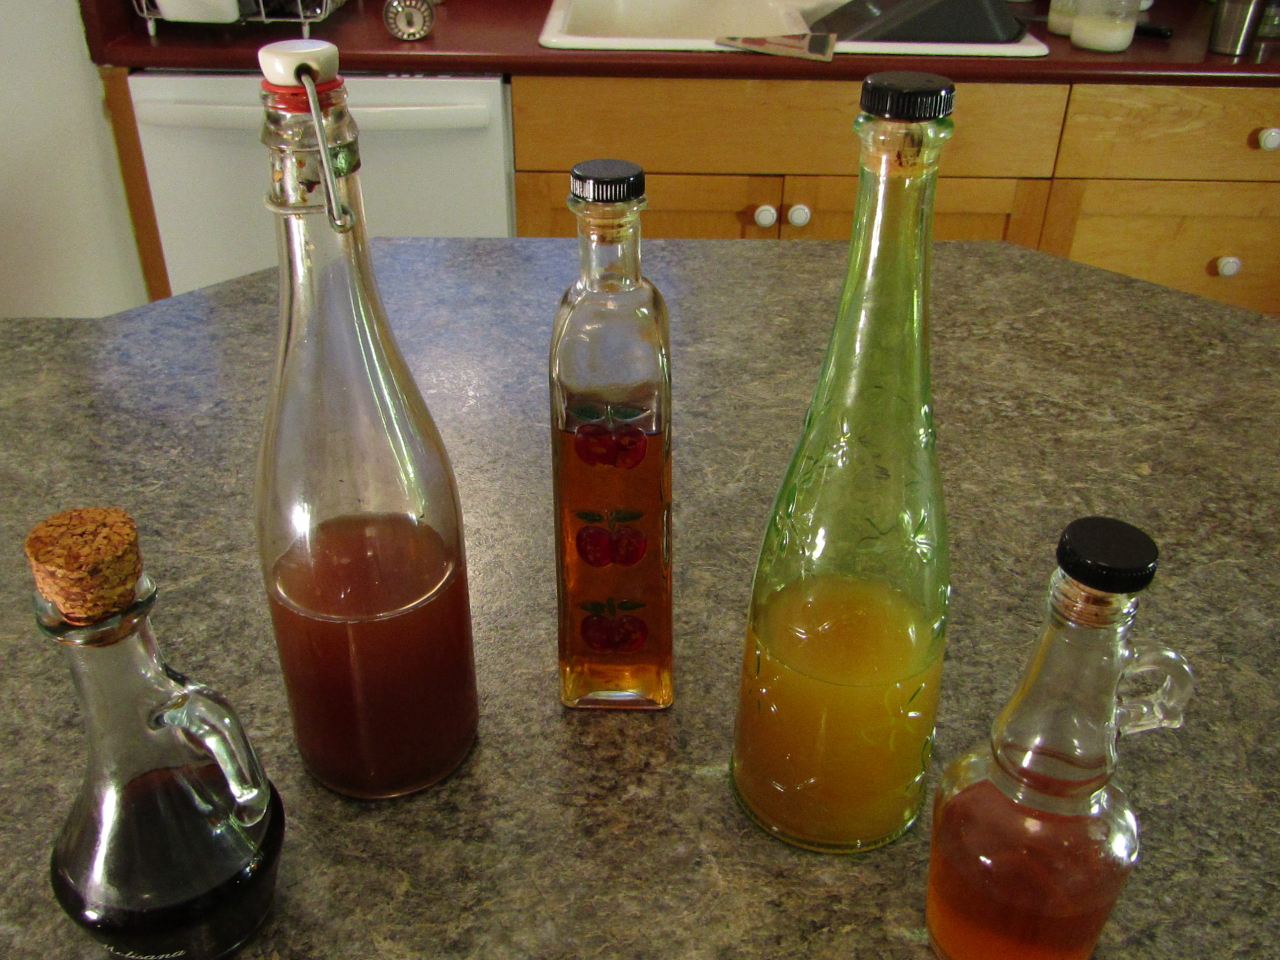
When making homemade vinegar it is important to reach a minimum pH of 4.0 as this acid level will prevent unwanted bacteria and molds from causing the vinegar to go off.  Although most vinegar has a pH under 3.0 sometimes you may want to make vinegar which has a lower pH. To do that you need to understand what are the factors which increase or decrease the acid level of vinegar.

To make a strong vinegar there are a number of factors: 

  • The amount of sugar the yeast has to consume
  • The starting pH of the medium
  • The efficiency of the yeast to make alcohol
  • The availability of oxygen for the acetic acid bacteria
  • The time period given the fermentation process

Vinegar is made by lactic acid bacteria in a sugar solution of some form.  It is a two step process where resident yeast uses the sugar to produce alcohol which the lactic acid bacteria use to produce lactic acid.  To get the strongest vinegar you need to optimize the above conditions and keep the yeast and acetic acid bacteria thriving in the fermentation for as long as possible.

Basic steps for making strong vinegar

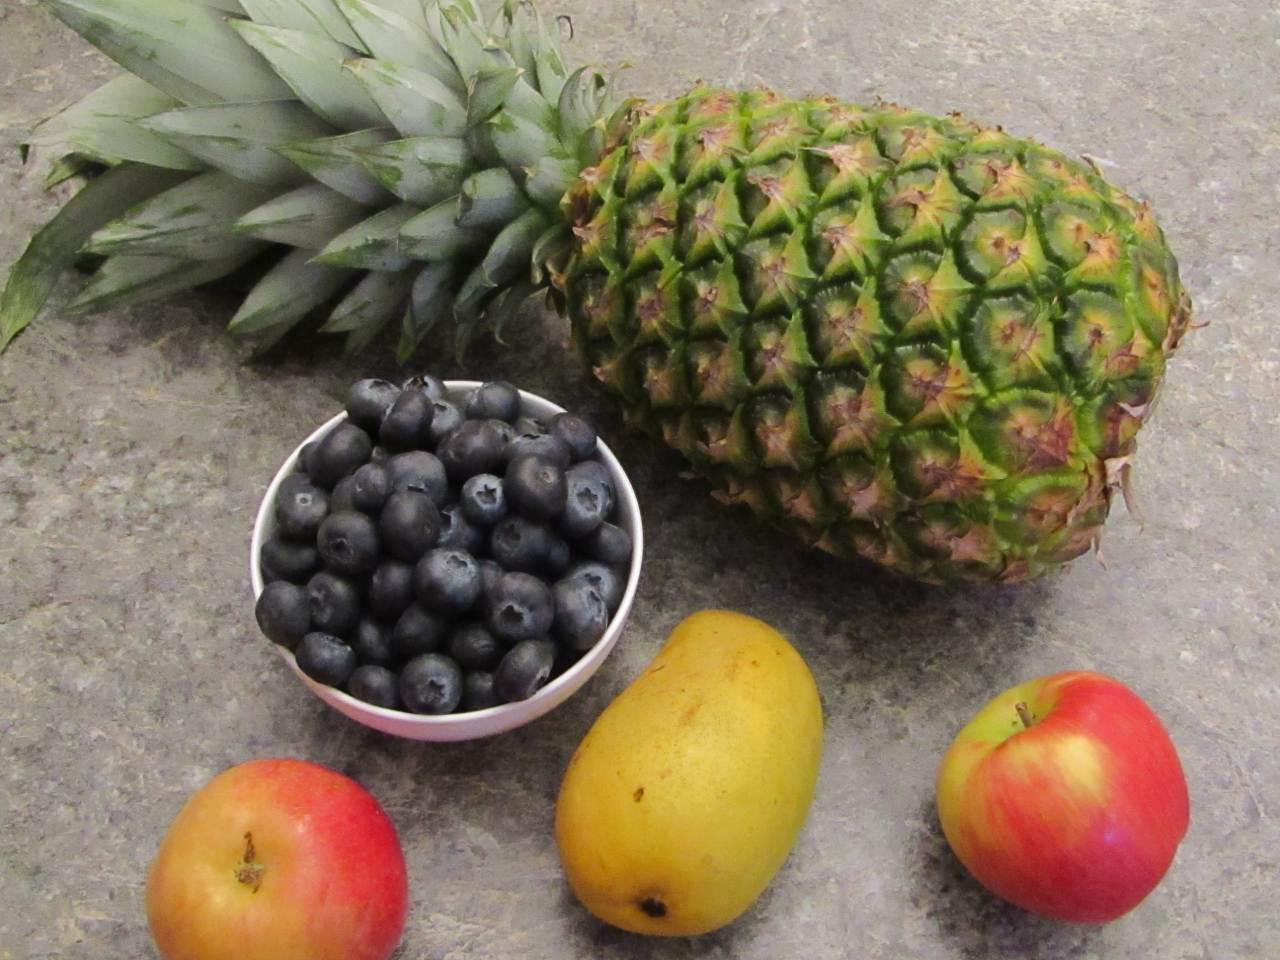
The most basic method of making extra strong vinegar is to use additional sugar than is naturally found in the fruit you are using.  The extra sugar will provide additional fuel for the yeast to produce additional alcohol.

The method:

  1. Wash the fruit with warm running water and cut into small enough sizes to fit through your juicer.
  2. Juice your fruit and pour into a wide mouthed non-reactive container.
  3. Place a cloth over the mouth of the container and secure it with an elastic band.
  4. Aerate the juice twice a day until it begins to bubble
  5. Add additional sugar to the juice.  Only add up to 2 tbsp for every cup/500ml of juice
  6. Stir and leave to ferment for 10-14 days
  7. Once the active fermentation has subsided, pour the liquid off the sediment on the bottom of the container, replace the cloth and leave to ferment for another 3-6 weeks.

Why additional sugar makes for stronger vinegar

When making vinegar there are two processes happening.  For most homemade vinegar these processes are going on simultaneously but they can be separated into two separate processes.  The first is the production of alcohol which requires a sugar solution and live yeast.  The second requires oxygen, alcohol and the presence of acetic acid bacteria.  

The strength of the vinegar is dependent on the amount of alcohol in the solution which the acetic acid bacteria consumes in the process of making acetic acid.  The more alcohol the more potential acetic acid and the higher the acid level in the vinegar.

By adding additional sugar when making vinegar you increase the amount of alcohol which the yeast can produce and as a result the acetic acid bacteria make more acetic acid.  This can be done a number of ways depending on your situation.

Add the sugar at the beginning of the fermentation

Fruits which are considered fruit in the grocery store such as apples, grapes and berries have enough sugar in them to produce vinegar with a pH of at least 3.8.  To increase the acid level in your vinegar you can add a little sugar at the beginning of the fermentation.  To do this simply add the sugar to the solution at the beginning of the fermentation time and stir it in. 

Be careful to not add too much sugar as too much sugar acts as a preservative in high concentrations and will slow the growth of the wanted yeast and bacterial culture, leaving an opening for unwanted mold to get a foothold.

Add the sugar partway through the incubation time

One of the problems with using sugar to increase the acidity level of your vinegar is that sugar is also used as a preservative.  Adding too much sugar at the beginning of the fermentation can stunt the growth of the yeast and acetic acid which leaves an open door for mold to start to grow.  

To solve this problem you can add the sugar in doses as the vinegar ferments.  By starting your vinegar and letting the yeast consume some of the sugar in the solution and produce alcohol two things happen which support a higher acidic level of the vinegar.

  1. The sugar content will drop allowing you to add additional sugar without concern that the additional sugar will slow the fermentation down.
  2. The acetic acid bacteria will consume the alcohol and produce acetic acid which helps the yeast to continue to grow uninhibited.

This leads to a more active fermentation and provides adequate resources for the yeast and acetic acid bacteria to continue acidifying the solution.  

Separate the two processes by using a restricted oxygen environment

One of the main challenges with simultaneous vinegar fermentation is the yeast species which are commonly found on fruit are not efficient at producing alcohol with the available sugar in the solution.  This means that they use more sugar to make the same amount of alcohol.  Thest yeasts produce interesting flavors which provide homemade vinegar with depth and complexity not often found in store bought vinegar but they also reduce the vinegar’s acidity level.

This works because most of the low efficient yeast cannot survive high levels of alcohol.  Whereas typical wine yeast () has a high tolerance for alcohol and is efficient at making alcohol, making more of it with the available sugar.

Don’t use too much sugar

Additional sugar in the solution will provide more food for the yeast to use to make alcohol but there is a limit.  To make extra strong vinegar you can add sugar in batches until your vinegar reaches the acidity you want.  To do this start your vinegar normally and let it ferment for a while, the amount of time depends on the method you are using to make your vinegar (For an explanation of the various methods read this article).  Then once it has started to acidify add additional sugar for the yeast to consume and make more alcohol.

One of the methods of food preservation is to use sugar concentrations to prevent microbial growth.  This is because although sugar is a source of energy it is also poisonous when concentrated too much.  Yeast growth will begin to slow once a solution has reached a 6% sugar concentration. Too much sugar can slow and even stop the fermentation.  By adding the sugar in batches you give the yeast a chance to consume the sugar and allow the acetic acid to use the resulting alcohol to produce vinegar.

High sugar concentrations also inhibit the growth of acetic acid bacteria.  Although they can use sugar directly to produce vinegar it is much less efficient and the sugar concentration needs to be lower than that of what yeast can tolerate.

Why the type of yeast affects the strength of vinegar

Yeast is a single celled organism which can be found in every environment.  It exists in a variety of types and all use simple sugars as a food source.  As a result of their respiration they produce alcohol.  So surely having any yeast in your vinegar fermentation will produce enough alcohol right? 

The most common yeast used to make wine or beer is Saccharomyces cerevisiae.  It is chosen because it is highly efficient at making alcohol, can survive in low pH solutions of 2.8 and high concentrations of alcohol.  Which makes it ideal for alcohol production but when making vinegar other yeast species are present.  These add flavors and depth to the vinegar and are therefore valuable in making homemade vinegars but they are less efficient at producing alcohol from the amount of sugar available.

This means that less alcohol is produced by these yeast species which results in less alcohol available for the acetic acid bacteria to produce acetic acid. 

To produce the highest strength vinegar you can divide the fermentation process into two portions:

Make the alcohol first

This requires some specialized equipment which prevents the fermentation from being exposed to oxygen during the fermentation process.  This does two things, it prevents the growth of acetic acid bacteria and it narrows down the dominant forms of yeast in the fermentation.

Most yeast species cannot survive in an alcohol solution above 6%and as a result will die off when the alcohol content reaches this level and more but wine yeast and a few other species are highly tolerant to high alcohol solutions and will continue to ferment the sugar until the alcohol content approaches 18% and in some cases 22%. 

Convert the alcohol to acetic acid (vinegar)

To convert the alcohol to acetic acid you need to expose the solution to oxygen and the natural process of acetic acid bacterial growth will begin to increase.  Vinegar can be made with any solution which has an alcohol content between 6-12%.  Obviously the higher the alcohol content within this range the lower the potential pH of the vinegar.

Why the availability of oxygen affects the acidity level

Oxygen is needed for the growth of acetic acid bacteria.  It is this family of microorganisms which convert the alcohol into acetic acid so without enough oxygen they will not be able to do their job. 

When using active methods of making vinegar like the Orlando method, using an aerator or pumping the solution over a wide surface area additional oxygen is available to the acetic acid bacteria which grow quickly.  As a result vinegar is produced more efficiently and it will have a lower pH.

More passive methods of making vinegar will often produce vinegar with less acetic acid as the solution is exposed to the air over a long period of time (weeks, months or years) and some loss in alcohol from the solution due to evaporation is inevitable.  This is why most homemade vinegar is less acidic than commercially made vinegar.

When making vinegar the fermentation is exposed to the environmental oxygen in one way or another.  Some methods require forcing air through the liquid while others are more passive where the fermentation is just left exposed the the air with a cloth over the surface of a wide mouthed container.  

All methods require the exposure of the solution to the air.  When an alcohol solution is exposed to the air some of the alcohol will evaporate.  This will reduce the amount of alcohol in the solution and lower the potential acidity of the vinegar.  Solutions with a higher amount of alcohol will lose more alcohol due to this evaporation process.  

Why fermentation time affects the acid level in vinegar

Homemade vinegar will have a wide variety of acetic acid bacteria species in the mother.  Each has a niche in the community and each has ranges of acid level, sugar tolerance and alcohol concentrations which they will thrive in.  This means that throughout the fermentation process different acetic acid bacteria will thrive while others will die off.  

A long fermentation time increases the acid level as in time more of the sugar in the solution will be converted to alcohol and then into acetic acid by the various acetic acid bacteria species.  This process will continue until the vinegar is pasteurized which kills the mother and stops the fermentation process.

Unpasteurized vinegar will continue to ferment as long as there is some alcohol being produced by yeast in the vinegar.  Once the main fermentation process is complete it may seem like it has stopped fermenting but it will continue slowly almost indefinitely.  This is evident by the slow growth of the “Mother” on the surface of the vinegar as long as it has access to oxygen.  

To stop the acetic acid bacteria from continuing the fermentation process you can place the vinegar into an anaerobic environment.  You can do this in two ways:

  1. Place an airlock on the vinegar container

This is the safest method as it allows any pressure which can build in the container to escape.  Since active yeast and acetic acid bacteria produce carbon-dioxide it can be dangerous to contain the pressure in non-pressure safe bottles.

  1. Bottle the vinegar 

When bottling your vinegar it is difficult to determine how much carbon-dioxide it is producing.  If it is too much it can build up and burst non-pressure safe bottles.  There are methods of testing the vinegar to see how much sugar is left in the solution but it is complicated and time consuming.  

Instead you can simply place your vinegar into pressure safe bottles which can be opened and closed easily.  This will prevent any oxygen from getting in and will stop the acetic acid bacteria from further acidifying the vinegar.  

Ensure the bottles you use are pressure safe as if the yeast is still active it can build up a fair amount of pressure and explode regular bottles. I recommend flip top beer bottles.  They can be found at beer making stores, online and, if you are patient, at thrift stores or from friends and family.  

What fruit makes the best vinegar


An arraingement of pineapple, blueberries in a bowl, two apples and a mango on a counter

Vinegar has been made from a variety of sources from grapes to grains and everything in between and depending on the application, time restrictions and what you want the vinegar for will determine the best type of fruit to use.  Since fruit can be easily made into vinegar in a number of ways (for a simple vinegar recipe click here) it is important to narrow your options before beginning.

Naturally sweet fruits like apples, grapes and mangos make great vinegar as the sugar in the fruit will ferment readily and quickly begin to produce acetic acid when exposed to oxygen.  Use only fully ripe fruit as they contain the most sugar providing enough energy to produce acetic acid.

Some fruits which are not highly sweet like blackberries, strawberries and kiwis can still be made into vinegar with some amelioration and can provide good alternatives for vinegar making when you want something a little different.  

What is the easiest type of fruit for making vinegar?

When making vinegar as a beginner, choosing the easiest method is usually the best.  Therefore your choices for making vinegar can be made by the simplest recipe with equipment anyone has. The simplest recipe requires only one piece of equipment, a jar and a cloth cover and one ingredient, fresh fruit juice.  

The easiest type of fruits to use for vinegar are hard fleshed with a high sugar content.  Apples, mangos and pineapple are good options so long as they are fully ripe and are not damaged.  These fruits can be made into juice easily and fermented into vinegar without additional steps.

The benefits of using this type of fruit is that all it needs is to juice the fruit and then let it ferment into vinegar (for step by step instructions click here).  Vinegar is often made by accident while trying to make other fermentations so it is not hard to make when you set out to make it.  Vinegar is the result of acetic acid bacteria growing in a sugar and oxygen rich environment. 

What is the best tasting fruit for homemade vinegar?

This goes to personal choice rather than a definitive answer as everyone has different preferences and flavor profiles they like better than others.  That said there are some types of fruit which do make great tasting vinegar and some which need amelioration.

Popular fruit vinegars include apple cider, grape, mango and pineapple.  These are easy to make and provide with interesting flavors which can vary depending on the batch.  Fruits which can easily mold like blackberries and blueberries make good vinegar but they need to be fresh.  

Strawberries are difficult to make good vinegar with as they are a heavily sprayed crop so unless you grow your own strawberries in large enough quantities to have extra you may find them hard to ferment and if you used store bought strawberries the vinegar may have a chemical flavor which lingers in the vinegar.

When making good tasting vinegar it is best to start with quality ingredients instead of using leftovers or degraded fruit.  Vinegar tends to concentrate flavors so if the fruit was a little off then it will be reflected in the finished vinegar.

What fruit will make vinegar the fastest

When trying to make vinegar fast it the method used is more important than the ingredients as the growth of the acetic acid bacteria is more dependant on its oxygen supply than anything else which is why methods like the Orando method, bottom aeration and vigorous stirring reduce the time it takes for the pH of the liquid to drop below a pH of 3.0.  

Fruit that makes vinegar the fastest starts out with a lower pH at the outset.  Fruits like pineapple, blueberries and grapes are high in sugar and start out with a pH below 4.0.  By starting with a lower pH the acetic acid bacteria will have to produce less acetic acid to get the liquid below 3.5.

Since acetic acid bacteria are acid tolerant they will have no problem lowering your vinegar to below a pH of 3.0.  Once it reaches 2.5 it will be very acidic, making it hard to use in dressings, shrubs as the flavor will be lost to the higher acid levels.  If you want to make vinegar quickly be sure to use it just as fast as it may become unsuitable for culinary use and be relegated to glass cleaner.

Other fruits will make vinegar quickly by using one of the above methods which are all focussed on aerating the liquid to feed the acetic acid bacteria.  Keep in mind that although these methods will produce vinegar quickly they may not be the best tasting vinegar.  Slower methods of making vinegar involve a wider range of bacteria and yeast which produce a variety of flavors which add depth to your vinegar.

Can Homemade Yogurt Be Keto Friendly


yogurt in a bowl with sunflower seeds and hemp hearts

Like any diet plan the keto diet relies on a certain set of parameters which make some foods allowable while making others off limits.  Yogurt with its healthy reputation for being a probiotic food can cause confusion as to whether or not it will have a high insulin response, kicking you out of ketosis.

Homemade yogurt has a strong insulin effect which can stop ketosis.  This is due to the high lactose content remaining in the yogurt after the short incubation period recommended in most yogurt recipes.  It can be made with little remaining sugar by increasing the incubation time and therefore lowering the amount of remaining lactose.

Recent studies have shown that the insulin effect of yogurt can also be tied to the amount and type of protein found in the milk.  Although homemade yogurt can be made to have a low amount of sugar remaining in the yogurt, the remaining proteins found in the milk may be enough to raise the insulin level enough to stop ketosis.  Care must be taken to not consume higher amounts of yogurt if you want to remain in ketosis.

How homemade yogurt can be keto friendly

There are two components found in milk which can cause an insulin effect, the lactose and the proteins found in the milk.  

The lactose can be lowered by incubating your yogurt for a longer period of time.  The increased incubation period allows the lactic acid bacteria additional time to consume the lactose in the milk which naturally lowers the glycemic effect.  As the lactose is consumed the yogurt becomes sour due to the additional lactic acid produced by the lactic acid bacteria.  

The whey is the liquid which can separate from the main yogurt during incubation and once it has been refrigerated.  The whey provides a strong insulin effect which can kick you out of ketosis.  Although it has been found that whey also has an appetite suppressing effect which can make up for the insulin effect it has on the body.  To reduce this effect you can make greek yogurt which lowers the amount of whey in the yogurt with the added bonus of making it thicker with a smooth texture.

Why most store bought yogurt is not keto friendly

Store bought yogurt often is not keto friendly because yogurt companies tend to add additional ingredients to yogurt and incubate it for the least amount of time possible.  Store bought yogurt has additives to help maintain the yogurt’s texture during transportation and handling on the store shelves.  They are usually starchy ingredients which absorb excess liquid and provide structure to provide thickness and body to the yogurt.

Commercial yogurt is incubated for the shortest period of time as it lowers costs, increases shelf life and provides customers with a sweeter product.  Additional additives have usually been added to maintain the yogurt’s texture during transportation and handling by employees and customers.  

When purchasing store bought yogurt for a keto diet try to find yogurt which does not have any additional ingredients besides milk and bacterial culture.  The extra ingredients are difficult to digest and can cause a strong insulin effect.

What milk types can be used to make keto friendly yogurt

Although any type of milk can be used to make keto-friendly yogurt it is important to understand that the higher the sugar content in the milk in the beginning the longer it will take the lactic acid bacteria to consume the lactose and the more lactose will be produced.  This increases the incubation time and makes the yogurt sour.

When making keto friendly yogurt use whole or high fat yogurt.  High fat yogurt has less sugar and more fat which lowers the incubation time and reduces the amount of lactic acid bacteria produced.  The higher fat content also slows the insulin response protecting ketosis.

Keto friendly yogurt made from whole or high fat yogurt will taste sweeter than higher sugar content skim or 1% milk due to the lower lactic acid in the yogurt.  They are also thicker and creamier due to the higher fat content leading to less separation of the whey. For an even higher fat content try this recipe for making super creamy yogurt with heavy cream.

The high fat content also provides a buffer for the remaining lactose in the yogurt which provides the digestive system time to absorb the remaining sugar without necessitating a strong insulin response.  The additional time given the digestive system also allows extra time for your microbiome to use higher amounts of the sugar in the yogurt which further lowers the amount of sugar your body needs to contend with.

What equipment is needed to make homemade keto yogurt

Keto yogurt can be made with a minimum amount of equipment.  All it requires is a non-reactive container to hold the milk and an incubation chamber of some sort.  You will also need a double boiler, whisk and a thermometer to ensure the milk is at the correct temperature prior to adding the starter.

Yogurt makers are the obvious choice for  serious yogurt production but other incubation methods include an oven with the light on, hot water bottles, using an insulated thermos or a crockpot.  The key is to keep the milk between 108 to 115 degrees for at least 12-24 hours.  This will lower the lactose content in the milk and increase the lactic acid and other organic acids which help to keep the body in ketosis.  

The difference between normal yogurt and keto friendly yogurt

Store bought yogurt is a commercial product designed to maximize the profit for the dairy.  As such it is produced using the least expensive methods possible.  This is not a bad thing until it starts to compromise the quality and value of the food.  Most store bought yogurt contain thickeners, supposedly to help maintain the texture of the yogurt during transportation.  These thickeners contain starches and sugar which automatically removes them from the list of keto approved foods. 

The remaining yogurts will contain only milk and bacterial culture but not all of these are keto friendly either.  The length of time yogurt is incubated is important as well since the longer it is incubated the lower its lactose content.   Keto yogurt needs to be incubated for at least 12 hours to remove as much of the sugar as possible without it becoming too sour.

Homemade yogurt can be made keto friendly by extending the incubation time and using high fat milk.  When making your own yogurt ensure your yogurt maker will incubate for at least 12 hours.  Some yogurt makers (if you are using one) will stop the incubation process after 4-6 hours.  You can use incubation chambers such as a dehydrator or an oven with the light on, just make sure the heat remains between 108-115 for 12 -24 hours.

How to make natto from natto beans


bowl of dried soy beans and a container of fermented natto

Natto is a live fermentation product made from cooked soy beans and inoculated with bacillus subtilis, a common bacteria found mostly in grasses.  This bacteria is still present in natto beans and can be used to inoculate a new set of beans simply by mixing finished natto beans with freshly cooked ones, then incubating the beans for 24 hours.

Natto can be made a number of ways: it can be made from scratch using wild bacteria found in nature, it can be inoculated with natto starter or it can be made by using previously incubated natto beans .  Each of these three methods produces a differently flavored natto but they all have the sticky, stringy biofilm which is produced by the bacteria used to ferment the beans.  For instructions on how to use all three of these methods check out this article here.

To inoculate natto from natto beans you simply need to introduce the freshly cooked soy beans with some natto beans.  The process is as follows:

Soak the soy beans 8-12 hours

Cook the  soy until soft but not mushy

cooked soy beans in a pot

Cool the beans until they reach 115 degrees

Cooked soy beans in an instapot

Spread the beans about 1″ thick and cool until they reach 115 degrees

cooked soy beans spread out on a ceramic pan

Mix in some natto beans (about ½ cup to 4 cups of cooked beans)

store bought natto beans on top of cooked soy beans in a pan

  1. Cover with plastic wrap and poke a few holes in the wrap to let in a little air
  2. Incubate the natto between 100 and 113 degrees for 24 hours
  3. Remove from the incubator and load into separate storage containers
  4. Refrigerate or freeze 

How to eat natto 

The traditional way to eat natto beans is for breakfast with rice and egg yoke.  The rice is usually white sticky rice and the egg yoke is uncooked.  The addition of soy sauce adds some salt.  The whole mixture is then stirred to encourage the sticky slimy texture which makes for good natto.  Eating it this way is an acquired taste which most people in North America are not willing to get past.

Other ways to eat natto are simpler.  I like natto made with soy sauce, fermented mustard (for a recipe to make fermented mustard click here) and a little yogurt or kefir.  Other ways to eat it include hot sauce, sweetened sauces like plum or hoisin or it can be eaten plain.  

If you are having trouble getting past the sticky slimy texture of natto beans you can add it to your morning shake.  The beans contribute to the creamy texture of a shake making it thicker and less likely to separate.  Or you could add them to a morning breakfast bowl hiding the texture with a vinegar dressing.  

Finally you don’t have to eat natto in the morning.  You could have it in a salad.  Asian dressings are often strong enough to help you ease into the flavor of natto while providing you with the benefits of the beans.

Why should you eat natto beans

There are several reasons why eating natto beans is a good idea, it is good for you, provides a simple breakfast, adds unique texture and flavor to your food and, once you get accustomed to it, it tastes great.  Natto is a fermented soybean product which on the outset seems like a bad idea but in fact once the beans have been incubated they produce many vitamins and make minerals available in the beans which were not available before fermentation.

Eating natto is like drinking coffee.  If you give a cup of coffee to a child they will find it offensive.  The flavor of coffee must be acquired before you get to the benefits of it like the caffeine effect.  Natto is also an acquired taste. It takes some time to learn to enjoy the slimy texture but once you have learned to enjoy the flavors you can become quite addicted to it.

Natto contains nattokinase which is a compound which helps cardiovascular health.  It also contains vitamin k2, many b vitamins and several minerals which provide the building blocks of your body.  The fiber which is not consumed by the bacteria help to feed your microbiome which help to provide you with vitamins and fight off unwanted bacterial species found in your digestive system.

For ten reasons why you should eat natto beans check out this article here

What natto beans taste like

The characteristics of natto beans which most people remember are the slimy texture of the biofilm which surrounds the beans and the look of them once they have been prepared.  Some have described the look of them as overcooked beans covered in snot.  Not too appealing!  Fortunately for natto (and for you) natto beans don’t taste anything like overcooked beans and snot.

Natto beans have an earthy flavor which resembles a soft cheese.  The bacteria slightly acidifies the beans which give them a slightly tangy taste and depending on the method you use to inoculate the beans (for two other methods click here) three ways to make natto can have a number of complex tastes in the mouth.  The biofilm which is so characteristic of natto remains in the mouth longer than most food which helps the flavors to linger in the mouth.

Another thing to consider is what condiments are used on the natto beans prior to eating them.  Some people like soy sauce which adds a high salt flavor, some like sweet sauces which hit the sweet taste buds.  Since taste can be made up of 5 different characteristics and everyone recognizes these characteristics differently it is difficult for one person to explain to another what something tastes like. 

Why make your own natto beans

Like any food natto is made commercially and sold in specialty stores in North America.  They come in little styrofoam packets usually in packs of three and are fairly inexpensive.  So the question is why not just buy your natto instead of making it?  Here are some of the reasons you might like to make your own natto.

For the fun of it

Fermenting your own food is often fun and provides a learning experience.  Figuring out what type of beans you can use, how long to incubate them to make the best natto (according to you) and developing a system to prevent spoilage are all interesting problems which take creativity and learning, which for many of us is fun. For other fun fermentation projects check out how to make super creamy yogurt.

Because it is cheaper

Natto, although inexpensive, can be made from scratch much cheaper than buying already made beans.  A package of soybeans which costs less than $0.50/g can make more natto than anyone should consume in a month.  

Because it is sometimes hard to find

Natto is not as popular in North America as it is in Japan.  This makes it sometimes difficult to find, especially if you live in a small town away from large populations of people.  By making your own you can control where your natto comes from and always have some on hand when you want it.

It is environmentally responsible

Just like any other commercially prepared product natto production produces waste products which are difficult to get rid of.  Natto usually comes in packages of three styrofoam containers held together with a plastic sheth.  None of that is good for the environment and takes over 100 years to break down in landfills.

What is Miso Made From?


four bowls of various sizes, one containing miso, one soy beans, one filled with salt and another containing rice with a packet of kogi mold

By the time you open a container of miso it is at least 6 months old.  It has been cooked, blended, incubated and aged and as a result it is hard to detect what it was in the first place.  Store bought miso is a thick paste which is used for flavoring a variety of recipes including miso soup, dressings and marinades for many Japanese recipes.

Miso is made from boiled soybeans, kogi, salt and a bacterial starter.  They are mixed together to form a paste and sealed to incubate for at least 6 months.  Depending on the type of miso being made the kogi can be made from rice, barley or other grain.

In traditional miso making the miso is weighted down with stones piled on the top of a wooden cover.  The liquid which is pushed out of the miso paste as a result of the pressure is tamari and is also aged to take on a dark red color over time.

How soybeans are used to make miso

Soybeans are the main ingredient in miso, making up the bulk of the volume of miso.  Soybeans are a typical bean made up of sugars and starches as well as protein which makes them difficult to digest, this is why beans are notorious for causing gas.  During the incubation process the starch is broken down by the enzymes in the kogi to make additional sugar for the bacterial culture to consume.

Soybeans are washed, soaked for 24 hours and then boiled for 5-6 hours until they can be easily crushed.  They are then mashed together with the other ingredients and some of the cooking water used in the boiling process to reach the right consistency.  Any discolored beans are discarded as they may add unwanted flavor to the finished miso.

Once the soybeans are mixed with the kogi the enzymes in the kogi will begin to break down the starches in the beans into simple sugars which the bacterial culture can use for its respiration.  This helps to make miso more digestible than other bean pastes.

What koji is and how it is made

Describing what koji is can get a little confusing as the name koji refers to two things which are needed during the fermentation process of many Asian fermented foods.  It can refer to the mold Aspergillus oryzae which breaks down the starches in the substrate it is added to or it is the mold and substrate together after it has incubated for a period of time.  Usually when koji is required in a recipe it is talking about rice koji which is steamed rice incubated with Aspergillus oryzae for 3-5 days depending on the purpose the kogi is used for.  

Koji is made by inoculating rice or barley with Aspergillus oryzae which breaks down the starch in the rice into smaller chain sugars in a process called saccharification.  The steamed rice is spread out on wooden trays and inoculated with koji mold and incubated at a temperature between 80-97 for 2-3 days. 

For sweet light colored miso rice kogi is used with a little barley for flavor and texture but for a stronger, more rich miso barley koji is the main koji used.  As the miso ages it turns from a pale beige color to a deeper red tone.  Miso aged 6 months is called sweet white miso as it still contains much of the sugar available from the beans whereas aged miso will develop a deep red color and become richer in umami flavor the longer it ages.

How to get miso culture and what it does

Miso culture is a collection of lactic acid bacteria which consume the simple sugars found in the bean and koji mash.  As this happens the miso’s pH will begin to drop.  Lactic acid bacteria produce lactic acid and other organic compounds which protect its environment from contamination from unwanted bacteria, yeast and mold.  These acids and organic compounds give the miso its unique flavor.

The miso culture is found in any commercial container of miso which has not been pasteurized.  To inoculate a batch of miso with a miso culture, mix a tablespoon or so of fresh store bought miso with the bean and koji mash.  The culture in the miso will grow quickly and dominate the mixture, preventing other bacteria, yeast and mold from gaining a foothold.

Type and amount of salt

Salt is one of the most important ingredients in miso.  It provides many functions which include preservation, flavor and enzyme production.  Miso is highly salted often with an amount of salt which would make most foods inedible but for miso it is needed for a number of reasons.

Miso is made using koji which is produced using a mold which breaks down the carbohydrates in the beans, rice and barley into sugars.  This makes them available to the lactic acid bacteria found in the miso culture.  Without the salt in the miso the mold would continue to grow and completely break down the carbohydrate.

Salt is a preservative which prevents several spoilage bacterial growth but it also prevents the growth of many yeast species and lactic and acetic acid bacteria.  This limits the number and type of bacteria which grow in the miso.  This provides flavor