
This post contains affiliate links.
Once you have started making kefir it can seem like you are locked into a routine which you can’t get out of. Every day you need to strain your grains out of the fresh kefir and add more milk. It gets even worse when you end up with extra kefir in the fridge which you don’t know what to do with.
If you feel you need a break from making kefir for a couple of days, a week, month, year or longer here are some ways to do it.
Over fermenting
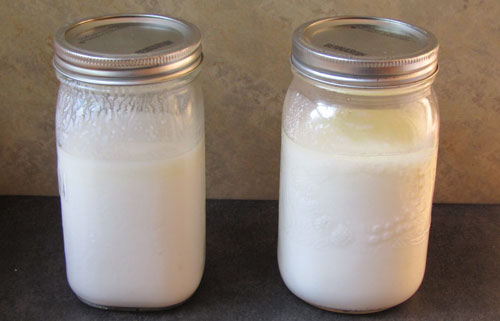
This is the shortest method of taking a break and the easiest. All it requires is you ignore your grains for a day or two. It will separate forming whey on the bottom and curds on the top. The grains will continue to ferment the milk converting it into very sour kefir which you can use for a variety of purposes. For some ideas of what to do with over fermented kefir read “23 ways to use over fermented kefir“.
You can leave your kefir fermenting a few days to up to a week but remember the longer you leave it the sourer the kefir will get. If you leave it too long the grains will take a while to equalize again when fed fresh milk. This is because the microorganisms in the kefir react differently to low food sources and may need a day or two to get back up to speed.
If you want to take a break of longer then 2-3 days try the next method.
Why it works
Kefir grains are hardy and can survive with little food energy for quite a while. The microbial makeup of the grains includes a wide variety of bacteria and yeasts which have ways of dealing with periods of low food availability.
The response yeast species have to low sugar environments
Yeasts alter their respiration rate as the sugar in a batch is consumed. They have the ability to slow their metabolic rate by up to ten times(https://www.ncbi.nlm.nih.gov/pmc/articles/PMC3430547/). This means that once the bulk of the lactose has been consumed in your milk the yeast will slow the rate which they consume it. This ensures there survival when you strain your grains and add more milk.
In extreme situations where the yeast has essentially run out of food(https://www.ncbi.nlm.nih.gov/pmc/articles/PMC3213374/#:~:text=In%20response%20to%20nitrogen%20starvation,produced%20in%20meiosis%20into%20spores.) they will go through a process of sporulation which produces inert spores which become dormant until new sources of sugar are introduced into their environment.
It is very hard to starve the yeast species in your kefir grains.
The response bacterial species have to low sugar environments
Although not all of the species found in milk kefir grains have been studied there appears to be a consistent pattern with the bacterial species which have been studied.
They go through metabolic changes which allows them to survive extremely low carbon sources. This allows them to survive long periods of low or no sugar environments.
Not all bacterial species can go through the process of sporulation but some can which indicates that the bacterial species found in kefir grains have two methods of surviving long periods of neglect.
- Change their metabolism to require lower amounts of energy
- Go through the process of sporulation
The take away here is don’t worry about killing your grains by ignoring them for a day or two. The various microbial species have ways of surviving these types of conditions, otherwise they would have died off a long time ago.
Refrigeration
So you are going on vacation or have a large project which needs all your time. Maybe you are just tired of kefir and want to stop for a while. Then the next level up is to refrigerate your grains. Refrigeration is a great fermentation slowing device and can lower your grains need for nutrients.
This method is great for times when you need a break of a week to a month from making kefir.
The method:
- Strain your kefir grains out of its current batch of milk/kefir
- Place grains in a clean jar the same size as the one they come out of
- Fill the jar with fresh milk and put a lid on it
- Label it so you know what it is and when it was put in the fridge
- Place the jar in the refrigerator
The method for restarting your kefir grains:
- Strain the grains out of the milk/kefir (you can use the strained kefir in baking recipes)
- Put the grains in a clean jar and add fresh milk
- Ferment for 24 hours
- If the kefir has not thickened repeat the first two steps
- Once the kefir has thickened (shouldn’t take longer than 48 hour) continue on as normal
How it works
The refrigeration method of preservation relies on two things:
When the microorganisms are cooled the enzymes which are responsible for their respiration slow down.
Enzymes are biological catalysts which break down the nutrients found in the milk. They act on the sugars, proteins and fats found in the milk to break it into pieces which can be used by the cell. As these enzymes slow down the food source is not digested as fast making it last longer.
The cell walls are made up of proteins in a fluid which becomes thicker as temperature drops.
The cell walls are semi-permeable which means that some things can get through while others cannot. It also means that the things which get through need to pass through a matrix of proteins, phospholipids and liquid. As the liquid gets cooler it thickens and motion through the cell wall is slower. This slows the rate which the nutrients pass into the cell where it is used for energy.
Basically when you refrigerate your grains they do not need as much food due to slower enzymatic reaction and there is less food entering the cell. This slows the respiration rate down even though there is food available for the cell.
Once the food source gets low the cell will change accordingly as explained in the over fermentation section.
If you forget about a set of grains in the back of the fridge you may find that it has converted the milk into a very sour kefir with a different texture then the normal kefir you are used to. This is because the various microbial species in the kefir grains have different temperature ranges which they can tolerate.
As you cool them down some become less active then others which reduces different flavors in the kefir. This kefir is still usable in recipes like waffles or pancakes, fruit smoothies or made into a very tangy cream cheese.
Freezing
This method can be a little more involved depending on how long you intend to stop making kefir. For a full explanation effectiveness of each of these methods read “Can Kefir Grains be Frozen and Easily Revived?“.
Break for 1-6 months
This is the easiest method of freezing your grains but is the least reliable for long term storage.
The method:
- Strain the grains from the current batch
- Place the grains in a sealable plastic bag
- Add some powdered milk
- Remove as much air as possible
- Label the grains with the current date
- Place in the refrigerator freezer
For a longer hiatus of 6-12 months
There is only one additional step for increasing your chances of reviving your grains after a long dormancy. You need to dry the grains for 12-24 hours. The longer the better. This gives the yeast cultures a chance to dehydrate a little helping to reduce the damage of water crystals forming within the yeast cell.
It also will encourage sporulation in some microbial species providing spores for these species when you reactivate your frozen grains.
The deep freeze method
1-2 years (maybe longer)
Many think that freezing temperatures will kill microorganisms just like it will kill higher life forms but fortunately in this case this is not always true. Bacterial species have been found in the arctic which have been frozen for thousands of years and have been revived by scientists in laboratory conditions.
The difference here is that not all the species in the grains react the same to extremely cold environments. The yeasts are the most susceptible to cool temperatures and often few of the yeast cells survive the deep freeze temperatures.
On the other hand the bacterial species don’t seem to be affected as much by the extreme cold but they are affected by varying temperatures. They need a constant cold temperature to ensure enough viable cells are left to repopulate the kefir grain and be able to make kefir again.
So to ensure the yeast species have the best chance of surviving the deep freeze you need to have as many yeast cells in the grains as possible.
The method
- Strain the grains from their current batch of kefir
- Leave as much of the biofilm which surrounds the grains as possible
- Dry the grains for 24-48 hours (they should be dry on the outside all around)
- Place the grains in a plastic sealable bag with a good amount of powdered milk
- Place the plastic bag into a hard freezable container
- Label it with the date
- Place it in the deep freeze on the bottom where there will be little temperature variation
This method is reliable because it considers all the various species methods of survival.
- The yeast cultures are encouraged into sporulation
- The bacterial cultures which develop spores are also encouraged into sporulation
- The whole community is placed under low food source stress which slows their respiration
- The constant cold temperature helps lower the rate if die off of the bacterial species which do not produce spores.
The method of reviving your grains:
- Remove your grains from the freezer
- Place them into a jar of fresh milk put a breathable lid on the jar
- Put the jar in the fridge for 48 hours
- Next day strain the milk gently and fill the jar again with fresh milk replace the lid
- Place the jar in a warm (18-20˚C) location for 24 hours
- Strain the grains again and add fresh milk as before
- Repeat until the grains are thickening the milk into kefir
If your grains do not revive after a week or the flavor of the kefir has changed considerably and you do not like it throw them away and start again.
Dehydrating
Dehydrating your grains is the hardest but can give you the longest break from making kefir with your current kefir grains.
To dehydrate your grains there are two methods to try:
Air dry on a cookie sheet
To air dry on a cookie sheet you need to use a non-stick surface like a silicone pad or saran wrap
The method:
- Strain the grain from freshly made kefir
- Place the grains on the non-stick surface and spread them out
- Place a colander over the grains to give them some air
- Place a cloth over the whole thing to keep out bugs
- Every 24 hours stir the grains around until they are hard and yellowish colored
- Remove them and any powder formed as the grains dried and place it into a plastic sealable bag
- Add some powdered milk, remove as much air as possible and seal the bag
Use a dehydrator
This is a simpler method but requires a food dehydrator with a silicone pad to prevent liquid from leaking down to the bottom of the dehydrator
The method:
- Strain the grains from freshly made kefir
- Place the grains on the silicone pad for your dehydrator
- Place the pad into the dehydrator and set it for the lowest setting
- Daily stir the grains until they are dry and yellowish colored
- Remove them from the dehydrator along with any powder on the pad
- Put them into a sealable plastic bag with some powdered milk
- Remove as much air as possible and seal the bag
- Label with the date
For best chances of reviving your grains after a long period place the grains in the refrigerator or the freezer taking advantage of the other methods of slowing metabolic activity in the grains.
Why it works:
When you dehydrate your grains the microorganisms in the grains act to protect themselves by slowing their metabolic rate and/or sporulation. It also removes as much water as possible to prevent crystallization which damages the cells membranes when frozen.
Yeasts which are industrially dehydrated go through a process of freeze drying. When this process is employed the yeasts go through a metabolic change which replaces the water in their cells with a special sugar called trehalose. At this point the yeasts metabolic rate has basically stopped.
When using a home dehydrator or air drying a small percentage of the yeast cells will go through that change. For the rest the dehydration does not stop the metabolic rate it only slows it down (albeit considerably) so by providing them with some dehydrated milk the yeasts will have something to consume.
The bacteria use a different method to survive extreme dehydration. They fold up their cell wallshttps://analytik.news/en/press/2014/109.html to make a thicker barrier between the inner cell and the outside environment. As the air dries out the cells change their DNA to make this possible.
Once you have dehydrated your grains place them in the fridge or freezer to further extend the period of time they will be viable for.
Give them away and start fresh later
So maybe you are just sick of kefir! You want to try making something else or you have begun a new hobby which is using all your creative energy. Kefir is no longer on the list.
If you are wanting to take a break from kefir for more than a year then let’s not be silly. It probably means you don’t want to have them hanging around your freezer or in the back of the fridge.
It is time to unload them and move on but how is the question. If you have been making kefir for more than a year you most likely have an attachment to them and don’t want them to go to waste.
To do so you could:
- Give them to a friend
- Feed them to a pet (I hear dogs love them)
- Post them on social media
- Blend them into a smoothie
- Compost them
- Add them directly to your garden
If you want to start making kefir again or is you want to make kefir a few times you can get a direct set powder which will make one batch of kefir without the use of grains. Make it from some store bought kefir or purchase another set of grains.
For details on the tree methods of making kefir read “Three ways to make kefir an illustrated step by step guide”.
Kefir has been around for thousands of years so don’t worry that you won’t be able to find new grains when you want to start again.