
This post contains affiliate links.
When you first start making homemade vinegar there are always those residual concerns about contamination and getting sick or worse from homemade vinegar. The idea that random bacteria which are present in the environment can safely ferment a mixture or sweetened water and fruit goes against the idea of food safety in our current society.
The truth is that making vinegar at home does not take anything to chance and the procedures which are used ensure a safe and great tasting product. Once it has reached the desired flavor profile it should be stored properly to preserve the great flavor and tanginess which makes those great dressings and sauces.
To store homemade vinegar place it in a sealable tinted glass container and place it in a cool dark location while not in use. Homemade vinegar if aged properly will have little bacterial activity due to its low pH and lack of fermentable sugars. This prevents spoilage bacteria and mold growth.
Storing homemade vinegar seems like an easy thing to do but unless it has been aged properly you may end up in trouble. There are several things to understand about homemade vinegar before you seal it in a glass container.
The pH must be below 4.0
The world health organization (WHO) have stated that for vinegar to be safe for storage it must have a pH of 4.0 or lower. This is because the lower pH inhibits the growth of unwanted bacteria and mold. The unwanted bacteria can come in the form of pathogenic bacteria as well as just spoilage bacteria which can give your vinegar an unpleasant flavor.
The best way to ensure a low pH is to ensure the starter liquid has enough sugar for the yeasts to produce adequate alcohol. The alcohol in the liquid is converted by the acetic acid bacteria into acetic acid (vinegar). Without adequate alcohol the vinegar will not reach the safe pH level of 4.0.
Ways to ensure your vinegar pH is lower 4.0
Check the specific gravity of the liquid before and after it is fermented
The specific gravity of a liquid is a measurement of how dense the liquid is compared to plain water. The higher the specific gravity the denser the liquid. When dealing with sweetened liquids it tells the user how much sugar has been dissolved into the water.
When the specific gravity of a liquid is checked before and after the primary fermentation a calculation can be done to determine the approximate ABV of the liquid. Acetic acid bacteria need between 5-10% ABV to drop the vinegar pH to below 4.0.
Add additional sugar during the aging process
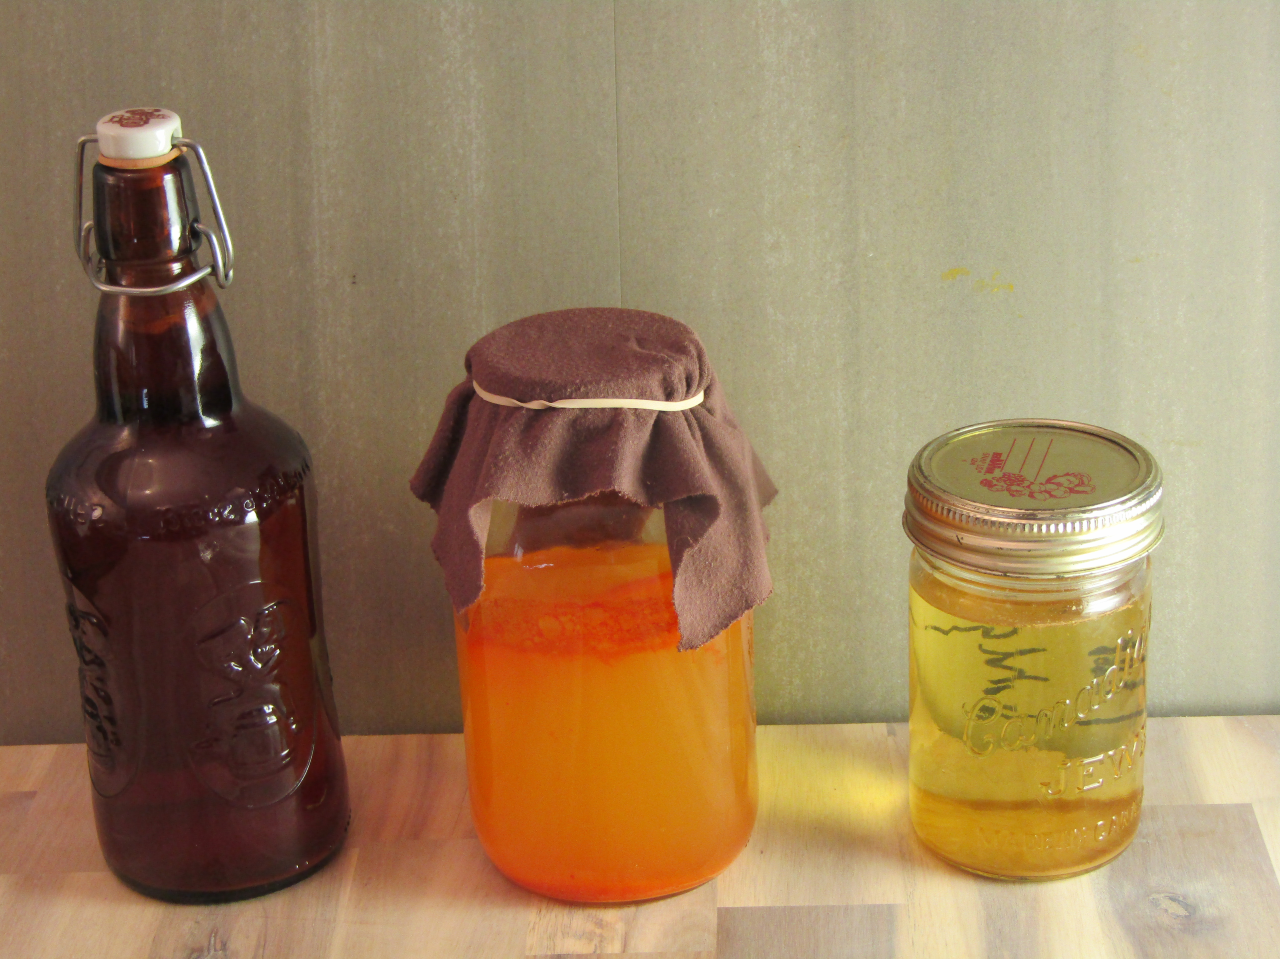
When making fruit vinegar from fresh fruit the first step is to load a jar with fruit, sugar and filtered water. Once the jar is full, the mixture is stirred daily to encourage the naturally occurring yeasts to begin to grow and convert the sugar into alcohol. You will know this is happening when the mixture begins to bubble.
Once this step is complete the fruit is strained off and the liquid begins an aging process where the yeasts continue to produce alcohol and the acetic acid bacteria convert this alcohol into acetic acid. Since the yeasts are still very active they will continue to make alcohol as long as there is sugar available for them to use as fuel.
By adding additional sugar at this stage you can be sure that the yeasts will be able to produce enough alcohol for the acetic acid bacteria to lower the pH to below 4.0.
Use a pH checker before bottling
A pH checker is mostly used by pool owners to ensure the proper chemical balance to keep the pool free from bacterial growth. They can also be used to check the pH of any other liquid. Although the pH of the vinegar is only one indicator to consider regarding when to bottle your vinegar for storage, it will tell you if it can be stored without refrigeration.
Once your vinegar has reached a pH of 4.0 you can be sure it will keep for a long time in a sealed environment.
Start with an alcohol content between 5%-10%ABV
With an alcohol concentration between 5%-10%ABV the acetic acid will have enough alcohol to reduce the pH to below 4.0. You can ensure you have the appropriate alcohol level by either starting with an alcoholic beverage which has an alcohol content within the above range or you can make your own.
To make your own you will need some additional equipment and more patience as you will have to wait for the yeasts to complete their job of fermentation before you convert it into vinegar.
Little fermentable sugar available
Besides the concern that the vinegar will spoil through lack of proper acidity levels another concern is carbonation within bottled vinegar. Carbonation happens when the yeast continues to convert the sugar in the liquid into alcohol and CO2.
If the vinegar is bottled too quickly this CO2 can build up quite substantially and burst the bottle, causing at best, a big mess but at worst it can cause serious injury from flying glass. When a bottle which is not meant to hold pressure explodes shards of glass are sent in all directions like a hand grenade. Worse still is that a glass bottle pressurized to the point of exploding has a greater chance of fracturing when it is disturbed like when it is being moved from one place to another.
To prevent this from happening there are a few choices
Ferment your vinegar for a long time
As the vinegar ferments the yeast in the liquid will continue to convert any available sugar into alcohol but as the available sugar drops so does the yeast population which in turn then uses less of the sugar which is available. As this process continues less and less sugar is available but less of the available sugar is being used.
You want to ferment the vinegar until the action of the yeast is low enough that the production of CO2 will not cause a problem. Sometimes this can be a very long time depending on the amount of sugar in the original liquid, the type of yeast species which are in the vinegar and the temperature at which the vinegar is fermented.
If you ferment your vinegar long enough the yeast population will drop low enough to facilitate safe bottling.
Measure the sugar content before bottling
This is done by using the above mentioned hydrometer which will determine the dissolved solids in the liquid. Since it is the sugar which is used by the yeast during the fermentation process, determining the difference between the starting and ending specific gravity needs to be known to accurately determine if enough of the sugar has been consumed.
If you don’t know the beginning specific gravity of the vinegar you cannot use this method.
Test the yeasts activity before bottling
This is the method used by most home vinegar makers but it is the least reliable. The method is to fill one bottle with vinegar you think is ready for storage. Place the bottle somewhere out of direct sunlight and wait a week. Then open the bottle and if there was no CO2 buildup then the vinegar is safe to bottle.
This will work if you have made a small amount of vinegar which you intend on using quickly. If you are wanting to store your vinegar for a longer period of time this method has some serious flaws:
The CO2 buildup is dependant on a number of factors
The temperature of the room
Yeast species are more active in warmer temperatures so if you performed this test while the ambient temperature was lower than the highest temperature the room you are going to store your vinegar in, this could lead to CO2 build up and explosions.
The effectiveness of the bottles seal
Pressure has a way of finding any exit it can. It will leak out of a pin hole, through a seal not properly tightened or through a gap made by a little piece of debris on the sea of the lid. Just because one bottle did not carbonate does not mean that all the bottles you fill will have the same result.
How good your senses are
For this test to work you need to be able to detect any CO2 build up which may have occurred in the week or two you performed the test. This means you need to be able to hear or feel the smallest amount of CO2 escaping from the bottle when you open it.
When it comes to avoiding explosions and possible serious injury you should rely on more definitive tests.
Warnings and safety precautions for this method
Bottles to use with this method
If you are going to use this method for storing your vinegar then use bottles which are made to withstand pressure. Swing top bottles are great for this as they are designed to hold pressure, can be reusable and are widely available.
Vinegar alcohol level will be higher
When making vinegar the method is aerobic, meaning that oxygen is required for the acetic acid bacteria to grow. It is not to inoculate the vinegar with acetic acid (although some acetic acid species will arrive that way). Acetic acid bacteria exist everywhere, the method of preventing their growth is to limit their access to oxygen. This is why wine is made in air locked containers.
When you pre-maturely bottle the vinegar you are placing the vinegar back into an anaerobic environment which inhibits their growth. The yeast on the other hand can switch their respiration from aerobic to anaerobic and in most cases produce more alcohol without the presence of oxygen.
By bottling prematurely you will have slowed the growth of acetic acid bacteria and boosted the alcohol producing yeast! Probably not what you want.
Keep in a cool dark location
Once your vinegar is ready for storage a cool dark location will help it to age gracefully. Like fine wine, vinegar is not an inert liquid. Chemical reactions are constantly occurring while it is being stored. These reactions are influenced by heat and light in a negative manner.
Keeping your vinegar away from heat and light reduces the speed at which these reactions occur. This helps to smooth out the flavor of the vinegar giving it a mature even flavor as the different flavor components blend together.
Use darkly tinted bottles
Storing your vinegar in dark tinted bottles helps prevent light from entering the bottle and affecting the vinegar just like storing red wine in tinted bottles improves the flavor of long aged wine.
Ideal temperature range
Vinegar just like wine benefits from a steady cool temperature to age gracefully. A range of 10 and 15 °C (50 and 59 °F) will provide a nice environment for the vinegar to mellow out and mature. Try to keep the temperature even without rapid changes in temperature that will negatively affect the vinegar flavor.
No need to pasteurize
Properly fermented homemade vinegar does not need pasteurization. The microbial action in the vinegar is very low due to the lack of food energy and low pH. Like any living thing spoilage bacteria need food energy to survive and most microorganisms rely on simple sugars. Since the aging process of your vinegar is designed to lower both the pH of the vinegar and the available food energy there is not much left for spoilage microorganisms to grow on.
The other consideration is the difficulty newly introduced microbes have in gaining a foothold in an established environment. It is like a new business trying to break into a saturated market, there is just not enough resources for them to grow.
How long vinegar can be stored
Vinegar with a low enough pH and protection from sunlight and debris from entering the vinegar will last indefinitely. In fact some of the best vinegars are aged for 5 years or more. Just like fine wine vinegar can improve with age.
Aging in the bottle is different from aging in wood or open containers. When aging in open containers the vinegar still has access to oxygen and will be more active at converting any alcohol into acetic acid. Although this slows considerably as the available sugar is consumed by the alcohol producing yeast.
Balsamic vinegar methods have been developed which entail aging grape musk vinegar in a series of wooden barrels over a long period of time. This both concentrates the liquid and adds additional flavors to the vinegar. Balsamic vinegar must be at least 5 years old before it can be considered balsamic vinegar. It can be aged 25 years or longer and gets more viscous and flavorful every year.
Unless you have access to a large cool location you probably will not age any vinegar this way but you can age it in the bottle in a dark location in the basement or crawlspace if you have one. Once you learn how to make vinegar in small batches you may want to make a larger batch to have enough to age over a longer period of time.
Keep a log of the characteristics of the vinegar as it ages. You will notice that it changes over time and its uses may change from cooking vinegar to drinking vinegar.